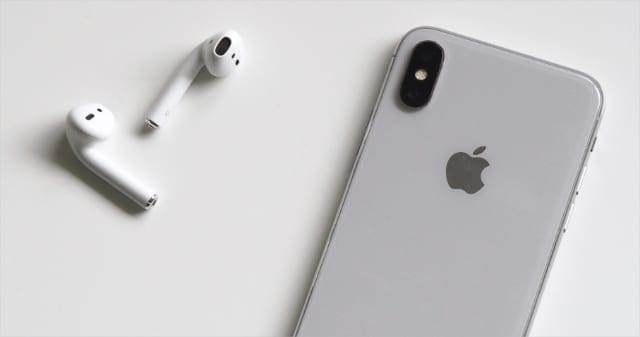
Outside of the Apple Watch, AirPods have taken over the world rather rapidly, and it doesn’t matter if you’re on iOS or Android. The AirPods have become the go-to option for on-the-go headphones, with many other manufacturers trying to replicate the success.
The great thing about AirPods and even Beats headphones is the fact that Apple is dedicated to improving the experience on a regular basis. Apple provides updates to the AirPods, even if you don’t realize they have been included with the iOS update. And with iOS 14, there’s a way to make these awesome and amazing headphones sound even better.
Although there was a lot of focus on the Apple Watch and Mac at WWDC 2020, the iPhone and AirPods also got plenty of love. iOS 14 is one of the largest updates in years, without adding too many “in your face” features. AirPods are one of the hottest commodities throughout the entire year, so it makes sense for Apple to give them some love too.
With iOS 14, the biggest new feature will be the ability to automatically switch between devices with your AirPods. This is similar to the Handoff feature that has been a fan-favorite for years on iOS, macOS, and iPadOS. But instead of handing off an app, the audio will be handed off to another device without any frustrations.
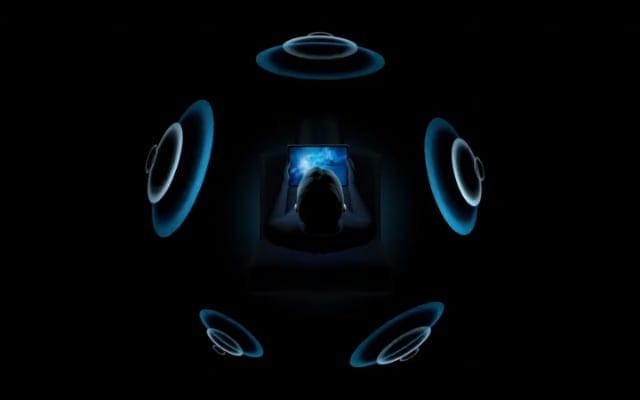
Spatial Audio simulates surround sound from your AirPods Pro.
The AirPods Pro is Apple’s “pro” headphones and not many folks can go to the movie theater, so Apple’s bringing the movie theater to us. Spatial Audio uses intelligent audio filtering to create an immersive experience while using the AirPods Pro. Using the various sensors in your headphones, Spatial Audio can make sure that whatever is in front of you is at the forefront of the audio being played back.
Another nifty feature that is long overdue is a battery notification when your AirPods are running low. This is a sleek and slim notification that appears, letting you know when you reach 10% of battery life so that you can pop your AirPods back in the case or get them on the charger.
How to enhance the audio playback with your AirPods
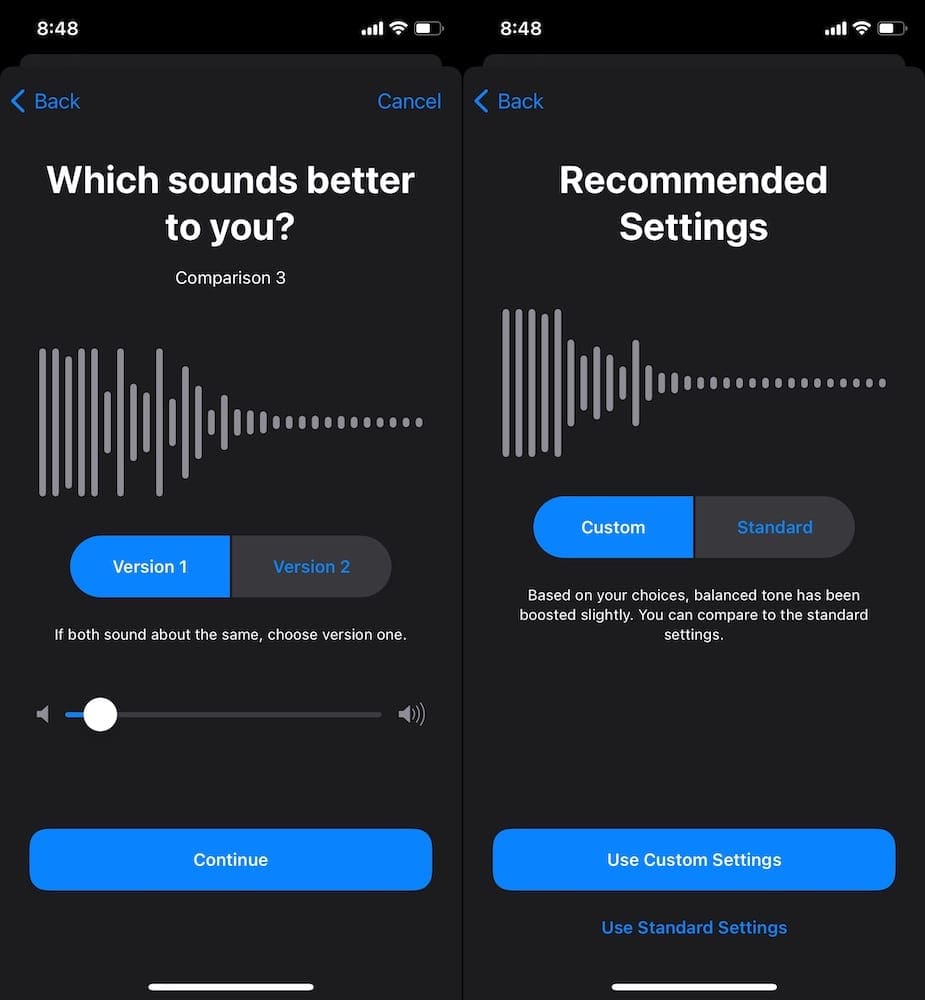
One feature that we didn’t mention above, but is exclusive to iOS 14 with your AirPods is called “Headphone Accommodations”. By performing a hearing test on your iPhone with the AirPods connected, this feature will tune the audio playback to your needs. But an unintended “consequence” of this is that it can vastly improve the general audio playback from your AirPods. Before getting started, make sure that your AirPods are connected to your iPhone or iPad.
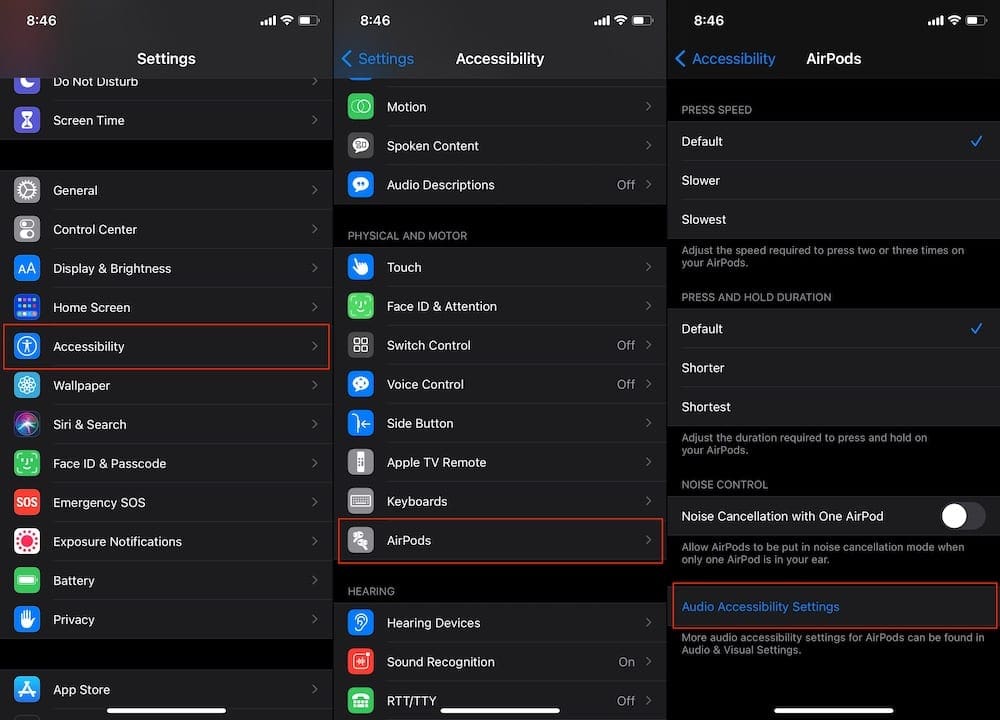
Open the Settings app on your iPhone.
Scroll down and tap Accessibility.
Scroll down and select AirPods.
At the bottom of the page, tap Audio Accessibility Settings.
Select Headphone Accommodations.
Tap Custom Audio Setup.
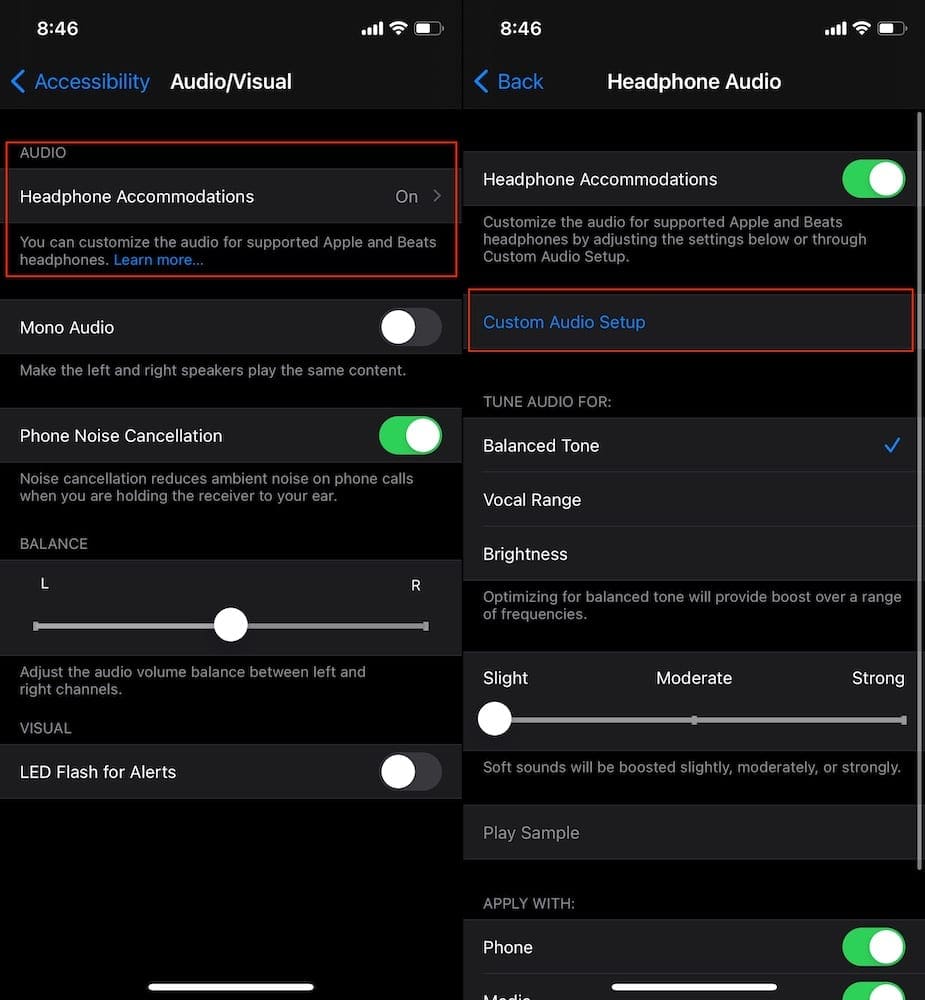
This will bring you to a brand new screen named Headphone Audio Customization. This process is designed to help tune the audio playback from your AirPods specifically to your hearing. Not everyone’s hearing profile is the same, so you may want to go through this process if you have hearing issues already.
For those wondering, these are the following headphones that work with Hearing Accommodations:
AirPods (2nd generation)
AirPods Pro
Powerbeats
Powerbeats Pro
Beats Solo Pro
Wired EarPods
Just follow the steps provided with the walkthrough. Once the customization has ended, your AirPods should sound better than ever before!
How to enhance the audio for PowerBeats Pro or other Beats headphones?
Since Beats by Dre is now owned by Apple, it would only make sense for Apple to make this feature available for Beats users as well. Thankfully, you can still change the audio profile, and here’s how:
Open the Settings app on your iPhone.
Scroll down and tap Accessibility.
Select Hearing.
Tap Audio/Visual.
Select Headphone Accommodations.
Tap on Custom Audio Setup.
Then you will be shown the same splash screen as those who have AirPods and want to adjust the audio settings. Follow the process, exit the screen, play some music and see if anything has changed.
What to do if something isn’t working
It’s important to note that this is a new feature to iOS 14, which is still going through its paces on the beta cycle. Features are added, tweaked, or removed on a regular basis, so if you are having some issues, part of the reason could be attributed to the #betalife. But if you want to make sure that it’s related to the beta and not anything else, there are some steps you can take.
Disable Sound Recognition
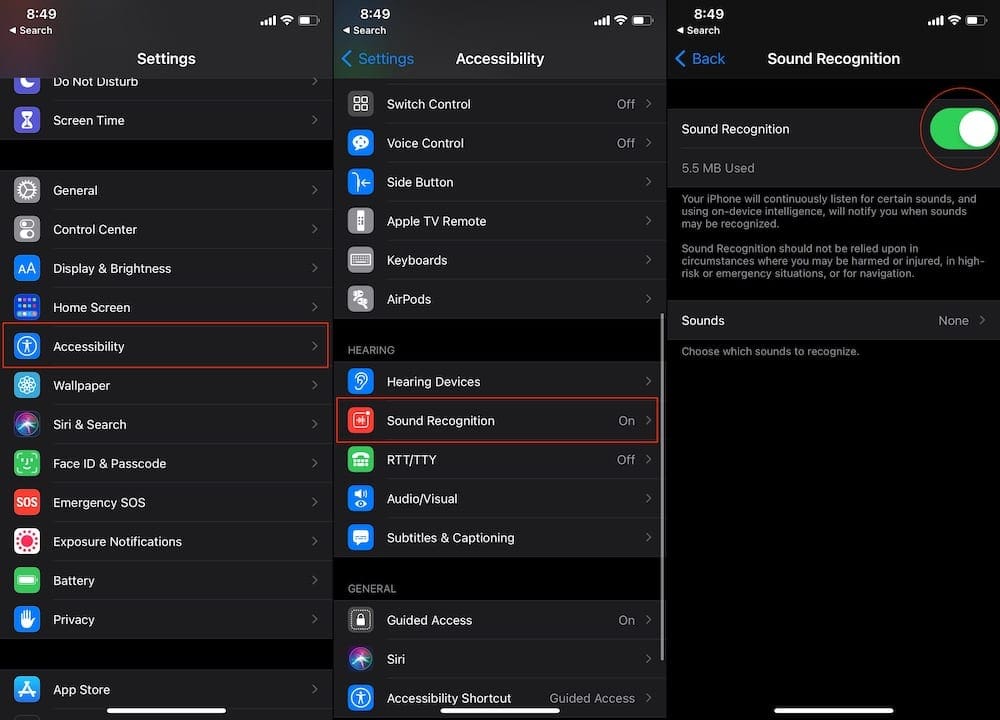
Another feature added to iOS 14 is Sound Recognition, which is also located in the Accessibility settings. This makes it possible for your iPhone or AirPods to alert you if certain sounds are recognized. However, it’s been noted that this can cause issues with the Hearing Accommodations settings.
Open the Settingsapp on your iPhone.
Scroll down and select Accessibility.
Tap Sound Recognition.
If enabled, tap the Sound Recognition toggle to the Off position.
It’s also possible that the Sound Recognition toggle may appear in your Control Center. Swipe down from the top right-hand corner of your iPhone, and look for the appropriate icon. If it’s there and turned on, tap the icon to turn it off.
Adjust Sound Recognition
Maybe you don’t want to disable all of the sounds, but only want a few of them to be enabled. Apple has made it possible for you to enable or disable specific sounds from the Settings app.
Open the Settings app on your iPhone.
Scroll down and select Accessibility.
Tap Sound Recognition.
Tap Sounds.
Go through the list and select which sounds you want to be recognized.
It is also possible to keep Sound Recognition enabled, but have all of the sounds turned off. This may help for those who run into issues throughout this process and want to test out all of the different variables.
Reset your AirPods
The final option to attempt if you are still running into issues is to reset your AirPods or Beats headphones. This is annoying, but if you are determined to improve the audio quality of your headphones, then this is the way to go.
Put your AirPods in the case.
Close the lid.
Wait 30 seconds.
Open the lid.
Open the Settings app on your iPhone.
Tap Settings then Bluetooth.
Tap the “i” icon next to the AirPods.
Select Forget This Device.
Confirm
With the lid open, press and hold the setup button for up to 15-seconds.
Reconnect your AirPods.
After your AirPods have been reconnected to your iPhone or iPad, follow the aforementioned steps again. This includes going through the same Headphone Audio Customization screen even if you already did so before the reset.
In the event that the reset doesn’t help, don’t reach out to Apple Support just yet. Keep in mind that iOS 14 is still in beta, so any support attempts will likely be rejected due to that alone, unless you are having other issues as well.
Andrew Myrick is a freelance writer based on the East Coast of the US. He enjoys everything to do with technology, including tablets, smartphones, and everything in between. Perhaps his favorite past-time is having a never-ending supply of different keyboards and gaming handhelds that end up collecting more dust than the consoles that are being emulated.
I can’t thank you enough! Before making those adjustments to my iPhone 12 – My AirPods Pro sounded much better on my MacBook Pro. Now, my AirPods Pro now sound the same on iPhone 12 as they sound when listening to music on my MacBook Pro.


I can’t thank you enough! Before making those adjustments to my iPhone 12 – My AirPods Pro sounded much better on my MacBook Pro. Now, my AirPods Pro now sound the same on iPhone 12 as they sound when listening to music on my MacBook Pro.
What if I didn’t receive the small and large AirPod tips in my AirPods box. The ones on the AirPods seem to not fit.
Contact wherever you bought them..
Apple do sell the ear tips separately too.
Sounds great judt eidh they would have better hearing device for those who wear hearing aids my downfall but love my Apple iPhone n iPad