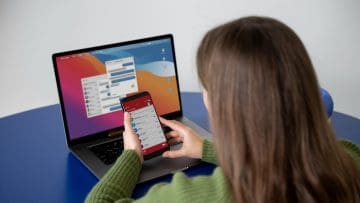
iPhones and Windows PCs are very different devices. However, with the power of the Remote Desktop app, you can form a useful connection between them. This app lets you remotely access a PC from an iPhone to open apps, do work, view files, and more.
This guide shows how to do so on both Windows 10 and 11 computers.
How to Remotely Access a PC From an iPhone (Windows 10)
We’ll begin with a look at how to remotely control a PC from an iPhone on Windows 10. Note that this only works if the device you’re trying to control has the Pro or Enterprise version of Windows 10 installed. You’ll first need to configure some remote access settings, and then set up the Remote Desktop app on your iPhone.
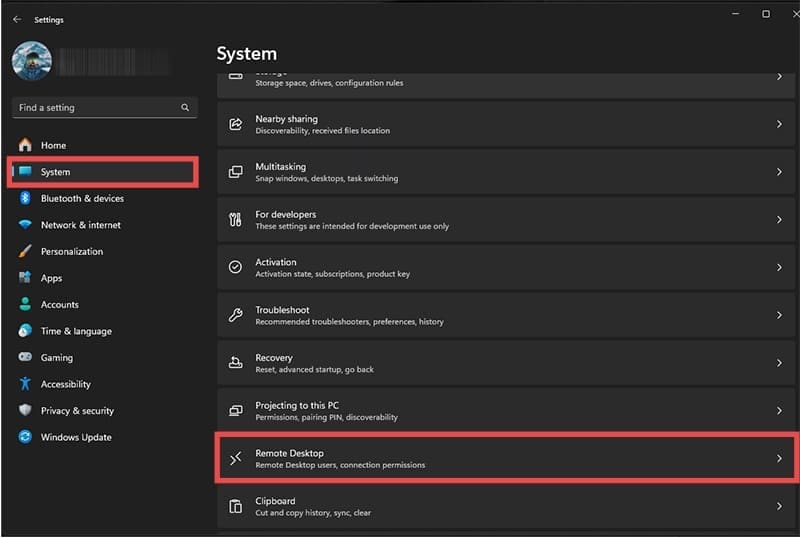
Step 1. Open the Settings menu. Go to “System” and then “Remote Desktop.”
Step 2. Under the setting labeled “Enable Remote Desktop,” toggle the switch to the “On” position.
Step 3. (Optional) Click on “Show settings” if you wish to adjust the options to keep your PC awake when plugged in or to make it discoverable on private networks. Otherwise, just leave these settings as they are.
Step 4. Select “Advanced settings,” and check the box next to “Require devices to use Network Level Authentication to connect.”
Step 5. Note down the name of your PC on the previous screen. You’ll need that when connecting later on.
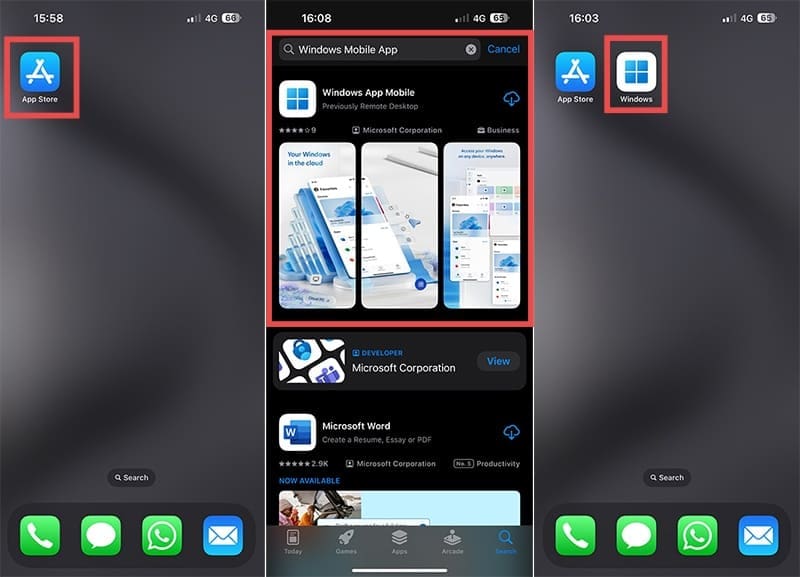
Step 6. Download and install the Remote Desktop app from the App Store to your iPhone.
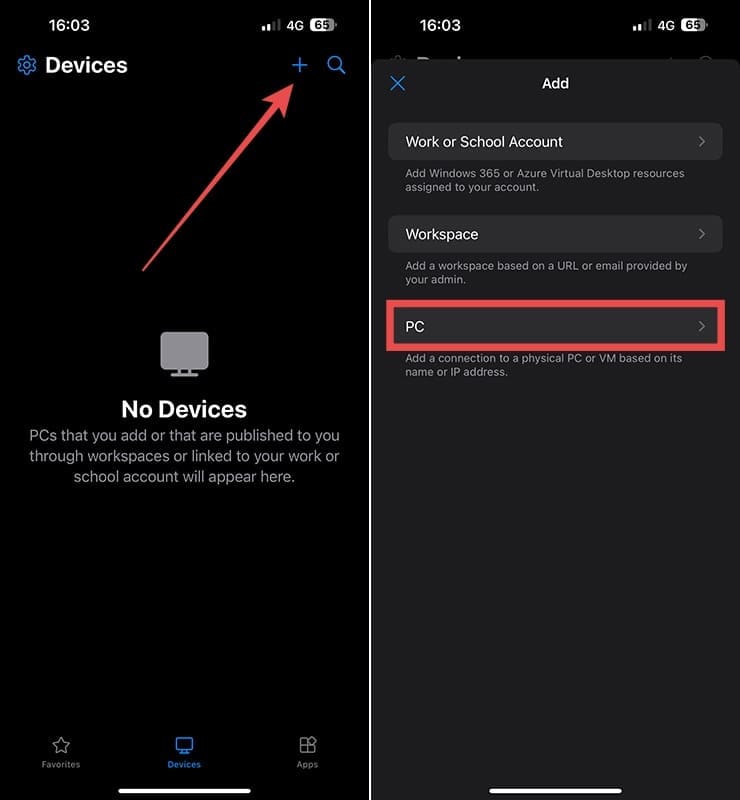
Step 7. Open the app and tap the “+” icon, then “Add PC.”
Step 8. Enter the PC name in the relevant field. Also enter your account name and a “Friendly Name.” You can also configure other settings at this stage, like swapping over the mouse buttons or enabling “Admin Mode,” and tap “Save.”
Step 9. Tap the icon that appears above your computer name to connect with it. You may have to first verify the connection, and it should then establish.
How to Remotely Control a PC From an iPhone (Windows 11)
Next, a look at the necessary steps for the same process, but on a Windows 11 machine. The process is largely similar, but with a few differences in terms of the initial configuration. Again, this feature is exclusive to Pro and Enterprise versions.
Step 1. Open the Settings menu.
Step 2. Go to System, then Remote Desktop.
Step 3. Turn “Remote Desktop” on, and click the drop-down arrow next to it. Check the box about requiring devices to use Network Level Authentication. Also note down the name of your PC.
Step 4. Find the Remote Desktop app in the App Store on your iPhone and download it.
Step 5. Open the app. Tap the “+” icon, then select “Add PC.”
Step 6. Enter the details of your PC, like its name and your account name. Also adjust the various settings as desired. Tap “Save” when you’re done.
Step 7. Tap the icon that appears above your computer name to connect with it. You may have to first verify the connection, and it should then establish.
As an avid gamer, I’ve run into my fair share of error codes and weird faults that have forced me to find fixes to problems I never anticipated. That gave me a passion for sharing those fixes with others so we can all game without feeling like our hardware is rebelling against us.


Write a Comment