Remote control and screen sharing apps like TeamViewer or AnyDesk are practically a must if you’ve got older relatives who need you to troubleshoot their PC. However, if you want to remotely control a device to run more demanding programs like editing software or even games, the DeskIn Remote Desktop (or just DeskIn) offers a more rounded experience.
Here’s what you need to know.
How to Control One PC From Another With DeskIn: Step-by-Step
Unlike stock remote PC controls, which require PCs to be connected to the same LAN or configured for remote IP access, DeskIn uses its client to locate PCs with a unique identifier created during installation. This allows you to control a PC from anywhere in the world provided it has a strong enough internet connection and are turned on.
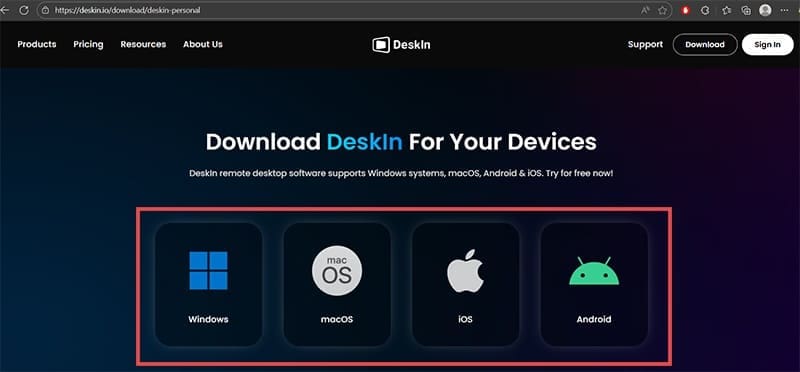
Step 1. Go to DeskIn’s downloads website and select the client based on your device’s operating system. Repeat this process for every PC you want to connect.
Step 2. Run the installer file (again on all devices). Typically the installation just requires you to press the “Install” button, and it will do everything else by itself.
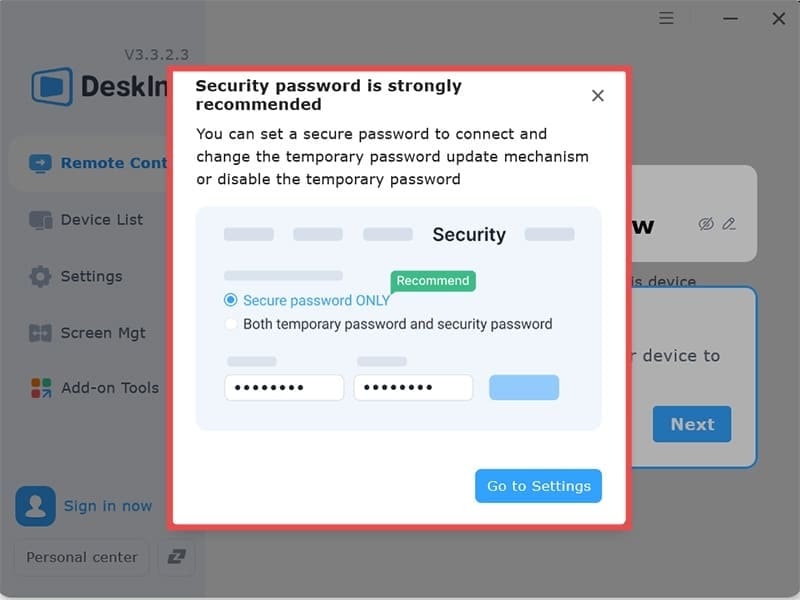
Step 3. The app should open automatically once installed. DeskIn will recommend you set up a password for your device, but you can forego this for now.
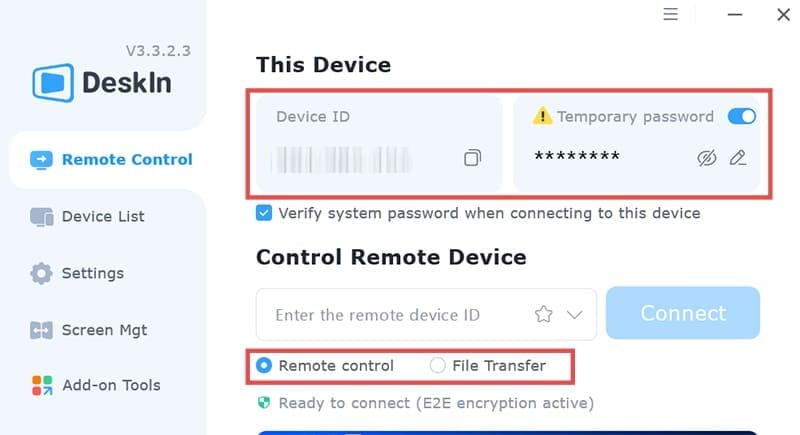
Step 4. Your device will have its ID and password listed on the screen. You will need to use that information to connect from another PC. The temporary password can be changed at will.
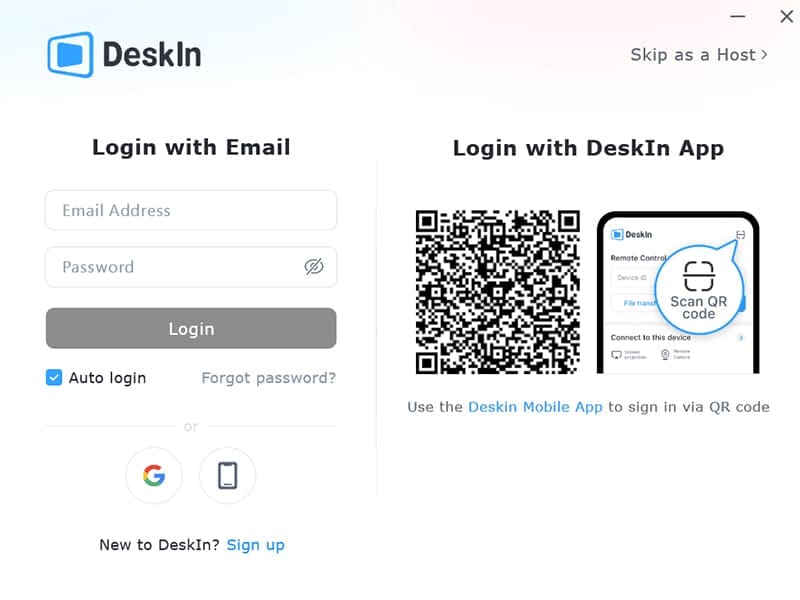
Step 5. Click on “Sign in to Connect” then click on the small “Sign up” button on the bottom and follow the instructions to create a free account. You’ll need to use an email verification code, which then prompts you to create a password.
Step 6. Once logged in, you can use the platform. On the main screen, you’ll get two options: remote control or file sharing. Select the option you need, type in the ID of the destination PC, then the password you’ve set for the device (or the predetermined temporary one if you haven’t changed the settings).
In remote controls, you can do pretty much anything on the remote PC with your own mouse and keyboard. For cross-platform keyboards, you can use the on-screen keyboard instead if you need the “Win,” “Fn,” or “Command” keys.
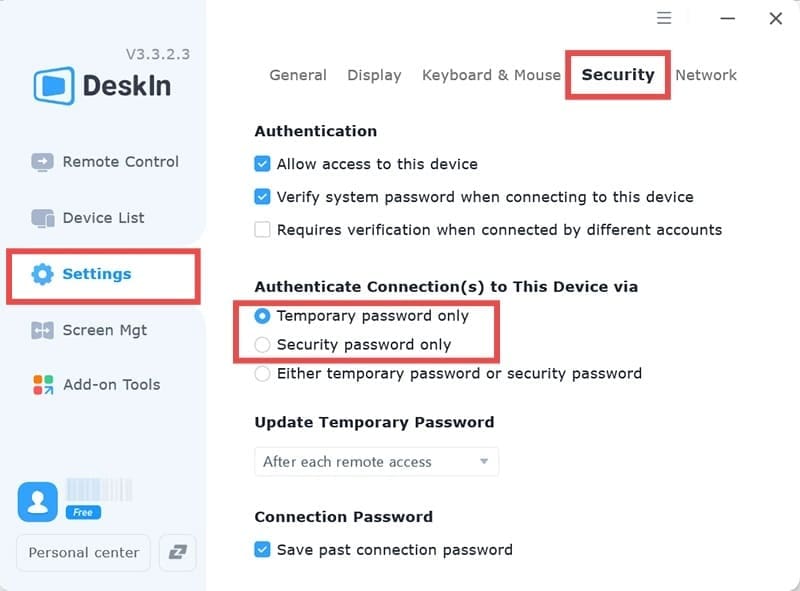
If you want to make your device a bit more secure or easier to connect to from static devices, you can set up a pre-determined password. Use the “Settings” screen, go to the “Security tab,” then check the option “Either temporary password or security password,” which prompts you to enter a new password for the system. Then, reshuffle the temporary password. You can then distribute either the temporary or the static password to other people as they need them.
Premium Features
For all intents and purposes, the free license should do fine for light work or even some resource-intensive apps on remote PCs. The premium upgrades primarily target corporate IT systems and distributed remote-work setups, enabling users to log into powerful servers or devices that use expensive software licenses.
Premium should also reduce the latency (in ideal scenarios where the PCs are close) and allow you to remotely print or add additional settings and virtual displays for more customization.
As an avid gamer, I’ve run into my fair share of error codes and weird faults that have forced me to find fixes to problems I never anticipated. That gave me a passion for sharing those fixes with others so we can all game without feeling like our hardware is rebelling against us.


Write a Comment