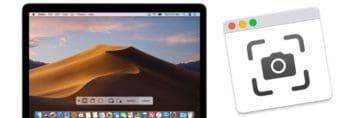
When it comes to interacting with your Mac, there are a lot of intricacies integrated. macOS Mojave and above is not any different. In this article, we explore the new screenshot features in macOS for Mojave and above.
Starting in macOS Mojave, Apple implemented a few new changes to the screenshotting features. Today, we’re going to take a look at these new features and how you can use them for yourselves.
If you are trying to take a screenshot, the keyboard shortcuts are not changing.
Here’s a list of those Screenshot app shortcuts:
Shift > Command > 3
Shift > Command > 4
Shift > Command > 4 > Spacebar
Shift > Command > 6 (for Touch Bar MacBooks)
Shift > Command > 5 (new for macOS Mojave and above)
macOS now integrates a new shortcut with Shift – Command – 5. This command shows the crosshair pointer, as well as bring up a new menu at the bottom.
From this menu, there are a few different options, which we are going to explain below.
Set a timer for screenshots
If you need to set a timer for a screenshot, follow these steps:
Press Shift – Command – 5
Select Options
Set Timer to either None, 5 Seconds, or 10 Seconds
After you set the timer, you then want to go back to the main menu and select from the following:
Capture Entire Screen
Capture Selected Window
Capture Selected Portion
Then a countdown will appear on your display, which can be canceled by hovering over it and pressing Cancel.
How do I change the save location for screenshots in macOS?
The default save location for screenshots is your Desktop.
However, if you don’t want to clutter your workspace and want to save screenshots to a specific folder, you can now do so.
Press Shift – Command – 5
Select Options
Scroll up to Save To and select from the following
Desktop
Documents
Clipboard
Mail
Messages
Preview
Other Location (available in later versions of macOS Mojave)
Once you choose an option, this location becomes the default for your screenshots to saved to.
To select a specific folder, choose Other Location.
Show the Mouse Cursor in screenshots
From time to time, you may end up wanting your mouse cursor to show in your screenshots. It’s possible to do so with its new screenshot settings.
Press Shift – Command – 5
Select Options
Select Show Mouse Cursor
Once you have finished taking your screenshots, you can go back and turn this off if you want to. It’s still a nice touch for Apple to include this functionality for those who need it.
How to edit a screenshot
Apple introduced a new way for users to interact with screenshots starting with iOS 11 and macOS High Sierra.
Whenever you take a screenshot, your Screenshot app shows you a small preview in the bottom left-hand corner.
Then, you can edit, crop, or share that screenshot all without having to actually go into the Photos app.
After you take a screenshot, a small preview of it displays in the bottom right-hand corner of your display.
You can swipe this away with your mouse, wait for it disappear after a few seconds, or open it in the new Preview.
From here, you can edit the screenshot like you normally would with Preview. There is a toolbar at the top with an array of different options.
These editing tools include things such as adding shapes or outlines, drawing, adding text, rotate, or crop. There are a few buttons to the right, for Done, Trash, and Share.
How To Move the Screenshots Directly to Clipboard in macOS
This request is another area where we field a lot of questions.
You can easily set up the destination of the screenshots to the clipboard so that they are available to use in other apps as opposed to moving them to desktop or a different location.
Press Command + Shift + 5 keys to launch the screenshot utility and click on Options.
Under Options, Select Clipboard and you are good to go! We love this new feature in the screenshots utility.
In Summary,
Apple is really ramping up screenshots in the newer versions of macOS, and it’s definitely a nice touch. Let us know if you run into any issues with screenshots and if you have any questions.
Still love Grab?
If you still want to go back to the ole ‘Grab’ utility, you can install it on Mojave/Catalina and above via using your older Time Machine copy. We have tested it and included instructions.
But, before you jump back to Grab, we suggest that you give this new Screenshot app a try!!
Andrew Myrick is a freelance writer based on the East Coast of the US. He enjoys everything to do with technology, including tablets, smartphones, and everything in between. Perhaps his favorite past-time is having a never-ending supply of different keyboards and gaming handhelds that end up collecting more dust than the consoles that are being emulated.
Is there anyway to disable the automatic save feature? I used Grab a ton for work. I could just save a file to a specific project folder (selected at time of save), related to the image I captured. No extra steps needed; quick and efficient.
Further, I used Grab for a quick reference when working between apps. I don’t want to save the image when I’m finished referring to it.
Use Terminal to change this default setting. First, close the screenshot app if open.
1) Open Terminal
2) Type in this command: defaults write com.apple.screencapture type JPG
3) Press return
4) Run a test–if it doesn’t work restart and test again (you may need to do this sequence of commands again)
Supported formats include: JPG, TIFF, GIF, PDF, and PNG
When I record a video with the app the sound on the clip is much lower than the sound in the actual video. How can I get the app to record the sound at a higher level?
The screenshot app defaults to the setting for your microphone established in your System Preferences. To raise the volume, open System Preferences > Sound > choose the Input tab > tap your microphone as listed or choose the internal microphone.
You can also screen record with QuickTime Player app, which gives you native controls for volume input (unlike screenshot app).
Screen record with QuickTime
File > New Screen Recording
Tap the arrow next to the red circle to see your options
Select your microphone
Choose to include mouse clicks if desired
Slide the volume slide right or left to adjust the levels
The default is your Mac’s Desktop and you mention it’s already set there in the options. Our suggestion is to use the spotlight search and type in the words “Screen Shot” and scan that search result list for any images. Select (highlight–do not open) one of the screenshot images and press down the Command key to show it’s location at the bottom of the window.
Why is the microphone option grayed out. I see that it was mentioned but typically if people record the screen there’s some audio. So far I have not been able to figure out how to record audio using this new screen capture feature (command + shift + 5)…
For the region capture, is there a way to ‘draw’ the capture area with mouse as in the previous version? now the selected area comes up, i need to drag the the area to the correct location and adjust the four corners before taking the screenshot. earlier, you just need to select the region selection option and drag the mouse from left top to right bottom corner .
To get rid of the floating screenshot thumbnails at the bottom of your screen in macOS Mojave, open the Screenshot Application via Applications > Utilities > Screenshot.
In the floating menu, select Options and then tap Show Floating Thumbnail to uncheck it. Then close the application and test it out.
As far as iOS is concerned, there is no way to turn off this thumbnail preview in iOS right now.
The options are to either ignore it or swipe left to remove it from your screen.
When I take a screen shot with the new mac update, I get a thin black boarder around my screenshots that I never used to get. You don’t see the boarder around the images until you print or change your document to a pdf and send to preview.


Is there anyway to disable the automatic save feature? I used Grab a ton for work. I could just save a file to a specific project folder (selected at time of save), related to the image I captured. No extra steps needed; quick and efficient.
Further, I used Grab for a quick reference when working between apps. I don’t want to save the image when I’m finished referring to it.
HI Stephen,
Unfortunately, we have not found a way to NOT save these screenshots!
That was indeed a nice feature of Grab!
Saving screen shots in preview, how do I set my default image from png to jpg.
Every time time a select save it defaults to png?
HI Rog,
Use Terminal to change this default setting. First, close the screenshot app if open.
1) Open Terminal
2) Type in this command: defaults write com.apple.screencapture type JPG
3) Press return
4) Run a test–if it doesn’t work restart and test again (you may need to do this sequence of commands again)
Supported formats include: JPG, TIFF, GIF, PDF, and PNG
Hope that helps!
In Catalina screen capture filenames are now prefixed with a dot, which makes them hidden files, is there anyway to change this behavior?
How to make a recording of my passwords in safari in screenshot? safari mac 10.14.
I set it to record selected portion and space goes white and around it grey and then the app freezes.
I have to restart the macbook to get it to go away or open.
Hi Jody,
We’re not sure why the screenshot app is freezing on you. What we suggest is to use QuickTime’s recording feature instead.
1) Open QuickTime Player
2) Choose File > New Screen Recording
3) Press the red button to start recording
This records your entire screen.
When I record a video with the app the sound on the clip is much lower than the sound in the actual video. How can I get the app to record the sound at a higher level?
Hi David,
The screenshot app defaults to the setting for your microphone established in your System Preferences. To raise the volume, open System Preferences > Sound > choose the Input tab > tap your microphone as listed or choose the internal microphone.
You can also screen record with QuickTime Player app, which gives you native controls for volume input (unlike screenshot app).
Screen record with QuickTime
File > New Screen Recording
Tap the arrow next to the red circle to see your options
Select your microphone
Choose to include mouse clicks if desired
Slide the volume slide right or left to adjust the levels
Hope that helps,
Liz
My screenshots are not saving to the desktop, even though it is set to this in Options.
Where can I find them?
HI Dorellle,
The default is your Mac’s Desktop and you mention it’s already set there in the options. Our suggestion is to use the spotlight search and type in the words “Screen Shot” and scan that search result list for any images. Select (highlight–do not open) one of the screenshot images and press down the Command key to show it’s location at the bottom of the window.
Hope that works for you!
Liz
Why is the microphone option grayed out. I see that it was mentioned but typically if people record the screen there’s some audio. So far I have not been able to figure out how to record audio using this new screen capture feature (command + shift + 5)…
Hi Fergus,
After pressing Command+Shift+5, press options and choose a microphone (like built-in) listed under the gray heading Microphones.
I only had to use this for 3min.
It’s now time to move to another tool.
They have made something simple to use and added 3 more steps!
Maybe you can share how to copy the old version into the latest version.
I tried this, but the app worked the same as the new one? Strange.
For the region capture, is there a way to ‘draw’ the capture area with mouse as in the previous version? now the selected area comes up, i need to drag the the area to the correct location and adjust the four corners before taking the screenshot. earlier, you just need to select the region selection option and drag the mouse from left top to right bottom corner .
Hi Arun,
Yes, absolutely.
Open screenshots app and choose the capture selected portion icon–it looks like a dotted-lined box.
You can then move the corners to change the size of the window to capture.
If you untick Remember Last Selection in the options menu when you CTRL+SHIFT+5 you’ll be able to ‘draw’ like you did previously
Hello.
The only problem I am having with Mojave screenshots, is they keep disappearing.
They used to save to the desktop, but now they disappear!!
I don’t know where they are now.
I did some ‘surfing’ to try and sort it out – was advised to go to Finder/Preferences and uncheck and then re-check “Show all filename extensions”.
This works, but I have to do it EVERY TIME I do a screenshot!!
Hi Marijke,
You are not alone! Quite a few people have problems and frustrations with macOS Mojave’s Screenshot App.
To change the default save to location or see where it is currently saving, open Screenshots and select the Options button.
Look under Save to and choose a different location or choose other location to manually set where your screenshots save to.
Hi. How do you remove the delay of the screenshot?
When I take a SS it appears on the bottom of the screen for a couple of seconds and only after this delay I can see the .jpg file on the desktop.
How to remove this useless delay?
Same question about the SS feature on iOS.
How do i get rid of the preview that appears on the screen?
I mean yeah we can edit it, great. But I don’t want to most of the time
Hi Frank,
To get rid of the floating screenshot thumbnails at the bottom of your screen in macOS Mojave, open the Screenshot Application via Applications > Utilities > Screenshot.
In the floating menu, select Options and then tap Show Floating Thumbnail to uncheck it. Then close the application and test it out.
As far as iOS is concerned, there is no way to turn off this thumbnail preview in iOS right now.
The options are to either ignore it or swipe left to remove it from your screen.
When I take a screen shot with the new mac update, I get a thin black boarder around my screenshots that I never used to get. You don’t see the boarder around the images until you print or change your document to a pdf and send to preview.
Any idea how to get rid of that?
Most sites scroll. Need scroll capture.