Over the past few weeks, I’ve been covering the basics of Automator on Mac (read here). It’s an app that most Mac users don’t know exists, and I think it can change the way you work. But that’s not the app we’re talking about today. Today, we’re going to be discussing the iPhone Shortcuts app.
Unlike Automator, Shortcuts is very popular. And though the majority of iPhone users probably don’t use it, a substantial portion of iPhone owners use it every day.
The Shortcuts app is about to appear on Mac alongside Automator this Fall in macOS Monterey. That means mastering it on your iPhone will help you master it on your Mac. And since the Shortcuts you create on iPhone will be transferrable to your Mac, learning how to use Shortcuts on iPhone will pay off later this year.
In this post, I’m going to cover the absolute basics of the Shortcuts app. If you’ve never used it before, this post is for you. If you already know how to use Shortcuts, though, don’t worry! I’ll be going into specific routines and techniques you can use over the next few weeks.
In shorthand, the iPhone Shortcuts app is a digital automation app available on iPhone. It’s produced by Apple, giving it a deep level of integration with iOS and your apps.
For those that don’t know, digital automation refers to apps and services that connect the other apps you use together. You can then create a chain of actions that take place across these apps automatically after one another. Kind of like setting up dominos and knocking them down, but for the apps on your phone.
Here are some popular examples of iPhone Shortcuts to give you an idea of what I mean:
Start a timer that turns on Do Not Disturb for the duration of the timer
Instantly text the most recent photo in the Photos app to a friend
Identify a song that’s playing and automatically add it to your Apple Music library
Create a preset timer for laundry, pasta, or walking the dog
Automatically generate a playlist of songs that you’ve listened to over the last week
Again, those are just some basic ideas! Each of these Shortcuts can be set to run on its own or you can add a button to your iPhone’s Home Screen to run them. This is a great way to save time and simplify your life.
From what I remember, the Shortcuts app doesn’t come pre-installed on iPhone. You have to download it from the App Store. You can download it here and start scrolling through it to get a better idea of how it works!
The anatomy of the iPhone Shortcuts app
As you mess around with the iPhone Shortcuts app, you’ll notice that it consists of a few different components. Below is a breakdown of the two main components of the Shortcuts app. Both of these elements are common to most digital automation apps (though they might go by different names) so learning them with this app will help you use others.
What are Shortcuts?
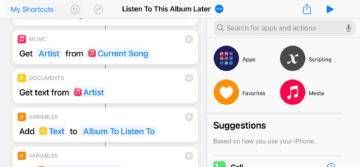
The first key component of the iPhone Shortcuts app is – surprise! – Shortcuts. Shortcuts are what the Shortcuts app calls its routines. A Shortcut contains a set of steps that fire off in sequence whenever the Shortcut runs.
You can think of a Shortcut like a recipe. Inside are several steps that when executed, will create a meal. When you put them all together in the right order, you get a recipe.
That’s what a Shortcut does. It brings together different steps to accomplish whatever task you want the Shortcut to complete. Whenever you run the Shortcut, it works through each step until your desired task is complete.
On other automation platforms, like IFTTT, Zapier, or Automator, you’ll see words like “routines”, “Zaps”, or “workflows” used in place of Shortcuts. These words all mean the same thing. The different titles are just a result of branding, so don’t get them confused!
What is an Action?
The second component of the iPhone Shortcuts app is actions. Actions are the steps that take place within your Shortcuts. Each action is a single step in the process that is your Shortcut.
A Shortcut can have as many or as few actions as you like. The more there are, the more complex the Shortcut.
Actions are, in my opinion, the backbone of any automation app. The more actions you have, and the more flexible those actions are, the more possibilities you’ll have when creating your Shortcut.
I think this is an area where the Shortcuts app is a bit lacking. All of the actions are pretty simple, which limits how intricate your Shortcuts can be.
That said, the Shortcuts app does offer the option to write your own script. Scripting is the ability to add code to your Shortcuts. If you know how to write code, this opens up substantially more possibilities for your Shortcuts.
Three ways to create Shortcuts with the iPhone Shortcuts app
There are three ways to create Shortcuts with the iPhone Shortcuts app. The first one is the best, the second is the easiest, and the third is (in my opinion) the most powerful.
1. Make your own workflows with the iPhone Shortcuts app
The first way to create a Shortcut is the method you’ll likely end up using the most. That method is creating workflows from scratch on your own.
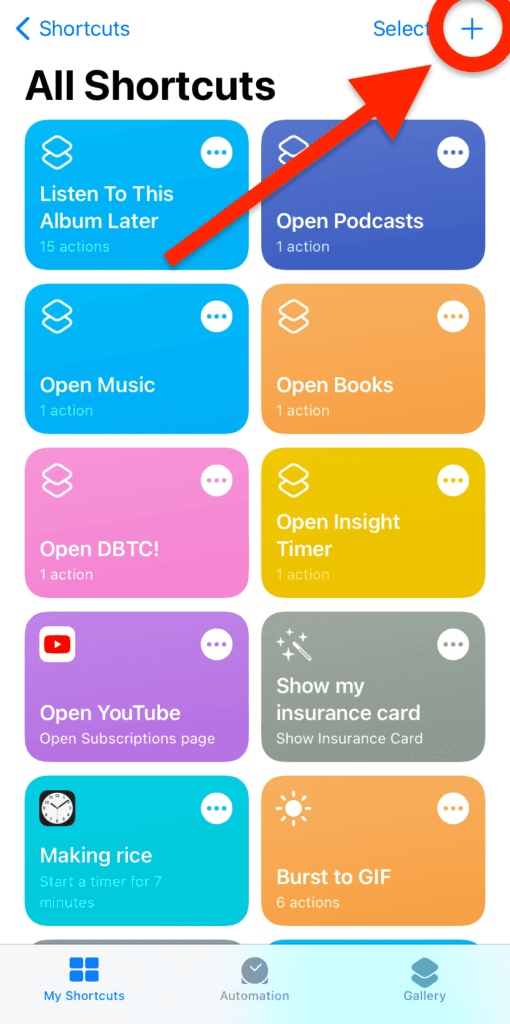
To create a Shortcut this way, open the Shortcuts app, tap the My Shortcuts tab, and tap the + button in the top right of the screen.
From there, just start adding actions and experimenting!
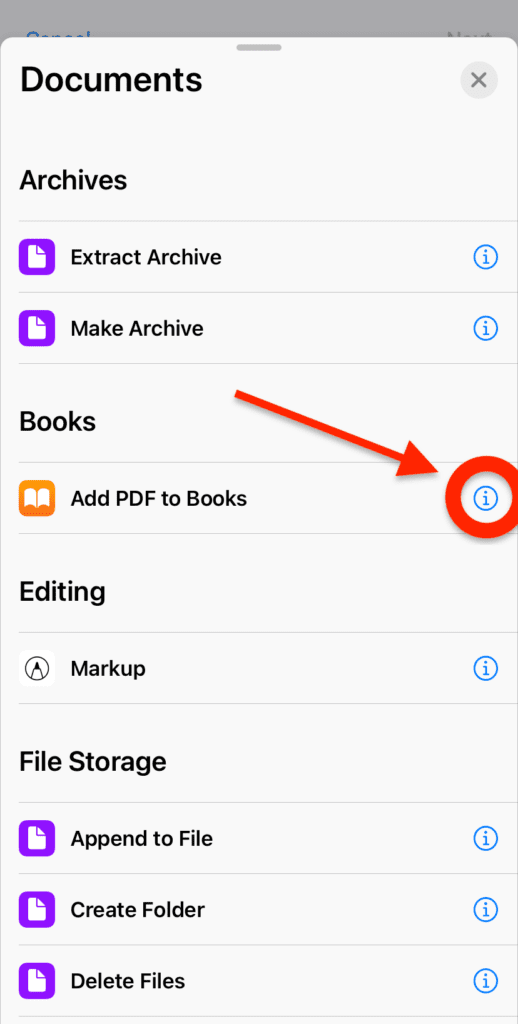
I’ve found two tools to be particularly useful while experimenting with different actions. The first is simply clicking the blue i next to an action.
That will show you a short description of how that action works and what it does. Admittedly, these descriptions aren’t always the clearest. But if you’ve got nothing else to go on, they’re a big help!
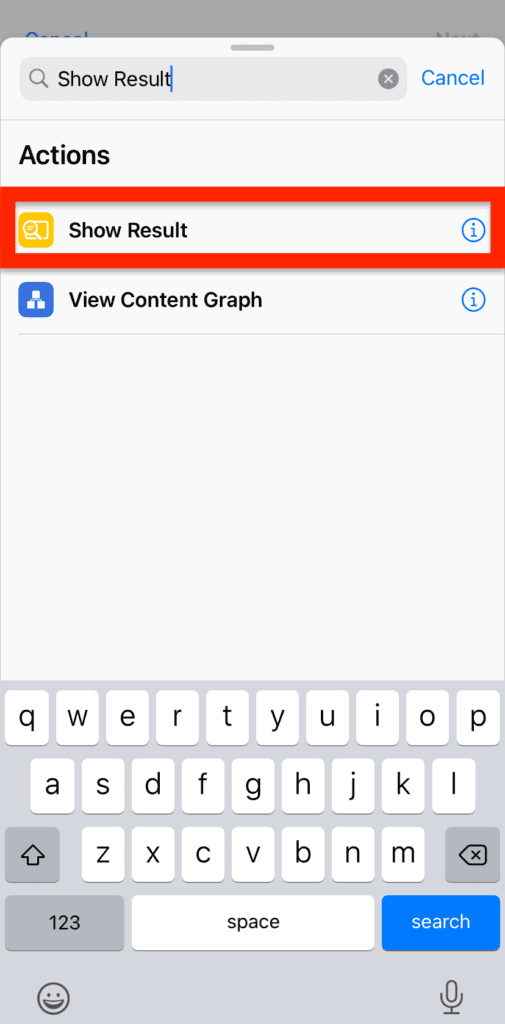
The second tool that’s immensely helpful is the Show Result action. You can find it by typing “Show Result” in the search bar in the Actions drawer.
All this action does is shows you a popup/notification containing the contents of whatever is passed into it. So if you’re trying to write text, see which file is being passed into your Shortcut, or figure out why your Shortcut isn’t running as expected, this can give you a visual into your Shortcut.
Just drag and drop the Show Result action underneath the action or variable you want to get a visual on. Then, run your Shortcut and see what the Show Result action shows you.
This action won’t change how your workflow runs, so don’t worry about that. It’s just a visual indicator and is a great way to debug.
2. Use the Shortcuts Gallery
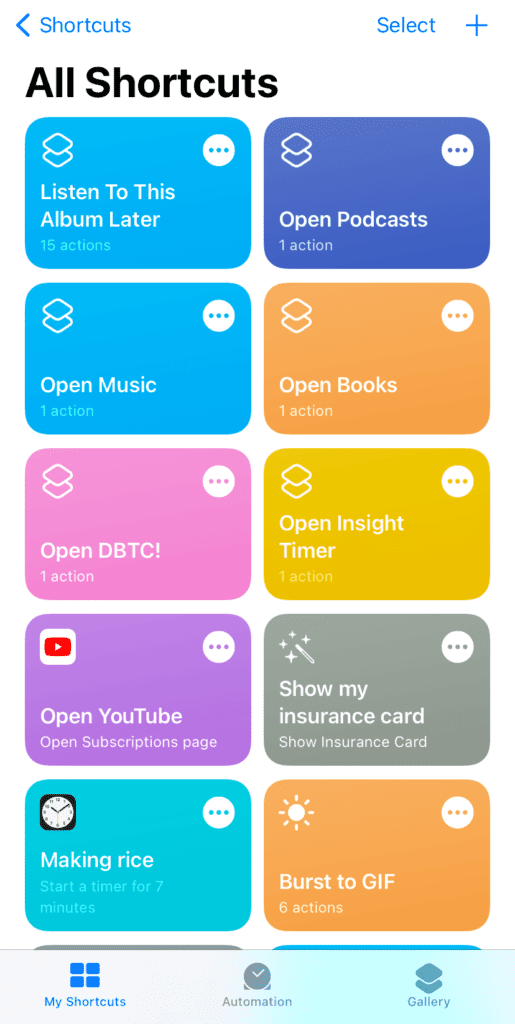
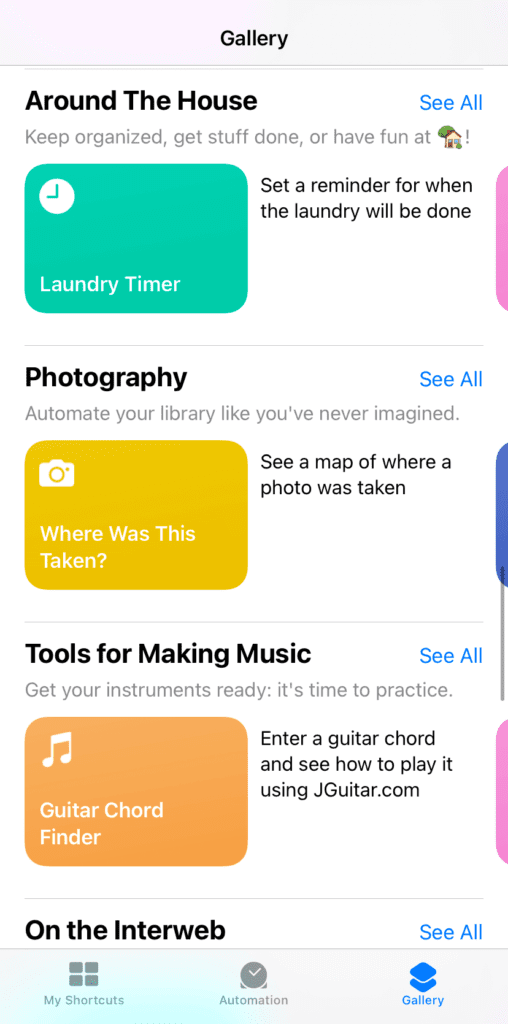
The easiest way to add new Shortcuts to your iPhone is by using the Shortcuts Gallery. This is a section of the iPhone Shortcuts app where you can find popular Shortcuts that have already been made. Just add them to your library, and you get their functionality without needing to build anything of your own.
The Gallery not only helps you fill up your iPhone with automations faster but can also be used to deepen your understanding of how Shortcuts work. Just tap on any Shortcuts in the Gallery to add them to your My Shortcuts tab.
Once added, you can tap the three-dot button on the Shortcut to open its editor. In the editor view, you can see all of the steps and variables that make that particular automation possible. It’s a great way to learn and steal ideas.
3. Use third-party app Shortcuts
The third and arguably most powerful way to create workflows in the iPhone Shortcuts app is through third-party Shortcuts and actions. By “third-party” actions, I’m referring to actions that come with non-Apple apps that you install.
For example, I use the app Lose It! to track my calories. This app comes with Shortcuts actions, which means that I can create Shortcuts that work with this app.
To me, this is incredibly exciting. Apps that have embraced the Shortcuts app help make it more powerful and versatile. And sometimes, these apps beat Apple to the punch. There was a time when you couldn’t append notes in the Notes app with Shortcuts, but you could with other apps like Bear Notes and Evernote.
If there’s an app you love using that doesn’t have any Shortcuts integrations, be sure to email the developers about it! This is especially important as Shortcuts is moving to Mac soon.
The iPhone Shortcuts app: Automations vs. Shortcuts
There’s another aspect of the iPhone Shortcuts app that I felt deserved some clarity. That’s the difference between Shortcuts and Automations.
Outside of the Shortcuts app, these two things are not that distinct. However, the Shortcuts app is set up in such a way that they are separate types of workflows. Fortunately, the difference is simple!
Shortcuts are workflows that run whenever you tell them to run. Either you press the button for that Shortcut or choose it from the Share menu. Regardless, you decide whenever it runs.
Automations, on the other hand, run on their own. You set up the parameters that will tell them when to run, and then they run whenever those parameters are met.
For example, I have an automation that turns on my Do Not Disturb whenever I arrive at an appointment. Whenever I leave, it turns it back off. I never have to interact with this automation – it handles itself for me.
So in short, Shortcuts run when you tell them to, and Automations are completely automatic.
How to create a simple Shortcut on iPhone
Before closing out this post, I figured I might as well give you a quick tutorial on a simple iPhone shortcut. That way, you can take the basics we’ve covered in this post so far and try them out for yourself.
The Shortcut we’re going to create is one that I described at the beginning of this post. When you tap it, it’ll send the most recent photo you’ve taken to a person of your choosing. It’s really simple to make, so let’s start!
First, open the Shortcuts app and tap the + icon in the top-right of the screen.
Tap Add Action.
In the search bar, type “Get Latest Photos” and tap the corresponding action.
You’ll see that this action is, by default, set to grab the last 1 photo that you’ve taken. You can increase this number if you want to send more photos. We’re just going to do one, though.
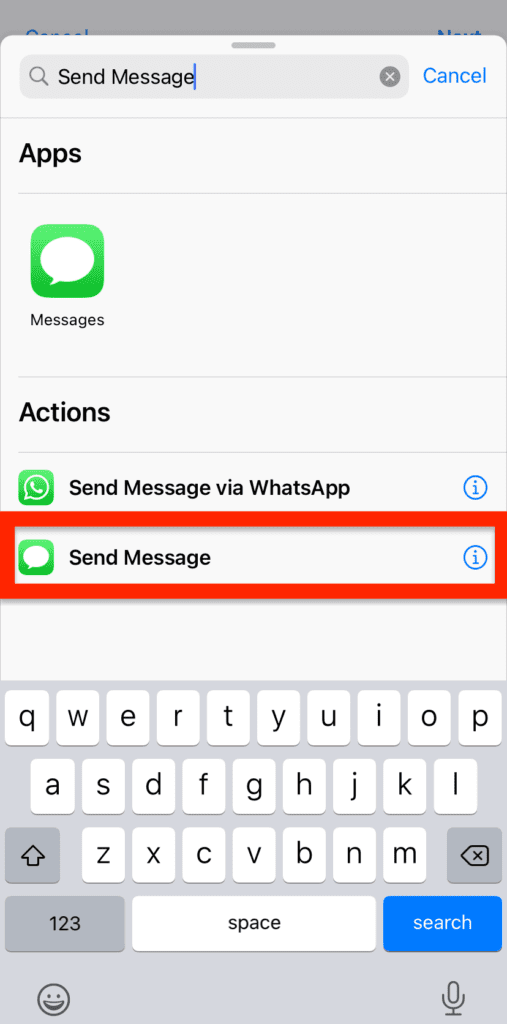
Next, tap the + icon in the blue circle underneath the action we just added. In the search bar, type “Send Message” and tap the corresponding action.
Now there is another crossroads. You can leave the Recipients field blank if you want, or fill it in now.
If you leave it blank, then this Shortcut will give you a chance to fill in the contact you want to send the picture to every time you run this Shortcut. If you fill in someone’s phone number now, however, then this will send your most recent photo to the same person every time. It’s up to you which of those sounds better for your purposes!
At this point, you can test the Shortcut out by tapping the triangle Play in the bottom-right of the screen. Just know that doing so will run this Shortcut instantly. If you’ve filled in someone’s phone number, they’re going to get the most recent photo in your Photos library.
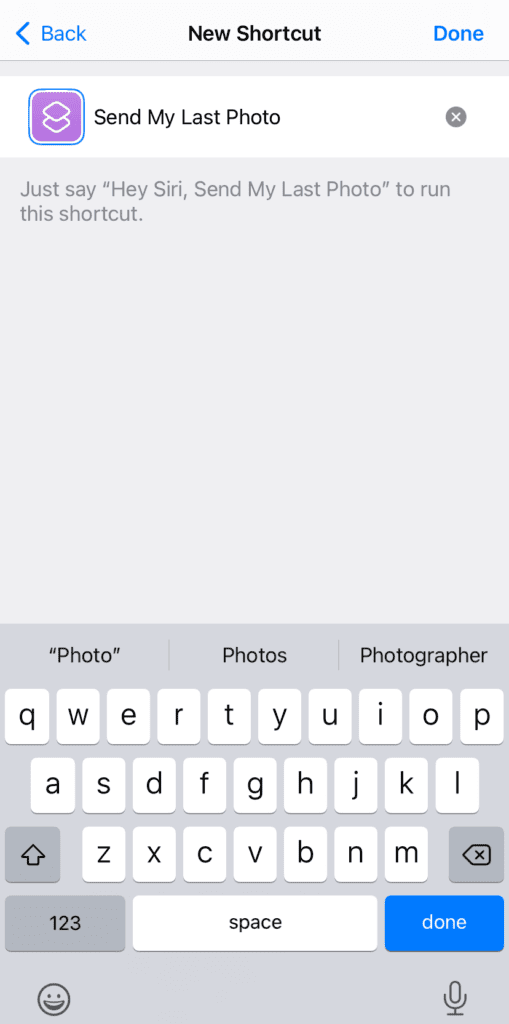
Once you’ve made your decision on that, go ahead and tap Next in the top-right of the screen. Name the Shortcut something that is memorable and quotable to Siri. You can run Shortcuts by saying the name of the Shortcut to Siri. You’ll have an easier time doing that if you name this routine something like, “Send My Last Photo”.
Once you’ve named the Shortcut, you’re done!
How to run a Shortcut on iPhone
There are a few different ways to run your Shortcuts.
The first and most obvious is to run them from the iPhone Shortcuts app. Just open the app and tap the colored rectangle that contains the Shortcut you want to run.
The second method is to have Siri run them for you. This is also pretty easy. Just activate Siri by saying “Hey Siri” or by holding the lock button on your iPhone for a few seconds. Then, say the name of the Shortcut you want to run. This is why it’s helpful to name your Shortcuts a short and easy phrase.
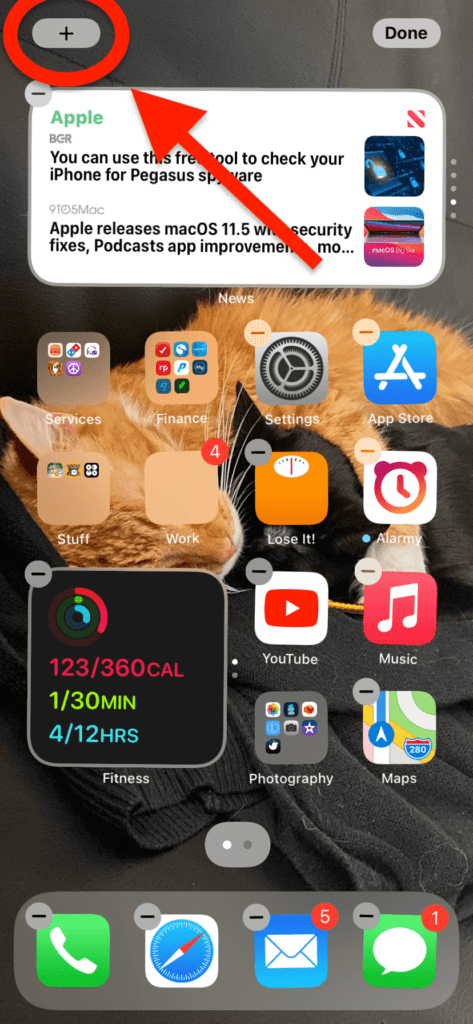
The third way to run a Shortcut is by adding it to your Home Screen as a widget. You can do this just like you would any other widget. Press and hold any app on your Home Screen until you activate Jiggle Mode. Then, tap the + button in the top-left of the screen.
Scroll down until you find the Shortcuts app in the list of available widgets.
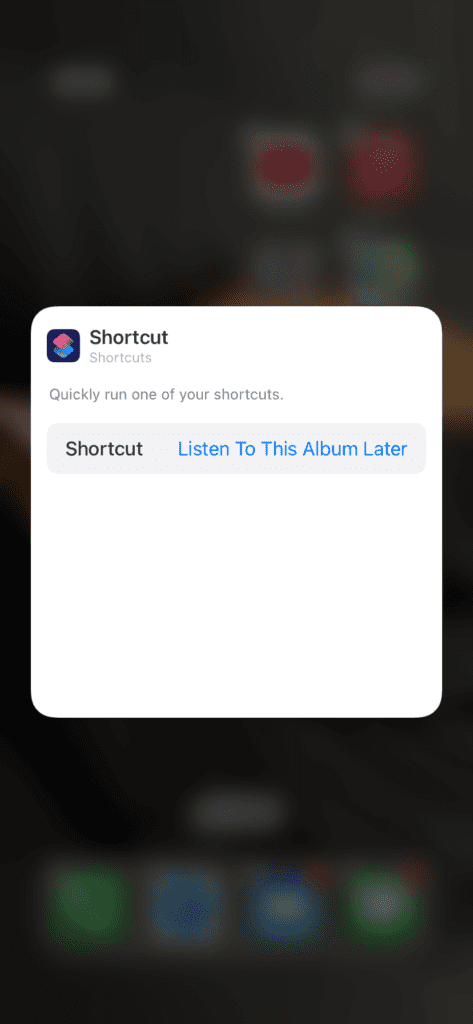
When you tap Shortcuts from the list of available widgets, its widget will be added to your Home Screen with one of your Shortcuts randomly selected. To change it to another Shortcut of your choosing, press and hold the Shortcuts widget until it enters Jiggle Mode. Then, tap it.
As you can see in the image above, you’ll see an option that says Shortcut [your Shortcut here]. Tap that and you’ll be able to change the widget to a Shortcut of your choosing.
And that’s it for the third way!
The fourth way to run a Shortcut is to build it as an automation. As covered earlier, Shortcuts automations run automatically whenever specified conditions are met. You don’t need to (and can’t) manually run automations.
Start using the iPhone Shortcuts app today
And that’s it! That’s all of the basics you need to know to start using the iPhone Shortcuts app. It’s a great way to save time, impress your friends, and accomplish things on your iPhone that wouldn’t otherwise be possible.
I’ll be covering more Shortcuts tips, tricks, and routines soon, so be sure to subscribe to the AppleToolBox blog! And if you want to learn more about automation on Mac, check out this post covering the basics of the Automator app.
I want to say thanks for this because apart from a guy called Proper Honest Tech on UTube, there’s no one/nothing to address people who want to know basics. I personally have zero coding knowledge and barely any IT skills and I am very overwhelmed by Shortcuts but because it now comes pre installed when I got my phone I figured that most people must use it and therefore that I should know how to make my own too. For months I have struggled and failed and felt rubbish. There’s so much I don’t understand and it’s an area/app that would benefit from lots more tutorials and explanation of things like variables and magic variables and parameters and why things don’t work and what input surface, input types and import questions and scripting are, but at least you address how commonly used they are(were in 2021).


I want to say thanks for this because apart from a guy called Proper Honest Tech on UTube, there’s no one/nothing to address people who want to know basics. I personally have zero coding knowledge and barely any IT skills and I am very overwhelmed by Shortcuts but because it now comes pre installed when I got my phone I figured that most people must use it and therefore that I should know how to make my own too. For months I have struggled and failed and felt rubbish. There’s so much I don’t understand and it’s an area/app that would benefit from lots more tutorials and explanation of things like variables and magic variables and parameters and why things don’t work and what input surface, input types and import questions and scripting are, but at least you address how commonly used they are(were in 2021).