With the iOS 18.2 update and the iPadOS 18.2, Apple has jumped right onto the generative AI bandwagon. Part of Apple Intelligence, Genmoji lets you create your own emojis with the help of AI. You can use them in messages, send as stickers, and even use as reactions in Tapback.
There’s just one issue:
You don’t know how to use Genmoji in iOS 18. We’re here to help you with that.
Before you can even think about how to create Genmoji in iOS 18, you need to check that it’s even possible in the first place. Apple has made its new generative AI feature available only for the iPhone 16 lineup and the iPhone 15 Pro and Pro Max. If you have an earlier iPhone, then sorry – Genmoji simply isn’t available to you no matter which version of iOS you have.
Assuming you do have the right type of phone, you also need to ensure you have the right version of iOS installed. Specifically, you need iOS 18.2 (earlier versions don’t feature Genmoji) and you can check with the following steps:
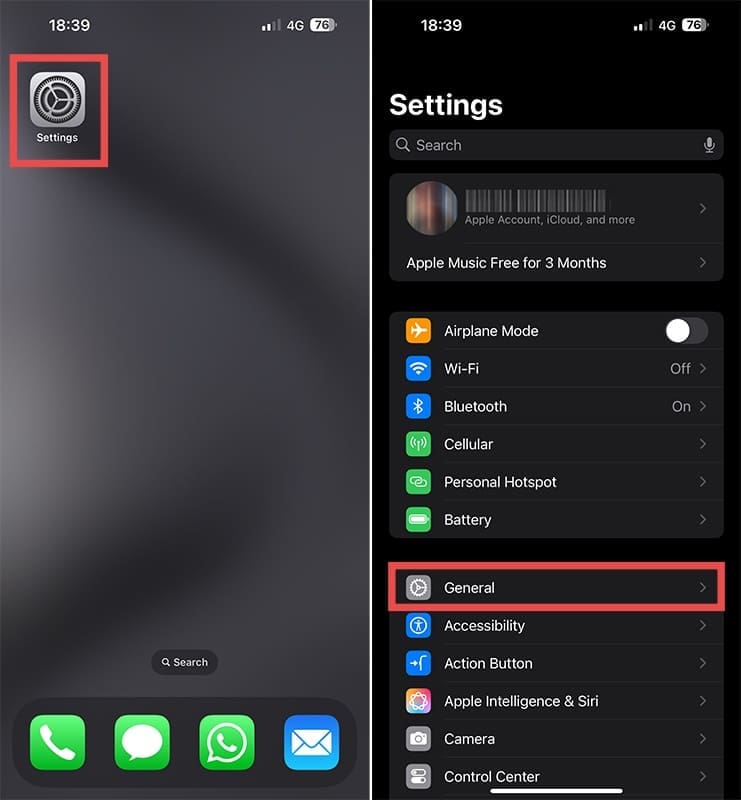
Step 1: Navigate to and tap the “Settings” icon on your phone and select “General.”
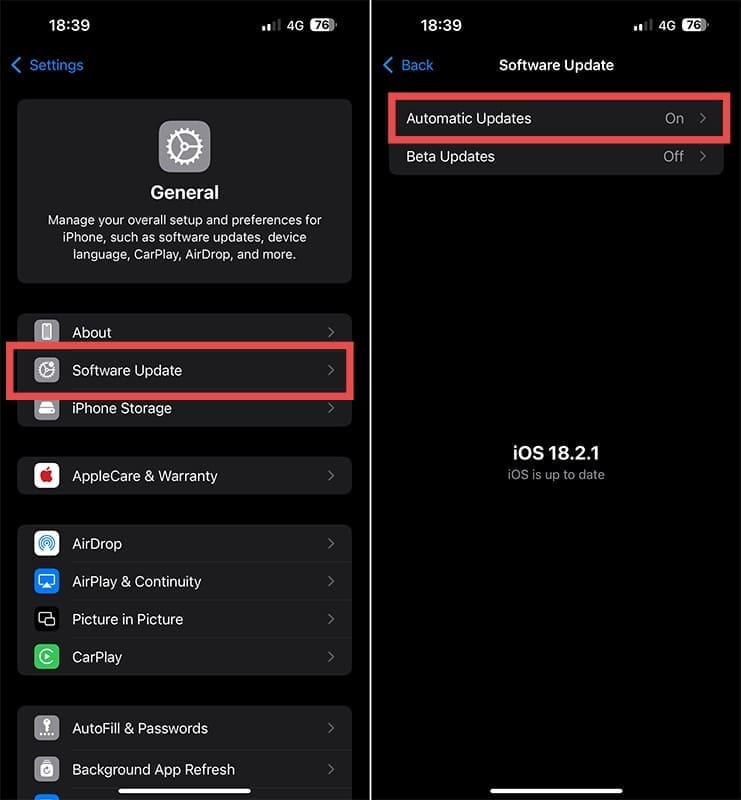
Step 2: Choose “Software update.”
You should see if an iOS update is available if you haven’t allowed your phone to update automatically. Hit “Install Now” and wait as the installation process completes.
How to Use Genmoji on iOS 18
The tricky thing with Genmoji is that it’s not an app you can access via your iPhone’s home screen. You can only use it when you’re typing.
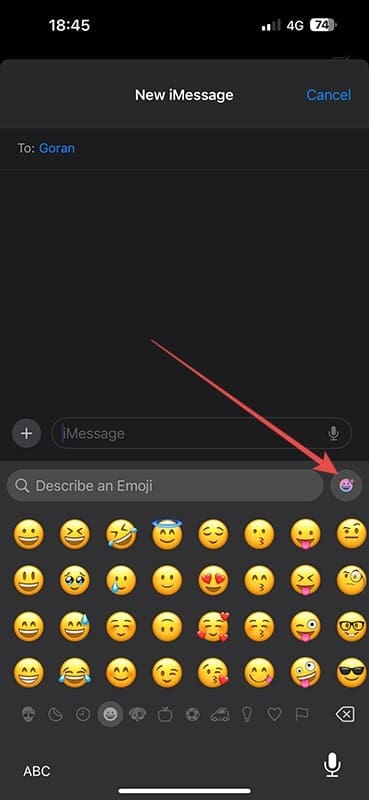
Step 1: Go into any Apple app – such as Messages – where you have access to a text field. Hit the icon to switch your standard keyboard to the phone’s emoji keyboard. This icon will usually be a smiley face or one that looks like a wireframe globe.
Step 2: Check the top-right of your emoji keyboard’s screen and you should see a smiley face with a small “+” at its top-right. Tap that icon to enter the Genmoji creator.
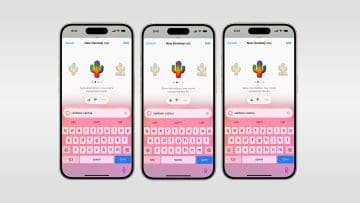
Step 3: Enter the description of the emoji you want to create – such as “purple daffodil” and hit the “Done” button.
Step 4: Add your new Genmoji to a message by swiping through your list of emojis until you find it and tapping it.
You can also create Genmojis using photographs in your phone’s photo library. The photo needs a description that states who is in the picture. Assuming you have that, select “Choose a Person” when creating your Genmoji and select the person identified in your Photos library. You can also create a variation of the person’s photo to give your new Genmoji a little extra oomph.
How to Refine Your Genmoji
Are you unhappy with the Genmoji? If so, you can refine it during the creation process. For instance, if the “purple daffodil” we mentioned in our above example isn’t cutting it, use the textbox to add more about what you want the daffodil to show. Something like “purple daffodil growing out of the ground” might make your Genmoji look a little closer to what you have in your mind.
As an avid gamer, I’ve run into my fair share of error codes and weird faults that have forced me to find fixes to problems I never anticipated. That gave me a passion for sharing those fixes with others so we can all game without feeling like our hardware is rebelling against us.


Write a Comment