Apple’s line of macOS computers is more powerful than ever before, as the company continues its transition into Apple Silicon with the M1 chip. But there are times when you might run into issues that return an error that is extremely vague. It’s those times that make us wish there was a one-stop-shop for all of the error codes within macOS. Today, we’re taking a look at the “Erase process has failed. Click done to continue” error code.
Fix “Erase process has failed. Click done to continue”
If you go through the proper steps to wipe a hard drive or delete a partition, you might end up being met with an “Erase process has failed. Click done to continue” message. This has been around on macOS for years and continues to throw a wrench in your plans to completely wipe your macOS computer. Thankfully, not all hope is lost as there are a few different steps you can try before giving up.
Partition Drive and Format
Even if you were met with the “Erase process has failed. Click done to continue” message in Disk Utility, the first step that you want to take is to try and go through the process again. But this time around, try restarting your Mac first to see if that will knock out any of the cobwebs that might have been causing the error to occur in the first place.
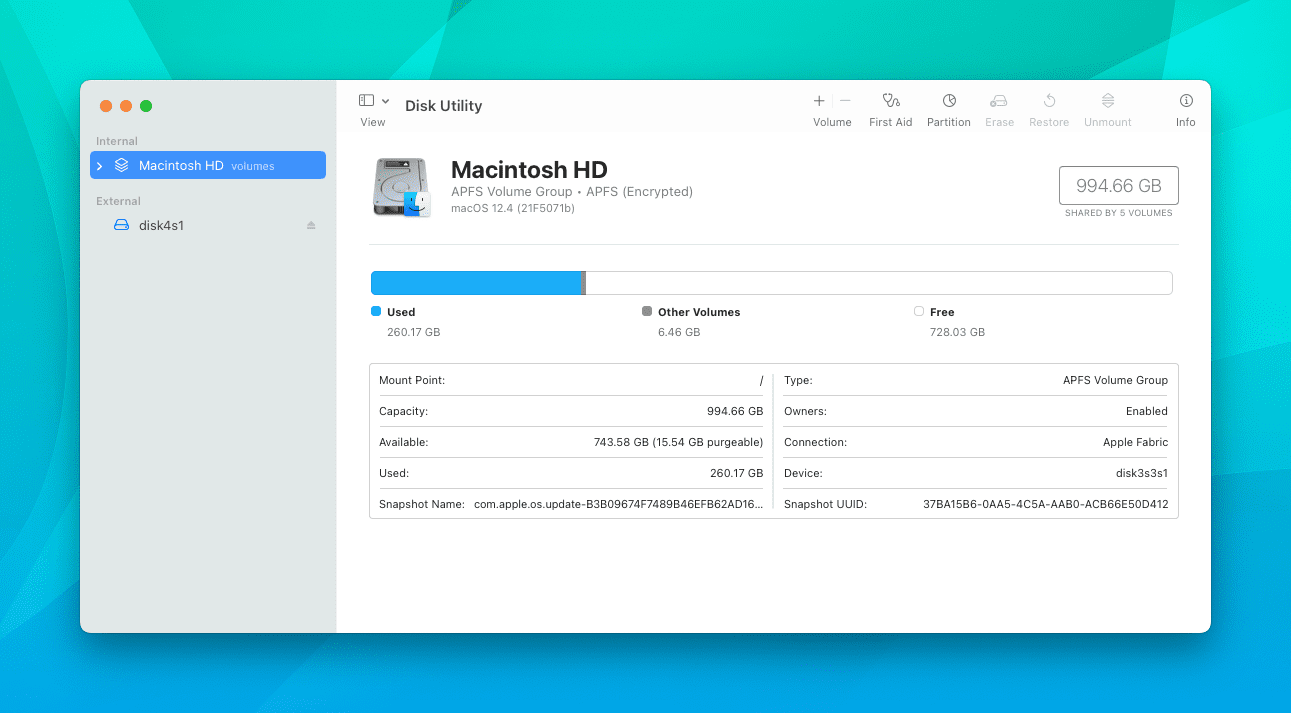
Open the Utilities folder on your Mac.
Double-click Disk Utility to open the app.
Select the hard drive that you want to format and partition.
Click Partition in the menu bar.
Select the partition that you want to remove.
Tap the – button to delete the partition.
Click the Apply button in the bottom right corner.
Close the Disk Utility app.
After you close the Disk Utility app, you’ll want to make sure that the hard drive or partition has been removed. Then, we recommend restarting your computer just so that any previous references to the deleted partition are properly (and fully) removed.
Unplug Everything and Try Again
Many of us enjoy the portability that a MacBook Air or MacBook Pro has to offer, but want to use the computer docked at a desk. This likely means that you have various peripherals plugged in and attached. In some cases, users found that simply unplugging everything, restarting their Mac, and trying the steps above again, ended up getting rid of the error message.
Erase Your Mac With Disk Utility
While Disk Utility can be accessed with your Mac turned on, things can get rather complicated if you are trying to erase the main hard drive. This is why Apple recommends erasing any disks or partitions from your Mac using Disk Utility from Recovery Mode. Unfortunately, you can’t access this from your Mac if it’s turned on, so you’ll need to follow the steps below after turning your Mac off.
Turn off your Mac completely.
Turn your Mac on again.
Immediately press and hold CMD + R until the Apple logo appears.
If prompted, enter the administrator password.
Select Disk Utility from the window.
In the sidebar, select the name of your hard drive.
The default hard drive is named “Macintosh HD”.
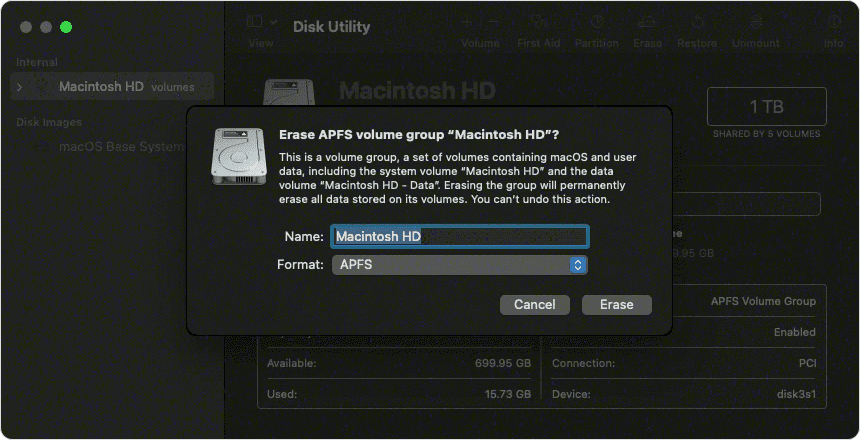
Click the Erase button in the toolbar.
Enter a name for the formatted hard drive.
Select the format for the hard drive:
APFS
Mac OS Extended (Journaled)
Click the Erase button in the bottom right corner.
Enter your Apple ID information, if prompted.
Once the hard drive is erased, select any other “internal volumes” in the sidebar.
Click the Delete Volume (-) button.
Quick Disk Utility.
Select Reinstall macOS in the Utilities window.
Follow the on-screen instructions to finish the installation process.
Going through the process of reinstalling macOS entirely can definitely be an arduous process. But these steps are necessary if you plan to give your Mac to a loved one, or if you have sold it. By erasing the hard drive in its entirety, all of your data is completely removed, ensuring that whoever the next owner of your Mac is won’t be able to access any of your old files.
Erase Via Terminal
Another method that you can try in order to erase a secondary hard drive or partition is by using the Terminal application on your Mac. The only “catch” here is that you won’t be able to follow any of the steps below if your user profile isn’t an administrator and if you don’t have the administrator’s password. But if that isn’t a problem for you, here’s how you can get rid of that pesky “Erase process has failed. Click done to continue” error from the Terminal app.
Open the Terminal app on your Mac.
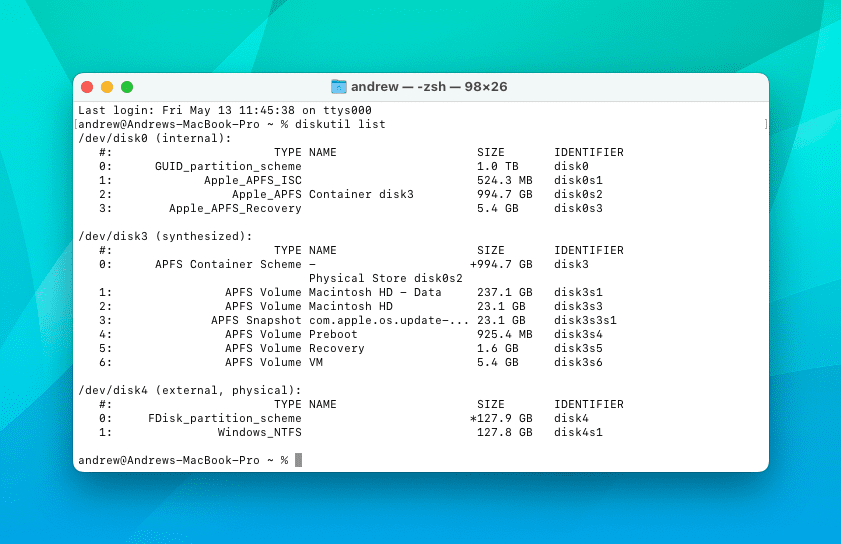
In the prompt type the following: “diskutil list” and press Enter.
Locate the disk or volume that you want to delete.
The information can be found under the IDENTIFIER section in the listing.
In Terminal, enter “diskutileraseDisk HFS+ DISK [disk name]“.
Press Enter.
As is the case with the other steps listed in this guide, you’ll want to then restart your Mac. Again, doing so should get rid of any potential issues that you might run into related to the deleted drive or partition.
Contact Apple Support
In the event that you’ve tried to use the methods above and you still can’t delete the drive or partition, there’s one step left to take. You’ll need to actually reach out to Apple Support. For some, taking your Mac to an Apple Store isn’t exactly feasible, but you might be able to take it to your local Best Buy as the retail giant is also an Authorized Apple Repair shop.
If your disk still doesn’t appear in Disk Utility, or Disk Utility reports that the erase process failed, your Mac might need service. If you need help, please contact Apple Support.
No matter the case, reach out to Apple Support first, explain the problems that you are running into, and have them help or guide you to the next steps that you need to take.
Andrew Myrick is a freelance writer based on the East Coast of the US. He enjoys everything to do with technology, including tablets, smartphones, and everything in between. Perhaps his favorite past-time is having a never-ending supply of different keyboards and gaming handhelds that end up collecting more dust than the consoles that are being emulated.


Write a Comment