Parallels Desktop is sometimes unable to launch your Windows virtual machine. When this issue occurs, an error message pops on the screen informing you that the virtual machine is not available. If you accidentally moved or deleted your virtual machine’s files, that could explain why you’re getting this error. Well, if you already restarted Parallels, but the issue persists, pursue the troubleshooting steps below.
Fix Parallels Desktop Virtual Machine Not Available
⇒ Quick Tip: If you’re running Parallels from an external hard drive, try to reconnect the device, and check the results. This quick workaround should solve the problem for most users.
Check Your VM Location
If you’re not using an external drive to run Parallels, maybe your virtual machine’s .pvm file was moved from its original location. Or perhaps you accidentally deleted the file.
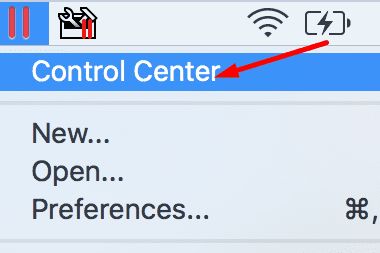
Right-click on your Parallels icon, and select Control Center.
Then right-click on your VM and select Show in Finder.
Your Mac should now open the folder where your .pvm file is located.
Parallels Desktop 12’s default location is UserName/Parallels.
Parallels Desktop 11 and earlier VMs are stored under /Users/UserName/Documents/Parallels or Users/Shared/Parallels.
If there’s no result, this means you either moved the .pvm file from its location or you completely deleted it from your Mac.
Launch Spotlight and search for the .pvm file. If you find it, place it back in its original folder. Or simply double-click the file to launch the VM.
Check your iCloud Drive as well, maybe the file is there.
Additionally, you can also use Terminal to locate the .pvm file.
Navigate to Finder → Applications → Utilities → launch Terminal.
Then run the find / -iname “*.pvm” command.
If Terminal is able to find the .pvm file, go to Finder, click on the Go menu, and select Go to Folder.
Enter the .pvm file location from the search results.
Go to the Trash folder, and check if the .pvm file is there. Restore it, and check the results. Virtual machines won’t run from the Trash Bin.
⇒ Note: Parallels Desktop has a “problem” with system cleaners. These tools sometimes delete the virtual machine files, sending them straight to the bin.
Check the PVM File Permissions
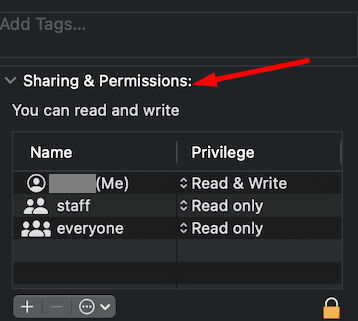
Go to the folder where your .pvm file is available. Select it, click on Get info, go to Sharing and Permissions, and check the current permissions. Make sure you’ve got full permission to access and edit the file.
Use Time Machine to Restore the PVM File
You can also use your Time Machine backups to restore the virtual machine.
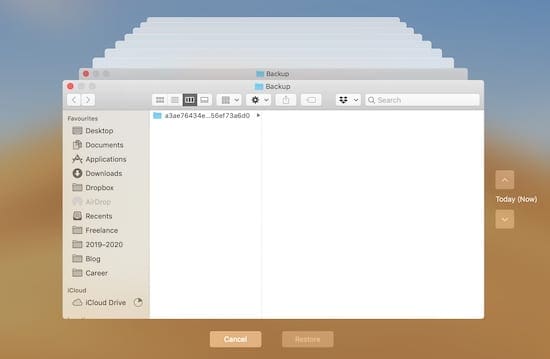
Launch Time Machine.
Scroll through previous versions of your backups using Time Machine.
Select the backup you want to restore.
Then go to your Parallels folder.
Locate the .pvm file. If it’s not there, there’s no point in using the Time Machine.
If the file is there, select it and hit the Restore button.
You can then find the .pvm file on your desktop or under its default location.
Restart Parallels and check if your virtual machine is available now.
Conclusion
If your Parallels Desktop virtual machine is unavailable, this indicates the .pvm file is missing or was moved from its original location. Use Finder, Spotlight, and Terminal to locate your virtual machine’s .pvm file. Once you find it, restore it to its default location. If the issue persists, use Time Machine to restore the virtual machine file. Or you can simply create a new Windows virtual machine from scratch.
Did these tips help you solve the problem? Let us know in the comments below.
Madalina has been a Windows fan ever since she got her hands on her first Windows XP computer. She is interested in all things technology, especially emerging technologies — AI and DNA computing in particular.


Write a Comment