Using a Mac to send messages offers convenience and efficiency for users who spend a significant amount of time on their computers. By sending messages directly from the Mac, users can streamline their communication, avoiding the need to constantly switch between devices. This not only saves time but also helps maintain focus on the task at hand, enhancing productivity.
Utilizing the Full Potential of macOS By sending SMS messages through macOS, users can leverage the full potential of their Mac’s features to enhance their messaging experience. This includes the ability to use a full-sized keyboard for faster and more accurate typing, as well as accessing macOS productivity tools such as Spotlight search, Quick Look, and drag-and-drop functionality. In addition, users can take advantage of the Mac’s larger screen to manage multiple conversations or view multimedia content with greater ease.
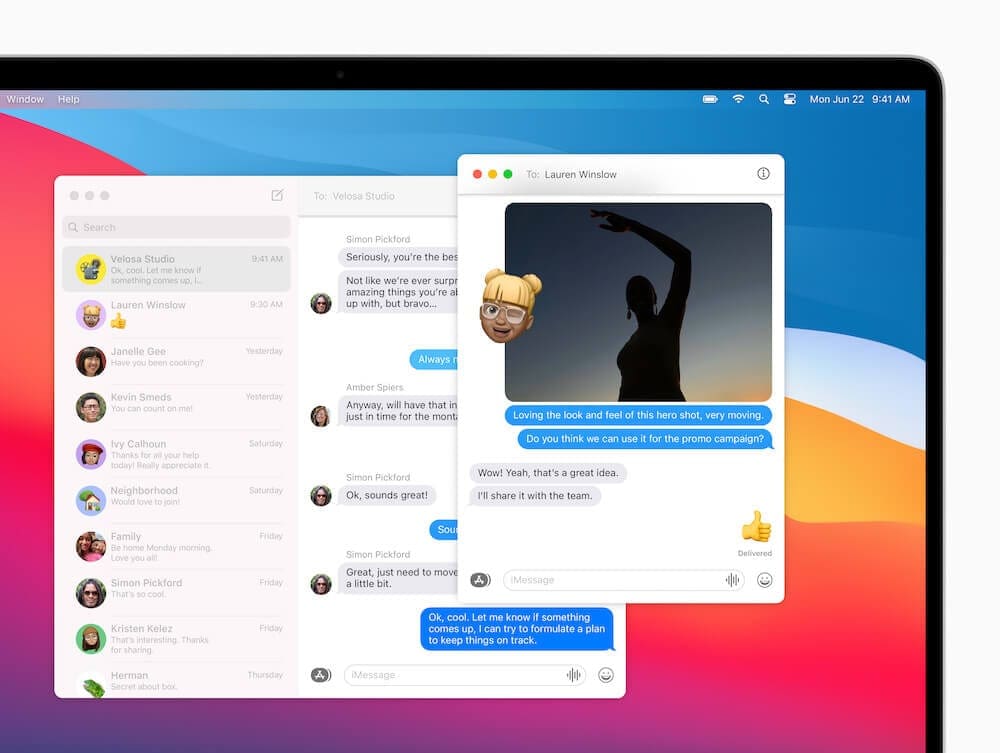
SMS messages with OS X Yosemite and iOS 8.1
Image Courtesy of Apple
With the release of Mac OS X Yosemite and iOS 8.1, Apple made it possible for you to use your Mac to send and receive SMS messages as part of a feature Apple calls Continuity. In older versions of OS X, you could only send iMessages to people with an iOS device, but it was always rather frustrating that any “green bubble” friends would only show up on your iPhone.
The new feature in Messages is extremely useful, and I find myself using it all the time when my iPhone is on the desk – mainly because it’s usually quicker to type a quick SMS response in the Mac’s slide-in notification. Many people wonder how I reply to SMS messages so quickly – and this is my secret!!
This short guide shows you how to send SMS messages using OS X Yosemite and an iPhone. The principle applies equally to an iPad or iPod Touch – in fact the setup process is just as simple.
What You Need to Send SMS Messages on macOS
If you have a Mac and an iPhone and want to send SMS messages on macOS, there are a few requirements to be aware of. The first of which is that both the Mac and iPhone must be signed into the same Apple ID. Here’s how you can verify this on both your iPhone and Mac:
View Apple ID on iPhone:
Open the Settings app.
Tap [Your Name] at the top of the screen.
From this page, the currently-active Apple ID email will appear below your name.
View Apple ID on Mac:
Open the System Settings.
In the left sidebar, tap Your Name at the top.
Again, the Apple ID that is signed into the Mac will appear below your name and profile image.
From here, Apple states that you must have at least iOS 8.1 installed on your iPhone in order to send and receive SMS messages on macOS.
Previously, Apple required users to be signed into the same Wi-Fi network if they wanted to send SMS messages on macOS. However, this no longer seems to be the case as a requirement, but we still recommend doing so when setting this feature up for the first time.
How does it work?
For the SMS “relay” to work, your Mac and iPhone must be using the same Apple ID and be on the same network. The Messages app will also synchronize your regular SMS messages (in addition to allowing you to send and receive them), so your message list looks identical on all your devices.
Normally, when sending a contact message from your the Mac, it will attempt to send an iMessage first (by checking the person’s email address or phone number with Apple’s database). If the person doesn’t use iMessage or has a non-Apple device, your Mac will just send a plain old SMS relayed via your iPhone.
Note that you must have iOS 8.1 installed on your iPhone. If you don’t, check out our post on how to update your iPhone.
How to Send and Receive SMS Messages on macOS
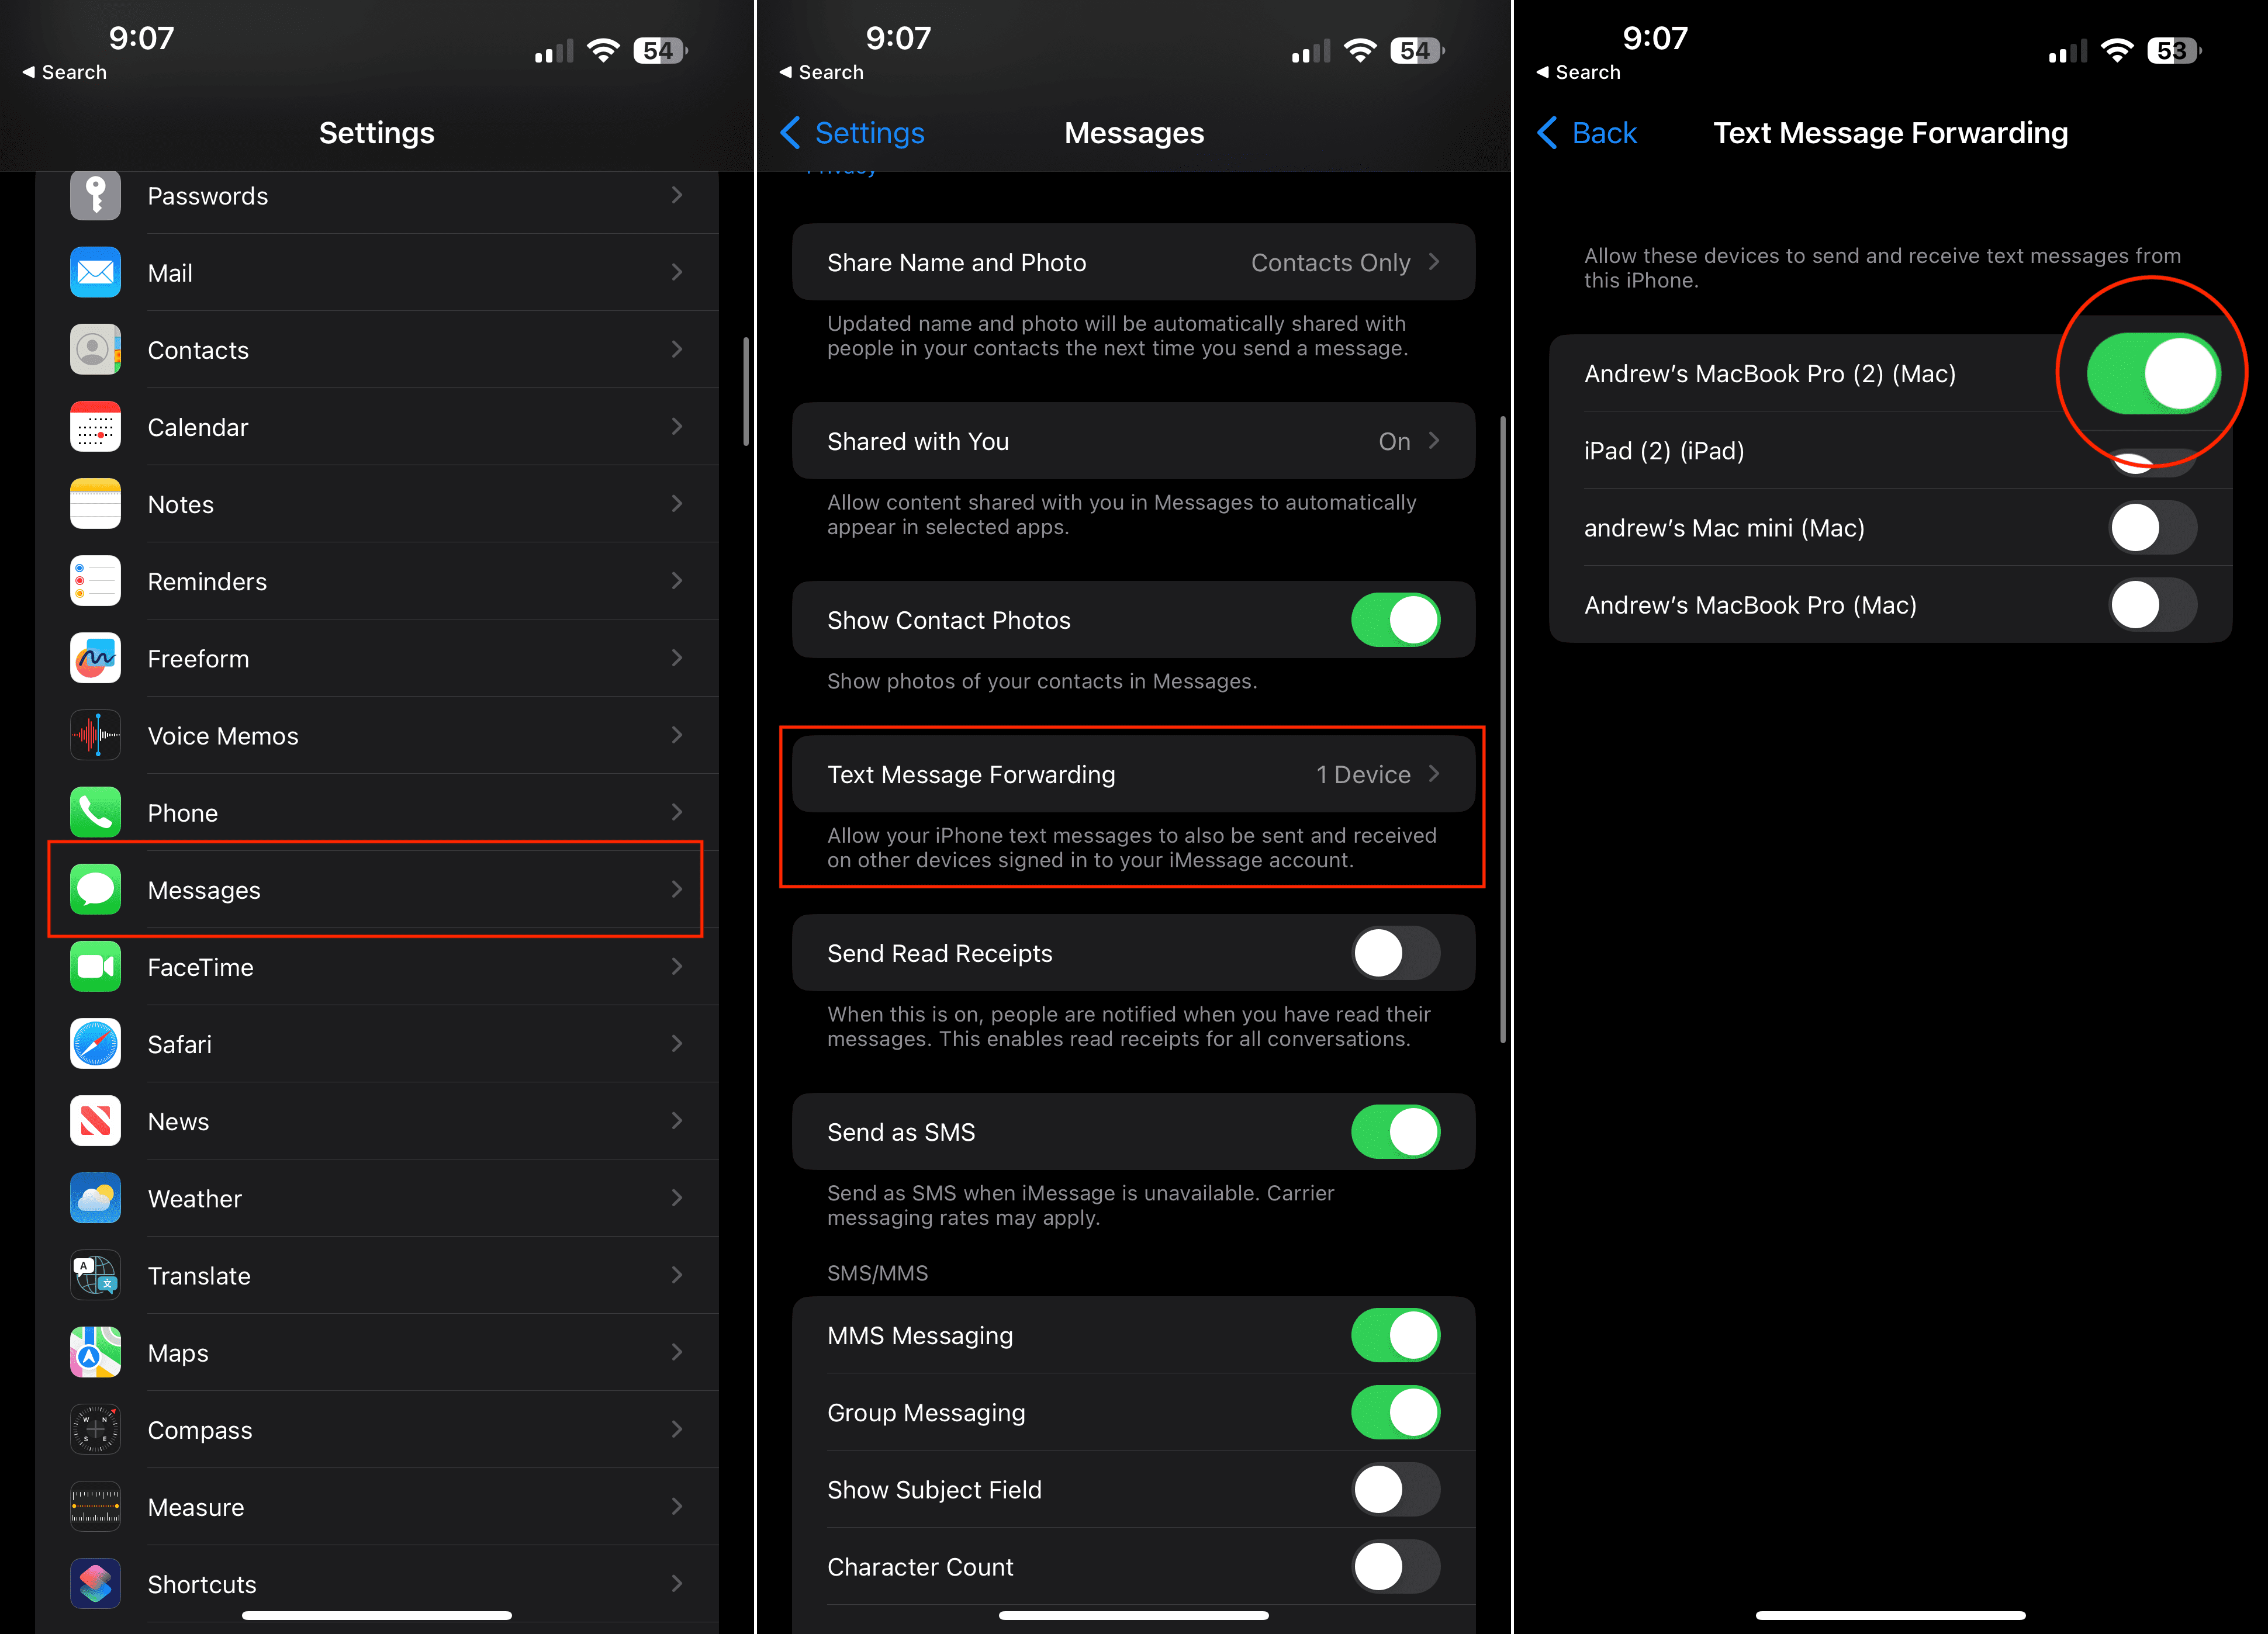
Provided that you meet the requirements listed above, there are only a few more steps to take in order to send and receive SMS messages on macOS. These involve enabling a feature known as Text Message Forwarding, which is what Apple relies on if you want to send SMS messages from other Apple devices. With that in mind, here’s how you can set up Text Message Forwarding to send and receive SMS messages on macOS:
Open the Settings app on your iPhone.
Scroll down and tap Messages.
Scroll down and tap Text Message Forwarding.
Tap the toggle next to the Mac that you want to send and receive SMS messages on.
In the event that you are not using two-factor authentication, a six-digit code will appear on your Mac. Enter this code on your iPhone.
Tap the Allow button.
Once you have confirmed the 6-digit code, your Mac and iPhone will happily synchronize all messages (both iMessage and SMS messages). You can now create a regular SMS on your Mac. It’s really that simple! It’s also worth noting that just like on the iPhone, any SMS messages sent from your Mac will show the green bubble.
Can’t Send and Receive SMS Messages on macOS? Three Solutions To Fix It
In the event that you can’t send and receive SMS messages on macOS, all hope is not lost. It might be rather frustrating to be greeted with the little red warning button every time you try to send a message. However, there are three different ways that we have found to “fix” this problem and get things working the way that Apple intended them to.
Sign out of Messages Then Sign in Again
An issue with your Apple ID might be causing confusion for the Messages app. This could happen if Apple is experiencing server issues or if you recently updated your Apple ID details.
Bring these problems to the surface by signing out of Messages and trying to sign in again. Typically, this refreshes the connection to your account and fixes most problems.
You should also take this opportunity to ensure the Apple ID details are the same as what you use on your iPhone. In fact, we suggest you check all the Messages settings are consistent across both devices.
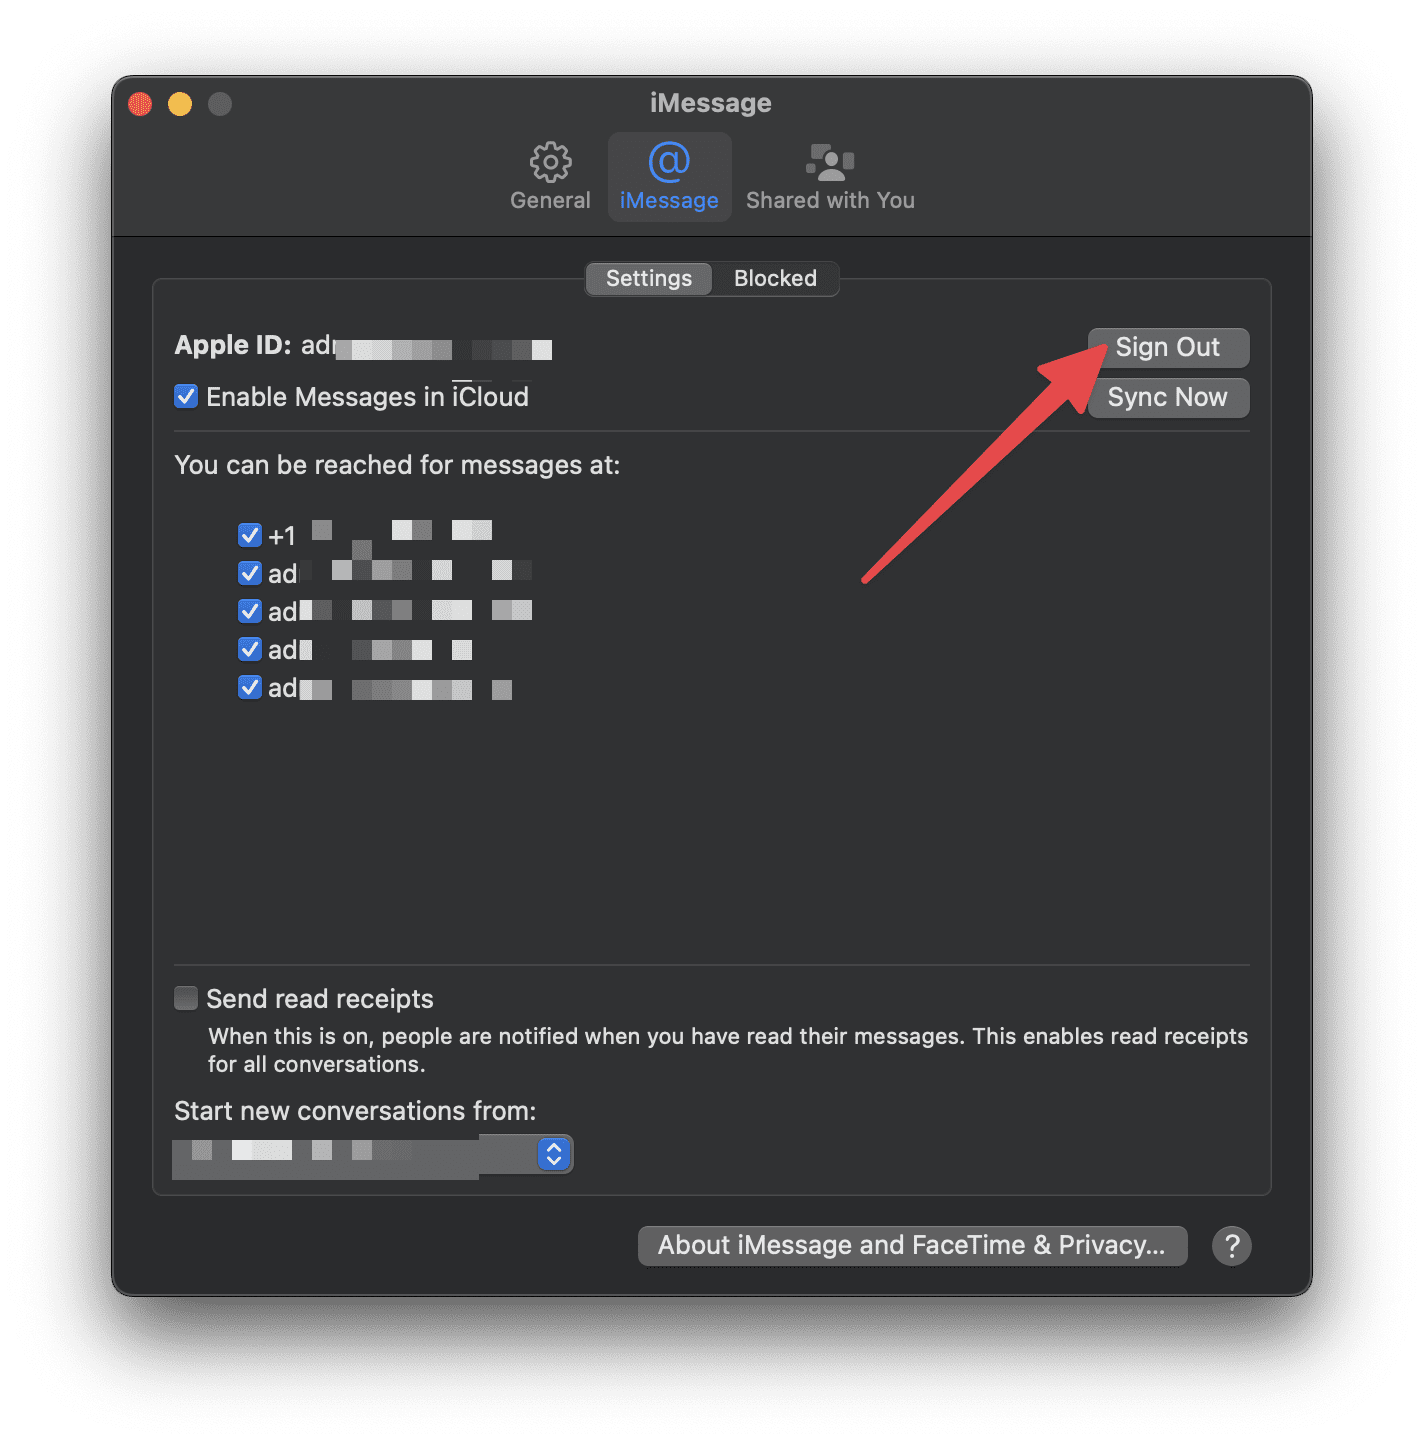
Open the Messages app on your Mac.
In the Menu Bar, click Messages.
From the drop-down menu, click Settings.
In the top toolbar, click iMessage.
Next to your Apple ID, click the Sign Out button.
Wait at least 30 seconds, then sign in with your Apple ID details again.
Lock and Unlock the Keychain on Your Mac
On the surface, it seems unrelated, but locking and unlocking the Keychain has proven to be an effective solution for this issue. If you can receive but you cannot send messages from your Mac, try doing this before anything else.
Problems with your Keychain stop your Mac from sending new messages by failing to authenticate your Apple ID password. These issues are easily fixed by locking and unlocking Keychain access.
From your Mac’s keyboard, press Command+Space to bring up Spotlight.
Search for, and select Keychain Access.
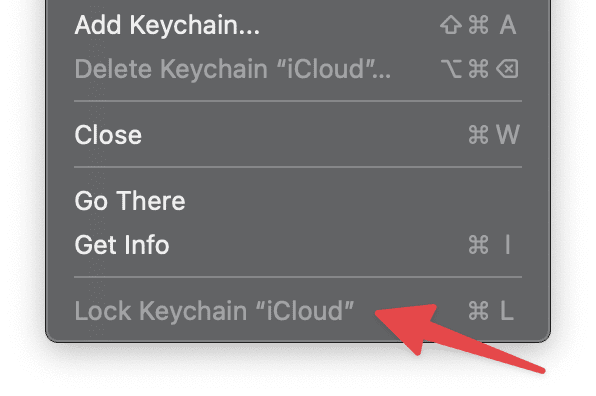
Once open, click File in the Menu Bar.
From the drop-down menu, highlight and select Lock Keychain “login”.
Wait for at least two minutes.
Click File again, then highlight and select Unlock Keychain “login”.
When prompted, enter the administrator password for your Mac.
Attempt to send an iMessage or SMS Message from your Mac.
Create a New User Account and Migrate Your Data on Your Mac
If you still cannot send text messages or iMessages on your Mac, there might be a problem with your macOS user account. If this is the case, it’s likely down to a corrupted file within the Library for your account.
The simplest solution is to create a new user account on your Mac, then migrate your important data using Finder. After you do this, simply delete the original account and start using the new one.
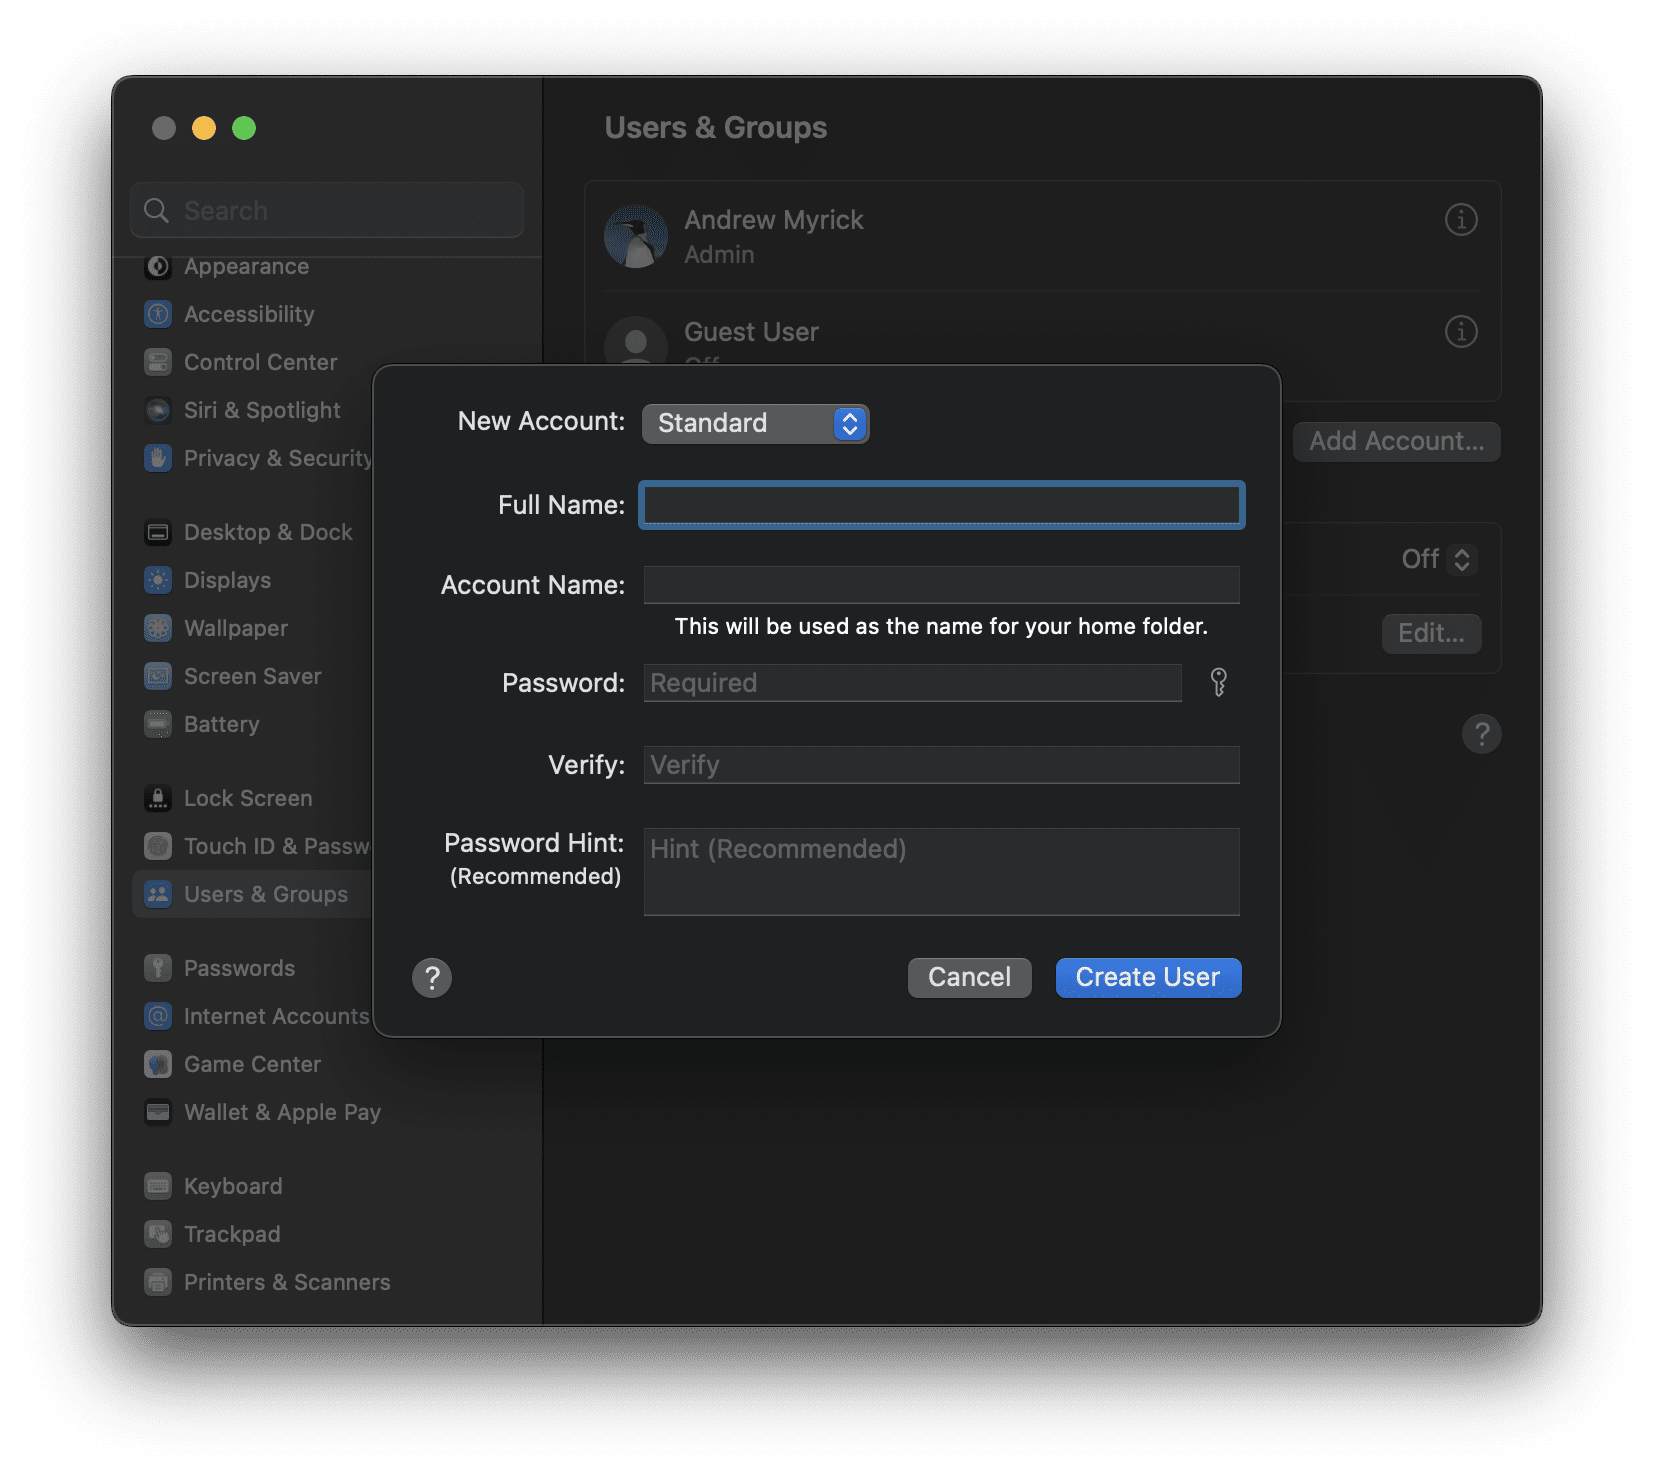
From the Menu Bar, go to > System Settings > Users & Groups.
Click the padlock and enter your administrator password to unlock changes.
Use the Add (+) button to create a new user account, filling in all the necessary account details.
Now go to > Log Out and log back in using the new user account details.
Open the Messages app, go to Preferences > iMessage and sign in to your Apple ID.
Try sending a text message or iMessage from your new account.
If it works open Finder or use an external drive to transfer content from your old account to the new one. When completed, return to the Users & Groups preferences to delete the old account.
Hopefully, you can send text messages and iMessages from your Mac again now. It’s no good to receive messages on your Mac if you can’t reply. And it’s no good having multiple Apple products if they don’t work seamlessly together!
Roland Banks has been passionate about Apple for more than a decade. He started his career at British Telecom’s research division working on collaborative virtual reality environments, before becoming a video streaming specialist at 3 UK where he helped launch some of the world’s first mobile video services.
Roland moved to Asia 4 years ago, where he writes about his passion for all things Apple.
I have a question. My iPhone is updated to 8.1.2. However, in the phone’s settings under Message it does not show the “Text Message Forwarding” box or option.


Thank you for your article.
I have a question. My iPhone is updated to 8.1.2. However, in the phone’s settings under Message it does not show the “Text Message Forwarding” box or option.
What have I missed?
Thanks!