Apple’s products are well known for seamlessly integrating with one another. But sometimes, that integration goes too far. Like when you can’t stop Siri reading out text messages from your iPhone or Apple Watch in your AirPods.
Although Apple designed this as a helpful feature, it’s still annoying when your music or workouts keep getting interrupted by new Siri announcements.
We’ll show you how to stop Siri reading messages in your AirPods completely. Or even better, how to edit this feature so Siri only reads the messages you want to hear.
Apple introduced the ability to let Siri read out incoming text messages as a way of making it easier to use your iPhone handsfree. With this Announce Messages feature turned on, Siri reads out messages whenever you’re using AirPods or compatible Beats headphones while your device is locked.
This feature only works while you’re wearing headphones to avoid reading messages to everybody within earshot. It also only works while your device is locked because if you’re using your device you can read the messages instead.
To control this feature from your Apple Watch, connect your AirPods directly.
If you’re using your Apple Watch with AirPods, Siri uses the same feature to read messages that go directly to your Apple Watch as well. This might include iMessages sent over Wi-Fi or text messages sent to a cellular Apple Watch.
If you want to take full advantage of this feature, you can wait until Siri finishes reading a message then say “Reply” and dictate a message to your Apple Watch to send back to that person.
But if you don’t like Siri reading out your Apple Watch or iPhone messages, follow the steps below to turn it off instead.
How to Permanently Stop Siri Reading Out Your Messages
If you never want Siri to read your messages again, you can disable the Announce Messages feature in your iPhone or Apple Watch settings.
Your Apple Watch might mirror the notification settings on your iPhone for this feature, which means you won’t need to turn it off on both devices. Though it still doesn’t hurt to check both devices in case they don’t sync properly.
On an iPhone:
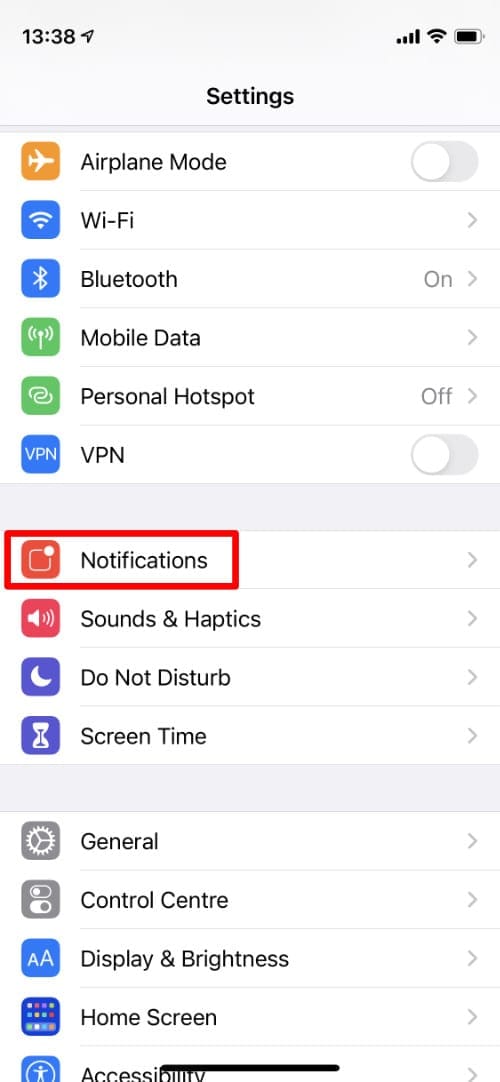
Open the Settings app.
Go to Notifications > Announce Messages with Siri.
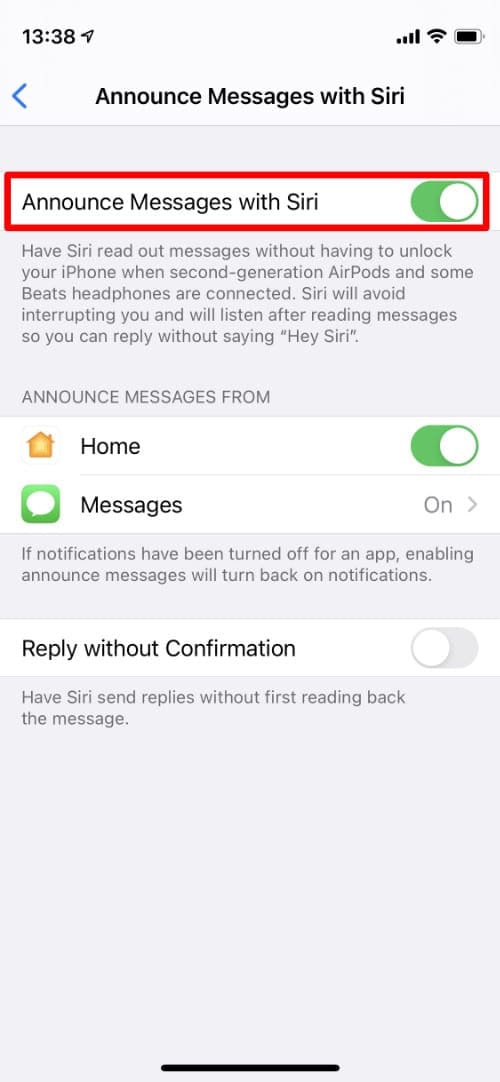
Disable the Announce Messages with Siri option at the top or turn the feature off for specific apps.
Open the Notification settings.
Tap Announce Messages with Siri.
Turn off the Announce Messages feature.
On an Apple Watch:
Click the Digital Crown and open the Settings app.
Go to Notifications.
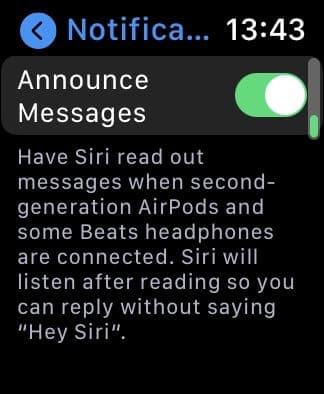
Scroll to the bottom and disable Announce Messages.
Open the Settings.
Tap Notifications.
Disable Announce Messages.
If you ever want to use Siri to read your messages again in the future, return to these settings and turn the feature back on.
How to Temporarily Stop Siri Reading Out Your Messages
You might not want to completely disable the Announce Messages feature if you still find it useful sometimes. Perhaps you like Siri reading your Apple Watch messages while you’re out on a walk, just not while you’re focussing on a workout.
If that’s the case, you can take advantage of any of the quick methods below to temporarily disable Announce Messages.
When you temporarily turn off the Announce Messages feature, Siri stops reading texts from your Apple Watch or iPhone until you turn it on again.
Here are all the ways to do it:
1. Toggle the Control Center Option
The best way to quickly stop Siri reading out your messages is by turning off Announce Messages in the Control Center. This method even lets you temporarily disable this feature for one hour.
You need to toggle this setting from whichever device your AirPods or Beats headphones are currently connected to: your iPhone or your Apple Watch.
Also, if your Apple Watch is connected to your iPhone, you might not be able to toggle this option on the watch itself.
On an iPhone:
Go to Settings > Control Center. Tap Add (+) next to Announce Messages with Siri to add it to your Control Center.
Now open Control Center and tap the Announce Messages with Siri icon to toggle it on or off. When it’s on, the icon shows a white background.
Alternatively, tap and hold this icon to Mute for 1 hour.
Use Control Center to turn Announce Messages on or off.
On an Apple Watch:
Slide up from your watch face to open the Control Center.
Tap the Announce Messages icon to toggle this feature on or off. When it’s on, the icon shows a red background.
Alternatively, tap and hold this icon to Mute for 1 hour.
If you don’t see the Announce Messages icon, tap Edit at the bottom of the Control Center to add it.
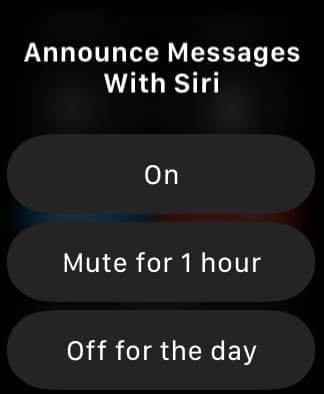
Tap and hold the Control Center icon.
Choose to turn it off for a set period.
The icon goes dark when it’s turned off.
2. Choose Who to Announce Messages From
If you want Siri to read out some of your messages, but not all of them, you need to tweak the settings on your iPhone. Unfortunately, you can’t change these settings on your Apple Watch, but it should affect which messages your Apple Watch reads out as well.
On your iPhone:
Go to Settings > Notifications > Announce Messages with Siri.
Tap the Messages app and choose to who to Announce Messages From:
Favorites: Any contacts marked as Favorite on your iPhone
Recents: Any contacts or numbers you recently contacted
Contacts: Anybody saved as a contact on your iPhone
Everyone: Anybody who messages you, even unknown companies
Choose who to announce messages from in the settings.
3. Pause Siri by Removing an AirPod
Before reading a new message, Siri plays a short tone and announces who the message is from. If you don’t want Siri to read out the message after this tone, remove an AirPod or hit the pause button to pause it.
This instantly stops Siri from reading any more. You can put your AirPods straight back in your ear and Siri still won’t read any more of the message.
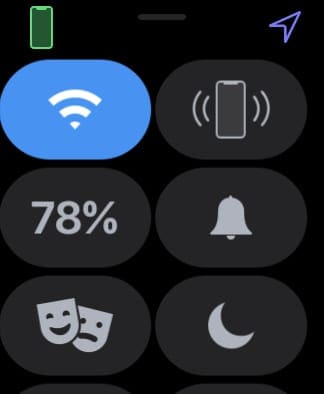
4. Enable Do Not Disturb Mode
If you don’t want to be distracted by any notifications on your iPhone or Apple Watch, enable Do Not Disturb mode. This mutes all notifications and stops Siri reading out new messages in your AirPods.
The best way to enable Do Not Disturb mode is from Control Center on your Apple Watch or iPhone. Tap the Moon icon to toggle Do Not Disturb mode on or off.
Tap and hold the Do Not Disturb icon to turn it on for set amounts of time:
On for 1 hour
On until this evening
On until I leave
That way, you don’t need to worry about disabling Do Not Disturb again later.
Use the moon icon to enable Do Not Disturb.
Tap and hold to choose a duration.
The moon appears purple when it’s turned on.
Siri Is Most Annoying When It Doesn’t Work Properly
You might find Siri most annoying if it reads out your texts inconsistently. When you can’t rely on Siri to read every message, you won’t feel that you can trust the messages it does choose to read out.
Since the Announce Messages feature is still only a couple of years old, Apple hasn’t ironed out all the bugs with it yet. But you can still fix most problems by following our Announce Messages troubleshooting guide.
Dan writes tutorials and troubleshooting guides to help people make the most of their technology. Before becoming a writer, he earned a BSc in Sound Technology, supervised repairs at an Apple Store, and even taught English in China.


Write a Comment