Step 2. Create an account using one of the options available, or an email address.
Step 3. Follow the instructions to verify your email address.
Step 4. Log in with the credentials you just created and you’ll be given an option to connect your Spotify and Apple Music accounts. Start by clicking Connect on the Spotify section.
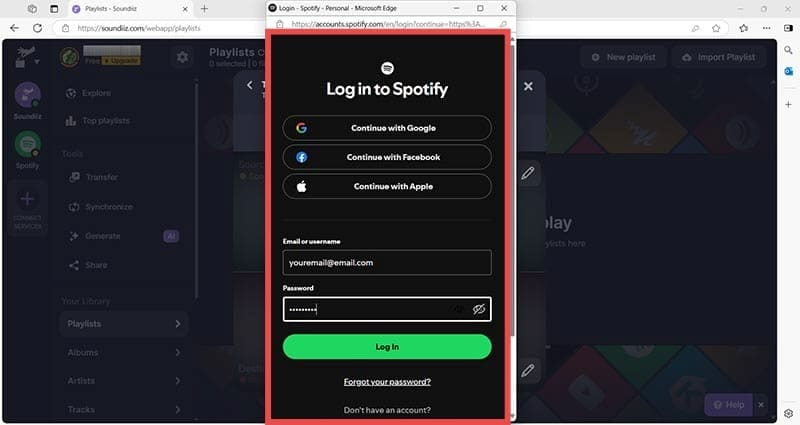
Step 5. Enter your Spotify username and password.
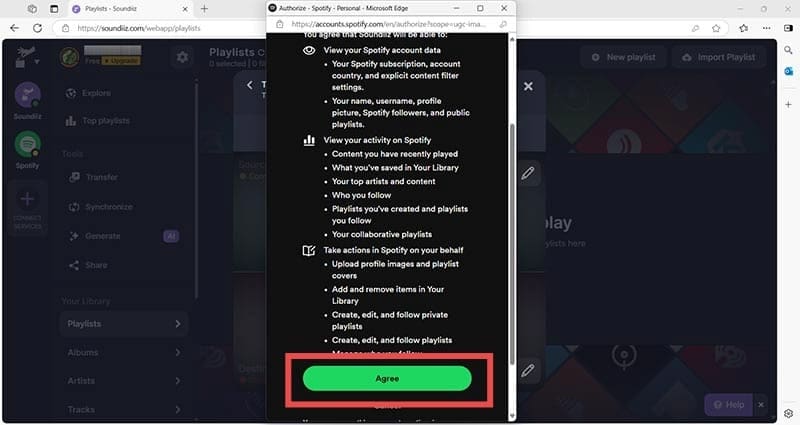
Step 6. Click Agree to connect the service.
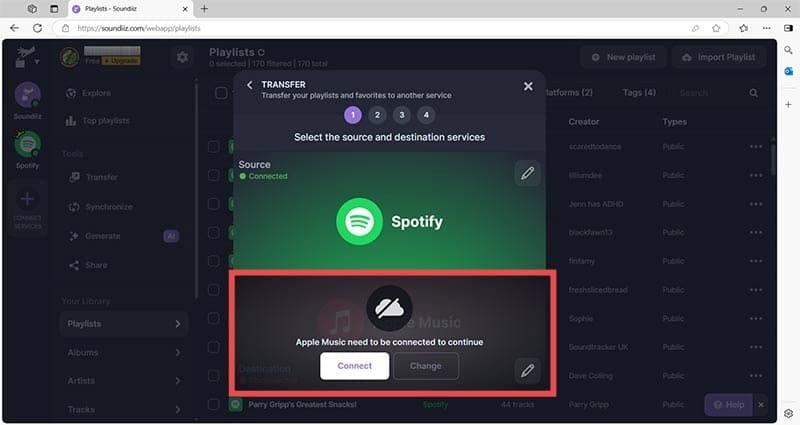
Step 7. Now click Connect in the Apple Music section.
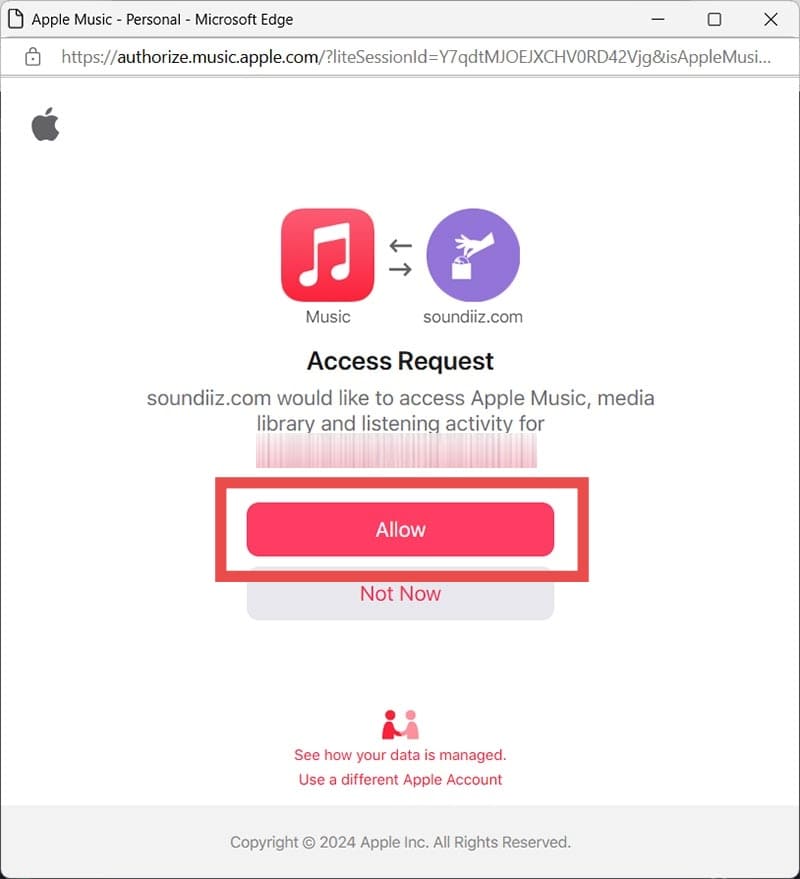
Step 8. Sign in using your Apple Music credentials.
Step 9. Click Allow when prompted.
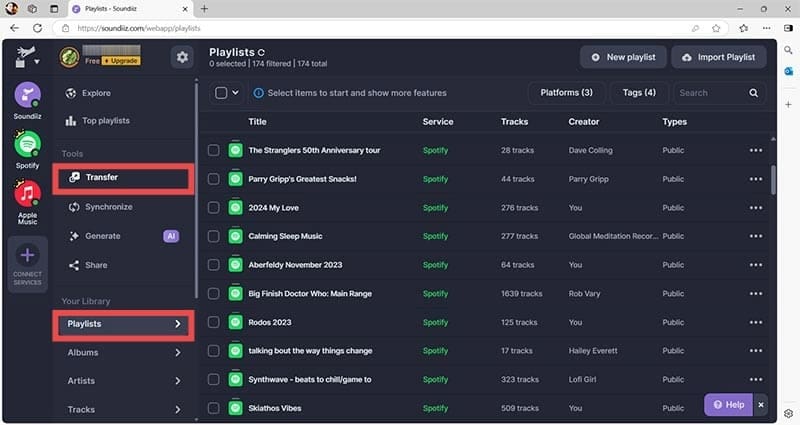
Step 10. Once both services are connected, you’ll be taken to an interface that shows the available tools. Click Transfer to transfer Spotify playlists to Apple Music.
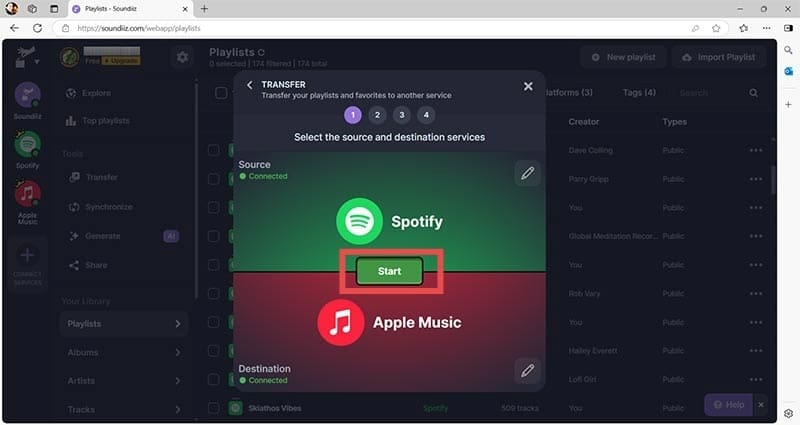
Step 11. Make sure the Source shows Spotify and that the Destination shows Apple Music. You can click each box to change it if it’s wrong. Click Start in the middle of the transfer box.
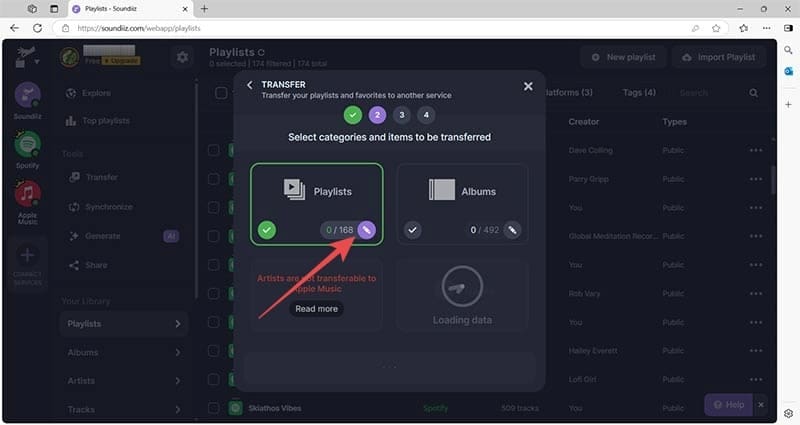
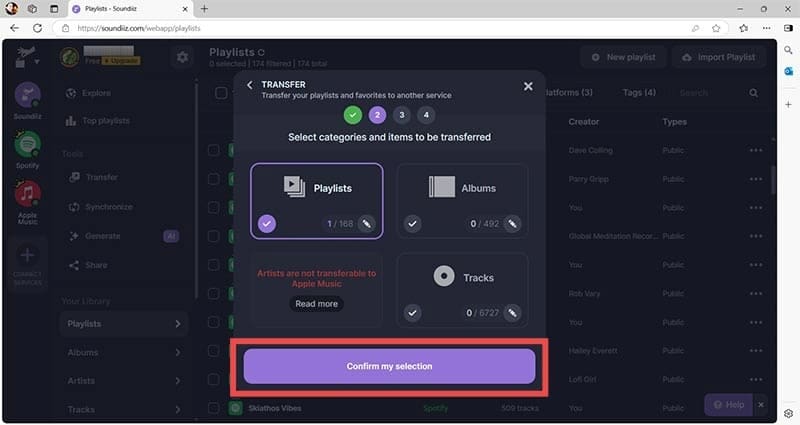
Step 12. Click the pen icon in the Playlists box.
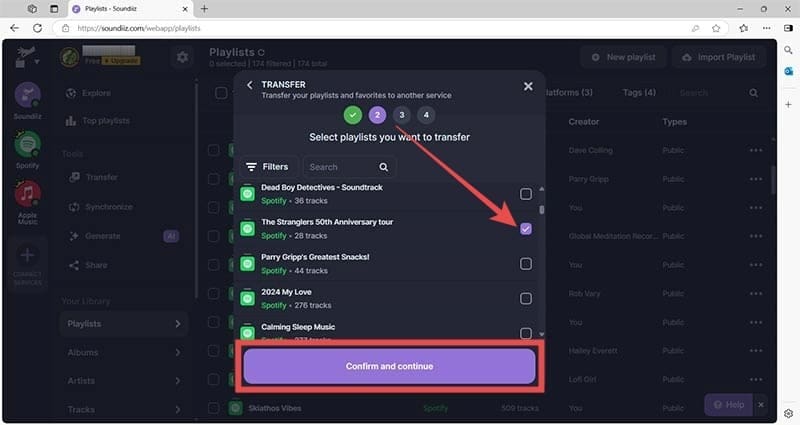
Step 13. Tick the playlists you want to transfer, then click Confirm and continue.
Step 14. Click Confirm my selection.
Step 15. You can now adjust the playlist title, add a description, and adjust options like playlist visibility. Once you’re happy with the settings, click Save configuration.
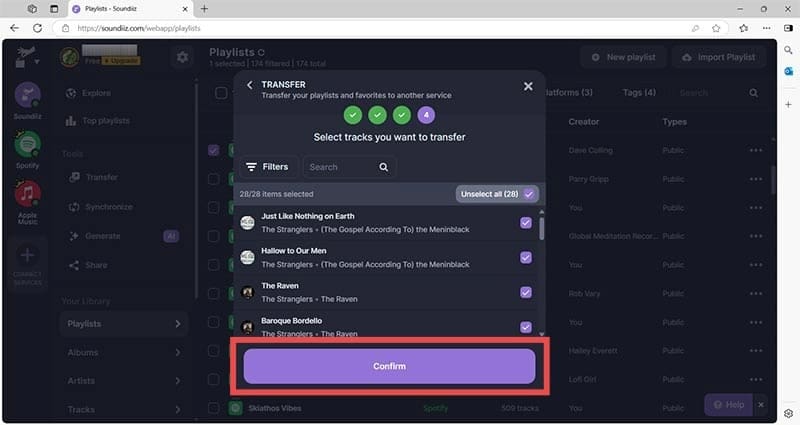
Step 16. Check that the tracks are as expected, and click Confirm.
Step 17. Click Begin the transfer. Note: As the disclaimer states, if the song doesn’t exist in the destination catalog, it won’t be included in your new playlist. That’s the same for all music transfer services.
Step 18. Wait a few seconds and you’ll see this confirmation screen. The longer the playlist, the longer this step will take.
Step 19. Open Apple Music (on any device) and, once signed in, you’ll see your chosen playlist.
Transfer Spotify Playlists to Apple Music With FreeYourMusic
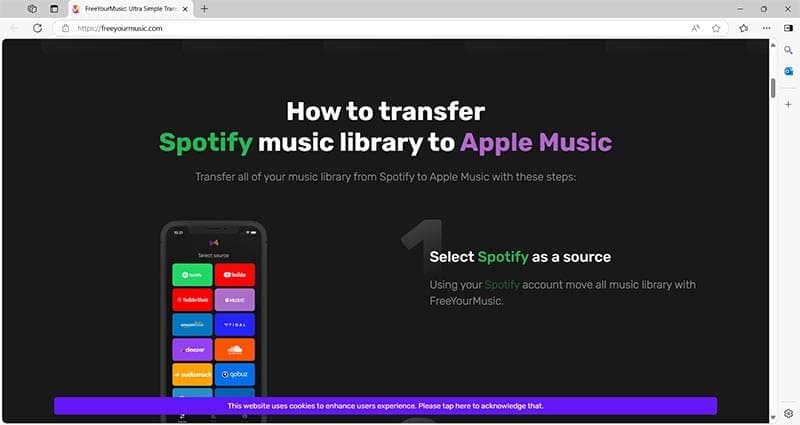
Step 1. Head to https://freeyourmusic.com/ and download the app for your device. It’s available on Windows, macOS, iOS, Android, and even Linux. In this guide, we’ll show the Windows interface, but the options are the same across the board.
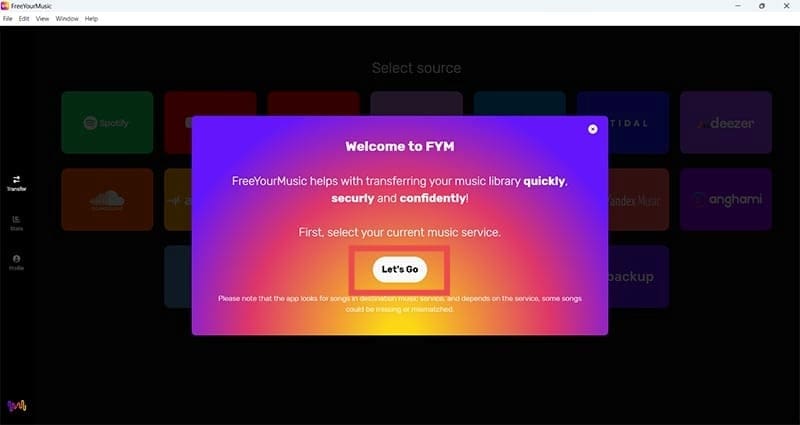
Step 2. The app will automatically install and open on the start screen. Click Let’s Go.
Step 3. Click Spotify to confirm that it’s your current music service.
Step 4. Enter your Spotify credentials.
Step 5. Click Agree.
Step 6. The app will now prompt you to Continue and choose the destination service.
Step 7. Click the Apple Music logo and follow the prompts to enter your Apple login details.
Step 8. The app will confirm that you’ve successfully connected both services and prompt you to Continue to select playlists or albums to transfer.
Step 9. You’ll now be in the transfer screen where you can choose Playlists, Favorites, and more. Click Playlists.
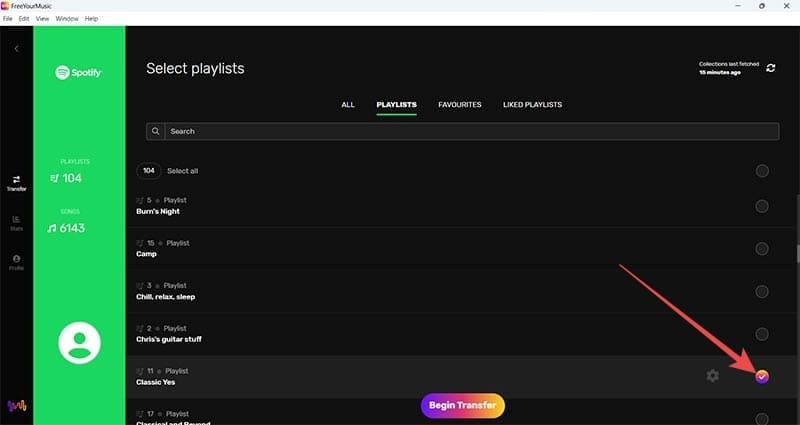
Step 10. Tick the playlist(s) you want to transfer and click Begin Transfer.
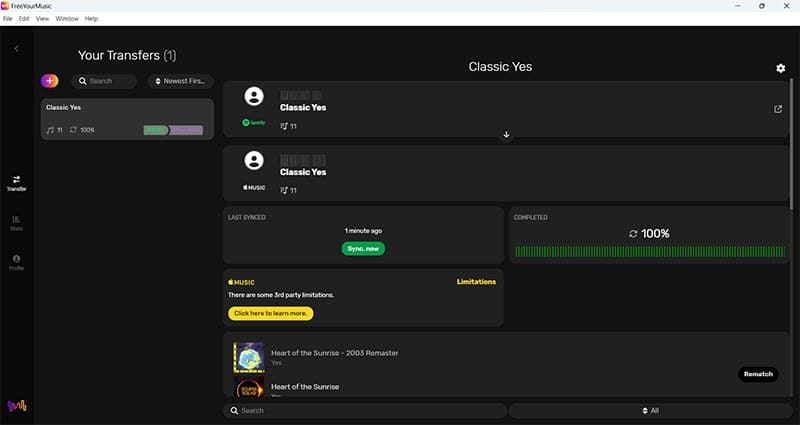
Step 11. Unlike Soundiiz, there’s no option to pick and choose tracks you want to include. However, the transfer screen contains a lot of detail, including what tracks were included and the order they appear in. You’ll also see in real-time when the transfer has been completed.
Step 12. Just like before, open Apple Music to confirm your playlist has transferred. You can also transfer Apple Music to Spotify and many other music services.
As an avid gamer, I’ve run into my fair share of error codes and weird faults that have forced me to find fixes to problems I never anticipated. That gave me a passion for sharing those fixes with others so we can all game without feeling like our hardware is rebelling against us.


Write a Comment