Apple has finally delivered the SOS Emergency feature to all iPhone users that are using iOS 11 and above on their device. Before iOS 11, Apple offered this feature only in limited geographies.
Apple has been bolstering up this feature across its device ecosystem via various patents for quite some time. This offering is another safety-oriented feature that Apple has introduced apart from the Do Not Disturb While Driving”. In this short article, we show you how to set up and use the new SOS Emergency feature on your iPhone.
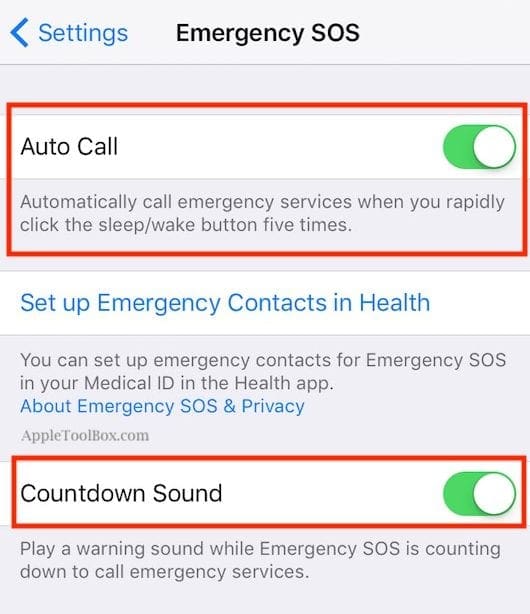
Step – 2 Enable the ‘Auto Call’ feature on the Emergency SOS settings
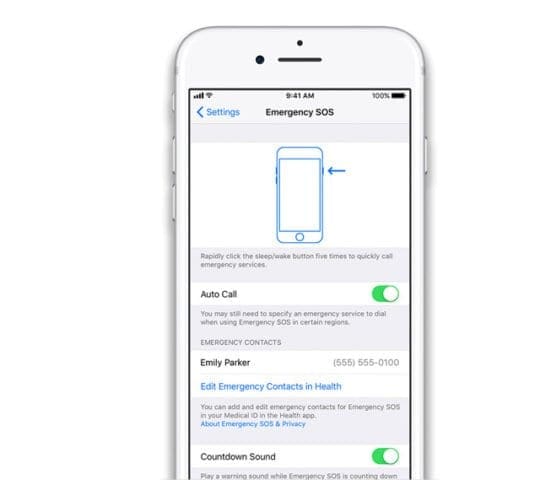
This setting makes your iPhone automatically call emergency services when you click the sleep/wake button five times in a row.
For folks using iPhone 8 models and above, the shortcut for emergency auto-calling is a bit different. Instead of tapping the Side button 5Xs, you press the Volume Up OR Down button AND the Side button at the same time.
If this action sounds familiar, it is the same stroke used on iPhone 7 models to perform a forced restart–yeah, it’s complicated!
Step – 3 Prevent Unintentional Emergency Calling
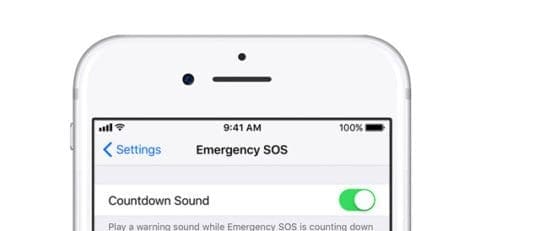
To avoid accidentally calling the emergency services, You can enable the Countdown Sound feature as well. This feature makes sure that your iPhone plays a warning sound while its counting down to call 911.
iOS 12+ Pinpoints 911 Call Locations
If you haven’t updated your iOS to iOS 12 or higher, consider doing so.
With iOS 12 and higher, you no longer have to know your exact location when calling 911 in the US. During emergency calls only, iOS sends your exact location data to first responders. It’s an effort to reduce response time and get care sooner.
Apple uses a technology it calls HELO (Hybridized Emergency.) It’s a combination of cell towers and on-device data sources like GPS, and WiFi Access Points that help to identify a 911 caller’s location.
Review Your Emergency Contacts
While you are exploring this new Emergency SOS feature settings on your iPhone, we urge you to review the emergency contacts that you have set up in the health app and make sure that it is up to date.
To review your emergency contacts, tap on ‘Set up Emergency Contacts in Health”. This feature updates your contact records associated with your medical id.
If you have not set up the Medical ID on your iPhone, we recommend that you look at our detailed article here.
The other important element that needs reviewing is for users that use their Apple Watch along with their Apple iPhone. Since the Watch also features an Emergency SOS service, review its settings and ensure that they align with your iPhone settings.
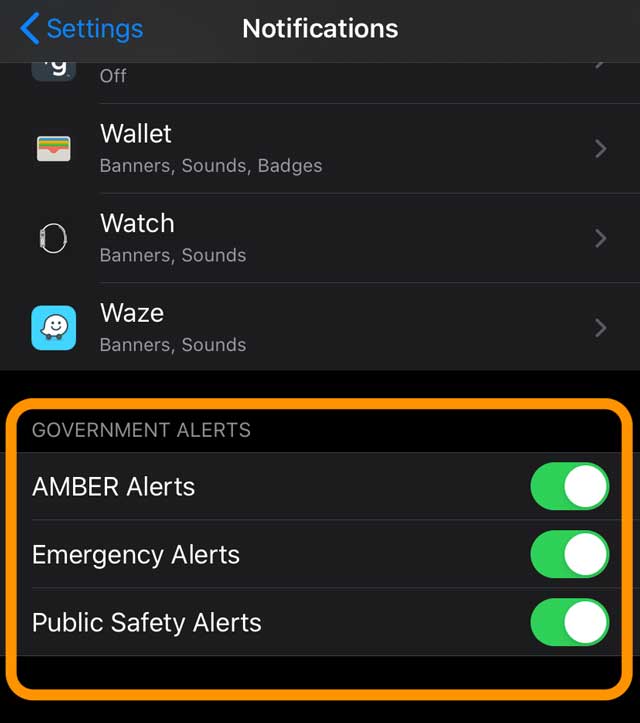
How to turn on (or off) government alerts on your iPhone
When you update your device’s iOS, Apple turns Government Alerts on by default. These include AMBER alerts, Emergency Alerts, and Public Safety Alerts.
You may receive these alerts on your iPhone and/or Apple Watch.
Example of the types of alerts sent include:
Alerts involving imminent threats to safety or life
Alerts for extreme weather conditions
Public Safety Alerts
Missing or abducted child alerts (AMBER alert)
When a government issues an alert, a special sound plays that’s similar to an alarm.
Check your iPhone’s government alarm settings
Go to Settings > Notifications
Scroll to the bottom of the screen
Look for the Government Alerts category
Toggle on or off any changes you want
We highly advise you to enable both Emergency and Public Safety alerts!
Receive Test Emergency Alerts (the US only)
When you use a US carrier and you are in the U.S, you can receive Test Emergency Alerts–just to make sure the system is working.
By default, this is turned off.
When you receive this type of alert, you hear an alarm and the alert says that it’s a test–not an actual emergency.
Turn these test alerts on or off
Open the Phone app and tap Keypad
To turn it on, type in *5005*25371# and make a call. You hear confirmation that”test alerts enabled”
To turn it off, type in *5005*25370# and make a call. You hear confirmation that”test alerts disabled”
Summary
We hope that you take the time to explore the Emergency SOS feature on your iPhone. And that you set it up for those situations when you need it the most.
We also recommend that you take time to set up the Medical ID features on the health app as they come in real handy to folks that provide you with EMS services.
Obsessed with tech since the early arrival of A/UX on Apple, Sudz (SK) is responsible for the original editorial direction of AppleToolBox. He is based out of Los Angeles, CA.
Sudz specializes in covering all things macOS, having reviewed dozens of OS X and macOS developments over the years.
In a former life, Sudz worked helping Fortune 100 companies with their technology and business transformation aspirations.
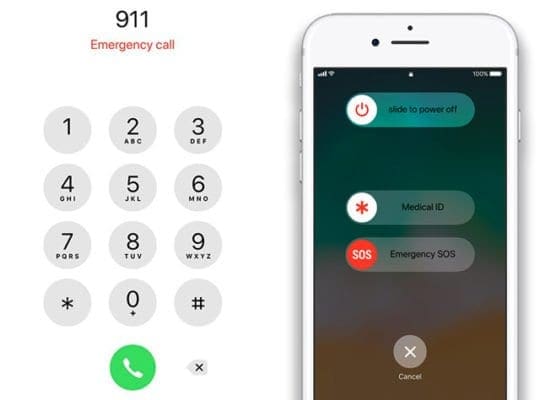
SOS automatically calls the local emergency services automatically–you can’t change that.
However, you can add emergency contacts.
After an emergency call ends, your iPhone alerts your emergency contacts with a text message and sends those contacts your current location, and sends updates to your emergency contacts when your location changes for sometime after that emergency call ends.
Add emergency contacts from the Health app on your iPhone:
Open the Health app and tap the Medical ID
Tap Edit, then scroll to Emergency Contacts
Tap the Plus icon to add an emergency contact
Tap a contact, then add their relationship
Tap Done to save your changes


Can you please tell me, can you send an SOS call to a family member rather than the emergency services
many thanks Katie
SOS automatically calls the local emergency services automatically–you can’t change that.
However, you can add emergency contacts.
After an emergency call ends, your iPhone alerts your emergency contacts with a text message and sends those contacts your current location, and sends updates to your emergency contacts when your location changes for sometime after that emergency call ends.
Add emergency contacts from the Health app on your iPhone:
Open the Health app and tap the Medical ID
Tap Edit, then scroll to Emergency Contacts
Tap the Plus icon to add an emergency contact
Tap a contact, then add their relationship
Tap Done to save your changes
Hope that helps,
Sam