If you’re getting the error message “The document could not be saved. You don’t have permission” when you try to save a file on your MacBook, you’ve come to the right place. In this quick guide, you’ll find 4 handy solutions to get rid of this error.
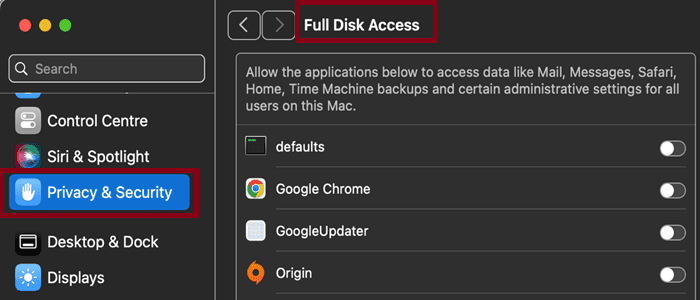
In most cases, this error pops up because the app that is trying to save the file on your Mac doesn’t have full disk access. In other words, it’s lacking the necessary permissions to make changes to your disk.
Go to System Preferences and select Privacy & Security.
Click on the padlock and enter your password. Go to the Privacy tab and scroll down to Full Disk Access.
Tick the checkbox associated with the app that’s trying to save your file to allow it to make changes to your disk.
If your app doesn’t show up on the list, click the + button and manually add it to the list.
Create a New File
If you don’t have permission to save your file to a particular folder or location, make a copy of the problematic document and save it to a different location.
For example, if you can’t save your Pages document to a specific folder, copy the content into a new Pages document and save it on your desktop.
If you use a template, you may not be able to save your Pages document straight to a folder on your desktop. Save it in the Pages app first, and then move it to your desktop.
You may also want to change the permission settings for the folder that triggered this issue. Open Finder, select the problematic folder, click on the File menu and then Get Info.
Select your username in the Name column and set the permission to Read & Write.
Repair Permissions
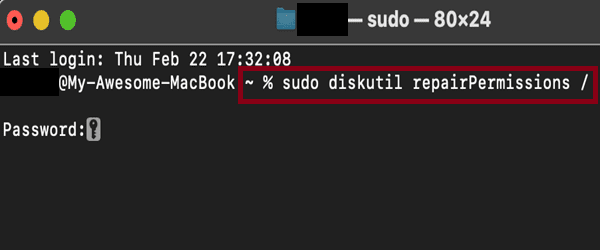
Launch Terminal and enter the following command to repair permissions: sudo diskutil repairPermissions /
Enter your password and wait until your Mac completes the process. Check if the issue is gone.
Create a New Admin User
Not being able to save documents may also indicate something is wrong with your admin profile. Create a new admin user and check if you can save documents under that profile.
Go to System Settings, select Users & Groups, click Add User, and create your new admin profile.
Have you managed to solve the problem? Which of these four solutions worked for you? Let us know in the comments below.
Madalina has been a Windows fan ever since she got her hands on her first Windows XP computer. She is interested in all things technology, especially emerging technologies — AI and DNA computing in particular.


Write a Comment