Did you just close Word for Mac app without saving the document on which you were working? Did the Word for Mac app crash along with the recent document? You’re in luck! Follow these methods to recover unsaved Word document on Mac.
Microsoft Word is the leading word processing app where you can create numerous documents like business reports, mail merge envelopes, mail merge postal mails, professional resumes, the scope of work documents, and so on.
The new Word app for Mac is also intuitive, native to macOS, and easy to use. It comes with robust text, image, and vector composing, editing, annotation, etc., features. Its autosaving feature is also state of the art. If you accidentally close out of the app without saving a document its AutoRecover function helps you with unsaved Word document recovery on Mac. Read on to learn the methods you can try to get back unsaved Word documents.
AutoRecover Helps You Recover Files in Office for Mac
It’s not uncommon that software crashes in between work wasting hours of effort. Word for Mac is nothing different. Hence, Microsoft added the AutoRecover feature in the new Word for Mac app along with other select Microsoft 365 apps like Excel and PowerPoint.
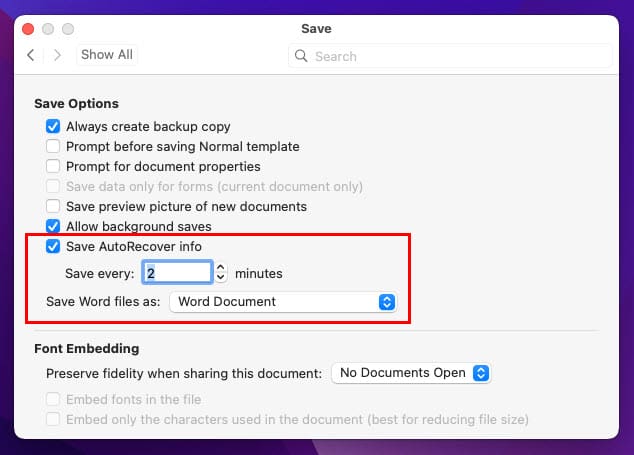
The AutoRecover feature location of Word on Preferences Output & Sharing Save
The AutoRecover module keeps saving a snapshot of the document when it’s open and you’re working on it. The tool saves a document every 10 minutes (can be adjusted to less or more) to create a recovery file of the currently open Word file. Furthermore, you can manually change the time interval after which AutoRecover will save an open file.
Thus, you can recover more data from your document in events like power failure, unexpected system shutdown, Word for Mac app crashing, and so on. By default, Microsoft Word stores its recovery files in a hidden folder that you can’t access yourself.
Find below the locations of the AutoRecover cache file in case you want to access the folder:
Recover Unsaved Word Document on Mac Using AutoRecover
The best and free method for unsaved Word document recovery on Mac is by using the cached data saved in the AutoRecover folder. Here’s how you can access this folder on MacBook or iMac devices:
On the Mac toolbar, click File.
Then, open a Finder screen by clicking the New Finder Window option on the context menu.
How to use Finder and AutoRecover to recover unsaved Word document on Mac
In the Search box on the top right corner of the Finder window, type AutoRecovery.
This should show the AutoRecover folder location for the Word app on Mac.
The folder will only show up if the AutoRecover tool made a backup of unsaved Microsoft Word files.
Manually Locate AutoRecovery Folder
If this method isn’t working for you, try manually locating the folder from the Computer folder. Here are the quick steps you can follow:
Click the Go menu on the Mac toolbar at the top of the screen.
In the context menu that pops up, find and click Computer.
You should now be at the main directory window of the Mac where you see these two options: an HDD icon and a network icon.
Double-click the HDD icon to enter the disk directory of the MacBook or iMac.
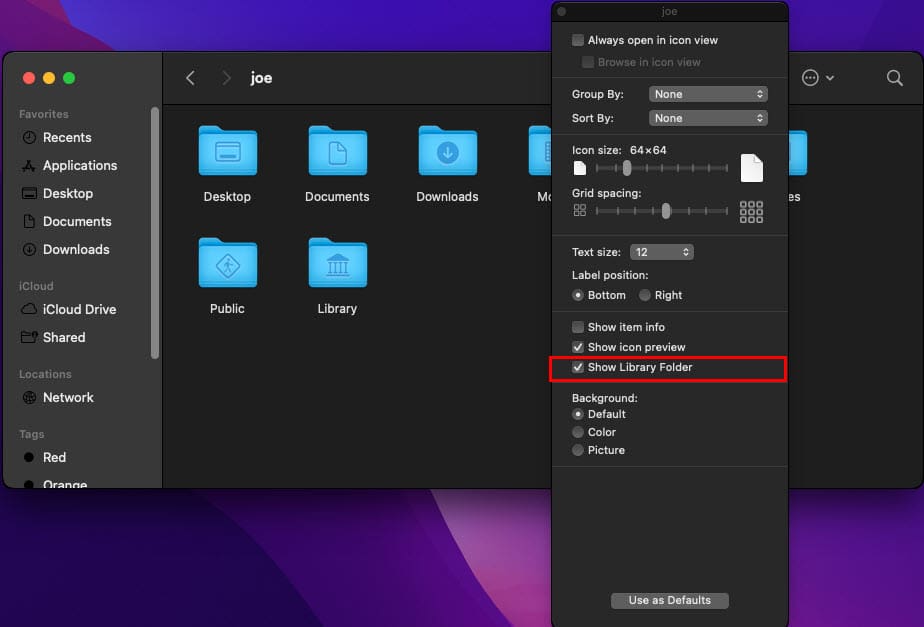
Enter the Users folder and double-click your username to open the folder.
Show library folder option on MacBook and iMac
Right-click anywhere within the directory and select Show Library Folder in the new context menu.
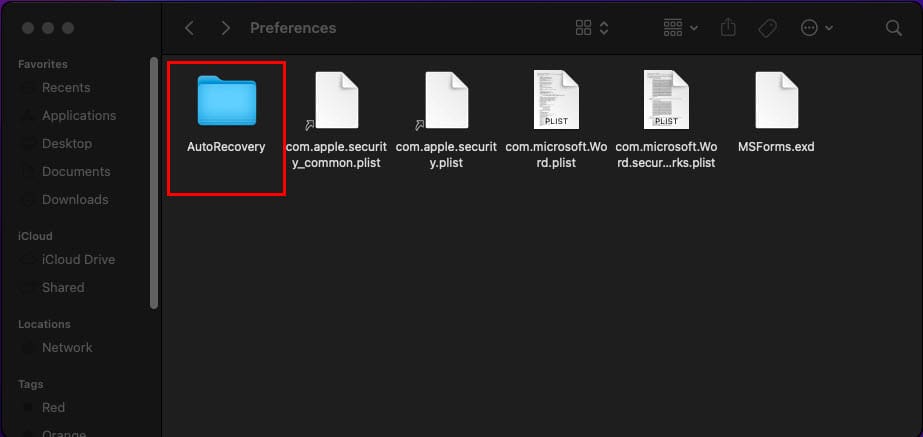
From Library, access these folders one by one:
Containers > Microsoft Word > Data > Library > Preferences > AutoRecovery
How to recover unsaved Word document on Mac from AutoRecovery folder
Now, simply go into the AutoRecovery folder. You should find all the backup copies of saved and unsaved documents for which Word automatically saved a recovery version. The AutoRecover saves the backup in .DOCX or .DOC file format. Thus, you can simply open the file in Word for Mac and save somewhere else like a local folder, Mac cloud storage, OneDrive, and so on.
Use Finder App to Locate AutoRecovery
Another way to access the AutoRecovery folder of the Word for Mac AutoRecover tool is the Go to Folder function of the Finder app. Here are the steps to use Go to Folder to recover unsaved Word files:
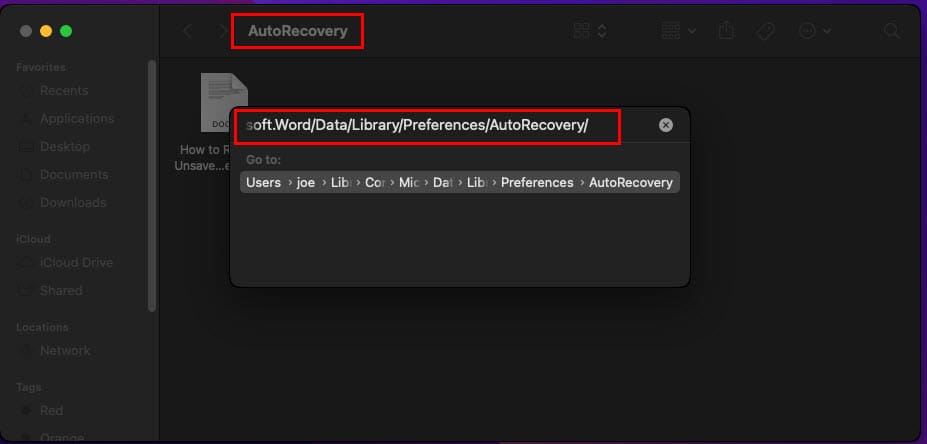
Select Go on the Mac toolbar and then select Go to Folder from the bottom of the context menu.
How to use go to folder to access AutoRecovery in macOS
In the Go to Folder search box, type in the following directory addresses depending on the version of your Word app:
~/Library/Containers/com.Microsoft/Data/Library/Preferences/AutoRecovery for Office 2019 and newer
~/Library/Application Support/Microsoft/Office/Office 2011 AutoRecovery for Office 2011
/Documents/Microsoft User Data/Office 2008 AutoRecovery for Office 2008
Now, enter the AutoRecovery folder and retrieve the file you need by its name. Don’t forget to save the file where you keep important business or personal documents.
Unsaved Word Document Recovery on Mac From Trash
When you need to force-stop MacBook or iMac, after a restart, the macOS sometimes moves files to the Trash bin from its Temporary folder. If macOS saved the unsaved word file in the Temporary folder, in this situation, you might want to check the Trash.
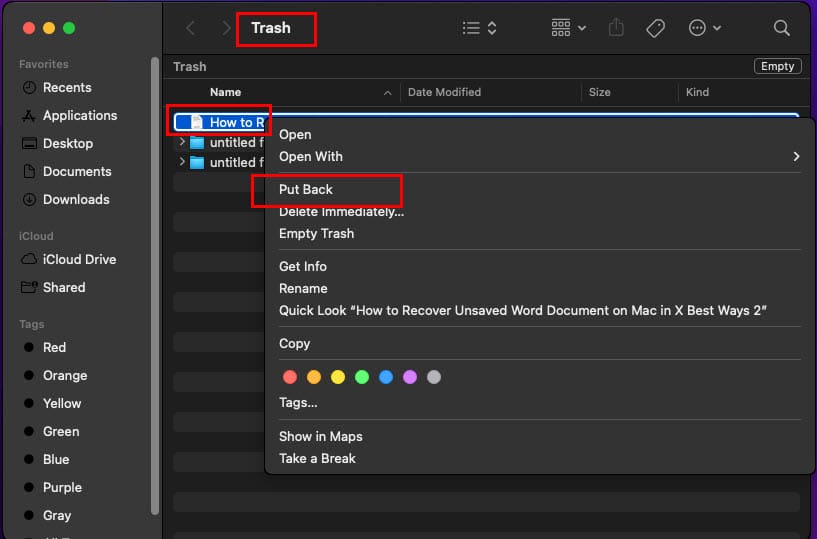
On the Doc, click the Trash icon.
If you found the Word file you’re looking for, select it.
Restore unsaved Word document on Mac using Trash
Right-click and then select Put Back on the context menu.
Recover Unsaved Word Document on Mac From Temp Folder
The macOS saves the files and documents of applications in its Temporary folder to run apps smoothly. When you stop an app usually, macOS clears the Temporary folder. However, when you force stop an app or if the app crashes, Mac may not be able to wipe clean the temporary folder.
Thus, you must also look in the macOS Temp folder to retrieve any unsaved Word document on which you were working recently. Here’s how you can do this:
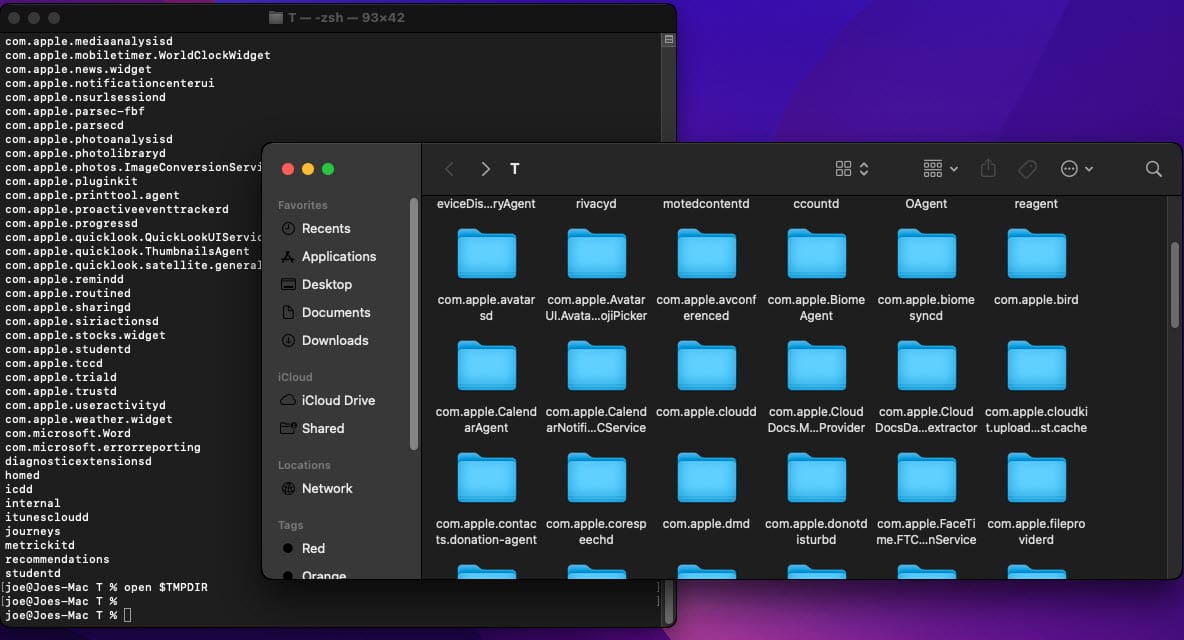
Open the Terminal app from Dock > Other folder for apps.
Now, type the following command in the Terminal app:
cd $TMPDIR
The Terminal app will access the TemporaryItems directory.
To view the content of the folder, enter the following command and hit Return:
ls
Now you should get a list of items within the macOS Temp folder.
Scroll the through the list in the Terminal app and try to locate the Word document you need.
If you find the Word file in the TemporaryItems folder, execute the following command to access the actual Temp folder:
open $TMPDIR
How to access temporary folder on macOS
Now, you can open the Word file in question on Word for Mac app and save its content somewhere safe.
Recover Unsaved Word Document on Mac Using Time Machine
Time Machine helps you to restore files and settings of your MacBook and iMac. If you were already using Time Machine to back up your macOS, then you can use this backup to retrieve unsaved Word files on macOS. Here’s what you need to do:
Insert the external storage device on which you regularly back up the MacBook or iMac using Time Machine.
How to open the Time Machine app
Now, open the Time Machine app by clicking its icon on the Mac toolbar.
Select Enter Time Machine.
You should now see the Time Machine browsing screen with timelines of content and macOS settings.
Browse the timeline carefully around the date when you unexpectedly closed Word app without saving an important file.
Explore Recover Unsaved Word Document on Mac Using Time Machine
If you find the Word document, select it on the directory and click the Restore button to send it to its original location.
Unsaved Word Document Recovery on Mac Using Word App
Often, you’ll find damaged Word documents within the Word app for Mac if you didn’t close the app normally the last time you used it. Also, when the app crashes on its own, it may be able to recover open files as damaged Word files for further processing. Follow these steps to see if Word for Mac app gives you the option to restore an unsaved Word document from its damaged copy:
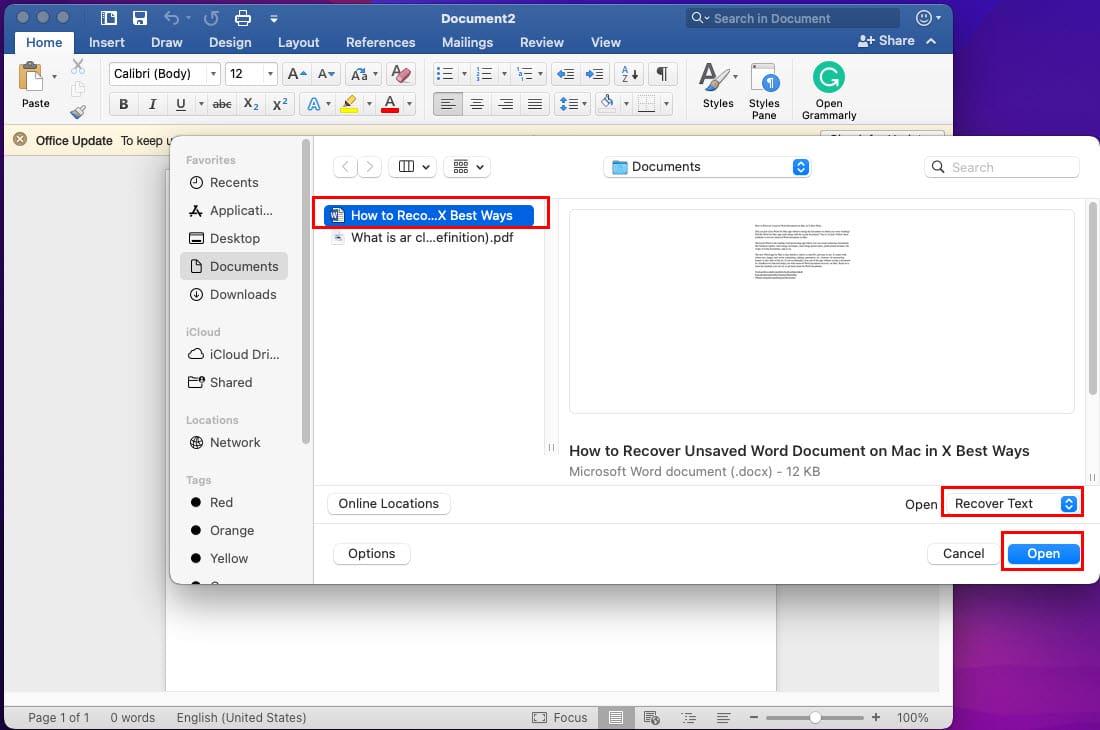
Open a blank document on the Word app.
Now, click File on the Mac toolbar and then select Open from the context menu.
You should now see available Word files along with the damaged ones.
The Open dialog box on Word for Mac app
Select a damaged Word file.
Click the drop-down list beside the Open option.
Learn to recover Unsaved Word Document Recovery on Mac Using Word App
Choose Repair or Recover Text.
Now, click the blue Open button below.
Word app will repair or recover text and open the content in a new Word file.
Conclusion
So far, you explored five different methods to recover unsaved Word document on Mac for free. These methods are quick and efficient because you don’t need to waste time on any data recovery software for macOS.
You must try a method depending on your unique situation of unsaved Word file recovery needs. Don’t forget to comment below to explain your experience of using the above methods.


Write a Comment