For most of us, the camera on our iPhone is the best we’ve ever owned. But we can still improve our photo collection with a little bit of iPhone photo editing.
That might include boosting the colors, adjusting the sharpness, or straightening out the horizon. Whatever you need to do to take your photo from “pretty good” to picture-perfect, you can do it on your iPhone.
If you’re new to editing photos on your iPhone—or you want to take your skills to the next level—we’ll explain exactly how to edit photos and videos below.
Related:
- iPhone Portrait Mode Explained: What Is It and How to Use It
- Top Professional-Style Tips to Taking Better iPhone Videos
- 7 Tips to Get the Most Out of Your iPhone 11 Pro Camera
- Live Photos on iPhone, a Complete Guide
Contents
Use the Photos App to Edit on Your iPhone
While there are plenty of third-party editing apps available on the App Store, the best photo-editing app is already installed on your iPhone: Photos.
Photos is the app you use to view your photo and video library. It comes pre-installed on your iPhone or iPad and is one of the few stock apps that Apple doesn’t let you delete.

As well as being the home to every photo or video you take on your iPhone, Photos is also home to an impressive selection of editing tools.
When you edit using the Photos app, all the changes you make are non-destructive. This means they never overwrite the original image, so you can revert back to the original at any time.
The Photos app also syncs your edited photos to iCloud Photos. This means you should see the edited version of your photos on every other device connected to your Apple ID.
Finally, the Photos app lets you edit both photos and videos, offering almost all the same tools for both media types.
How to Edit Photos and Videos on an iPhone
Follow these steps to start editing a photo or video on your iPhone:
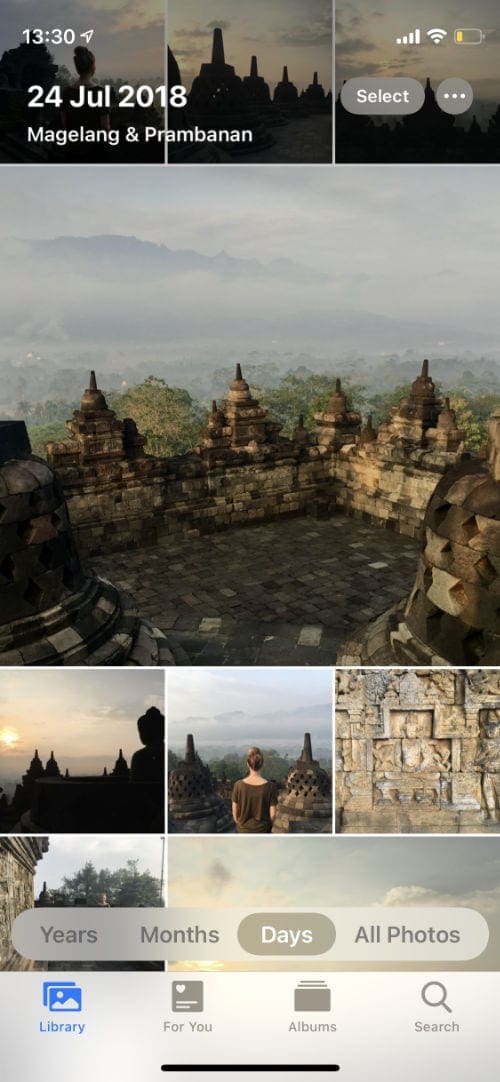
- Open the Photos app.
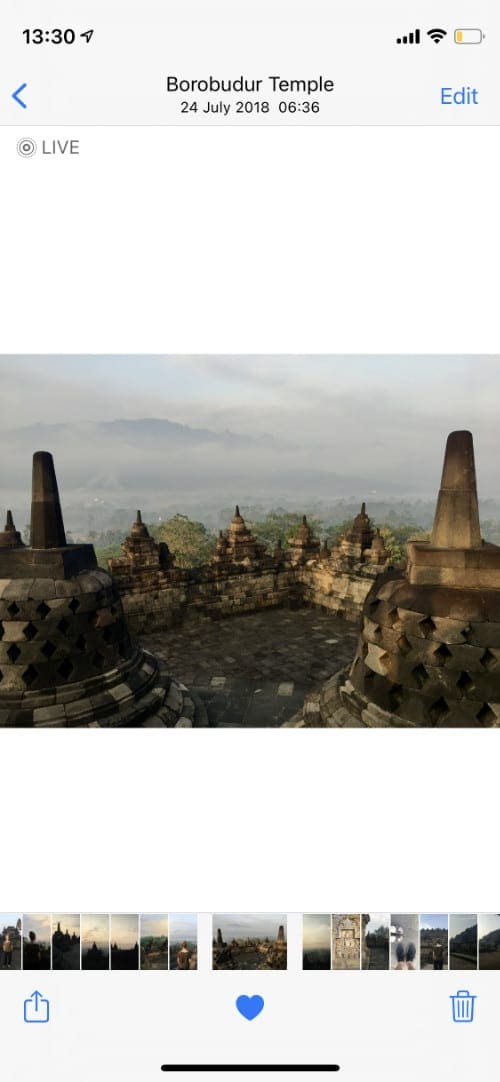
- Find the photo or video you want to edit, then tap to view it fullscreen.
- Tap Edit in the top-right corner. If you don’t see this option, touch the screen to make it appear.
- Use the buttons at the bottom or the side of the screen to reveal different controls and edit your photo or video. We’ll explain each of these controls below.
- When you’re finished editing, tap Done to save your edited photo or video. If you don’t want to save your changes, tap Cancel and choose to Discard Changes instead.
How to View Your Original Photo
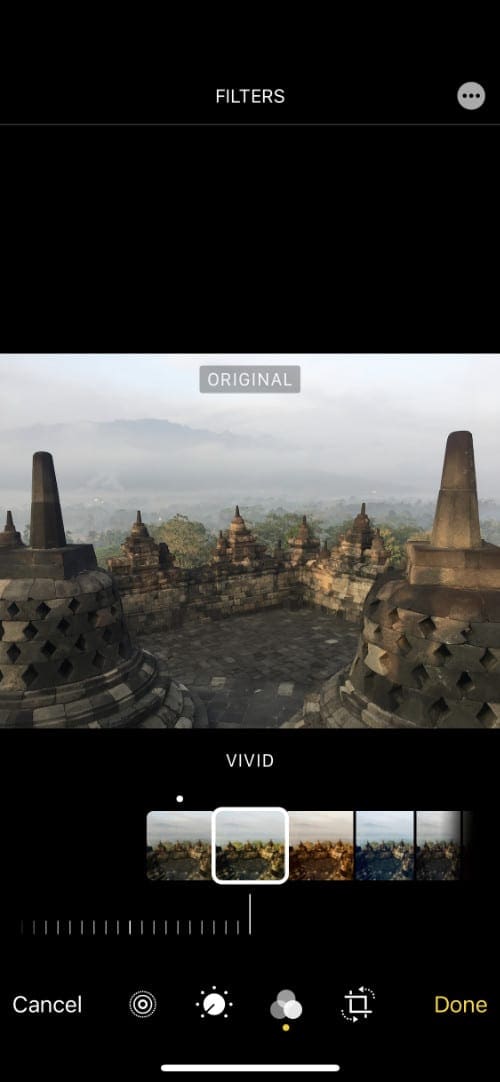
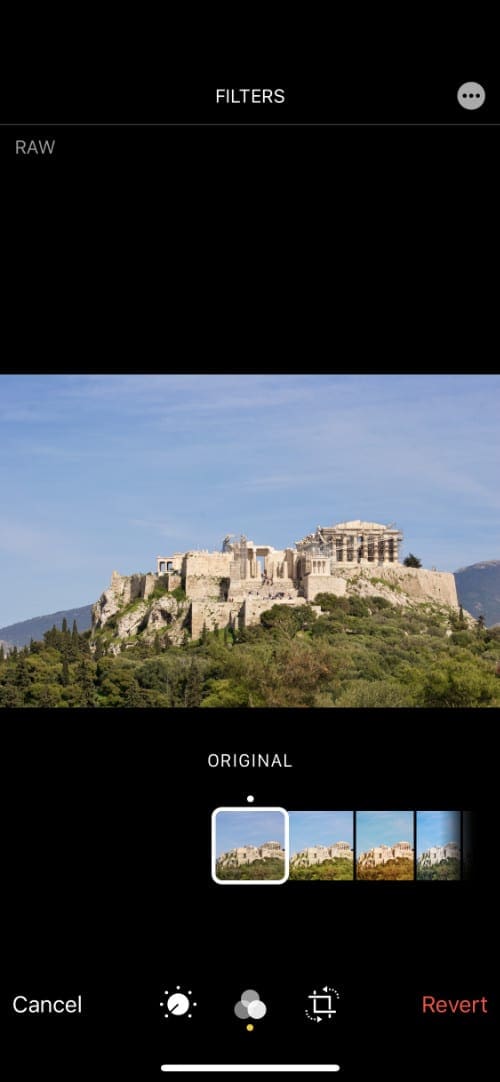
While editing a photo, it’s useful to occasionally compare your edited image to the original. The Photos app makes this incredibly easy to do.
Simply tap the image while editing to view the original version for a couple of seconds. You should also see Original appear at the top of the image while this happens. The image then switches back to the edited version automatically.
How to Undo the Changes on an Edited iPhone Photo
To revert an edited photo or video back to its original state, open the editing options and tap Revert in the bottom-right corner, then choose to Revert to Original.

This option only appears if you haven’t made any changes since opening the editing controls.
Reverting back to the original image deletes all the edits you made. You’ll need to recreate them manually if you want to get the edited version back again.
Explaining All the Different iPhone Editing Controls
After entering edit mode for a photo or video on your iPhone, you should see a range of icons at the bottom or side of the screen. The icons closest to the image represent individual editing controls, whereas the smaller icons near the edge of the screen represent different sections with more controls.
These sections always include icons for adjustments, filters, and cropping.
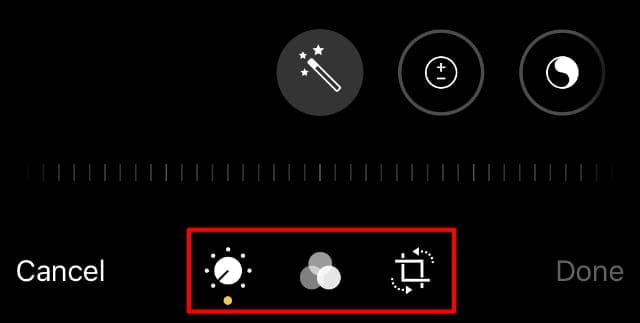
When you edit a Live Photo, a Portrait, or a video, you’ll see an extra icon for that media type as well.
Here are explanations of all the possible editing sections and their controls.
Adjust
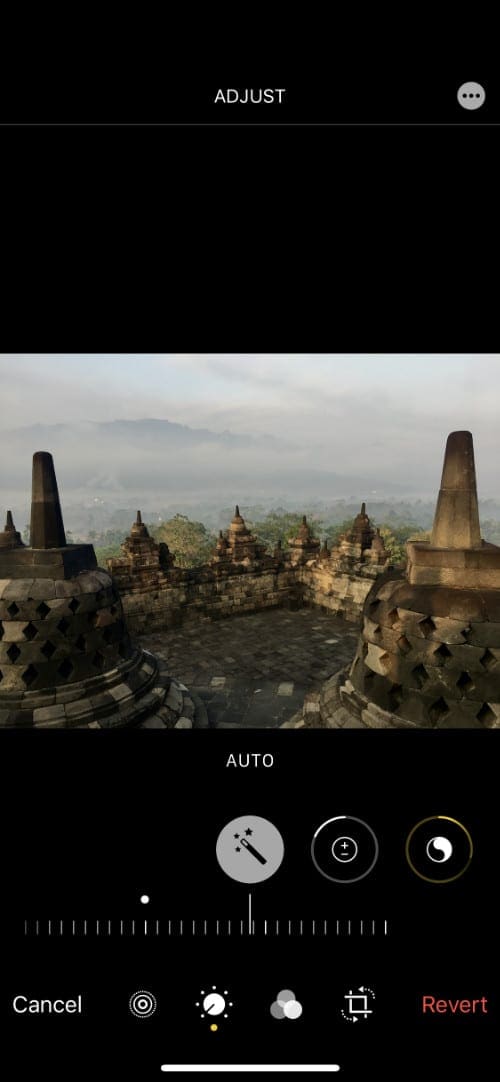
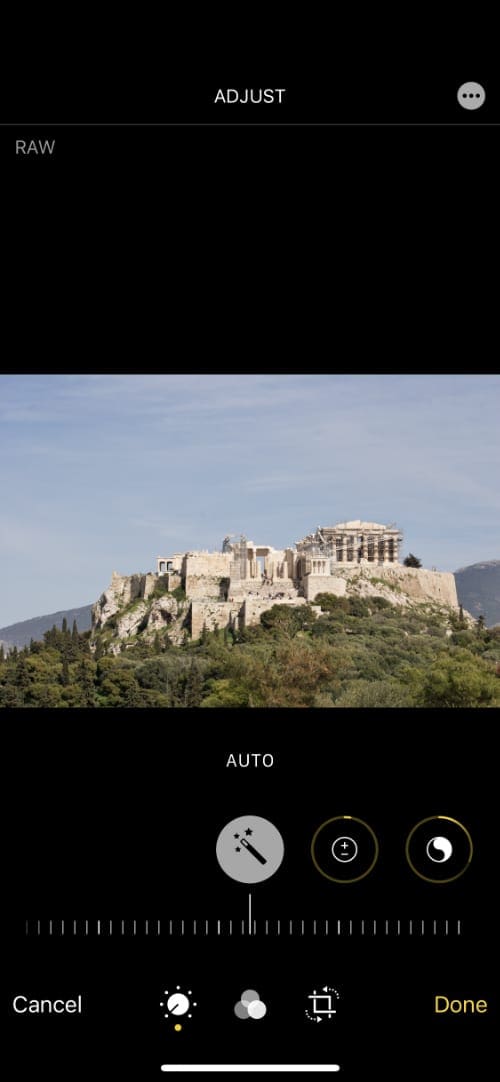
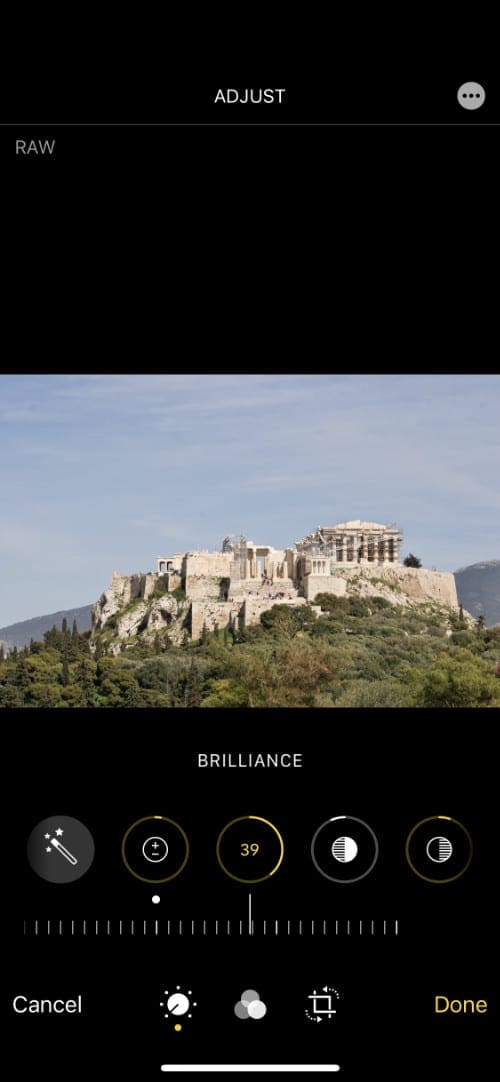
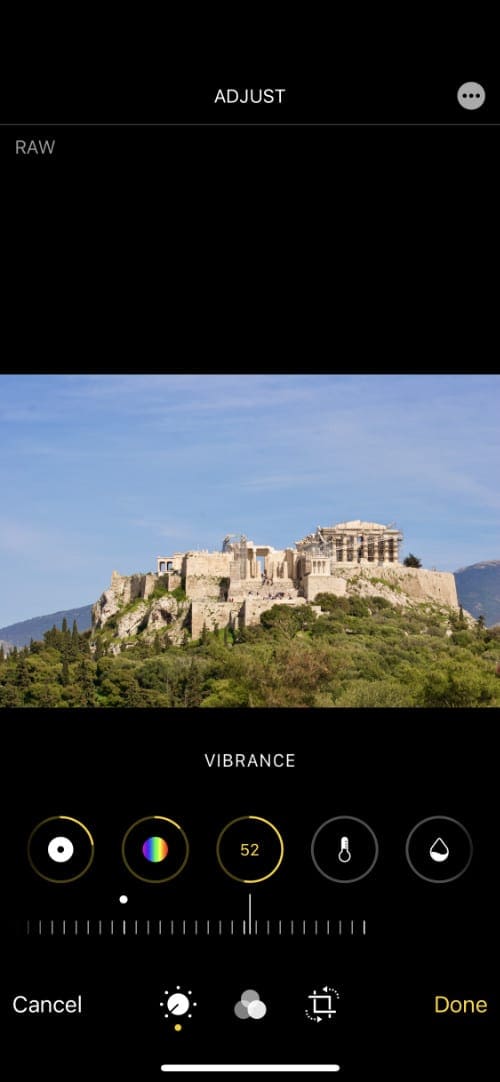
The Adjust icon looks like a dial and is the main section you’ll use to edit photos or videos on your iPhone. The controls in this section allow you to edit the light, colors, and details in your photos or videos.
Tap the magic wand icon to Auto Enhance your photo or video. This is a great place to start with editing, but it isn’t always perfect. Fortunately, you still tweak the other Adjust controls yourself after using Auto Enhance.
Tap to select the control one you want to change then drag the slider next to it to adjust it. The default position for most sliders is in the center.
As you edit your photo or video, a yellow or white outline appears around the control to show your adjustments. Tap this ring to toggle that control on or off, letting you compare how the image looks with and without that particular change.
We’ll separate all the other Adjust controls into three categories: light, colors, and details.
The light controls include:
- Exposure: Act as though more or less light got into the lens.
- Brilliance: Lighten shadows while toning down highlights.
- Highlights: Adjust the brightness of the lightest parts in the image.
- Shadows: Adjust the brightness of the darkest parts in the image.
- Contrast: Make the darker parts darker and the lighter parts lighter.
- Brightness: Make the entire image lighter or darker.
- Black Point: Adjust the very darkest part of the image.
The color controls include:
- Saturation: Change the intensity of colors in the image.
- Vibrance: Change the intensity of the least saturated colors.
- Warmth: Adjust the yellow and blue tones to warm or cool an image.
- Tint: Adjust the green or magenta tones in your image.
And the detail controls include:
- Sharpness: Sharpen the edges in your image.
- Definition: Make the details in your image clearer.
- Noise Reduction: Reduce the graininess in your image.
- Vignette: Darken the corners of the image.
Filters
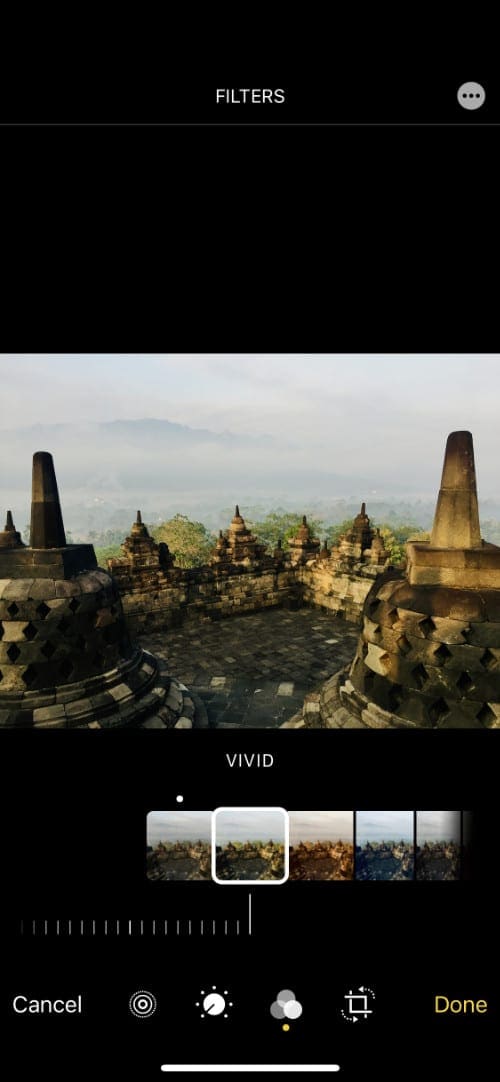
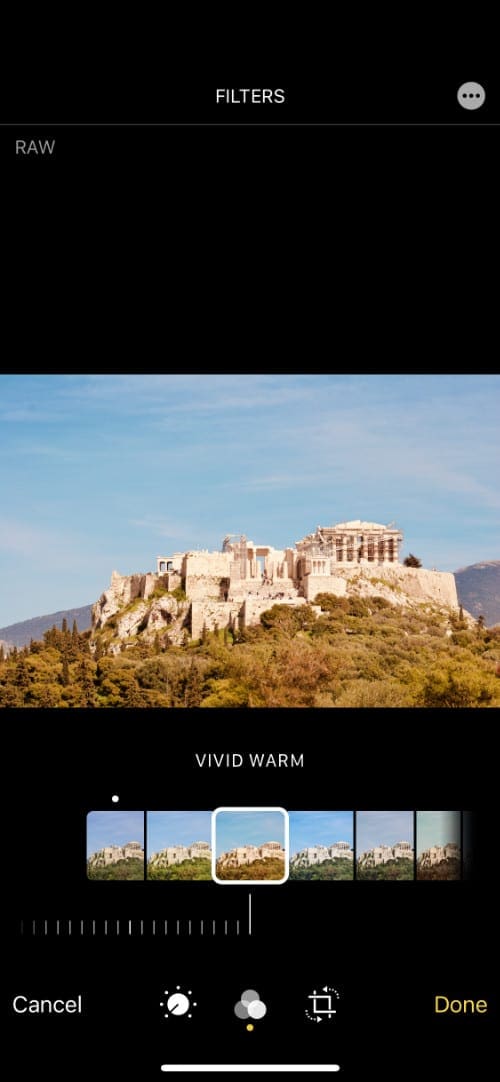
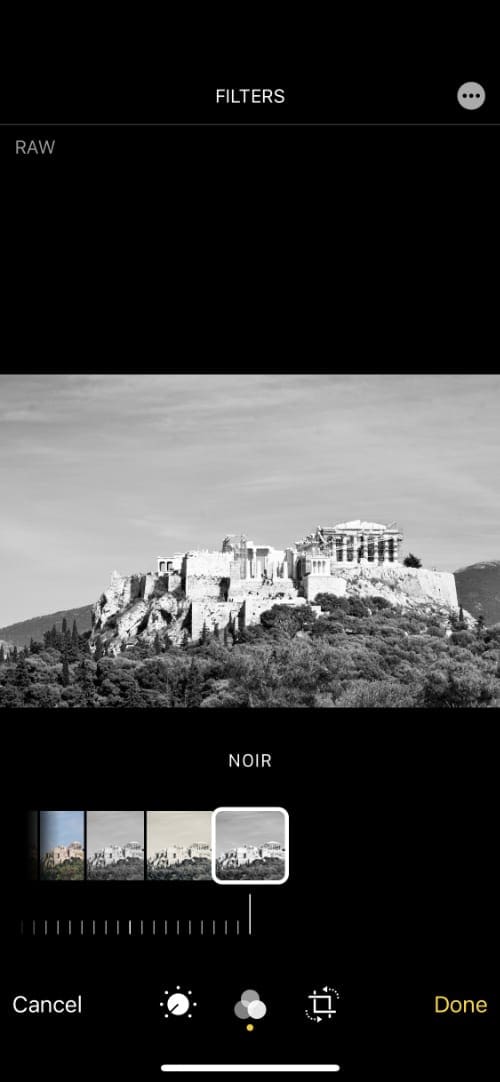
The Filters icon looks like three overlapping circles. You can use Filters to quickly edit the colors in an iPhone photo or video, adding a different feel to the image without needing to make exhaustive adjustments.
The Photos app on your iPhone includes nine filters to choose from:
- Vivid
- Vivid Warm
- Vivid Cool
- Dramatic
- Dramatic Warm
- Dramatic Cool
- Mono
- Silvertone
- Noir
After selecting a filter, drag the slider to adjust the intensity of that filter.
Crop
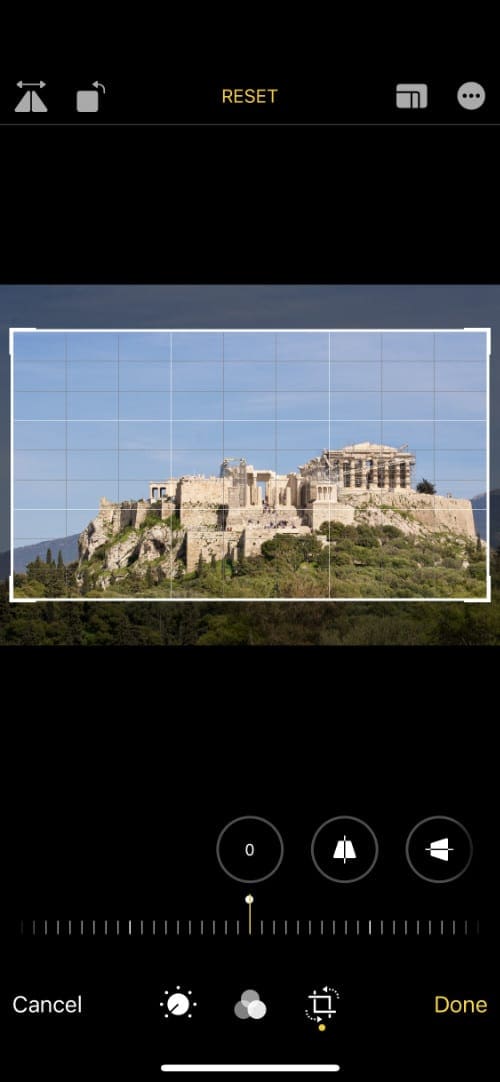
Use the Crop section to straighten, rotate, flip, or crop your photo or video. You can even change the perspective by enlarging the different edges of an image.
Drag a corner of the image to crop it. You can then drag from the center of your cropped selection to move the image beneath it.
The button in the top-right corner lets you choose a specific aspect ratio to crop to. You can even switch between portrait or landscape orientations.
Tap the button in the top-left corner to mirror the image or use the icon next to it to rotate the photo or video anti-clockwise by 90 degrees.
You can also use the slider and the controls at the bottom to straighten your image and adjust the perspective.
If you use the Auto Enhance option in the Adjust section, your iPhone automatically edits and Crop section settings for you as well.
Live Photo
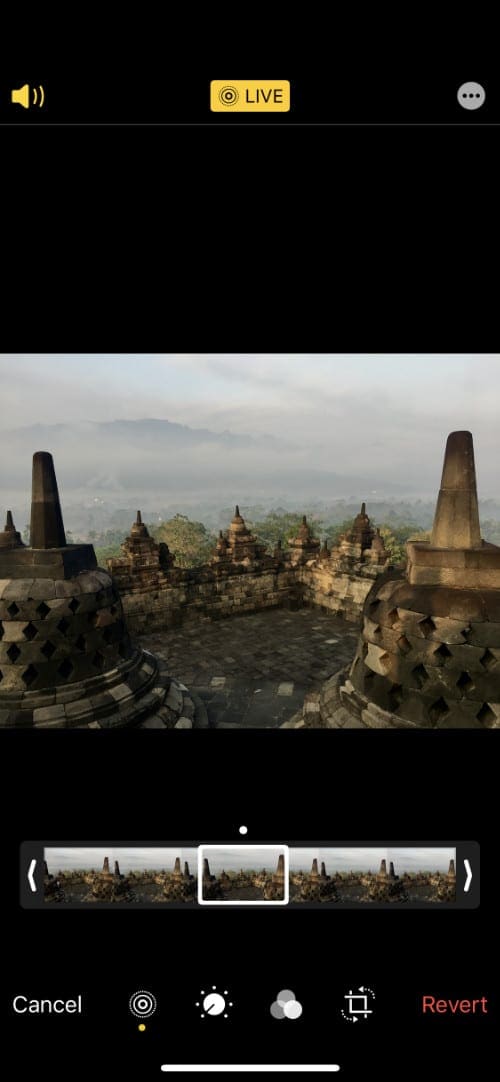
As expected, the Live Photo icon only appears when you edit a Live Photo on your iPhone; it looks like a circle with dots around it. Although you can turn a Live Photo into a regular photo using these controls, you can’t turn a regular photo into a Live Photo.
So make sure you enable Live Photos in the camera to use these options.
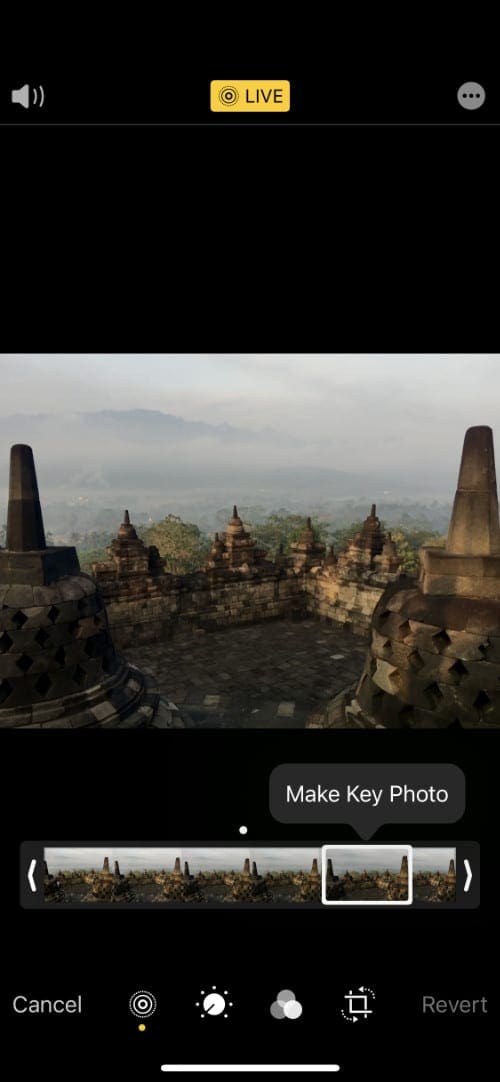
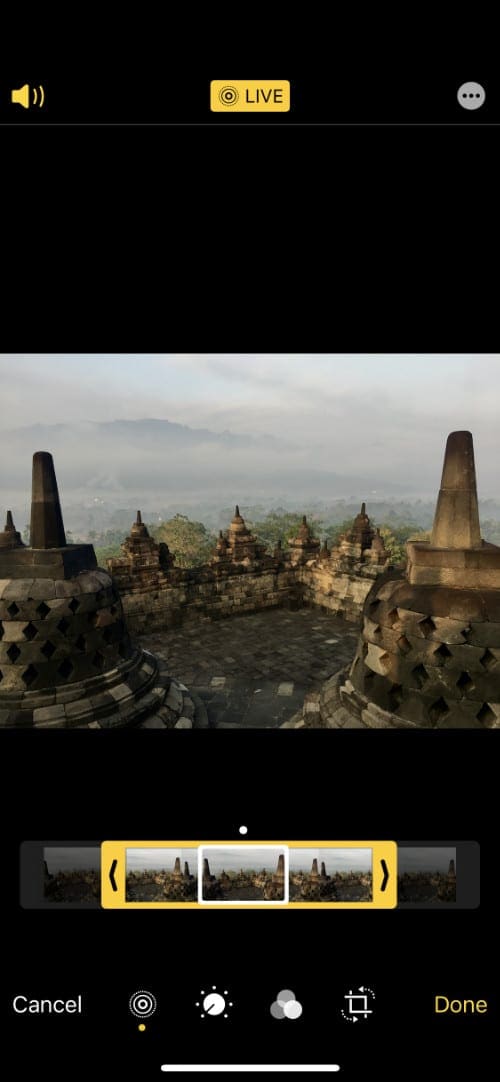
After tapping the Live Photo icon, a timeline appears next to your photo showing the video captured on either side of the image. Drag the arrows on the edges of this timeline to trim the beginning or end of your Live Photo.
The white dot represents the Key Photo, which is what shows when the Live Photo is still. To change it, slide your finger across the timeline to scrub the video and pause on the frame you want to use instead. Lift your finger and tap Make Key Photo.
At the top of the screen, tap the speaker icon to turn sound on or off for the Live Photo. When the speaker is yellow the sound is turned on.
You can add playback effects to a Live Photo, but you need to exit the edit screen to do so.
Tap the Live button at the top of the screen to disable the Live Photo features for this image and turn it into a standard photo.
Portrait
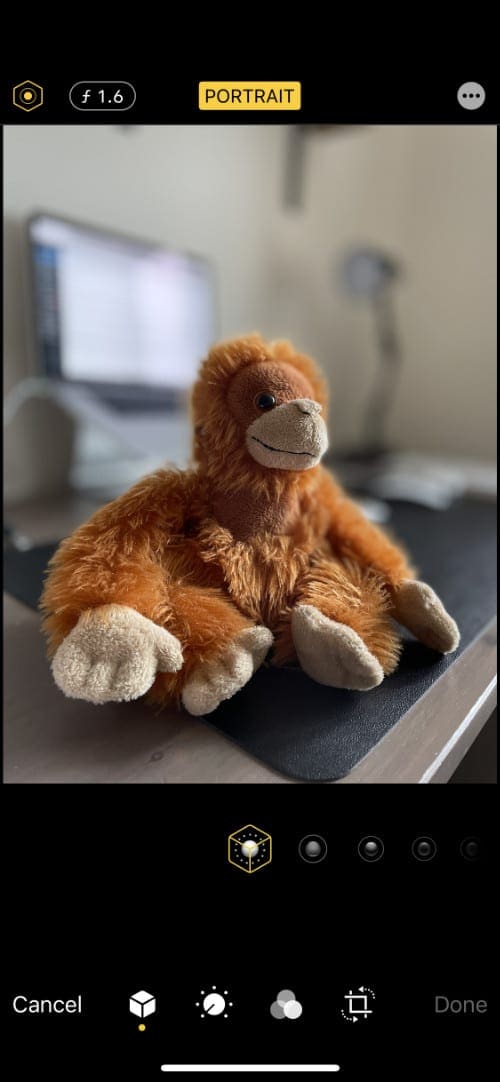
Tap the Portrait icon, which looks like a cube, to edit the lighting effects and aperture for your photo. This option only appears if you took the original photo using Portrait mode on your iPhone.
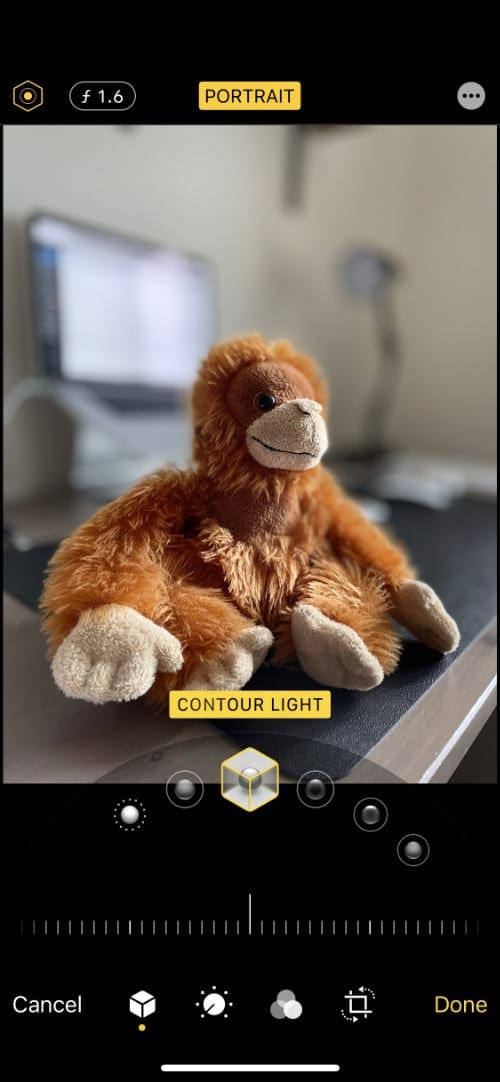
Tap the diamond shape in the top-left corner to change the lighting effect for your photo. You can then slide across the effect options at the bottom of the screen to choose the one you want.
After selecting an effect, drag the slider beneath it to change the intensity of those lights.
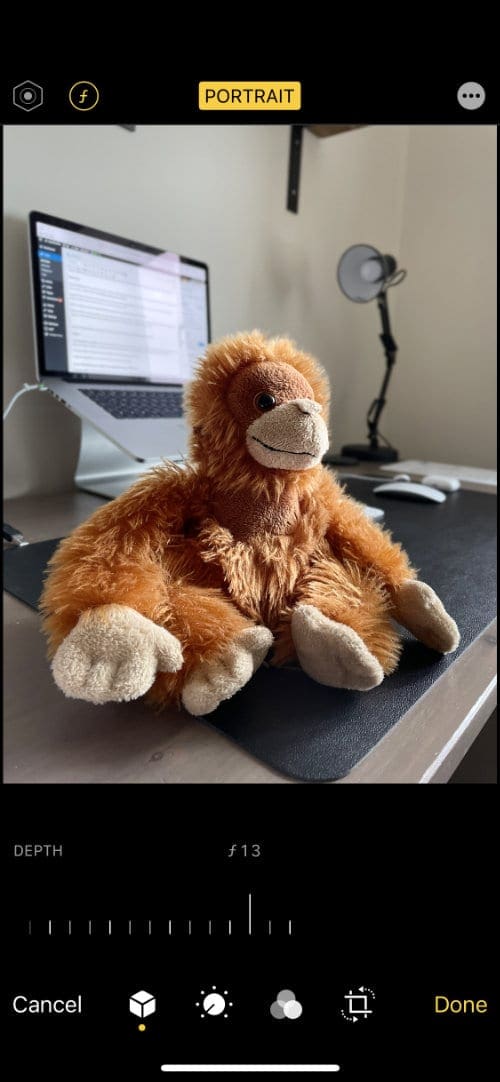
Select the f icon in the top-left corner to change the f-stop, or aperture, of your photo. This changes how blurry the background appears. After selecting it, drag the slider at the bottom of the screen to change the f-stop value.
Tap the Portrait button at the top of the screen to disable all the Portrait effects on your photo.
Video
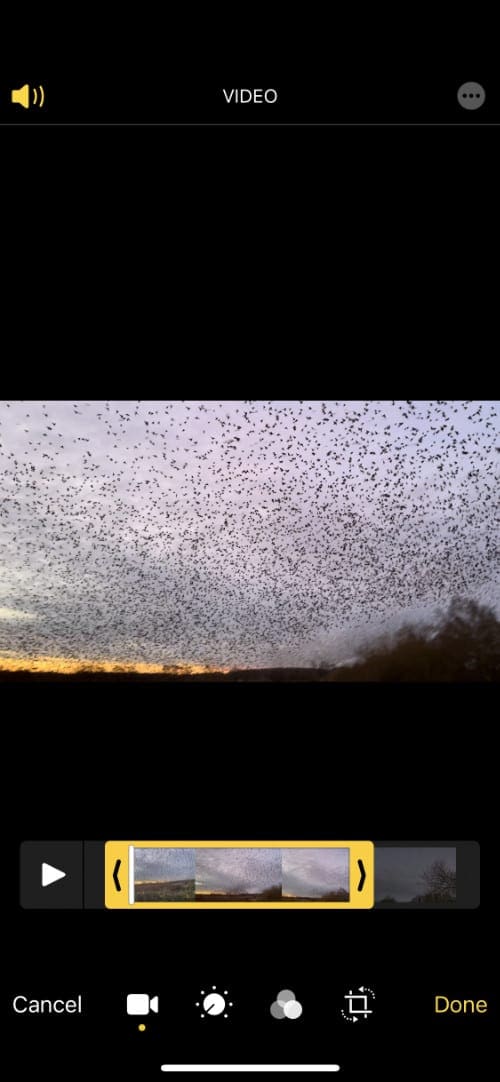
A camcorder icon appears when you’re editing videos on your iPhone. Tap this to make a timeline appear alongside your video. Slide your finger along the timeline to scrub through the video, or tap the play icon to play from that selected point.
Drag the arrow at either end of the timeline to trim the start and end times.
Toggle the speaker icon in the top-left corner to mute your video.
Use Markup to Add Annotations to Photos
You can use Markup on your iPhone or iPad to add drawings, text boxes, and shapes to your photos. This is useful if you want to highlight an area of a photo or annotate it with labels and descriptions.
Markup works particularly well with an iPad and an Apple Pencil.
To use Markup, tap the three dots in the top-right corner, then choose Markup. Select the tool you want from the toolbox and start drawing on the photo to use it.
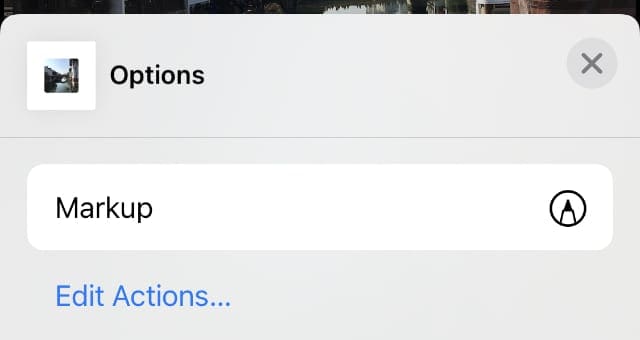
Unfortunately, it’s not possible to use Markup with a video.
When you’ve finished editing a photo or video on your iPhone, tap Done to save your changes. If you use iCloud Photos, these changes automatically upload to iCloud and sync to all your Apple devices.
Now you’ve perfected your photo, it’s time to share it! Tap the Share button to see all the different ways to share media from your iPhone and send it to your friends and family members.

Dan writes tutorials and troubleshooting guides to help people make the most of their technology. Before becoming a writer, he earned a BSc in Sound Technology, supervised repairs at an Apple Store, and even taught English in China.







How do I change the photo editing options? I clicked on copy edits and paste edits and now they have red circles with minus signs and I can’t get them back –help please.
Where did the retouch tool go in Apple Photos on iphone? Thye need to bring this back!