Thankfully, the camera on your iPhone is pretty smart. You don’t need to know anything about how cameras work to be able to snap a great photo in an instant. But if you want to take your smartphone photography skills to the next level, there are more built-in controls you can use to improve your pictures.
In this guide, we’ll talk you through using each of the controls available to you in the iPhone Camera app. You can use them to adjust the exposure, the aspect ratio, the focus, and much more.
Which Camera Controls Are Available on the iPhone?
When you open the Camera app, there is a range of different iPhone camera modes you can choose to use: Photo, Video, Slo-Mo, and more. Each camera mode on your iPhone offers a different selection of controls you can adjust.
These controls generally include options like zoom, focus, and exposure. However, certain modes offer extra controls, like depth in Portrait mode.
Unfortunately, there are some industry-standard photography controls that you can’t access with the Camera app, such as white balance, ISO, and shutter speed. To adjust those controls, you need to use a third-party photography app, such as VSCO.
How To Access iPhone Camera Controls
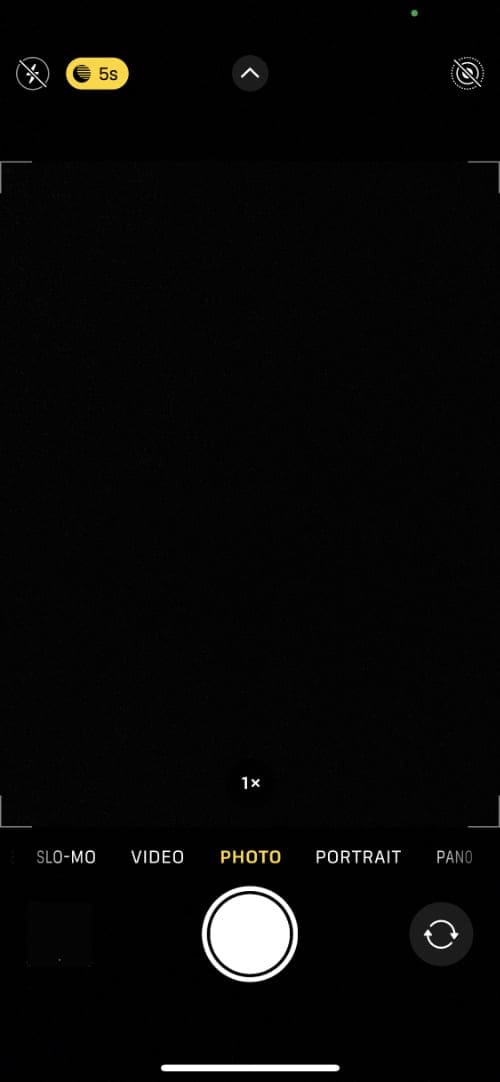
When you open the Camera app, you’ll see different icons around the edge of the screen representing the various controls currently in use.
While it’s possible to adjust some of these controls by tapping those icons, the best way to edit your iPhone camera controls is by tapping the arrow button to reveal more options.
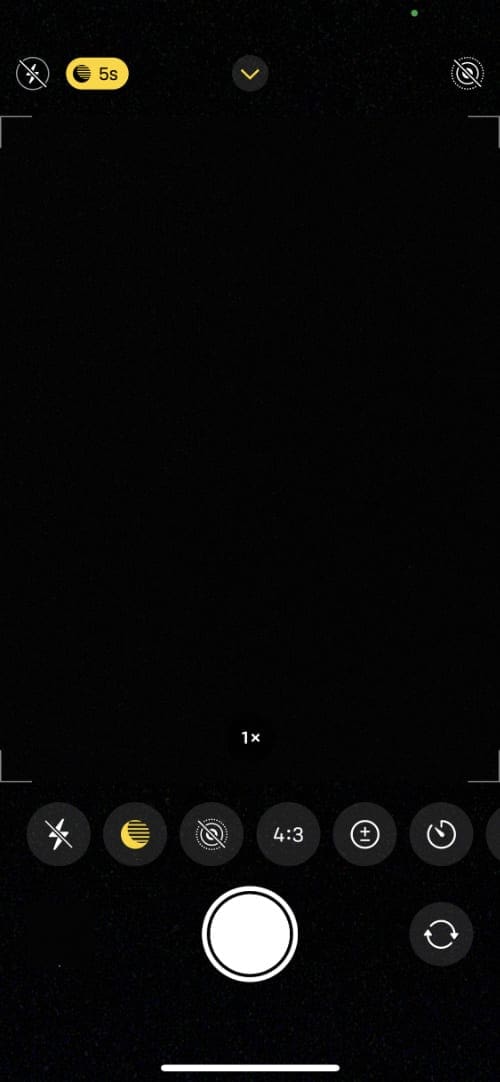
Tapping the arrow button reveals an icon for every control available right now. You can tap one of these icons and use the sliders or buttons to edit that control in different ways.
Tap the arrow at the top to reveal more controls.
Tap an icon at the bottom to edit a camera control.
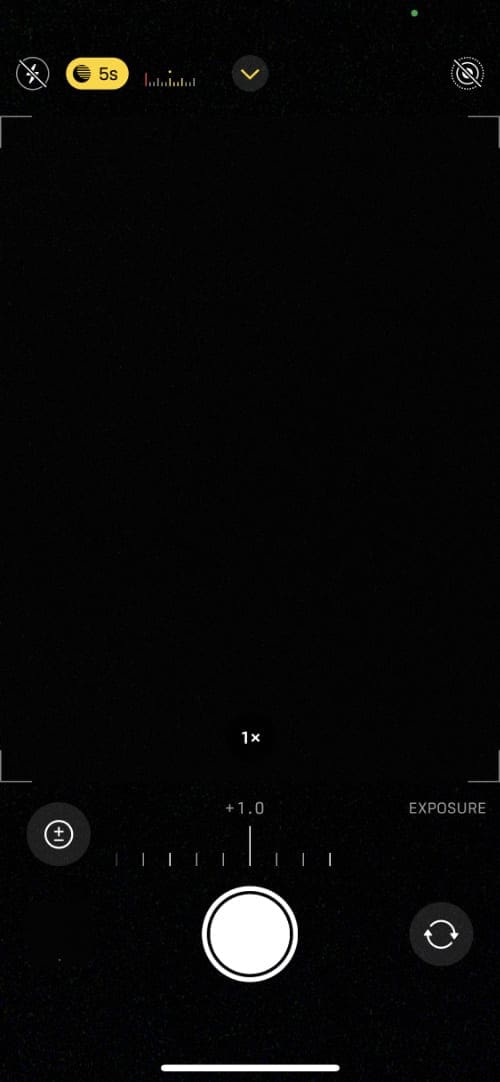
Use the slider to adjust camera controls.
When a camera control is in use, the icon turns yellow. When it’s disabled, a strikethrough appears instead.
Here are all the different controls available in the iPhone Camera app and how to use them.
1. Zoom
Near the shutter, tap the 1x icon to change how zoomed in you are. If your iPhone has an Ultra-Wide lens, you can zoom out to 0.5x and if your iPhone has a Telephoto lens you can zoom in to 2x or 2.5x.
You can also pinch your fingers in and out on the screen to fine-tune your zoom. When you do this, your iPhone uses digital zoom, rather than optical zoom, so you’ll see more pixelation in the final image.
2. Focus
Your iPhone is pretty good at automatically deciding what to focus on, but sometimes you need to help it if your focal point is particularly close to or far away from the camera.
Tap anywhere in the iPhone Camera app to focus on that point in the image. Tapping the screen also tells your iPhone to adjust the exposure for that point, but we’ll talk more about that in the Exposure section below.
If your iPhone refuses to focus on an object after you tap on it, move the camera at least 5cm away and make sure there is plenty of light.
Tap on the screen to focus your iPhone camera.
To lock the focus, tap and hold at any point in the image. You should see AE/AF Lock appear on the screen (which is short for Auto-Focus/Auto-Exposure Lock).
With this enabled, your iPhone keeps the same focal point even as you move it around; this is a good way to intentionally cause objects to appear out of focus.
To disable AE/AF Lock, just tap the screen again at any point.
3. Flash
The flash is useful if you’re taking photos in a dark environment. However, it can cause your subjects to appear too bright and washed out, so you shouldn’t use it all the time.
When you take a photo with the flash, it might flash several times to help your iPhone find the correct focus and exposure before taking the picture.
The Camera app gives you three options for the flash:
Auto: Your iPhone decides when to enable the flash
On: Your iPhone uses the flash for every photo
Off: Your iPhone never uses the flash
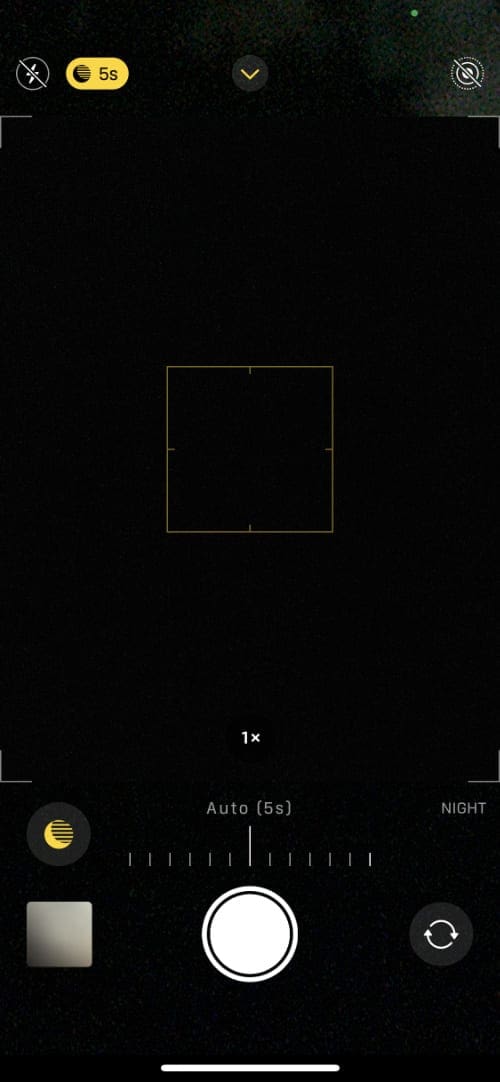
4. Night Mode
With an iPhone 11 or later—not including the iPhone SE (2nd generation)—you can also take photos using Night Mode. This allows you to take better photos in dark environments without needing to use the flash.
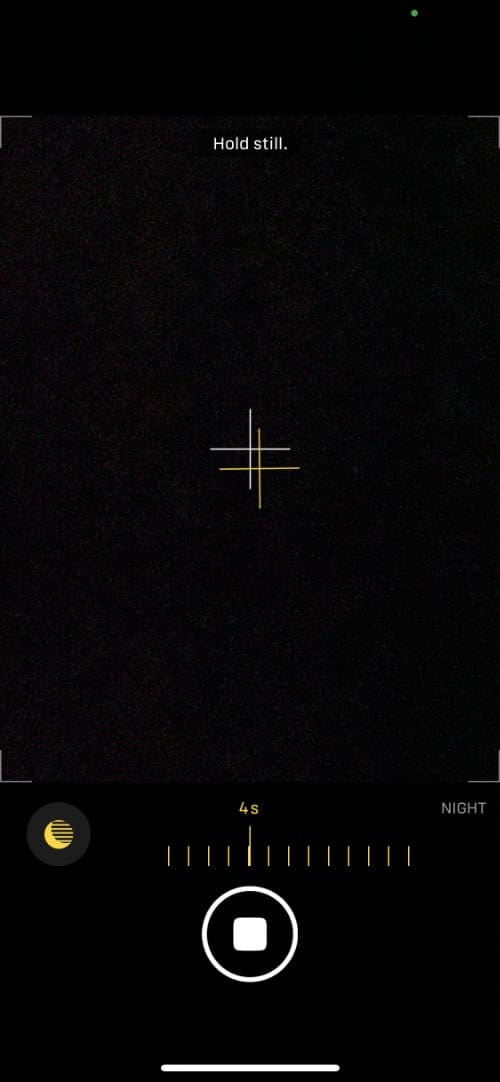
Night Mode uses a longer exposure to capture more light, but as a result you need to make sure you hold your iPhone still to avoid getting blurry photos.
For particularly long exposures, your iPhone might show a crosshair on the screen to help you keep it still.
Drag the slider to change the Night Mode exposure.
Line up the crosshair to avoid blurry photos.
In the Night Mode controls, you can adjust how long the exposure is on a sliding scale, though there are only really three options:
Off: Night Mode is turned off
Auto: Your iPhone determines the best exposure length
Max: Lengthen the exposure even more for a brighter image
The exposure length for the Max setting varies depending on how dark your environment is.
5. Live Photos
Live Photos capture a small amount of video on either side of your photo, bringing it to life, without taking up too much storage space on your device. You need an iPhone 6S or later to take a Live Photo.
Opening the Live Photos controls in the iPhone Camera app gives you three options:
Auto: Your iPhone chooses when to enable Live Photos depending on what you’re taking a picture of
On: Your iPhone always captures Live Photos
Off: Your iPhone never captures Live Photos
6. Aspect Ratio
The aspect ratio determines how wide your photo will be. You can choose between:
Square
4:3
16:9
Choose between three aspect ratio options.
It’s easy to edit the aspect ratio to make your photo smaller after taking it, but you can’t ever make it bigger. For this reason, you should only capture photos in a square aspect ratio if you definitely want to keep them square.
7. Exposure
Just like controlling the Focus, tap anywhere in the Camera app to make your iPhone automatically adjust the exposure for that spot. Unlike with focus, you can also make further adjustments to the exposure by tapping the arrow icon, to reveal an exposure slider.
Tap and hold at a point to enable AE/AF Lock and lock the exposure at that level. This is a great way to create intentionally lighter or darker images than Auto-Exposure usually allows.
To unlock the focus and exposure, tap on the screen again.
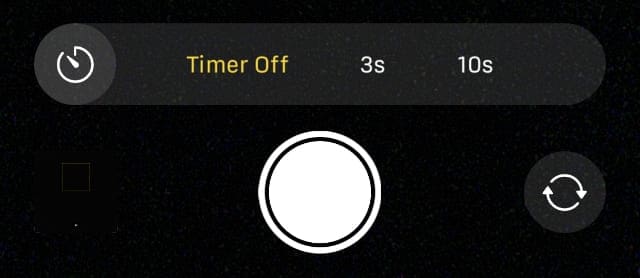
8. Timer
Set a timer that counts down from when you tap the shutter button before snapping a photo. You can choose between a three- or 10-second timer, or you can turn the timer off.
Set your timer length, then tap the shutter to start the countdown.
This is a great way to take a photo with you in it.
The iPhone LED will flash each second, so you can count the flashes to know when it’s going to take the photo.
9. Filters
Add a filter to change the colors of your photo. Your iPhone offers nine different filters to choose from, each offering a slightly different tone.
You can always remove or edit filters after taking a photo if you change your mind later.
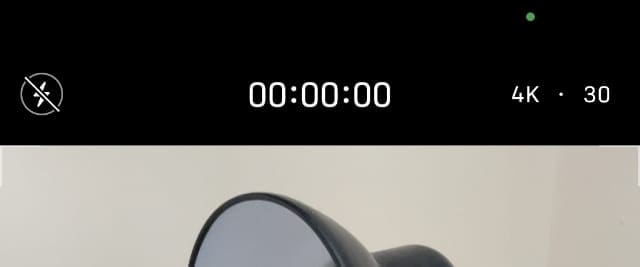
10. Frame Rate and Quality
When shooting a Video or Slo-Mo video, you should see the frame rate and picture quality appear at the edge of the screen.
The frame rate determines how smooth the video appears, or how much it slows down for Slo-Mo videos. And the quality determines how sharp the picture is.
Tap these numbers to cycle through the different options available for your iPhone.
For standard videos, you can usually choose between 4K or HD video quality and 30fps, 60fps, or 24fps for the frame rate.
Tap the video quality or frame rate indicators to cycle through your options.
11. Depth
If you can take Portrait photos on your iPhone, it’s also possible to edit the virtual aperture to increase or decrease the depth of field. This option is only available in Portrait mode.
Tap the f icon to open the depth settings, then drag the slider to select a different f-stop level. The lower the f-stop, the more blurry the background appears.
Because your iPhone uses software algorithms to determine the depth, it’s also possible to edit this option at any point after taking the photo.
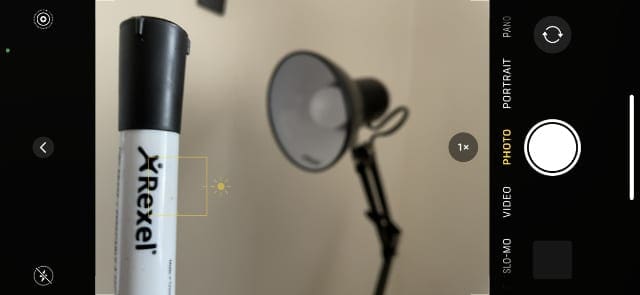
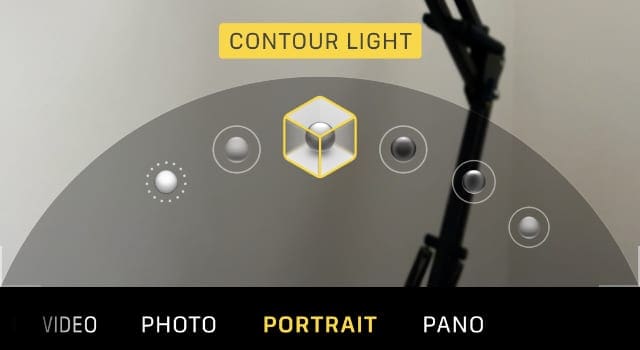
12. Lighting Effects
Portrait mode also lets you create virtual lighting effects to use on the people in your photos. These effects appear at the bottom of the screen when taking a photo with Portrait mode.
Simply slide across the different effect names at the bottom of the screen to switch between them.
The name of the lighting effect turns yellow when it’s ready.
You can also enable, disable, or further adjust Lighting Effects when editing an iPhone photo after you’ve captured it.
Choose your lighting effect from the bottom of the screen.
Preserve Your Camera Settings for Quicker Capturing
By default, all the controls in the Camera app reset each time you open the app. This can be frustrating if you like to edit the controls before you snap a picture and they keep resetting.
Luckily, you can change this option in Settings to make the Camera app load your previous settings each time you open it.
Here’s how to make that happen:
Open the Settings and go to Camera.
Tap Preserve Settings.
Enable the options for Creative Controls, Exposure Adjustment, and Live Photo. You can also enable Camera Mode if, for example, you want your iPhone to always open the Camera in Portrait mode.
Take the Best Photos You Can Take
Using these tips, you should be able to take better photos than ever before using your iPhone camera controls. Let us know in the comments which camera controls you edit most often.
Dan writes tutorials and troubleshooting guides to help people make the most of their technology. Before becoming a writer, he earned a BSc in Sound Technology, supervised repairs at an Apple Store, and even taught English in China.


Write a Comment