While browsing the web, you might have seen a “pornographic virus alert” pop up on your Mac, telling you to call Apple in order to fix it. But this alert is a scam and calling the number provided could cost you a lot of money.
Apple doesn’t issue virus alerts like this so you need to be very wary.
In this guide, we’ll explain where this “pornographic virus alert” came from and how to safely remove it from your Mac for free.
Despite the claims of any popup, it’s highly unlikely that you got a computer virus from watching pornography on your Mac. In fact, “pornography virus alerts” even show up when no-one has ever viewed pornography on your Mac.
As we already mentioned, this isn’t a genuine virus alert; it’s a scam.
Everything mentioned in a “pornography virus alert” is designed to scare you into calling the fake Apple support number it displays. These scare tactics could include:
Claiming you’ve broken the law
Warning that your Mac is blocked
Accusing you of sharing viruses from your Mac
Playing a robotic voice that tells you to call Apple
This fake “virus alert” may even start downloading files to your Mac, which it does in order to slow your Mac down. It could even freeze your Internet browser to give the appearance that your Mac is blocked.
Don’t call the number you see on this page as it’ll direct you to scammers.
The aim of this alert is to convince people to call the fake Apple support number provided, which leads to a team of scammers claiming to be Apple. These scammers will attempt to trick you into paying them to remove the virus from your Mac.
Don’t worry, we’ll show you how to get rid of these “virus alerts” and any other viruses on your Mac for free.
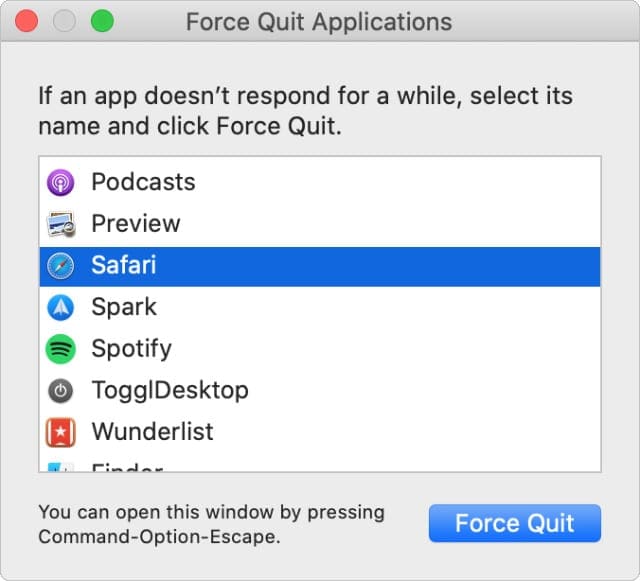
Step 1. Force Quit Your Browser to “Unblock” Your Mac
It’s highly likely that your Mac’s Internet browser stopped working when the “pornographic virus alert” appeared. This is because this alert wants you to think your Mac is blocked and won’t work anymore.
Luckily, that isn’t the case.
All you need to do is press Cmd + Q to quit your Internet browser. If it’s unresponsive, press Cmd + Option + Escape and choose to Force Quit your browser instead.
Use the Force Quit app for any apps that are not responding.
If you use Safari, hold Shift while opening it again to avoid loading the same fake “pornographic virus alert”. For other browsers, visit the developer website to find out how to open a new window without loading your previous session.
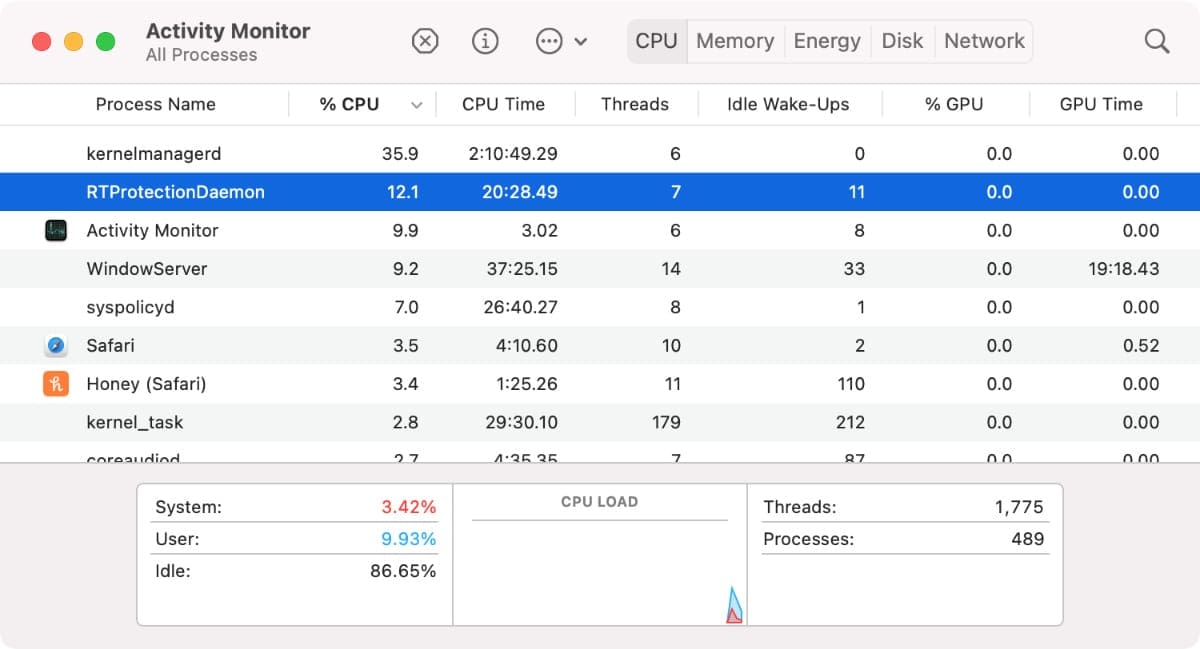
Step 2. Stop Suspicious Processes in Activity Monitor
After closing your browser, your Mac should start working at its normal speed again. However, if you do have a virus, there could be other processes running in the background that are also slowing it down.
Press Cmd + Space, then search for and open Activity Monitor to stop these processes.
Do some research on any suspicious processes before you stop them.
In Activity Monitor, find any suspicious-looking processes that are using a high % CPU, then select them and click the Stop icon to quit them.
Step 3. Create a New Backup to Prevent Data Loss
Now that you’ve closed your browser and stopped any power-hungry background processes, your Mac should be running at its normal speeds again.
Don’t be fooled, we haven’t done anything to remove any viruses or virus alerts from your computer yet. But now your Mac is back up to full speed, it’s a good time to create a backup in case you lose any data in the following steps.
When backing up your Mac, it’s crucial that you don’t overwrite any existing backups.
Right now, there might be a virus on your Mac that we can’t help you remove. If that’s the case, you’ll need to restore a backup from before you got the virus in order to remove it.
For that reason, make sure you create a brand new backup, rather than simply updating your existing one. We suggest you use Time Machine to back up your Mac. Time Machine preserves your existing backups so you don’t need to worry about overwriting anything.
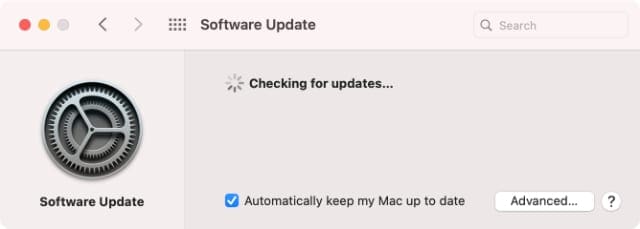
Step 4. Update macOS and All Your Mac Apps
It’s important to keep your Mac up to date to ensure you’re benefitting from the latest security improvements to macOS. With each update, Apple updates its list of known malware and computer viruses while patching up potential security flaws.
To update your Mac, click the Apple icon in the top-left corner, then go to System Preferences > Software Update.
Be sure to install any new macOS updates available for your Mac.
You should also take the time to update all the apps on your Mac.
To update apps you got from the App Store, open the App Store and click Update in the sidebar. Then choose to Update All.
For apps you downloaded outside of the App Store, visit the developer’s official website to download the latest updates for that app.
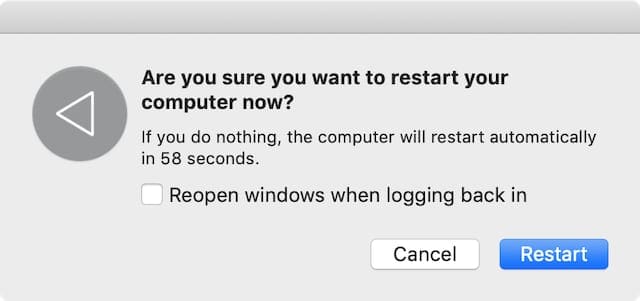
Step 5. Restart Your Mac
Your Mac includes a built-in tool that removes known malware and computer viruses every time you restart. That means, removing the “pornographic virus alert” from your Mac could be as easy as turning it off and on again.
Click the Apple icon in the top-left corner of the screen, then select Restart and confirm you want to restart your Mac.
Have you turned it off and on again? This trick really does work a lot of the time!
If you still see the “pornographic virus alert” after doing this, then it means Apple doesn’t know about this particular virus yet. Repeat the steps above, then follow the steps below to manually remove this virus from your Mac.
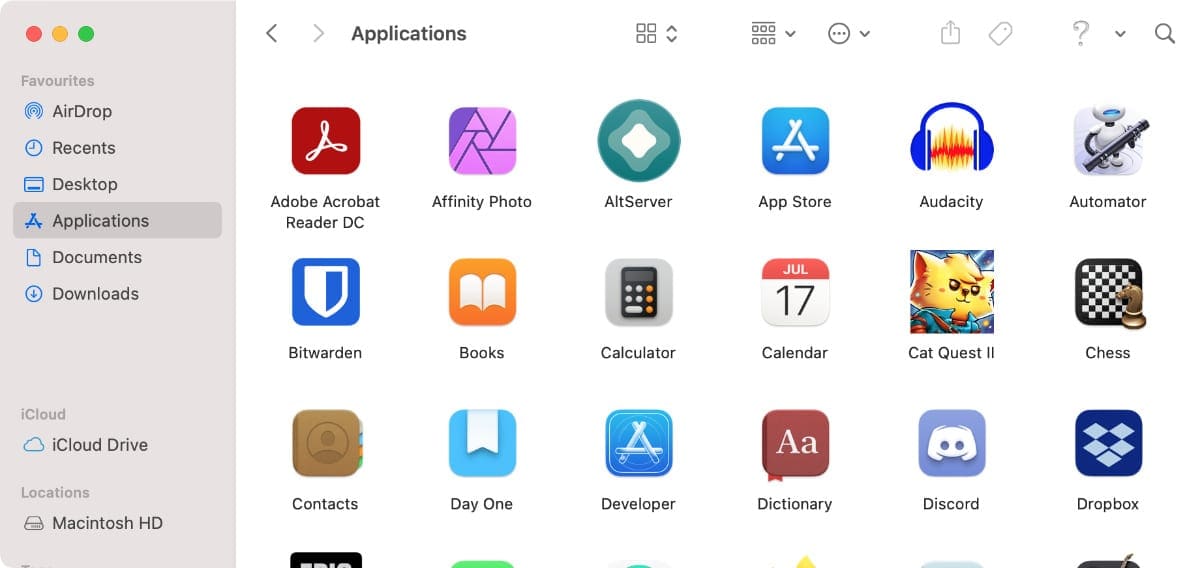
Step 6. Remove Newly Installed Apps From Your Mac
If there is a virus on your Mac, it’s most likely that you installed it yourself believing that it was another app. Think back to remember if you downloaded any new apps recently—it’s a good idea to remove them now.
To uninstall an app, open Finder and click Applications in the sidebar. Find the app you want to uninstall, then drag it into the Trash. When you empty the Trash, it’ll delete that app from your Mac.
Search through your apps for any that you don’t recognize or recently installed.
You may also need to check the apps installed in your user account, rather than on a Mac as a whole.
To do this, open Finder and press Cmd + Shift + Home to go to your user account files. Then open the Applications folder to view any apps installed on your account.
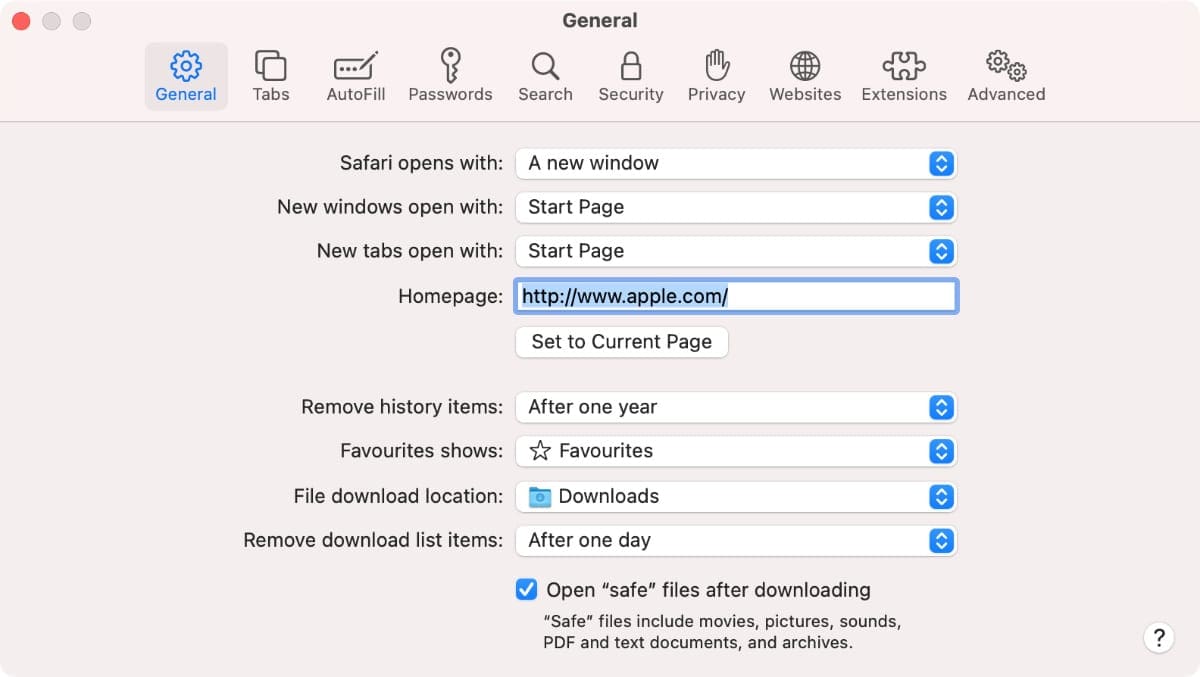
Step 7. Reset Your Browser Home Page and Extensions
Some viruses change your browser settings to keep redirecting you to the same “pornographic virus alert” webpage. This might even happen due to an extension you recently installed on your browser.
We recommend you reset your browser homepage in the settings and disable or uninstall any extensions you recently installed.
If you use Safari, press and hold Shift while opening Safari to avoid loading the last session you had open. Then click Safari > Preferences to view the settings.
From the General tab, change the Homepage to a trustworthy website, like https://www.apple.com/.
Ensure your browser Homepage is set to a trustworthy website.
From the Extensions tab, uncheck extensions to disable them or select them and click Uninstall to remove them completely.
If you don’t use Safari, check the developer’s website for your browser to find instructions on how to change the homepage or uninstall your extensions.
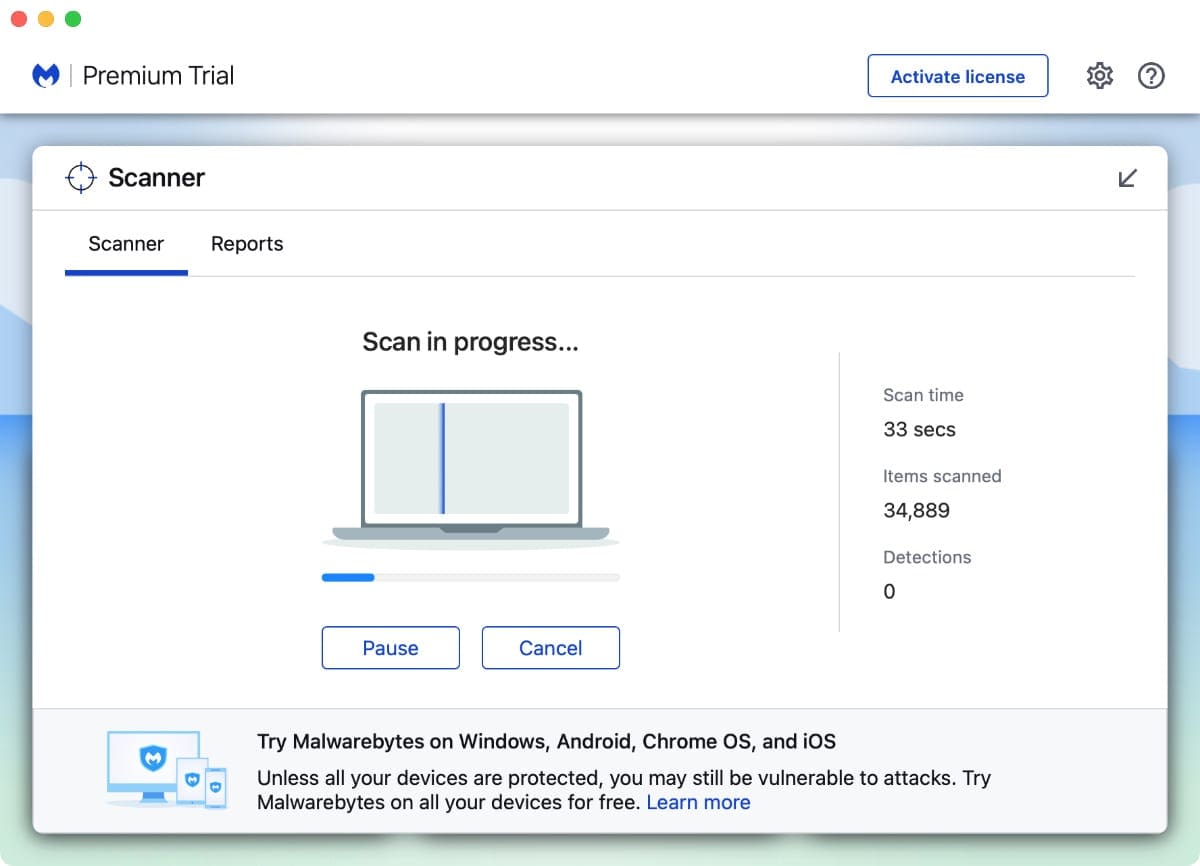
Step 8. Scan Your Mac for Viruses With MalwareBytes
Most viruses find a way to hide in the system files on your Mac, making them hard to find and remove by yourself. Luckily, you can use MalwareBytes to find and remove these viruses for you.
MalwareBytes is a cybersecurity app that can protect your Mac from viruses, adware, spyware trojan horses, and various other types of malicious software.
Although MalwareBytes offers premium monthly subscriptions, you can download it and scan your Mac for free to remove “pornographic virus alerts” and other similar viruses.
Visit the MalwareBytes website to download this software, then follow the prompts in the app to allow full disk access and scan your Mac for viruses.
MalwareBytes is an incredibly reliable way to find viruses on your Mac.
You Need to Follow Different steps for iPhone Viruses
These steps are effective at removing just about any virus from your Mac—including the pesky “pornographic virus alert” virus—but they might not be so helpful if you’ve managed to get a virus on your iPhone.
And be sure to let us know in the comments if these steps helped you remove a virus from your Mac. Which step did you find most helpful? And what virus were you struggling with?
Dan writes tutorials and troubleshooting guides to help people make the most of their technology. Before becoming a writer, he earned a BSc in Sound Technology, supervised repairs at an Apple Store, and even taught English in China.


")


Write a Comment