In today’s world, Apple goes to extreme lengths to ensure that the different applications and services that we use are secure. Most of the time, you are able to use all of your devices and apps without running into any hiccups. However, there are other times when Apple’s security system ends up glitching a bit and making it impossible to enjoy the seamless ecosystem.
Your Device or Computer Could Not Be Verified. Contact Support for Assistance
One such example of this is when you are greeted with a message informing you that “your device or computer could not be verified”. Of course, this is a troubling message to see, especially if you’ve been using your Mac for awhile and have never run into any similar issues before. Thankfully, there are a few different steps you can take to try and get rid of the message yourself.
Before we can begin fixing the problem, you might try and go through the steps below and notice that your Mac’s hard drive is not listed in the Finder sidebar. This is an easy fix, and here’s how you can make it appear:
Open the Finder app on your Mac.
Click Finder in the menu bar.
Select Preferences from the drop-down menu.
Click Sidebar in the top bar of the Preferences panel.
Under Locations select the name of your Mac.
Close the Finder Preferences window.
Now that you have enabled your Mac to appear in the Finder sidebar, you’ll be able to proceed with the following steps. Here’s how you can fix your Mac if the App Store tells you that your device or computer could not be verified:
Open the Finder app on your Mac.
In the sidebar under Locations, click the name of your Mac.
Double-click Macintosh HD.
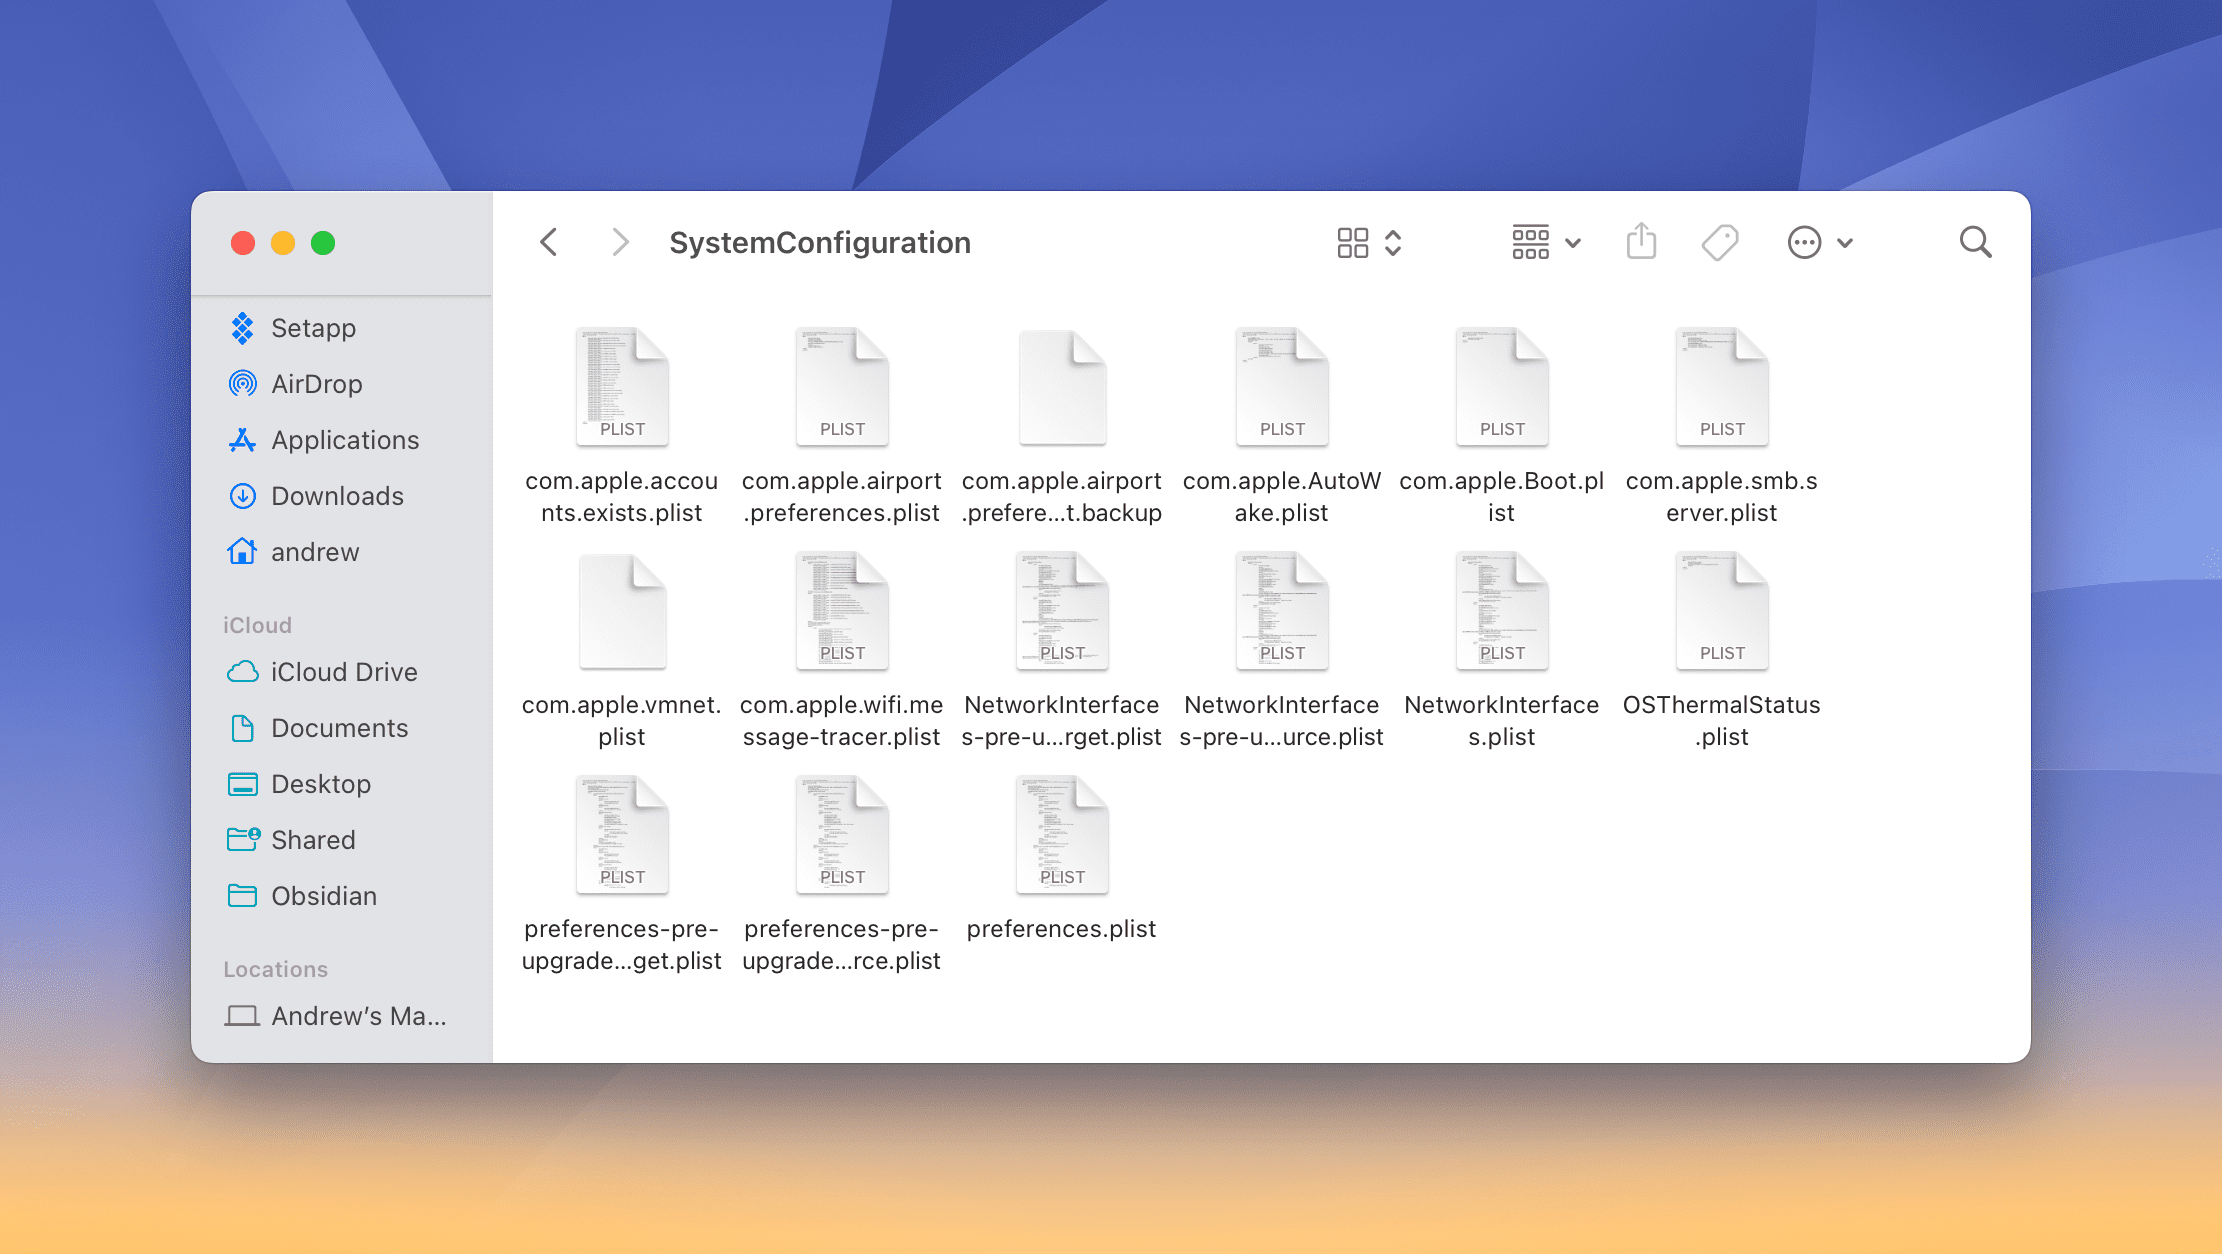
Open the Library folder.
Scroll down and open the Preferences folder.
Scroll down again and open the SystemConfiguration folder.
Locate and delete the file named NetworkInterfaces.plist.
Click the Apple logo in the menu bar.
From the drop-down menu, select Restart.
Once your Mac is finished restarting, open the Mac App Store app.
Log in with your Apple ID credentials.
After logging in, you should be able to download apps just as you could before. It’s not entirely known what causes this problem, as it has been around on various Macs for years at this point.
If the steps above aren’t enough to solve the problem, there are a few more steps you can take to get things working again. Here’s what you’ll need to do if deleting the NetworkInterfaces.plist file does not work.
Open the System Preferences app on your Mac.
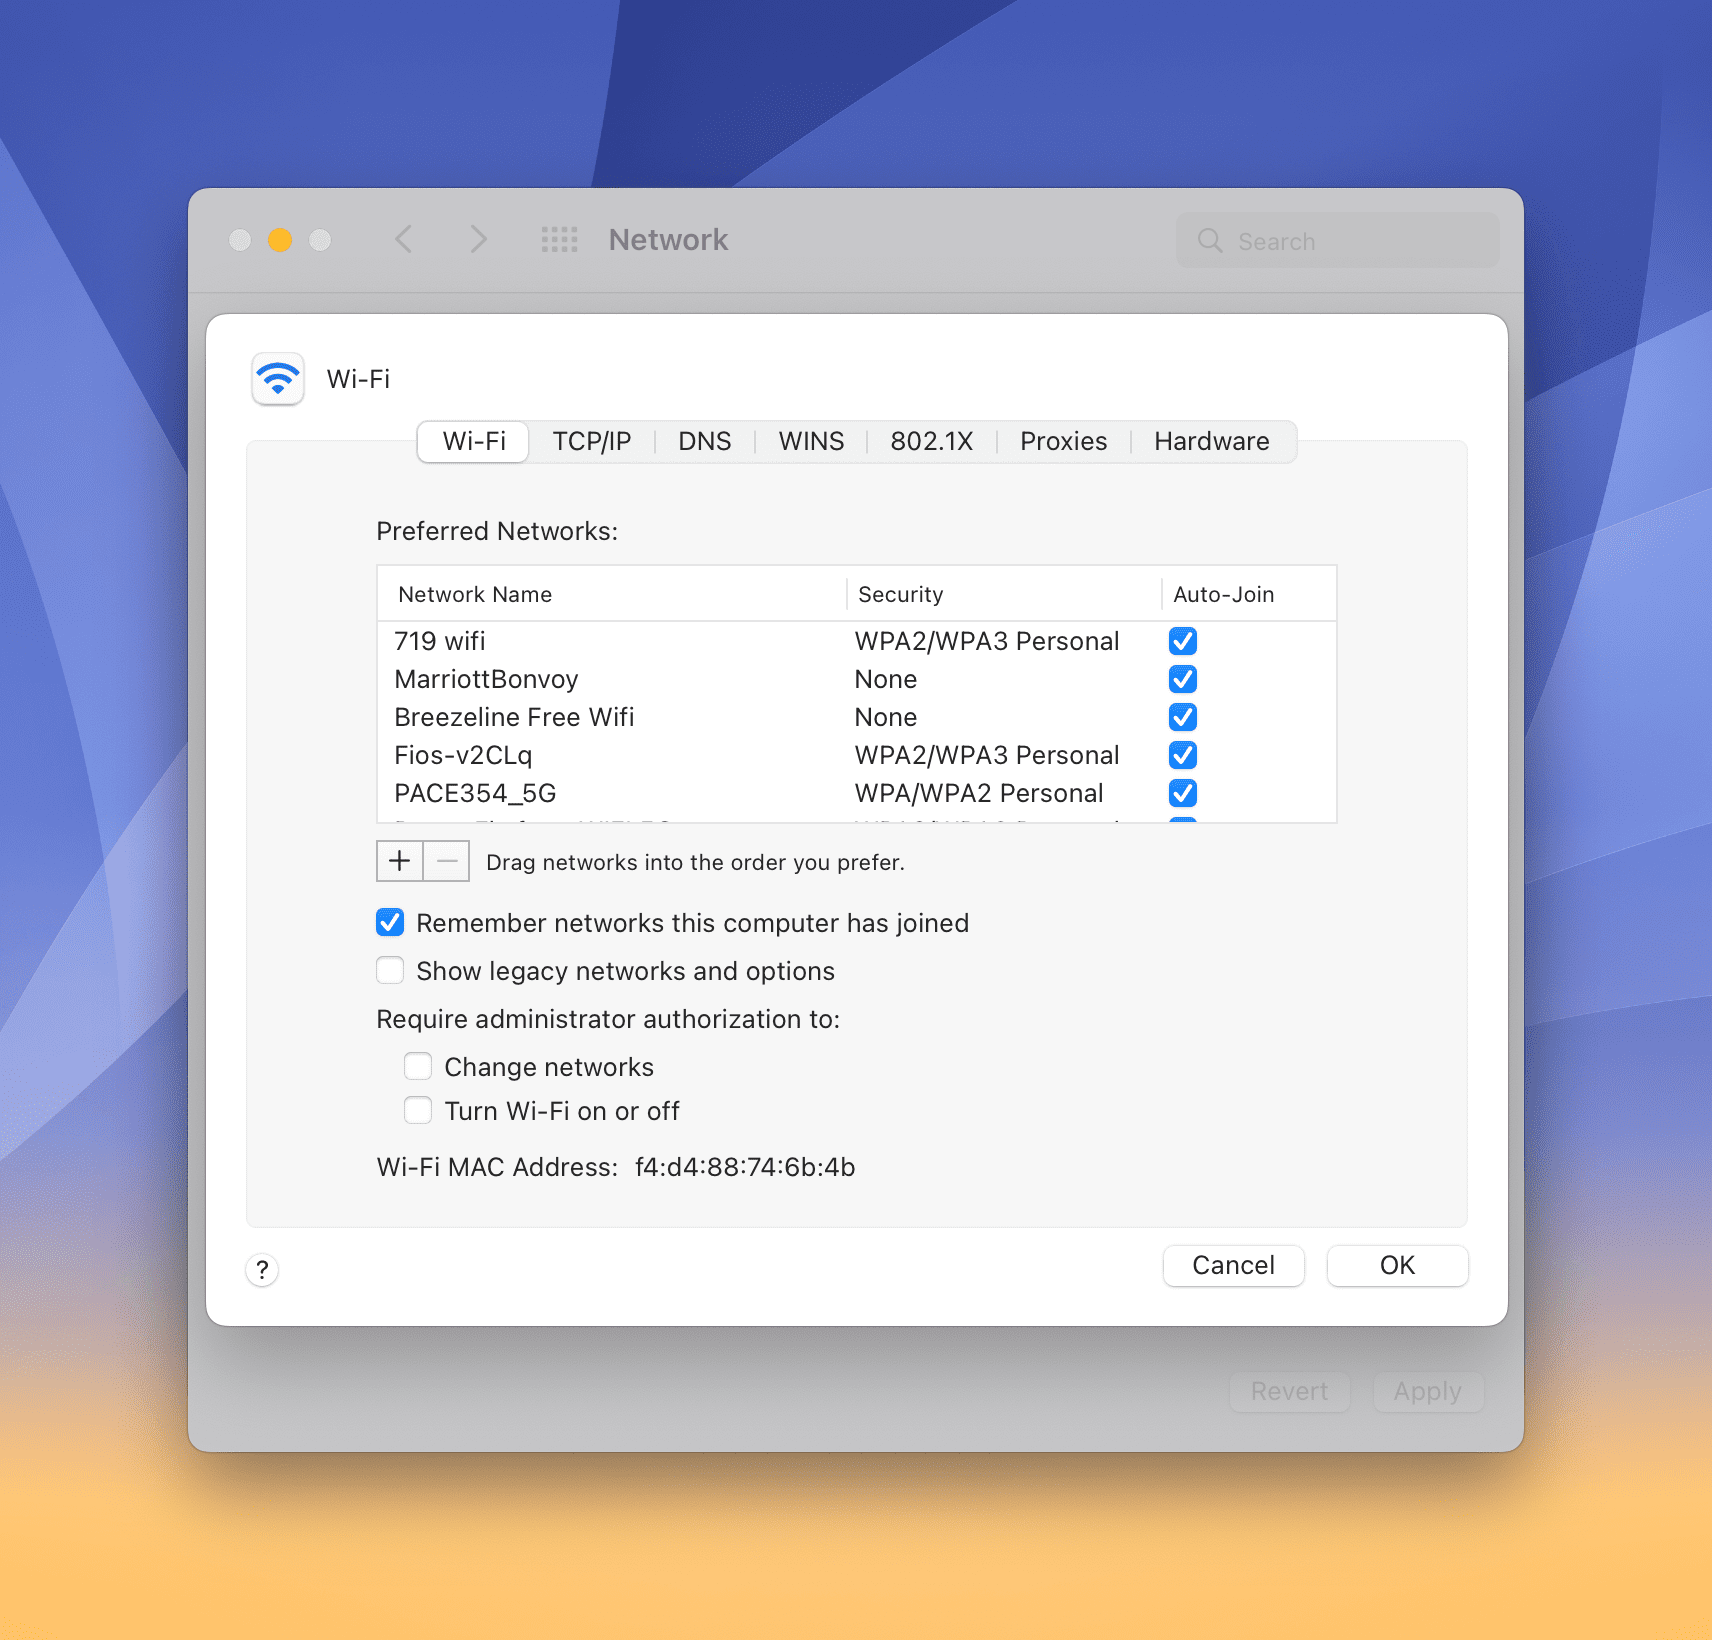
Click Network.
Next to Status, click the Turn Wi-Fi Off button.
In the bottom right corner, click the Advanced button.
Select the Wi-Fi network that you were previously connected to.
Click the – button below the list of preferred networks to delete the connection.
Click the + button.
Enter the Network Name and Password for the Wi-Fi network you are joining.
Click the OK button.
At the top of the Advanced box, click TCP/IP.
Next to Configure IPv4, click the drop-down and make sure that Using DHCP is selected.
Click the Renew DHCP Lease button.
Click OK.
From the main Network window, click Apply.
In the event that you try the steps above and are still prompted with the error message, the next step is to reach out to Apple’s support team. From there, the company’s team should be able to troubleshoot the problems and get your Mac back in working order.
Andrew Myrick is a freelance writer based on the East Coast of the US. He enjoys everything to do with technology, including tablets, smartphones, and everything in between. Perhaps his favorite past-time is having a never-ending supply of different keyboards and gaming handhelds that end up collecting more dust than the consoles that are being emulated.


Write a Comment