If you’re using a Mac for creative work, you’ll have a beautiful screen display to work from. In some cases, however, you might need to change the color profile on your device. Fortunately, doing so is quite simple if you want to do that.
In this article, you’ll learn how to change your Mac color profile. You can also customize your settings, which we’ll also discuss in more detail. These tips will apply to users with macOS Ventura.
If you want to change the color profile on your Mac, you can choose from numerous ones. Here are the steps you should follow to get your desired results:
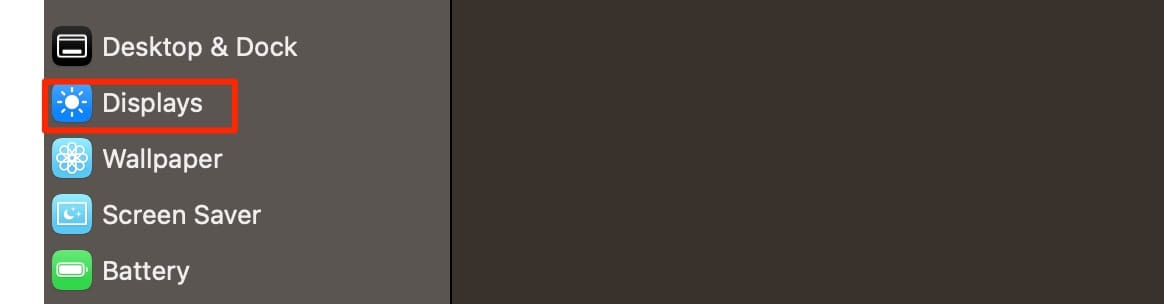
1. Open System Settings. In the left-hand toolbar, you’ll see an option titled Displays; click on this.
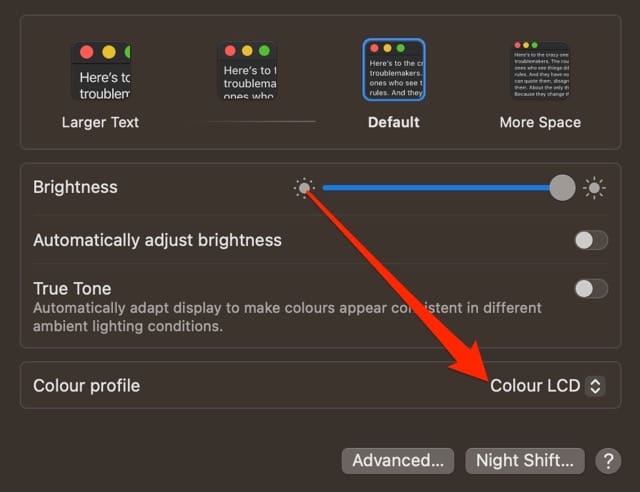
2. Next to Color Profile, you’ll see a dropdown menu. Click on it to make your options visible.
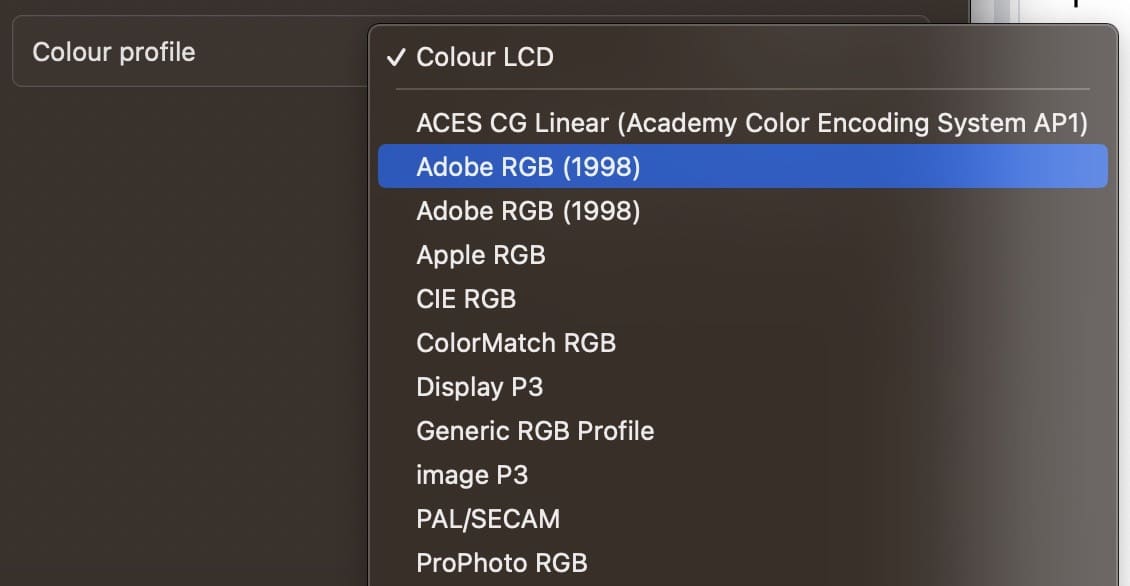
3. Choose the color profile you’d like to change your Mac display to. Your changes will take immediate effect.
How to Customize Color Profiles on Your Mac
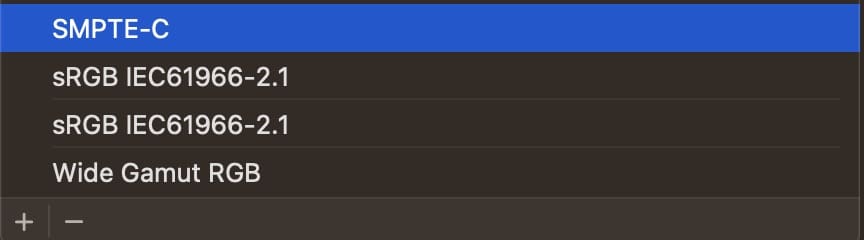
Besides changing your Mac color profiles, you can also customize this option and remove profiles however you want. Here are the steps you need to follow to customize your Mac color profiles:
1. Go to System Settings > Displays.
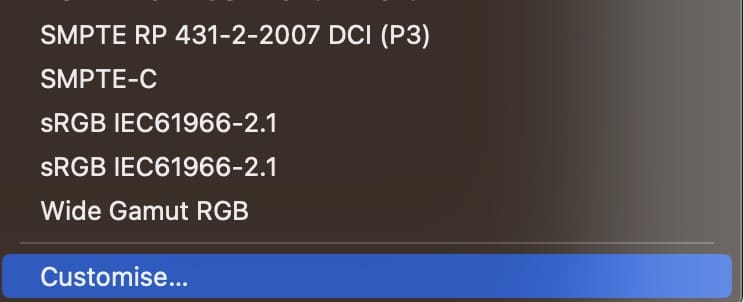
2. Go to Color Profiles and scroll down to the bottom. Here, you’ll see an option called Customize; click on it.
3. If you want to delete a color profile, select it and tap the – button at the bottom of your screen.
4. A pop-up window will ask whether you want to confirm this action. When you see it, hit Delete again.
5. Click on Done after you’ve removed the profiles you’d like to delete.
Adjusting Your Color Profiles in macOS: The Steps You Need to Follow
If you want to change the color profile of your Mac screen, you can do so in just a few minutes. All you need to do is go to your System Settings and complete the remaining steps from there. You can choose between several profile types, making it easier for you to pick one that best fits your needs.
You can also customize your profiles and remove any that you don’t want. If you’d like to add some, you’ve got the option to do that as well – and Apple’s Calibrator Assistant will help you achieve your desired result.
Danny has been a professional writer since graduating from university in 2016, but he’s been writing online for over a decade. He has been intrigued by Apple products ever since getting an iPod Shuffle in 2008 and particularly enjoys writing about iPhones and iPads. Danny prides himself on making complex topics easy to understand. In his spare time, he’s a keen photographer.


Write a Comment