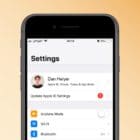
When you first go through the setup process for your Apple ID, you are required to provide a shipping and billing address. This is done just to ensure that any of the cards that you use to purchase apps can be appropriately authorized and charged. However, chances are that you don’t live in the same place forever, and will likely need to change your Apple ID shipping and billing address. Today, we’re going to walk through the steps to take on the iPhone, iPad, and Mac.
Related Reading
- Apple ID Problems?
- What to Do if iPhone Is Already Linked to an Apple ID
- Your Apple ID Has Been Locked for Security Reasons
- Apple ID Cannot Be Used to Create Accounts for Other Apps
- How To Delete Apple ID Permanently
Contents
How to Change Your Apple ID Shipping and Billing Address on iPhone and iPad
When it comes to making the necessary changes on your iPhone and iPad, the steps are virtually identical. The only real difference is that the iPad has a two-column layout for the Settings app, whereas the iPhone only has one.
- Open the Settings app on your iPhone.
- Tap [Your Name] at the top of the page.
- In the top section, tap Payment & Shipping.
- When prompted, authenticate using Face ID or your iPhone’s passcode.
- Under the Shipping Address section, tap the Add Shipping Address button. If there was already an address available, tap the existing shipping address.
- Enter your Name and Shipping Address.
- Once entered, tap the Done button in the top right corner.
You can repeat the steps above whenever you move to a new location or add a card to your Apple ID that has a different billing address.
How to Change Your Apple ID Shipping and Billing Address on Mac
As you might expect, while the steps are largely the same when trying to change your Apple ID shipping and billing address on the Mac, they aren’t exactly the same. That being said, here’s how you can make the appropriate changes to your Mac:
- Open the System Settings app on your Mac.
- In the left sidebar, click [Your Name] at the top.
- Click Payment & Shipping.
- If prompted, authenticate using your Apple ID password.
- Click the Edit button under the Shipping Address section.
- Enter your Name and Shipping Address.
- Once entered, click the Save button in the bottom right corner.
What If You Can’t Change Shipping and Billing Address?
In some instances, users have found that they are not able to change their Apple ID shipping and billing address. Sometimes this can be remedied simply by restarting your iPhone or switching between your cellular network and a Wi-Fi connection. However, some users have found that the secret to the problems is hidden within Apple’s Screen Time settings.
- Open the Settings app on your iPhone or iPad.
- Scroll down and tap Screen Time.
- Tap Content & Privacy Restrictions.
- Scroll down until you reach the Allow Changes section.
- Make sure that Passcode Changes and Account Changes are both set to Allow.
For the majority of users, the Passcode Changes and Account Changes options are already set to Allow. However, if you notice that this isn’t the case, you should be able to tap the toggle next to Content & Privacy Restrictions to the On position. By doing so, it should unlock the ability to make any changes within this section of the Screen Time panel.
Andrew Myrick is a freelance writer based on the East Coast of the US. He enjoys everything to do with technology, including tablets, smartphones, and everything in between. Perhaps his favorite past-time is having a never-ending supply of different keyboards and gaming handhelds that end up collecting more dust than the consoles that are being emulated.


Write a Comment