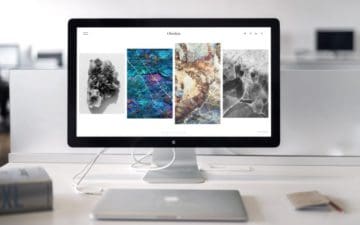
Nobody likes to feel cramped into a tight space. It’s as true for the real world as it is for your MacBook screen. If you struggle to keep all your overlapping apps in view, find out how to connect an external monitor to your MacBook for extra space.
Connecting a second screen to your MacBook is usually as simple as plugging it in. You can enjoy full-screen apps across multiple displays or mirror your screen to the TV for a presentation. In case you can’t get it to work, here’s everything you need to know.
Everything you need to connect a monitor to your MacBook
Before we show you how to connect an external monitor to your MacBook—not that there’s a special trick to it—we need to make sure you’ve got all the equipment you need for the job.
Of course, you already have a MacBook. And hopefully you have an external computer monitor. If you don’t, you can always use a TV instead. The only other piece of equipment you need is a cable to connect both devices together.
All you need is a MacBook, a monitor, and a cable.
The precise cable you need depends on the available ports on your MacBook and monitor. You may need to buy an adapter if they don’t match up.
What display ports do I have on my MacBook?
Over the years, Apple has included a range of different display ports on MacBooks. The ports on your MacBook depend on its model and release year, but you should have at least one of the following options:
Thunderbolt 3 or USB-C
They may look the same, but Thunderbolt 3 and USB-C ports support different devices. If you want to use a Thunderbolt display, you need to connect it to a Thunderbolt port on your Mac. This is normally shown by a lightning bolt icon next to the port, rather than a USB icon.
A USB-C display, on the other hand, works with both Thunderbolt and USB-C ports.
HDMI
The HDMI port is standard on most modern HDTVs and also present on a selection of MacBook Pro models. If you connect your MacBook to a TV using an HDMI cable you can also play audio through the TV.
Original Thunderbolt and Mini DisplayPort
The original and second-generation Thunderbolt ports shared a form-factor with the Mini DisplayPort. These are present on older MacBooks. Again, for Thunderbolt displays, you need to ensure you have a Thunderbolt port. This is shown by a lightning bolt icon rather than a display icon.
Other ports
If the display port on your MacBook doesn’t match the connector on your external monitor, you need to buy an adapter. Apple sells a range of different adapters catering to VGA, DisplayPort, and DVI displays.
Make sure the adapter you buy matches the port on your display and the port on your MacBook.
How do I connect my MacBook to an external monitor?
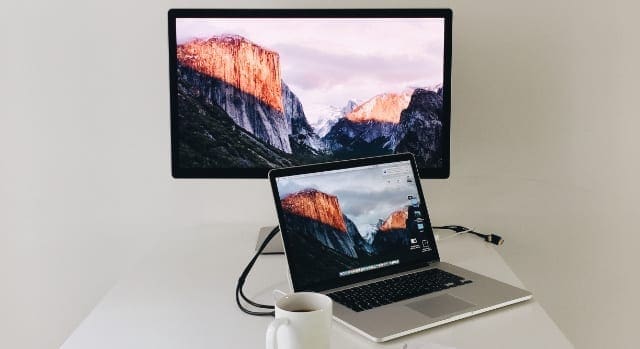
Connecting your MacBook to an external monitor or TV is as simple as plugging in a cable between both devices.
For absolute clarity, follow these steps:
Power on your MacBook.
Use a cable and adapter (if necessary) to connect your MacBook to your external display.
Power on your external display.
After the MacBook screen flickers for an instant, you should recognize your desktop as it appears on the external monitor. Simply move your mouse across both screens as if they were connected to start using it.
The external monitor should show your desktop after plugging it in.
To adjust the settings for your monitor, open the Apple menu and go to System Preferences > Displays. Here are the options you might want to tweak:
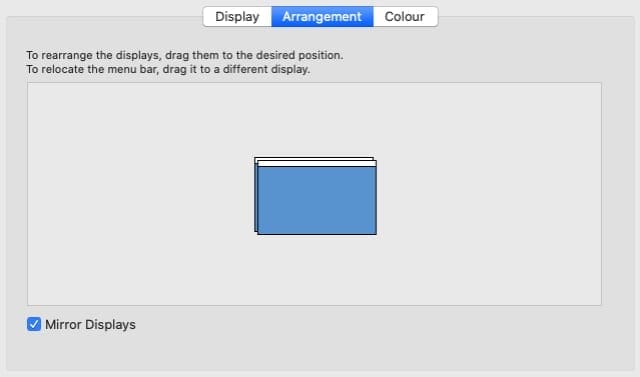
Choose to mirror your desktop
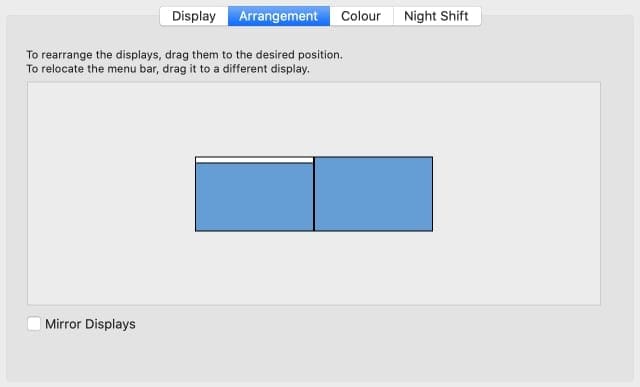
With an external display connected to your Mac, you can choose to mirror your screen or extend your desktop. Go to the Arrangement tab and use the Mirror Displays checkbox to choose what you want to do.
If you mirror the screen, everything from your MacBook display also shows up on the external monitor. It’s as though you’ve got double-vision staring at a single screen.
Mirrored displays show the same thing on each screen.
This is great for presentations or watching films. It’s also how you would use an external monitor connected to your MacBook while the MacBook is closed.
Choose to extend your desktop
Most of the time, however, you’ll want to use a second display to extend your desktop. This lets you use each screen for a different app, giving plenty of screen retail space for all your many tasks.
Uncheck the Mirror Displays checkbox to extend your desktop. Then drag and drop the blue rectangles in the System Preferences window to match the arrangement of displays on your desk.
Arrange the displays to match your desk layout.
For example, drag your MacBook display to the left if it’s on the left side of your desk, with the external monitor to the right. Now you can move the mouse from left to right, jumping fluidly from one display to the other.
You can also choose which screen to use as your primary desktop by moving the menu bar icon to your main screen.
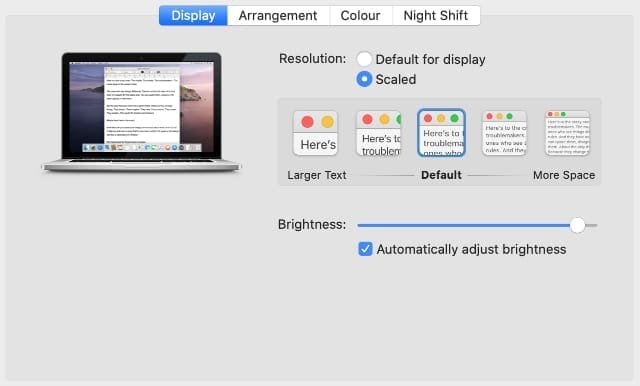
Adjust the display resolution
Whether you mirror your MacBook screen or extend your desktop, you might need to adjust the display resolution to make sure everything looks as good as possible. This also fixes most problems where text appears too large or too small.
Go to the Display tab in the System Preferences and choose the Scaled resolution. Now try out the different options to find which looks best on your display. Use the separate System Preference windows on each display to change the resolutions for that particular screen.
Change the resolution to make images larger or smaller.
Alternatively, select Default for display to keep the default resolution.
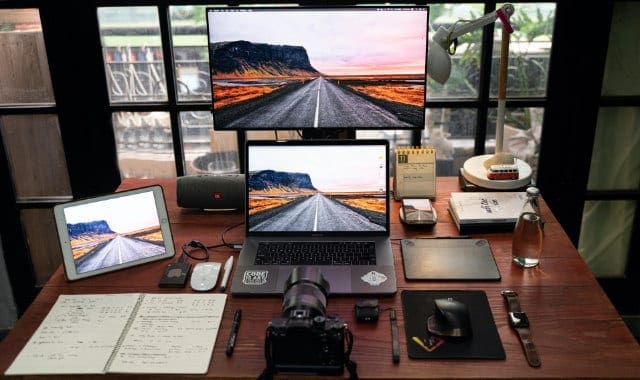
Find out how many external displays your MacBook supports
If your desk is big enough, you can usually connect more than one external monitor to a single MacBook. Although you might need a USB-hub or serial USB-C connections to do so.
To find out how many external monitors you can connect to your MacBook at once, open the Apple menu and go to About This Mac > Support. Then click the Specifications button. On the page that opens on Apple’s website, find the total number of supported displays under Graphics and Video Support.
Find out how many displays your MacBook can support online.
How do you connect a MacBook to a TV as an external display?
Using a TV as an external monitor for your MacBook is exactly the same as using any other monitor. The main difference is that you usually need to use an HDMI cable to connect to your TV and then tune it to the right channel.
If you have an Apple TV or an AirPlay 2-compatible smart TV, you can also connect it as an external monitor to your MacBook wirelessly. Be warned, you might experience a delay on the TV as the signal needs to travel through your Wi-Fi router to the TV.
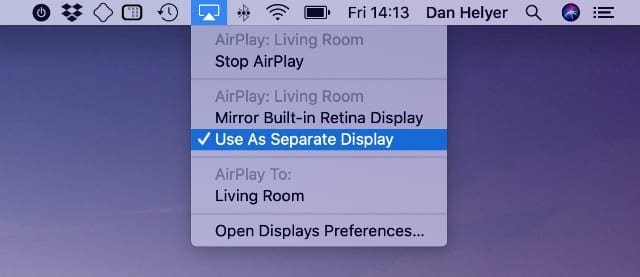
How do I connect a MacBook to a TV wirelessly with AirPlay?
Make sure your MacBook and your Apple TV—or your AirPlay 2-compatible TV—are both connected to the same Wi-Fi network. Then, from the menu bar on your Mac, select the AirPlay icon and choose to AirPlay to your TV.
Select your TV or Apple TV from the AirPlay menu on your MacBook.
You should see your computer Desktop appear on the TV. If AirPlay doesn’t work, make sure you’re tuned to the correct channel.
Open the AirPlay menu again to choose whether you want to mirror your display or extend your desktop. How you choose to use your TV as an external MacBook monitor is up to you; you might want to play music, watch films, or keep important documents in view.
Can I use my iPad as a second monitor for my MacBook?
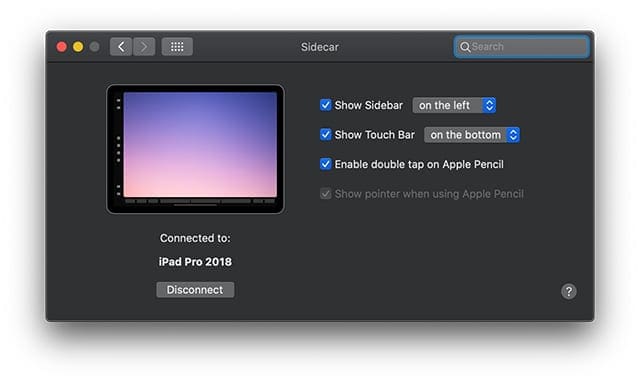
With the release of iPadOS and macOS Catalina, Apple made it possible to use an iPad as a second monitor for your MacBook. You can do this using the Sidecar feature, which also lets you mark up documents, access Touch Bar buttons, and use an on-screen keyboard.
View your Sidecar settings in the System Preferences.
Unfortunately, Sidecar doesn’t work with older MacBook or iPad models. There are some third-party alternatives, such as iDisplay or Air Display, but none of them are particularly well-reviewed or regularly updated.
Dan writes tutorials and troubleshooting guides to help people make the most of their technology. Before becoming a writer, he earned a BSc in Sound Technology, supervised repairs at an Apple Store, and even taught English in China.
I have an older Cinema Display, approx 1999, that has the DVI connection. I am working with a Macbook Air approx 2020 with the USB C port. I have purchased a converter for the DVI connection to the USB C port and my Cinema Display flickered and now has gone black. The computer recognizes the display, and when extending my screen, the mouse seems to work, but the screen remains black. I have attempted to reset all the resolutions, reset, etc. No Luck. Any suggestions?
Question: Need some ideals on how to get my external tv monitor (HDMI) to work with my MACBOOK PRO
(2011) OS X 10.13.6 . I have a new Thunderbolt to HDMI adapter which does not work. Unable to detect
display of the monitor when I hod down the “option” button ( system preference> display). Done several
power up and power down sequences , they were no help. My cable configuration was working great on my
older MacBook (OS X 10.9.5) ??? Is there firmware that needs to be loaded with the THUNDERBOLT to HDMI Adapter? is there something else that I’m missing?