• Skip to primary navigation
  • Skip to main content
  • Skip to primary sidebar
  • Skip to footer

AppleToolBox

Tools and Fixes for Mac, iPad, iPhone & iWatch

Search posts

  • About
  • Contact

CONNECT WITH US

CATEGORIES

  • iPhone
  • iPad
  • iPod
  • Apple Watch
  • Mac/MacBook
  • AirPods
  • Apple TV
  • News
  • Apple Services
  • HomePod
  • Reviews

SITE

  • Home
  • About Us
  • Contact
  • Advertise

Search posts

You are here: Home / iPhone / How to Manually Change a Network Carrier in iOS

How to Manually Change a Network Carrier in iOS

By Danny Maiorca 0 comments Last updated January 5, 2023

If you have an iPhone, you’ll likely have one network provider that you use more than the others. But in some cases, you might have to deal with not getting service – especially if you’re in another country.

Related Reading:

  • iOS 16: How to Manage Wi-Fi Networks
  • What to Do if Your iPhone Is Not Connecting to a Cellular Network
  • iOS: How to Enable and Disable Wi-Fi Calling
  • iPhone Will Not Connect to Wi-Fi: How to Fix
  • Does Your iPhone Connect to Wi-Fi But Have No Internet? Here’s How to Fix It

Regardless of whether you’re still in your country of residence or somewhere else, changing the network carrier on your iPhone is easy. In this article, you’ll learn how to do so manually.

How to Manually Change Your iPhone’s Network Carrier

screenshot showing the cellular page in iphone settings
screenshot showing how to automatically select a network in ios and turn the feature off
screenshot showing how to manually choose network providers on iphone

Regardless of whether you use iOS 16 or you’ve still got iOS 15 downloaded, the step to change your iPhone’s network carrier is identical. Below are the steps you need to follow.

  1. Open the Settings app and go to Cellular.
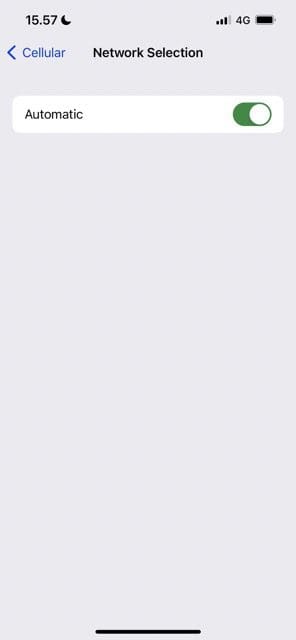
  2. Click on the Network Selection tab.
  3. If your device has the Automatic feature toggled on, switch this off.
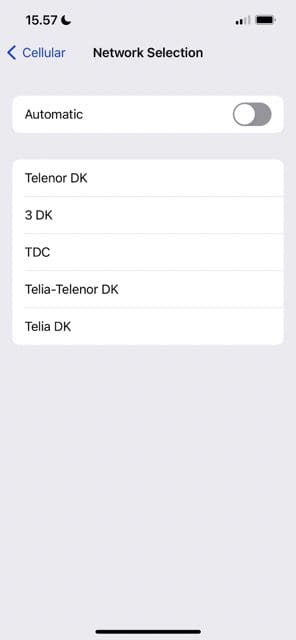
  4. Once you’ve turned the toggle off, a list of network providers should appear; you might need to wait for these. When they show up, choose the carrier you’d like to use.

After choosing your network carrier, you should be able to start using your iPhone on that network before too long.

Changing Your iPhone’s Network Carrier Doesn’t Require Too Much Effort

As you can see from the steps listed above, changing your iOS network carrier is a straightforward process. You might be limited in terms of internet connection for different providers, but you can switch to another from the list if that’s the case.

If you’ve used this feature when traveling abroad, note that you might need to switch back to your preferred carrier when arriving home.

Related Posts:

  • The home screen on an iPhone
    iPhone Not Connecting to Cellular Network: How to Fix
  • Photo of an iPhone being taken out of its box
    How To Use Dual SIM and eSIM on Your iPhone
  • The home screen on an iPhone
    iOS iPhone Visual Voicemail Not Working After iOS 17…
  • iphone and airpods on a table
    iPhone Dropping Calls After Updating to iOS 17? Here…
  • pexels-designecologist-1779487
    The Best iPhone And Mac Shortcuts For Beginners
  • 2023 Mac Studio lifestyle – 1
    macOS Could Not Be Installed, How-To Fix
  • pexels-cottonbro-5082579
    Getting Started With iOS 15: Everything Good And Bad
  • Photo of someone using Apple Music on their smartphone
    How to Fix Apple Music Not Working on iPhone / iPad
  • 2022 Mac Mini with Studio Display and Accessories
    Mac Tips For New Users In 2023
Danny Maiorca

Danny has been a professional writer since graduating from university in 2016, but he’s been writing online for over a decade. He has been intrigued by Apple products ever since getting an iPod Shuffle in 2008 and particularly enjoys writing about iPhones and iPads. Danny prides himself on making complex topics easy to understand. In his spare time, he’s a keen photographer.

Reader Interactions

Write a Comment Cancel reply

Primary Sidebar

Recent Posts

  • How to Share Screen on Teams on MacBook
  • How to Use Microsoft Teams on Mac for Collaboration
  • How to Fix Bad AirPods Sound Quality on PC
  • Use This Trick to Sync Apple Notes and Microsoft Word
  • How to Run Android Apps on a Mac
  • What Is the Best iOS Emulator for Windows PCs?

Connect with us

Footer

ABOUT

  • About Us
  • Contact us
  • Advertise
  • Privacy
  • Terms of Use

GUIDES

  • iOS & iPadOS
  • Apple ID
  • iCloud
  • App Store
  • iTunes
  • FaceTime
  • iMessage
  • Siri
  • Books and iBooks
  • Game Center
  • AirPlay

CONNECT

  • Facebook
  • Twitter
  • FeedBurner
  • YouTube

© Copyright 2010-2024 Guiding Tech Media · All Rights Reserved

This site and its content are in no way affiliated or endorsed by Apple, Inc. · Reproduction without explicit permission is prohibited