Managing time efficiently is crucial in our fast-paced world, and sometimes, a single timer just isn’t enough. Whether you’re juggling cooking tasks in the kitchen, working through various workout intervals, or managing a complex schedule, the ability to set multiple timers can be a game-changer.
Fortunately, iPhones and iPads, with their versatile iOS, offer ways to handle this need seamlessly. This article will guide you through the process of setting multiple timers on your iPhone and iPad, ensuring you stay on top of everything without missing a beat.
How to Set Multiple Timers on iPhone and iPad
In what you might consider a rather basic feature of smartphones and modern devices, Apple didn’t actually introduce the ability to set multiple timers on iPhone and iPad until iOS 17 and iPadOS 17. This has been one of the most-requested features, but until now, we were left relying on third-party apps from the App Store.
Thankfully, that’s no longer the case, and as long as you are updated to at least iOS 17 or iPadOS 17, here’s how to set multiple timers on iPhone and iPad:
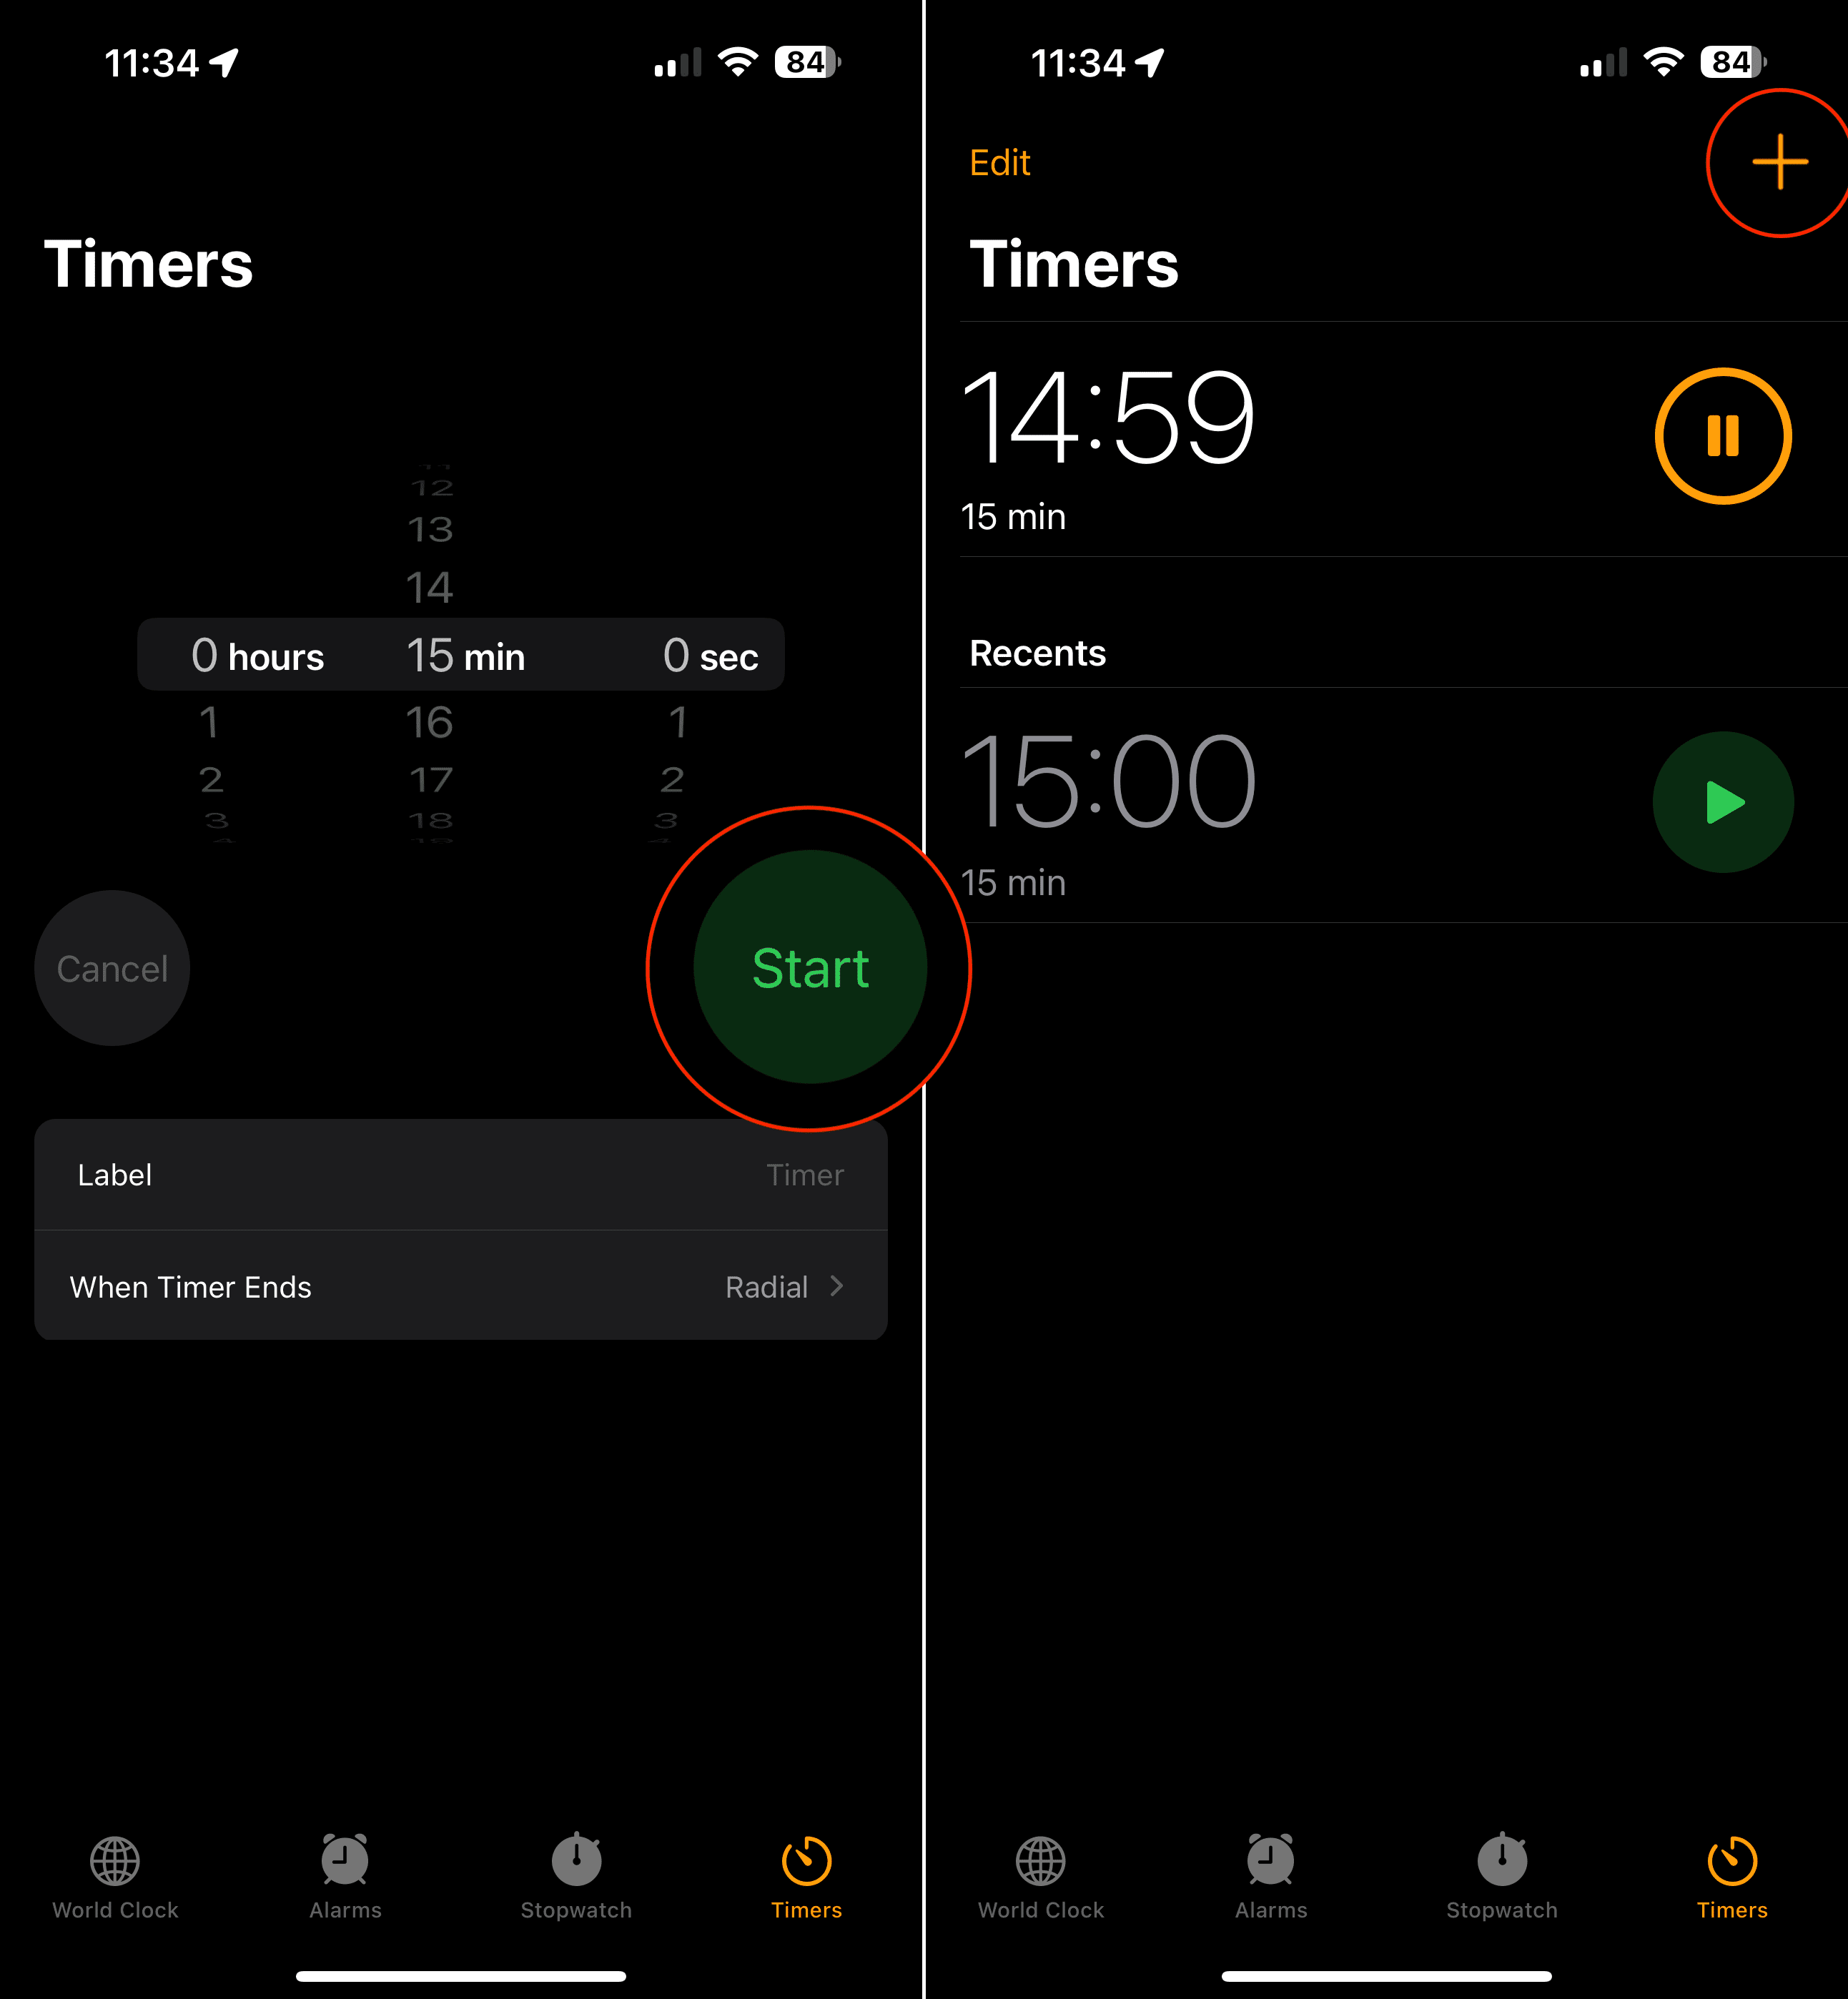
Open the Clock app on your iPhone.
Tap the Timers button in the bottom right corner of the toolbar.
Adjust the Timer, setting it for how long you want the first timer to run.
If you want, add a Label and select a sound that will play when the timer expires.
Tap the Start button.
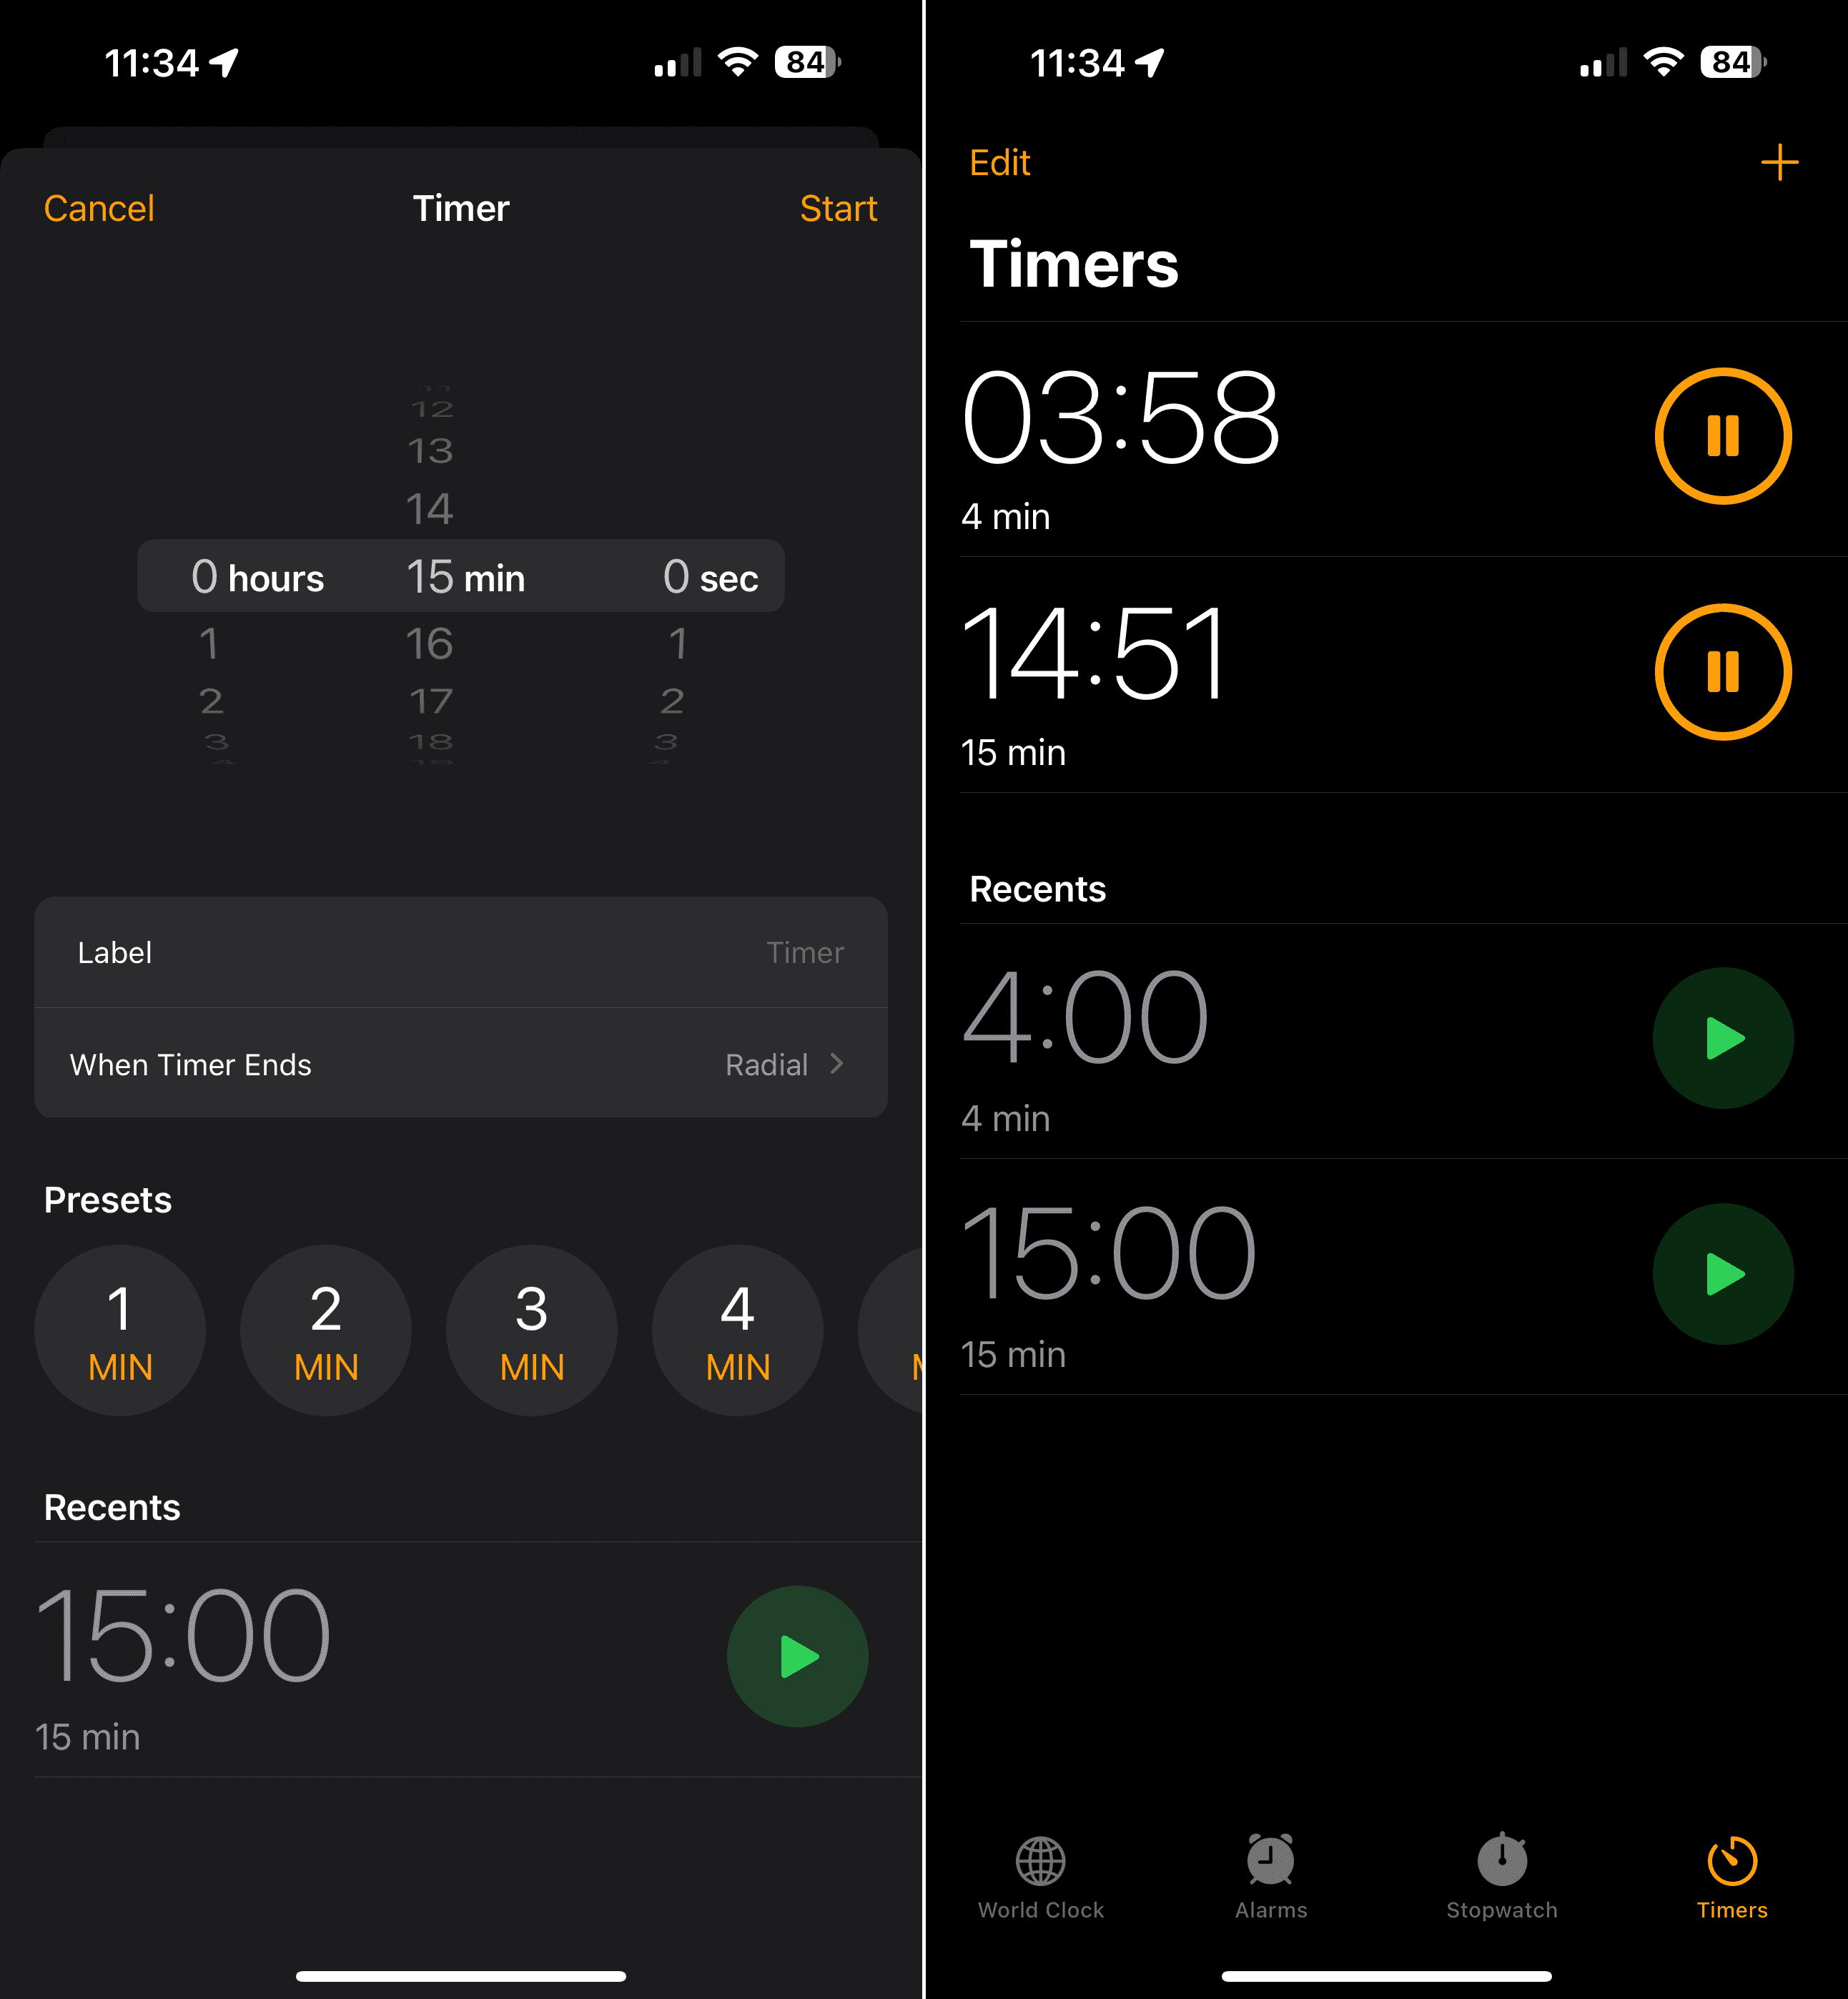
After the first timer has started, tap the + button in the top right corner.
Adjust the second timer, setting it for how long you want the first timer to run.
Alternatively, you can select one of the following presets:
1 min
2 min
3 min
4 min
5 min
10 min
15 min
20 min
30 min
45 min
1 hour
2 hours
Again, you can change the label and select a different sound that will play when the timer goes off.
Once complete, tap the Start button.
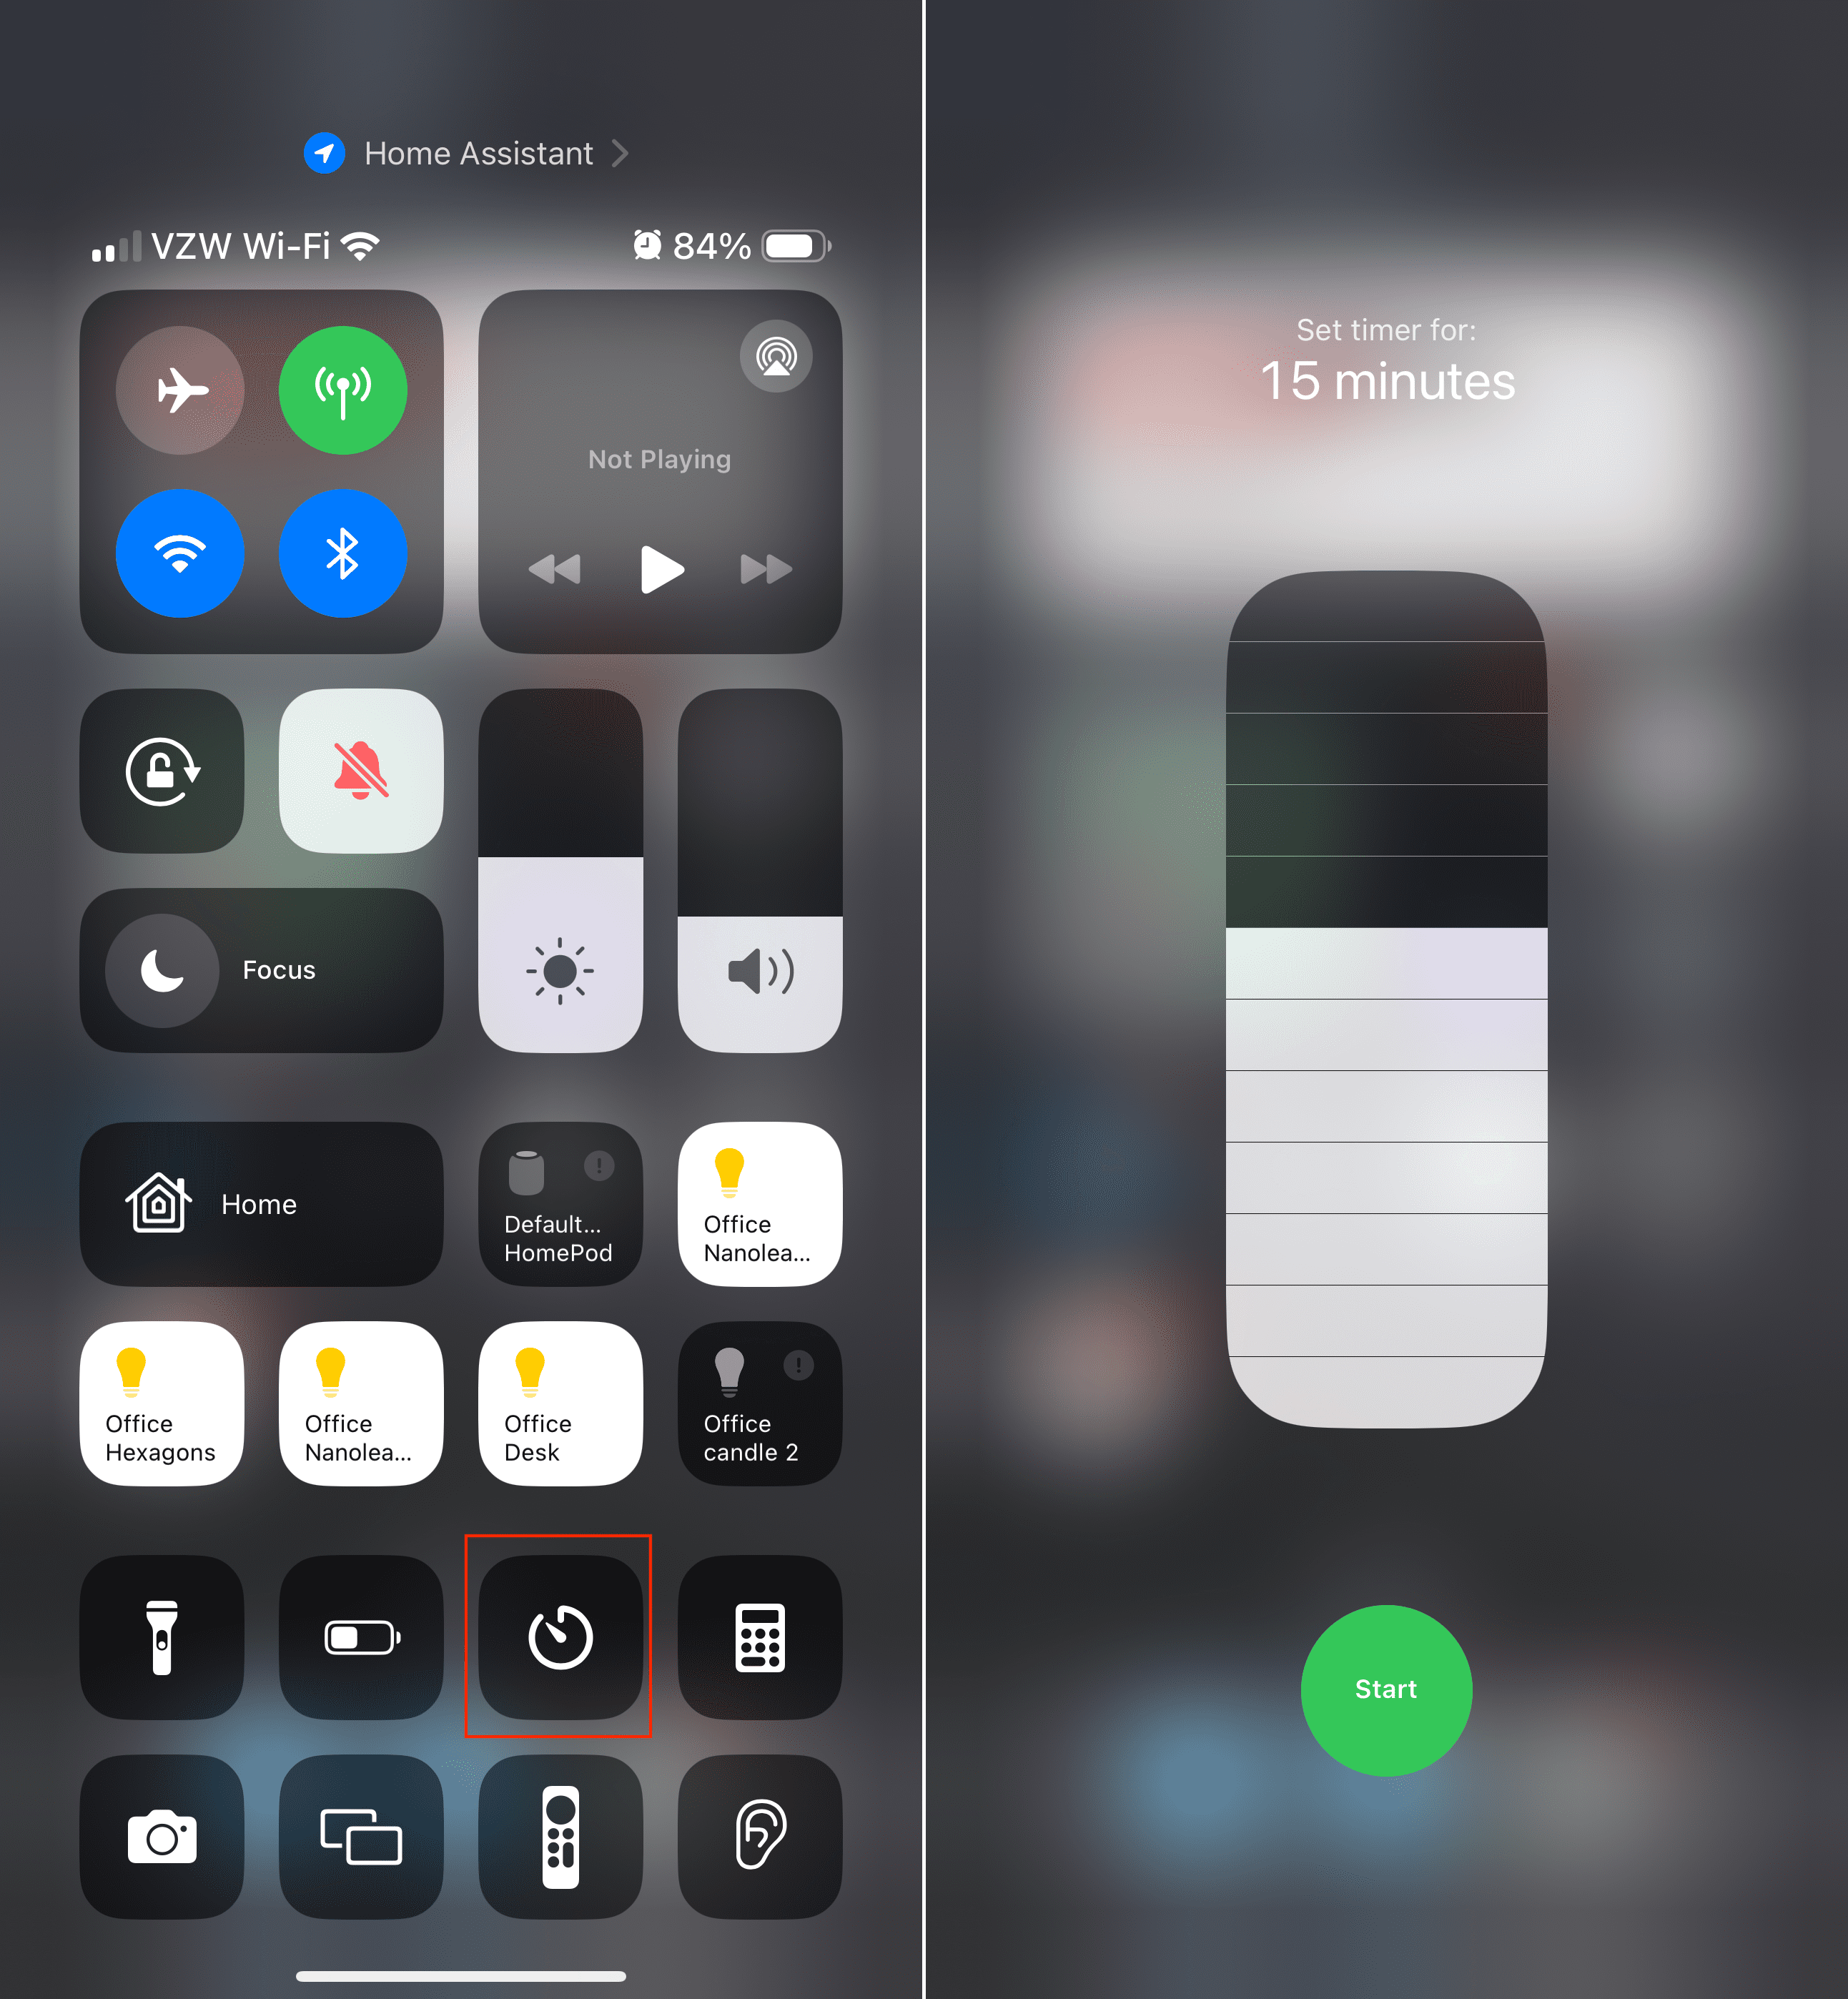
There’s actually another way for you to set multiple timers on iPhone and iPad. This method comes courtesy of Control Center, as there’s a quick Timer shortcut button that is easily accessible. Better yet, you can still set multiple timers from here without manually opening the Clock app.
Unlock your iPhone.
Swipe down from the top right corner to reveal Control Center.
Long-press the Timer button that appears.
Drag the slider up and down until you reach the desired length of the timer.
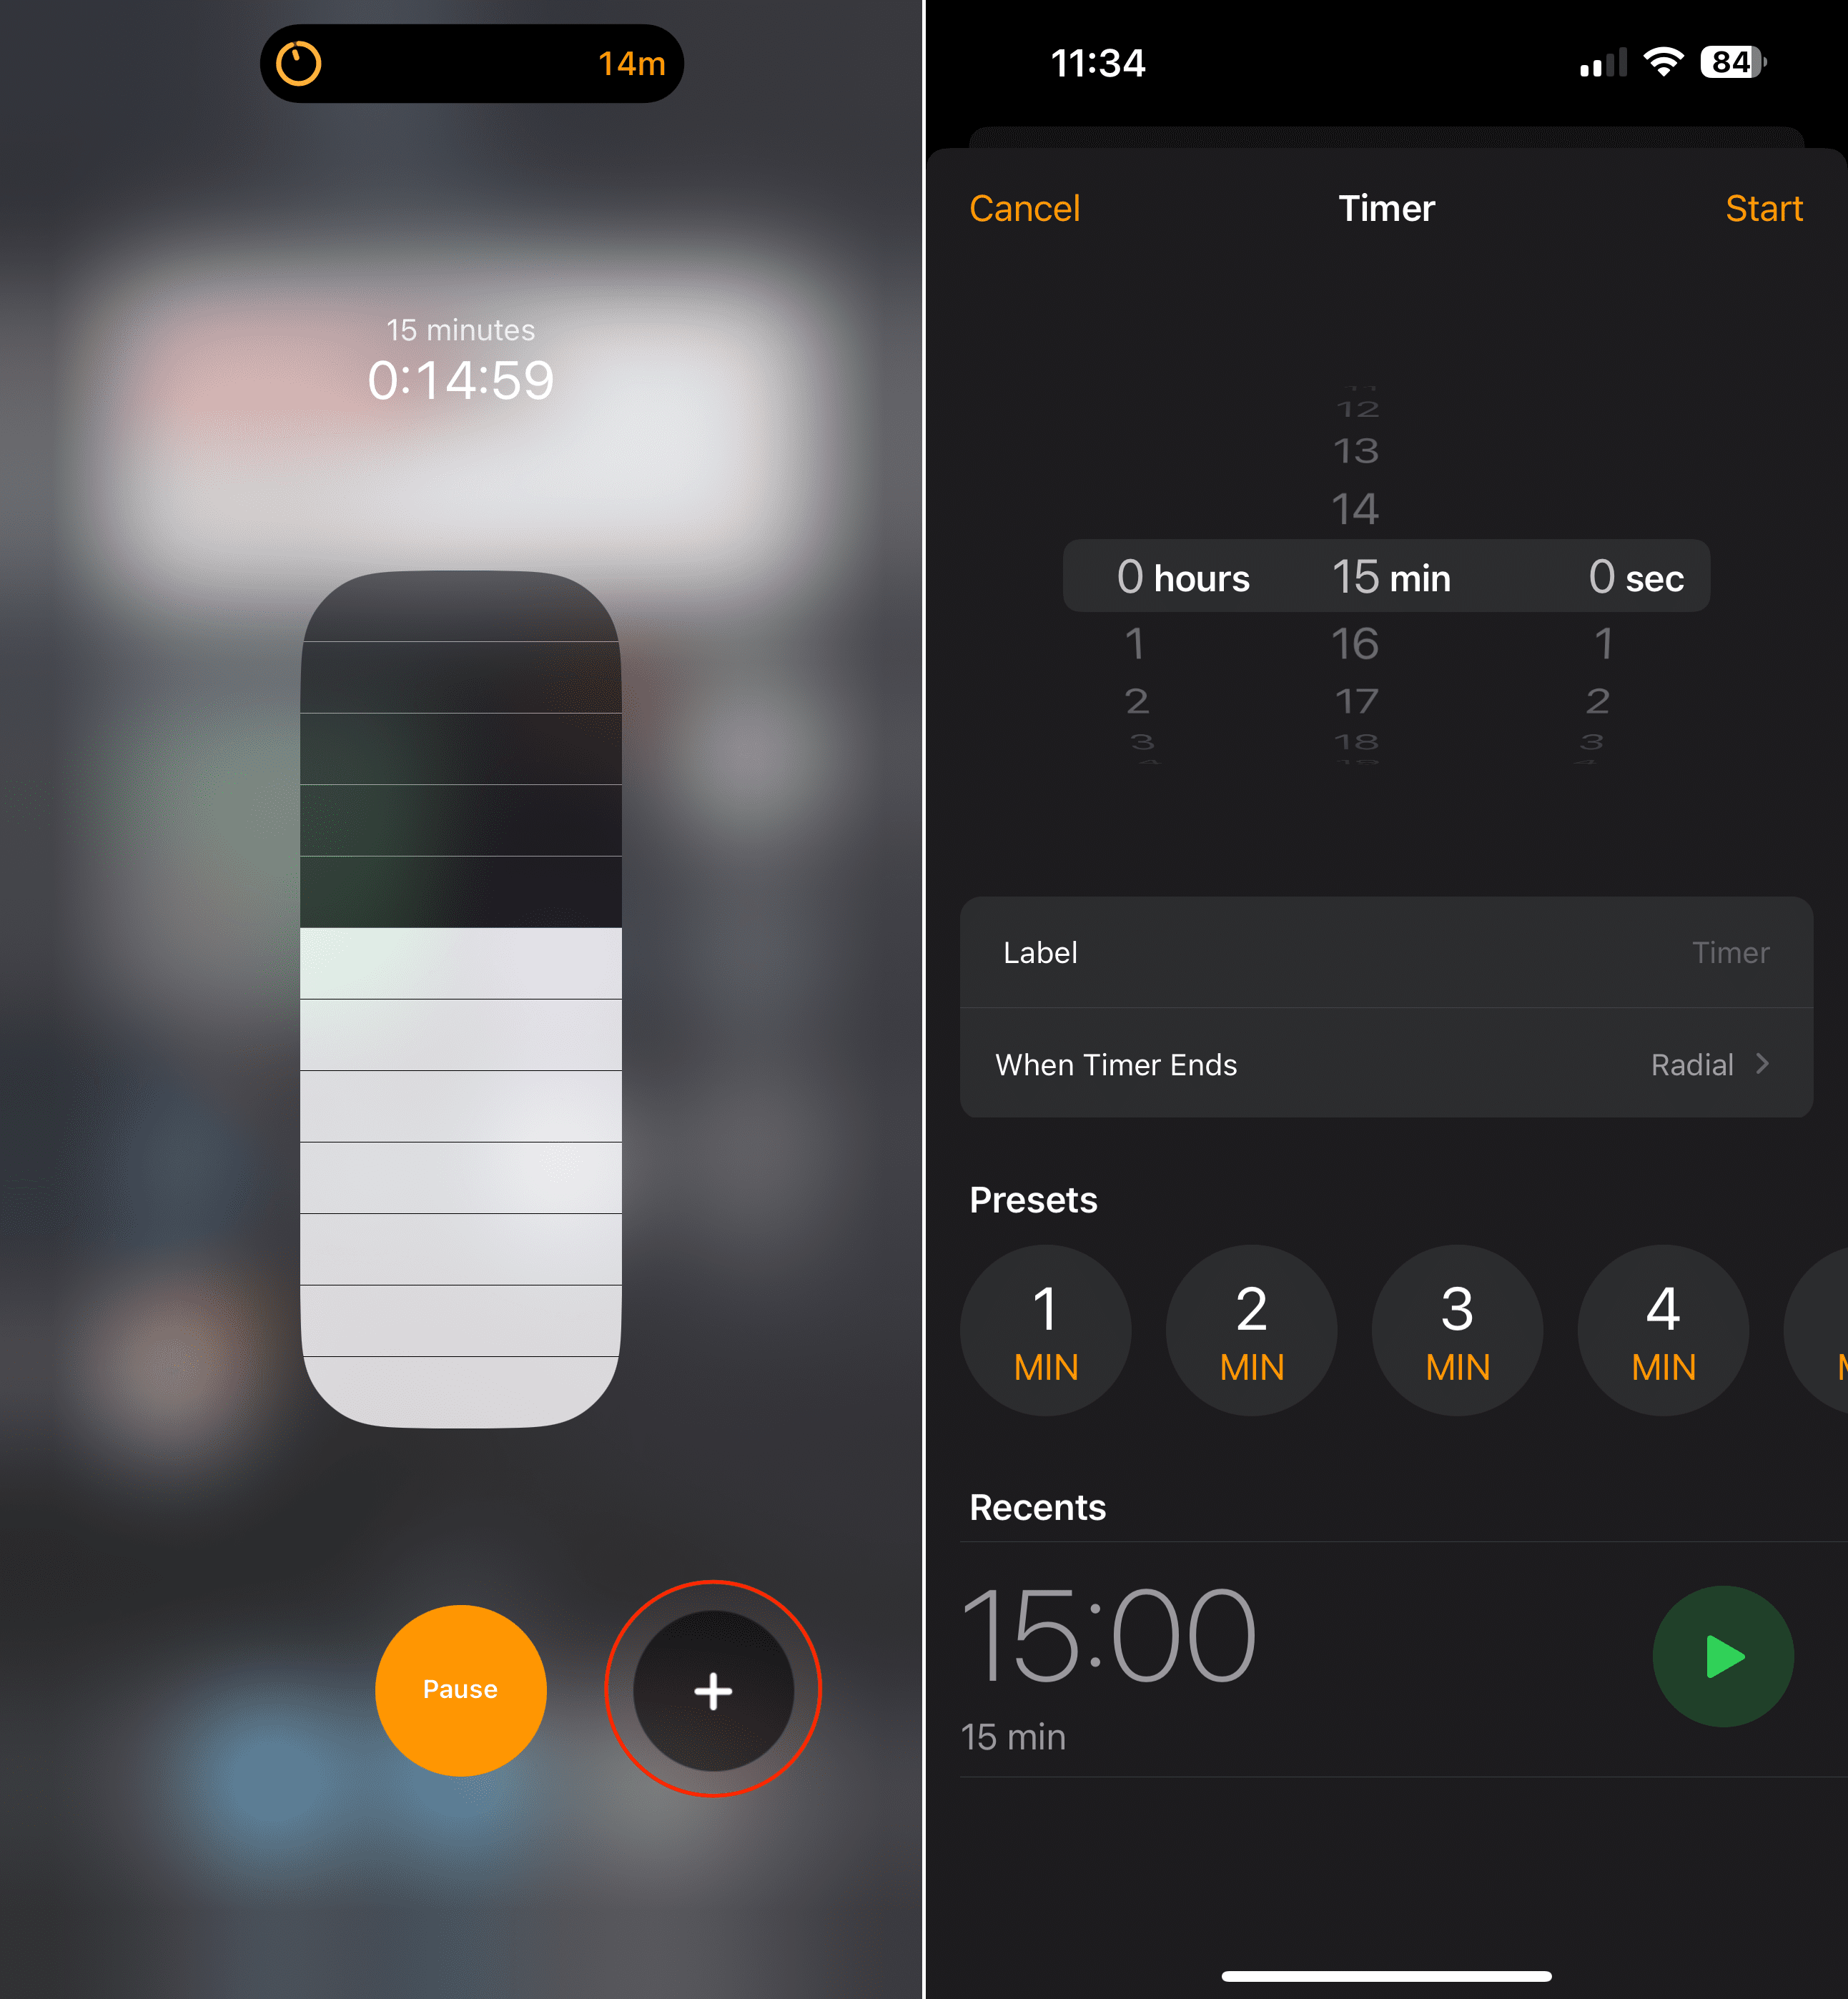
Tap the Start button.
After the first timer has started, tap the + button in the bottom right corner.
You’ll be taken into the Clock app.
From here, customize and set the second timer that you want to have.
Once complete, tap the Start button.
Repeat these steps if you need to set multiple timers.
Admittedly, it’s a bit annoying that if you want to set an additional timer, you’re taken into the Clock app to do so. On the bright side, this is done automatically, so at least there’s a shortcut from the Control Center to set up any additional timers that you might need.
Conclusion
Setting multiple timers on your iPhone or iPad is a straightforward process that can significantly enhance your ability to manage various tasks simultaneously. Whether you opt for the built-in Clock app, Siri commands, or third-party applications, each method offers its unique advantages to fit different needs and preferences.
By leveraging these tools, you can bring a new level of organization and efficiency to your daily routines, from cooking and exercising to time management and productivity. Embrace the power of your Apple device to keep track of time effectively, ensuring you’re always ahead of the schedule and never behind the clock.
Andrew Myrick is a freelance writer based on the East Coast of the US. He enjoys everything to do with technology, including tablets, smartphones, and everything in between. Perhaps his favorite past-time is having a never-ending supply of different keyboards and gaming handhelds that end up collecting more dust than the consoles that are being emulated.


Write a Comment