Despite being the first to provide a digital assistant on a smartphone, Apple has been a bit behind when it comes to releasing a Siri-powered smart speaker. A few years ago, the original HomePod was introduced, and that remained the company’s only smart speaker offering until the HomePod Mini was released. Now, the HomePod has been discontinued, leaving just the Mini as the only smart speaker powered by Siri. Nevertheless, Apple continues to push forward with bringing new updates to the smart speakers, including the addition of Intercom.
How To Set Up Intercom On Your HomePod or HomePod Mini
One of the hallmark features that arrived with the HomePod Mini is Intercom. This is a new way to communicate with others in your family, and although it was introduced alongside the HomePod, it’s available for just about all of your Apple devices.
Intercom offers a quick and easy way for you to send voice messages to family members hanging around in different rooms of the house. Create an Intercom message, designate what device or zone to send the message to, and fire it off. Then, the person, or people, can respond to the Intercom message from wherever they receive it.
Here’s how you can set up Intercom on your HomePod or HomePod Mini:
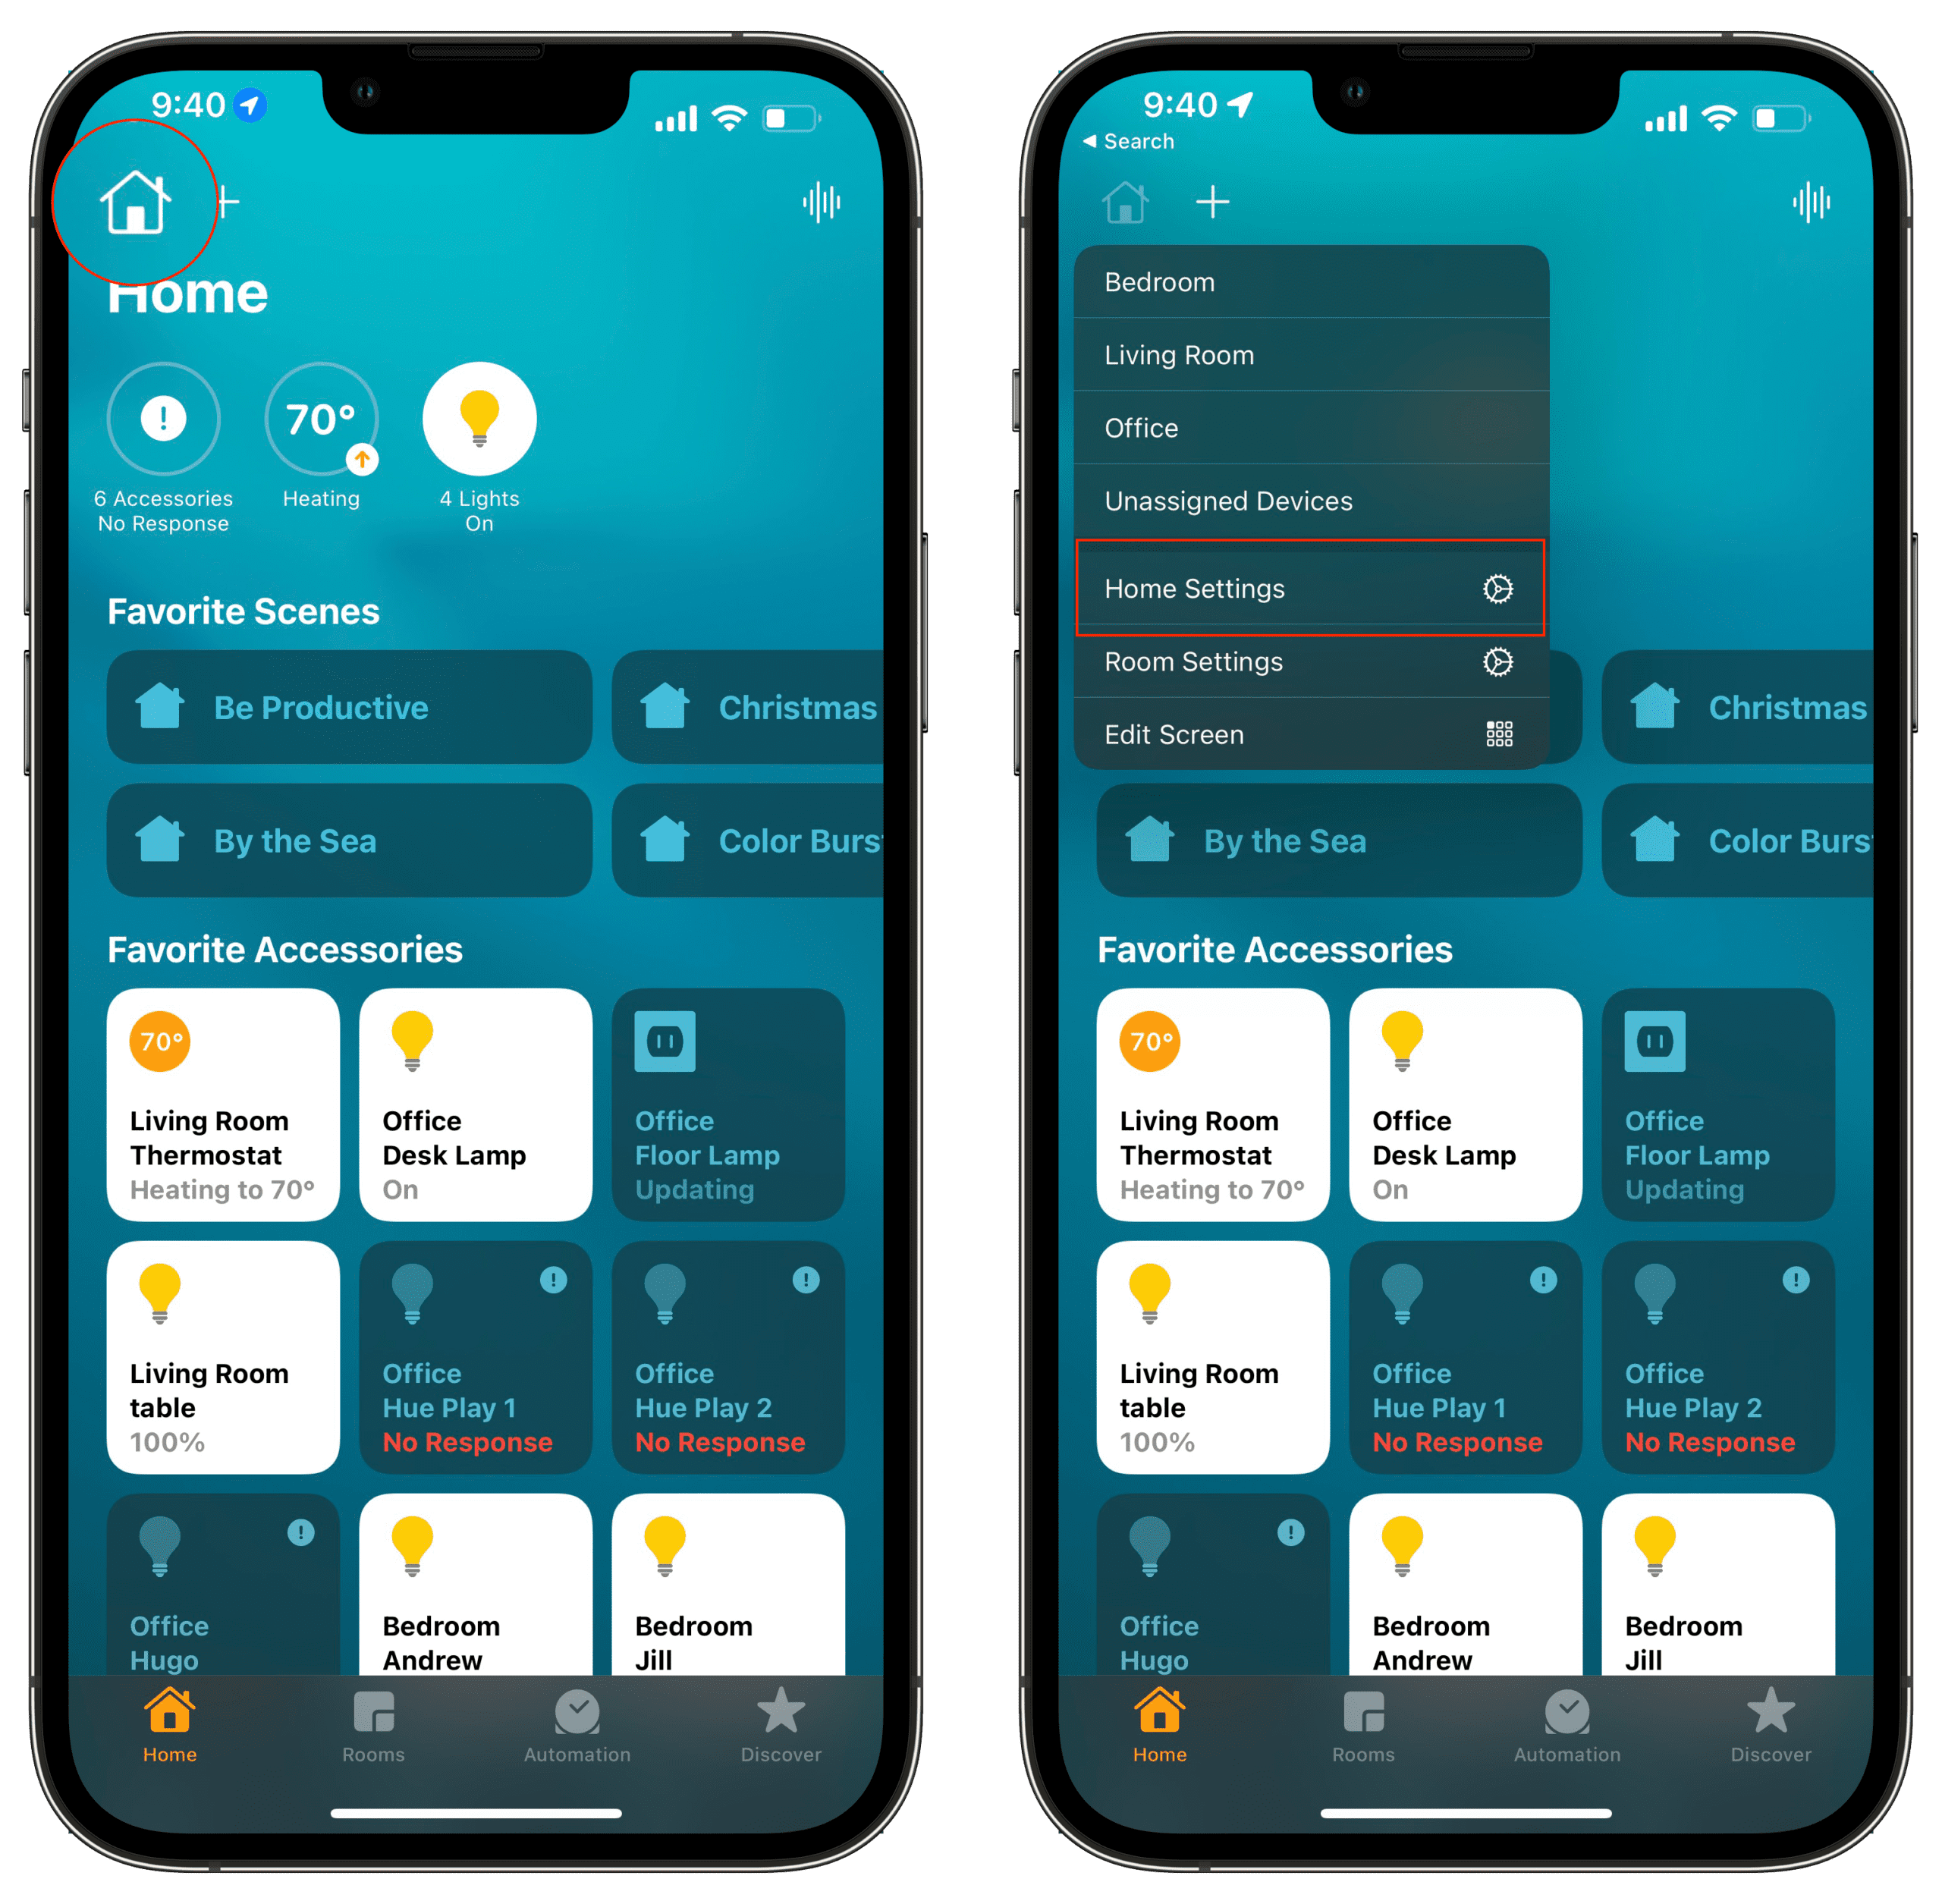
Open the Home app on your iPhone or iPad.
Tap the Home icon in the top left corner.
From the drop-down menu, tap Home Settings.
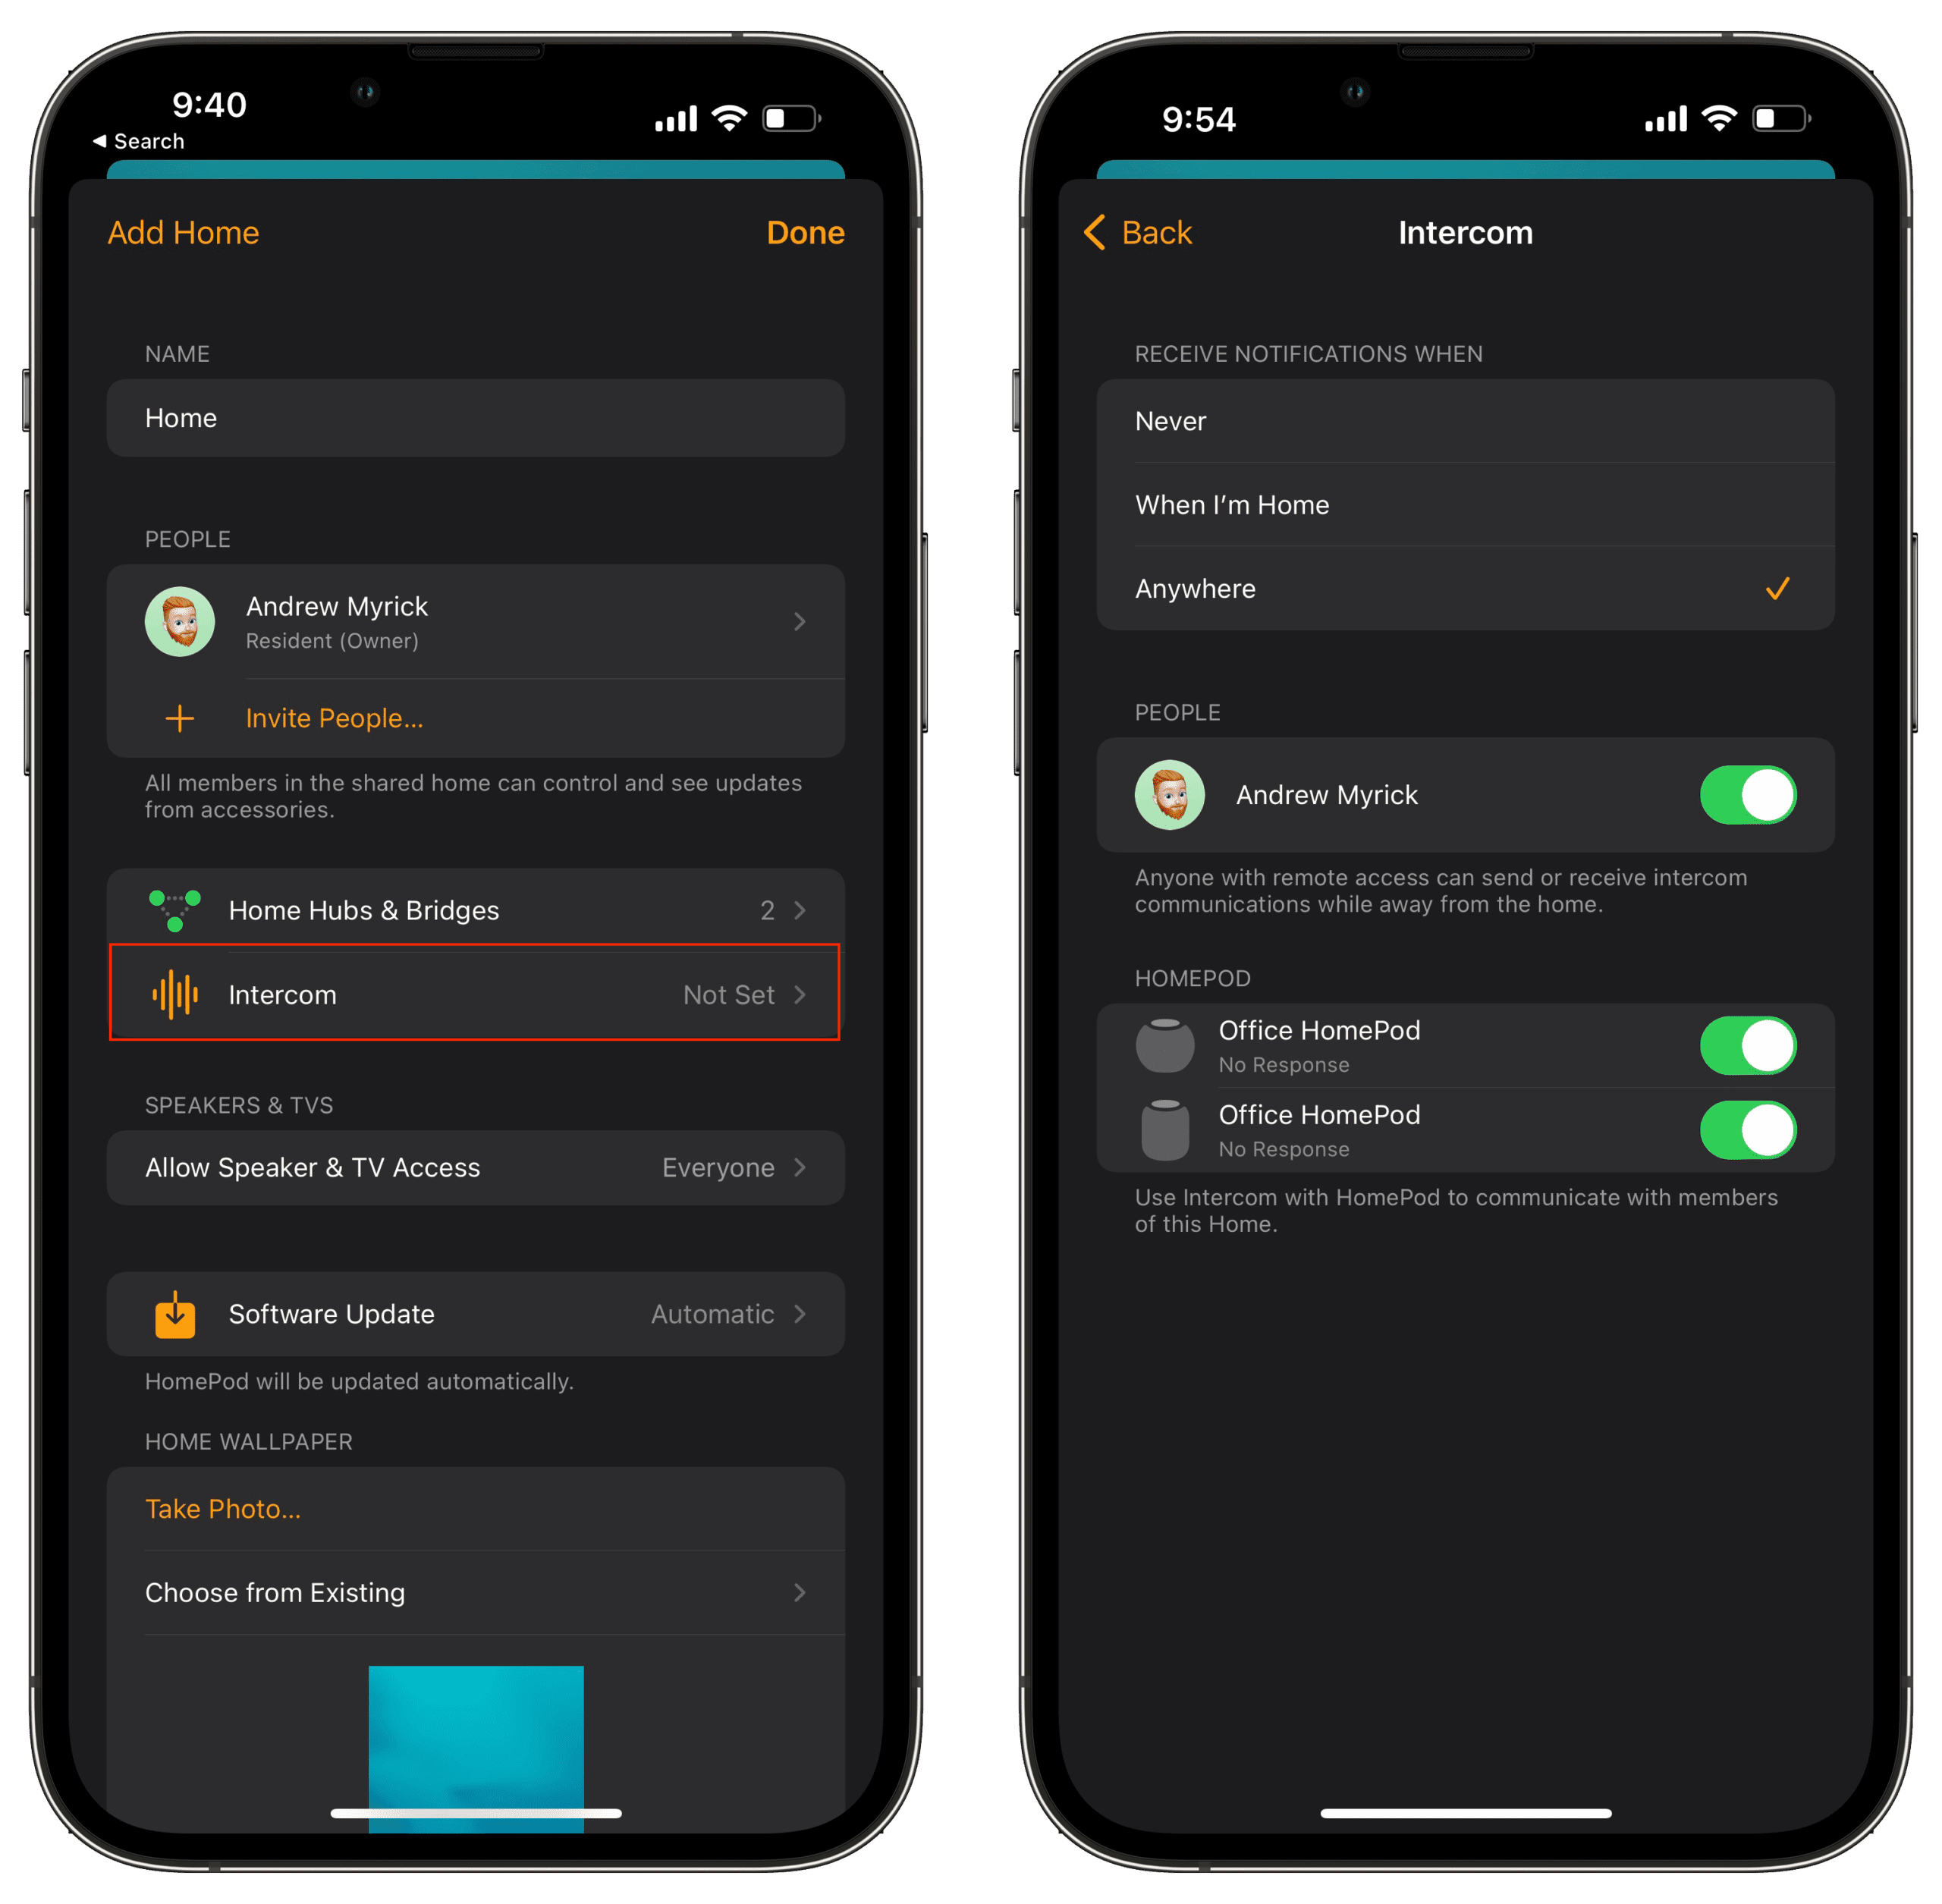
Tap Intercom in the settings panel.
Choose one of the following options for when you want to receive notifications:
Never
When I’m Home
Anywhere
Tap the toggle next to the HomePod or HomePod Mini that you want to enable Intercom for.
In the top left corner, tap Back.
Tap Done in the top right corner.
How To Use Your HomePod as an Intercom
After you have turned on the Intercom functionality and finished setting everything up, you can start using the feature. The method that we’re using below is for those who want to manually send an Intercom message, but you can also just ask Siri from your device.
Open the Home app on your iPhone or iPad.
Tap the Intercom button in the top right corner.
Say the message that you want to send through the Intercom feature on your HomePod.
Tap the Done button when you’re finished recording.
When recording the message, make sure you indicate which HomePod you are using Intercom with. So if you want to use the Intercom feature with a HomePod placed in your Living room say “Ask living room ‘Has anyone seen my keys?'” This ensures that the Intercom message is sent to the correct HomePod, and not just sent to all of the HomePods or HomePod Mini’s in your home.
After an Intercom message has been received, you have the ability to respond right from the same HomePod. If the Intercom recording came through on to all devices, then your reply is also sent to all devices that received the initial message. But if the message was sent to a specific room, the reply only goes to the device that initiated the Intercom conversation.
Andrew Myrick is a freelance writer based on the East Coast of the US. He enjoys everything to do with technology, including tablets, smartphones, and everything in between. Perhaps his favorite past-time is having a never-ending supply of different keyboards and gaming handhelds that end up collecting more dust than the consoles that are being emulated.


Write a Comment