You can capture more info when you screenshot the entire webpage without worrying about missing anything. Instead of taking various screenshots to get everything you need, you can save time by knowing how to take a screenshot of an entire web page. But the process continues since once the screenshot is taken, you’ll need to know how to save it. Keep reading to see how you can screenshot the entire page on your iPad and iPhone and how you can save it.
For iPad and iPhone users to take a screenshot of the entire webpage, you must take a screenshot like you usually would. You can press the power and volume down buttons simultaneously or use gestures. If you’ve never used gestures before to take a screenshot, you’ll get a message on your screen for you to tap on to enable the feature.
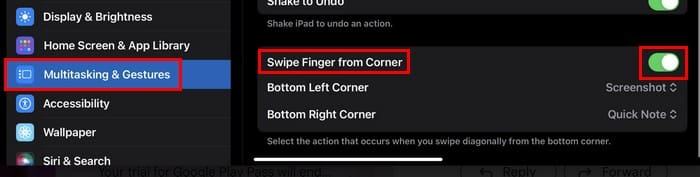
But if you missed it, you can go to Settings > Multitasking and Gestures. At the bottom, you’ll see an option called Swipe Finger from Corner. Toggle on the option and ensure that one of the options is set to Screenshot. If both are set to Quick Note or Off, tap the option and choose Screenshot. Another option is to ask Siri to take the screenshot. You can say something like, “Siri, screenshot.”
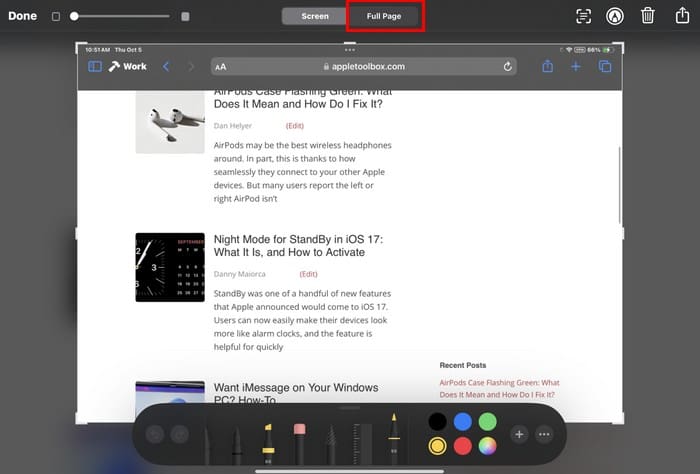
Once you take the screenshot, tap on the thumbnail preview, and you’ll see two tabs at the top:
Screen and Full Page. Tap Full Page, and on the right, you’ll see a preview of your screenshot.
Slide the preview thumbnail on the right to view what you took a screenshot of. Slide it up and down to view everything the screenshot will have. You can use the crop option if you want to remove anything. But ensure that you place your fingers on the brackets on the side, or else it won’t move. Move the sides until everything you want the screenshot to have is included. Tap Done at the top, and you’re ready to save your Screenshot. Remember, you can tap the Markup option, add shapes to your screenshots, and draw on it. You can even use a ruler if you need help drawing a straight line (I know I do).
How to Save Your Fullpage Screenshots
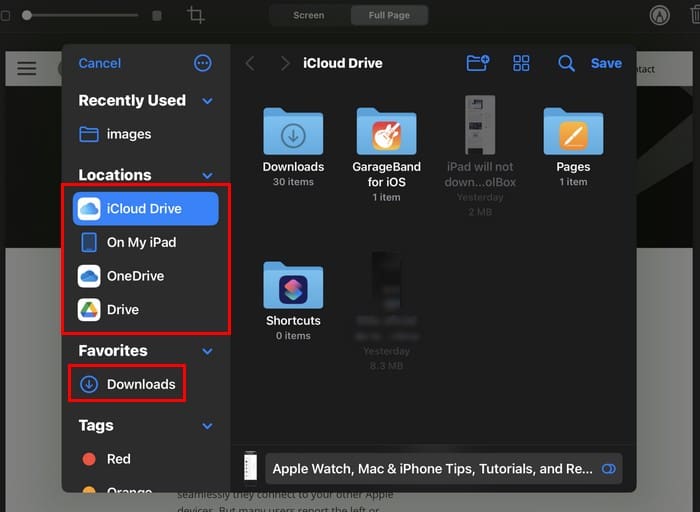
You’ve taken your screenshot and even added some shapes. To save your full-page screenshot, tap Done at the top left. At first, you may only see the Save PDF to Files option. If this option is OK with you can tap the option to save your screenshot. Your iPhone or iPad won’t save it to your gallery, but instead, show you the option to save it on your iCloud Drive or your iPad or iPhone, among other options.
If you want to save it to your OneDrive or Google Drive account, you’ll see a message that prompts you to turn it on before being able to save it. Choose where to save it and tap the Save option at the top.
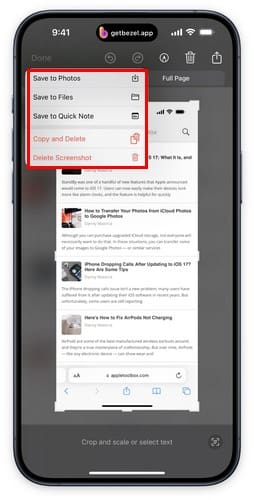
You can leave the file’s name as is or tap the name and rename it. Remember to save it. You won’t find the screenshot in the Photos app when you save it as a PDF. Instead, you must open the Files app and go to where you saved it. You can look in your iCloud Drive or downloads on your iPhone/iPad. But if your iPad or iPhone allows you to save it to Photos, go for it. But don’t look for it in Screenshots, but look in Library instead.
What if I Don’t See the Options to Save the Screenshot in the Photos App?
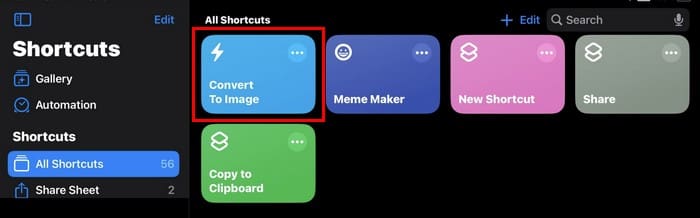
So, you’ve made all the necessary changes to your screenshot, and when you save it, you don’t see the option to save it to Photos. In that case, you can use the Shortcuts app and use Convert to Image as a last resort. Install the shortcut, and once it’s added, you can check if it was added correctly by telling Siri to open Shortcuts, and it should be there. If you ever want to erase it, long-press on it and tap Delete.
If you try to take a screenshot on apps such as Slack to get an image of the entire conversation, unfortunately, you don’t see the Full Page option. However, the Full Page option was available for browsers such as Safari, Chrome, and Firefox during testing.
Those days of having to take several screenshots to get everything you need are gone. Even before you save the screenshot, you can preview what you have and remove any unwanted content. The steps for iPad and iPhone are the same, so you don’t have to learn additional methods to do the same thing. You can even draw on your screenshot before saving it if you need to. Are you happy with Apple’s process to create a full-page screenshot? Share your thoughts in the comments below, and don’t forget to share the article with others on social media.
I am a tech geek who loves technology. I have been writing about tech for over a decade, covering various devices and programs. I write about the latest Apple products and services and never go far without my Apple devices. I always stay updated on the latest gadgets, upgrades, features, and news. I aim to make complicated tech information easy for everyone to read. I’ve been with TechniPages from the beginning to help others fix their tech issues with the easy-to-follow guides.


")
Write a Comment