Sending photos between devices used to be complicated, involving emails, expensive file-sharing services, or physically storing media to external drives. Today, most files are shared via internet-based cloud services, which is much easier. But what if you’re offline?
Many people want to share files offline for security reasons. Most services that support this only do so for one type of device; for example, Apple AirDrop will send files between iOS and macOS devices. The LocalSend app goes further, supporting file sharing between most types of devices, even while offline.
How to Use LocalSend for Windows and iOS Transfers
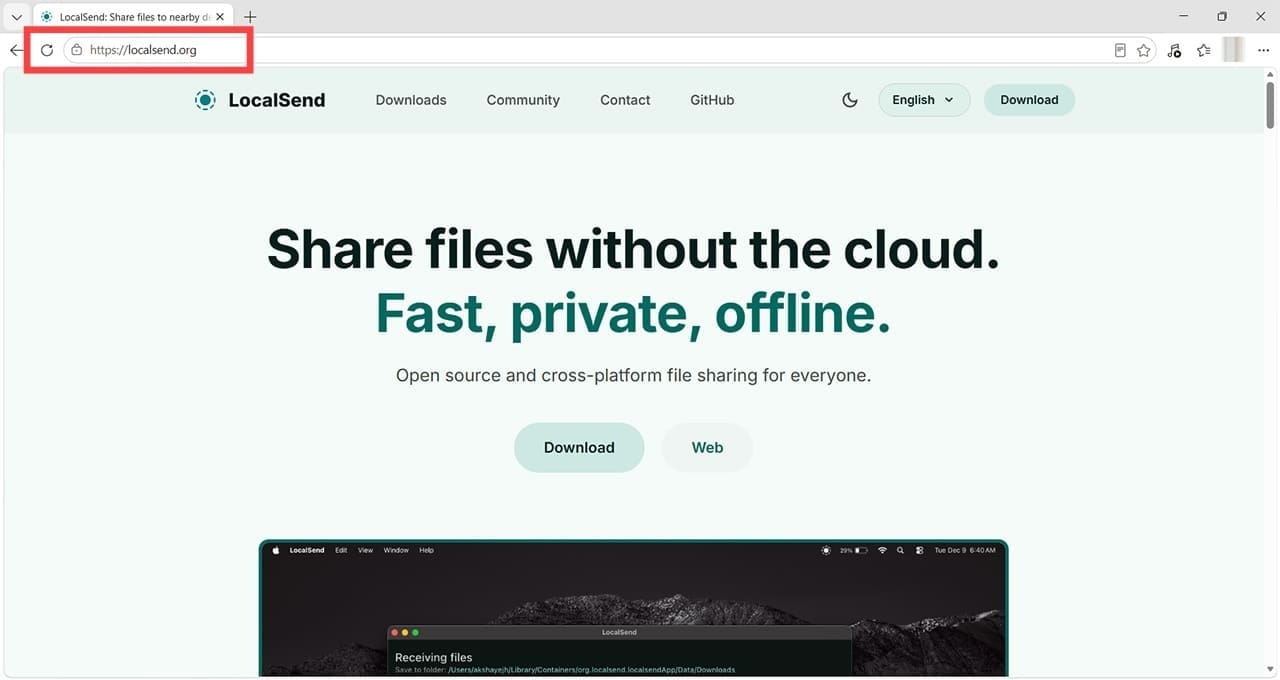
Step 1. Open a browser window on your Windows machine. Navigate to https://localsend.org/.
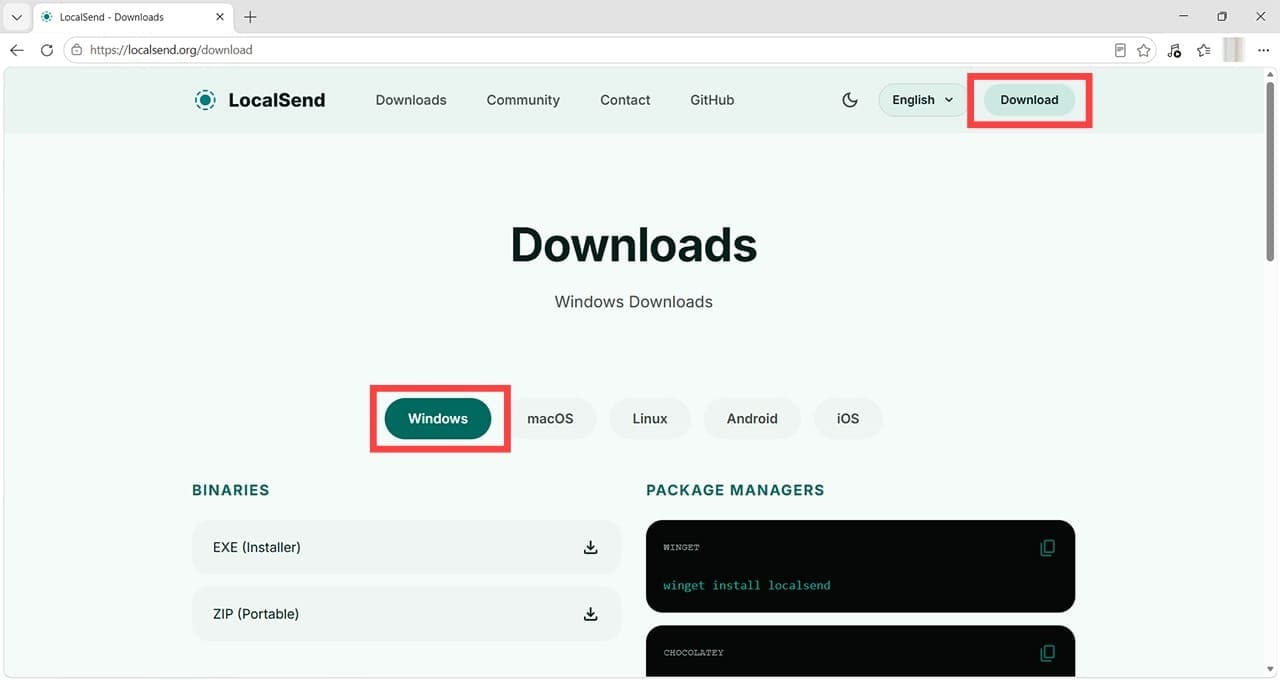
Step 2. Click “Download” and make sure the Windows tab is highlighted,
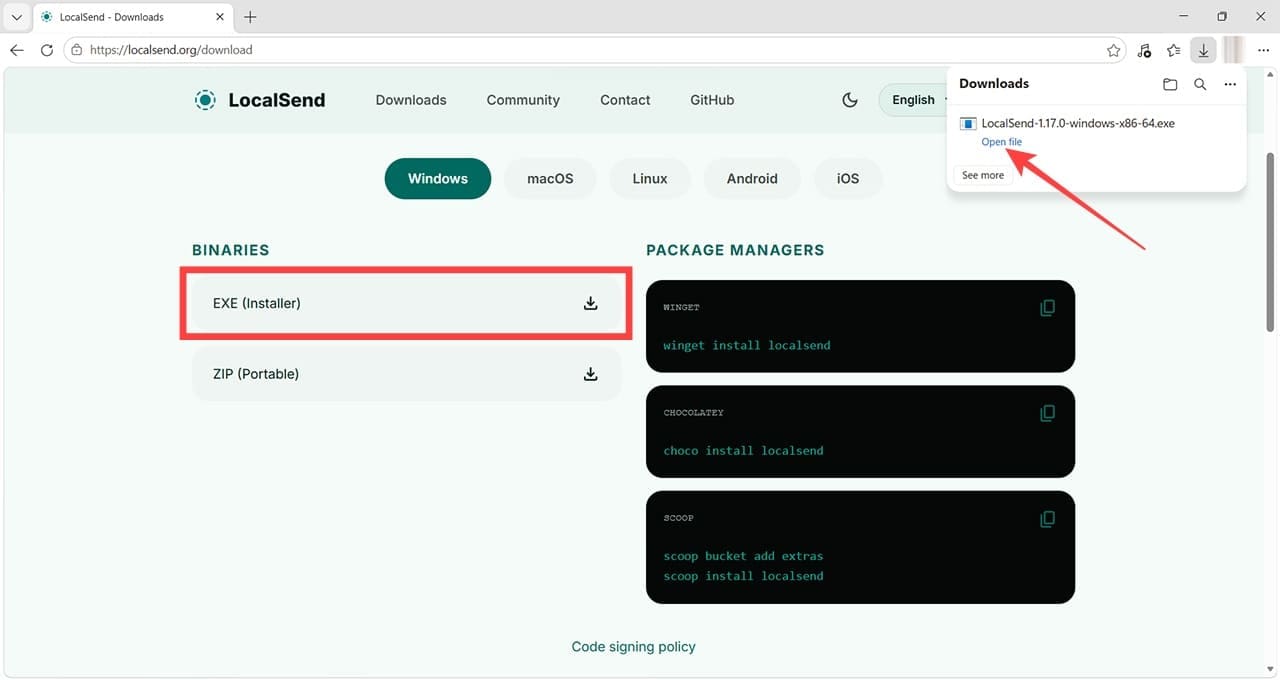
Step 3. Click the download button next to EXE (Installer), which should start downloading the relevant files. Click “Open File” once the download is complete.
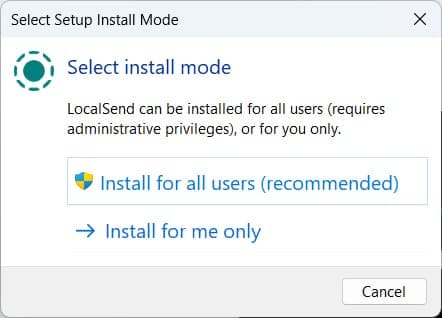
Step 4. Choose whether you want the LocalSend app installed for just you or all users.
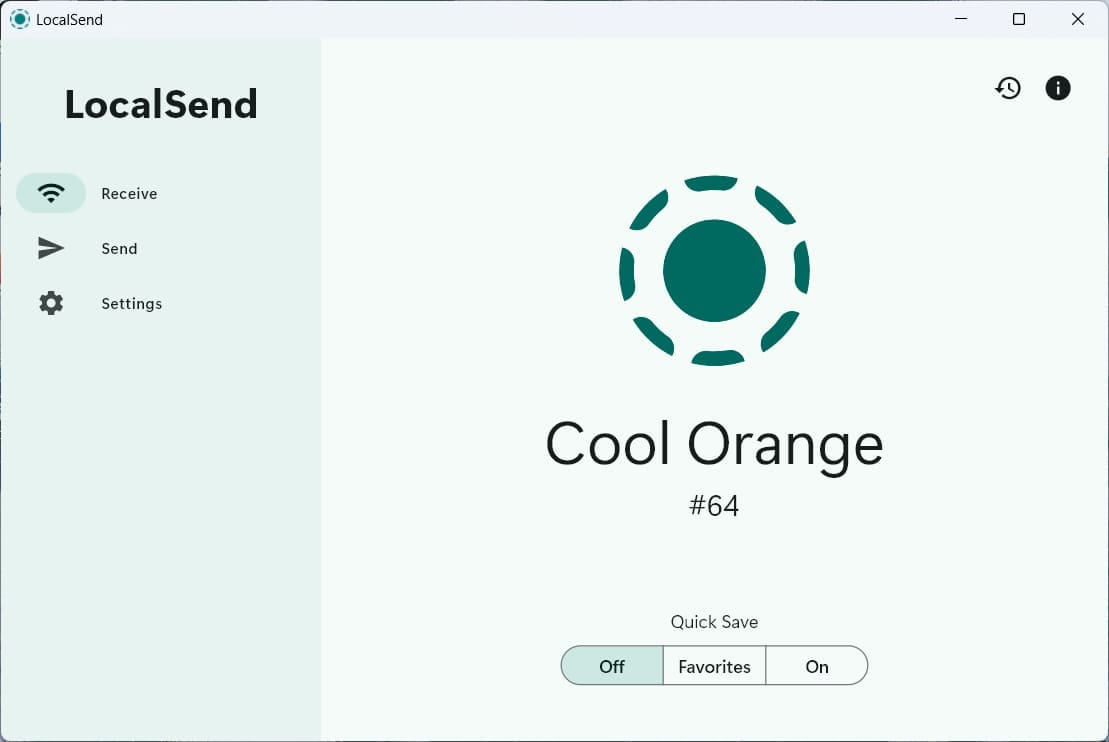
Step 5. Follow the installation instructions, e.g., choosing the right language and confirming that you’re happy for the app to use local networks. Once complete, you should see the main LocalSend for Windows interface.
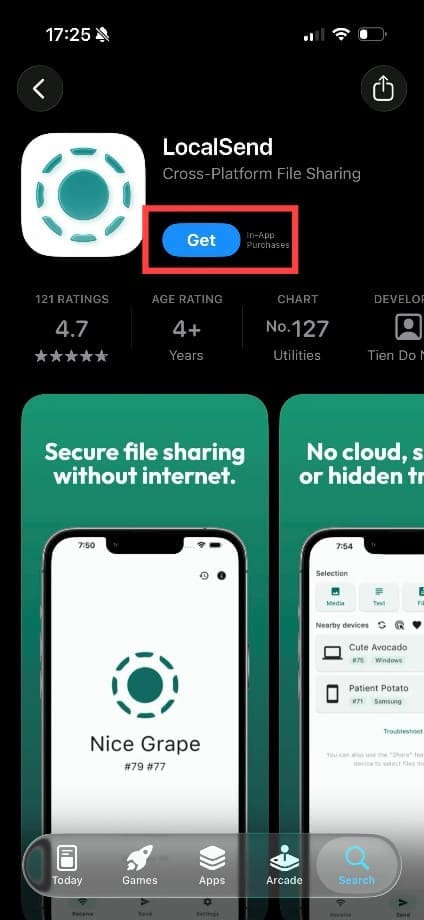
Step 6. On your iPhone (or Mac, or iPad), head to the App Store and search for the LocalSend app. Press the “Get” button and confirm you want to install the application.
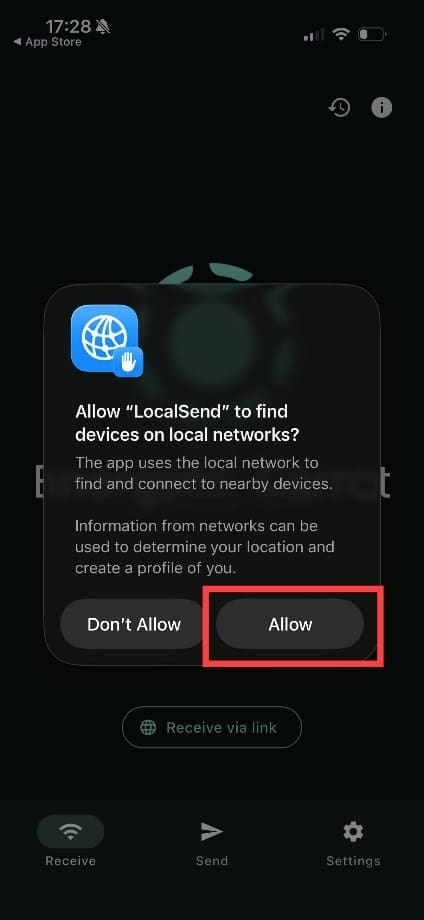
Step 7. Open the app and confirm that you’re okay with LocalSend finding devices on local networks.
Step 8. From the main interface, you have three offline options: “Receive,” “Send,” and “Settings.” You can also create links to send and receive files, which allow recipients to access files through a browser.
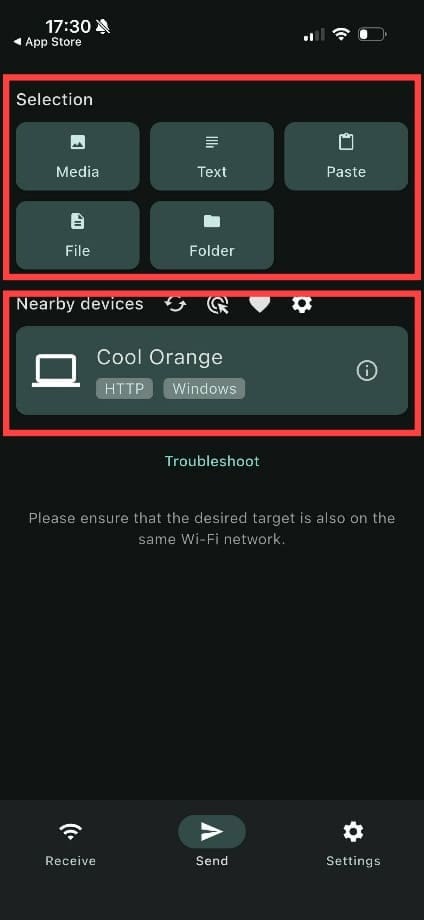
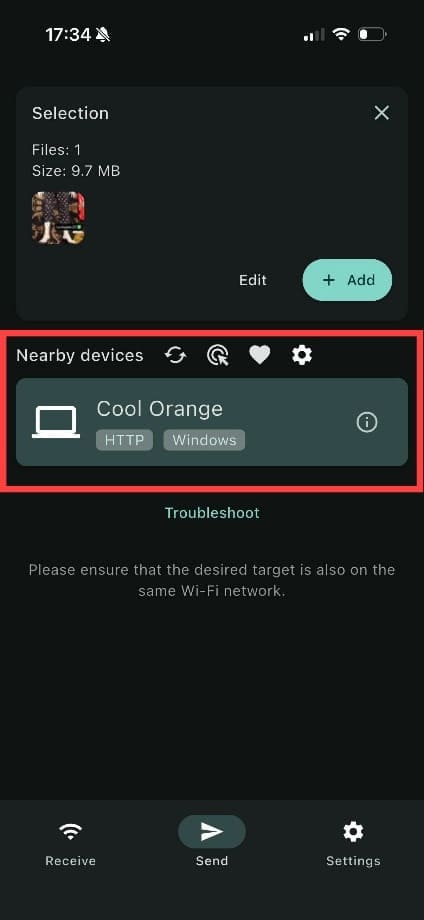
Step 9. You now have the choice to send media, text, pasted content, a file, or a whole folder. You can also see local devices immediately. On this iPhone, you can clearly see the Windows device from earlier in the guide, which LocalSend named “Cool Orange.” Press “Media” to send a photo. You may be prompted to confirm whether you want to provide the app with full access to your photo library, which you can either confirm or tell it to have limited access, i.e., choosing which photos it can access each time you use the app.
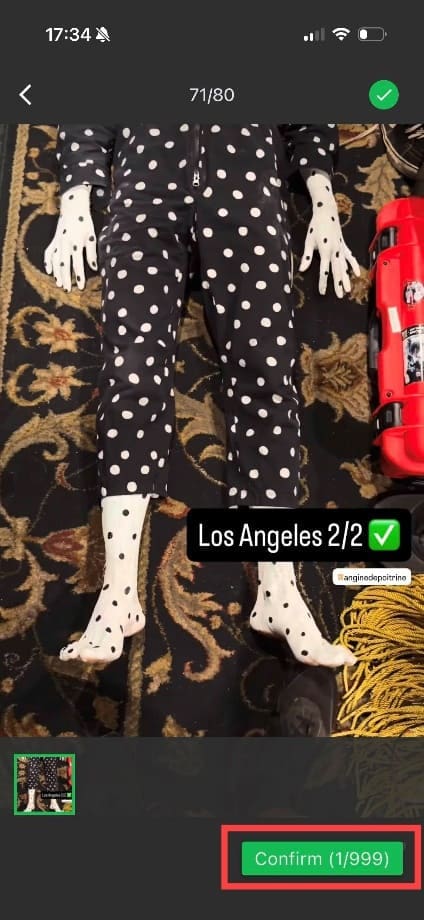
Step 10. Choose a photo to send, and press “Confirm.” You can select multiple photos if you wish.
Step 11. You’ll now see the photo in the main interface, under “Selection.” Press the device you want to send it to, in this case, the Windows computer named “Cool Orange.”
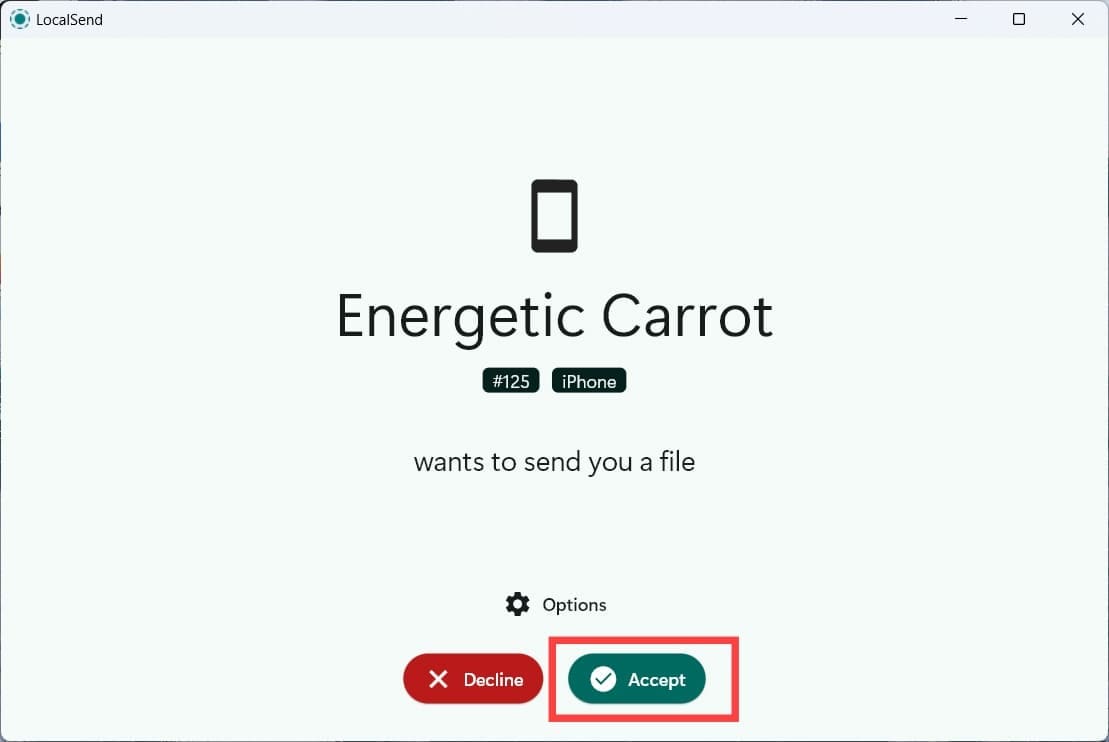
Step 12. Go back to the LocalSend app on the Windows device and press “Accept.”
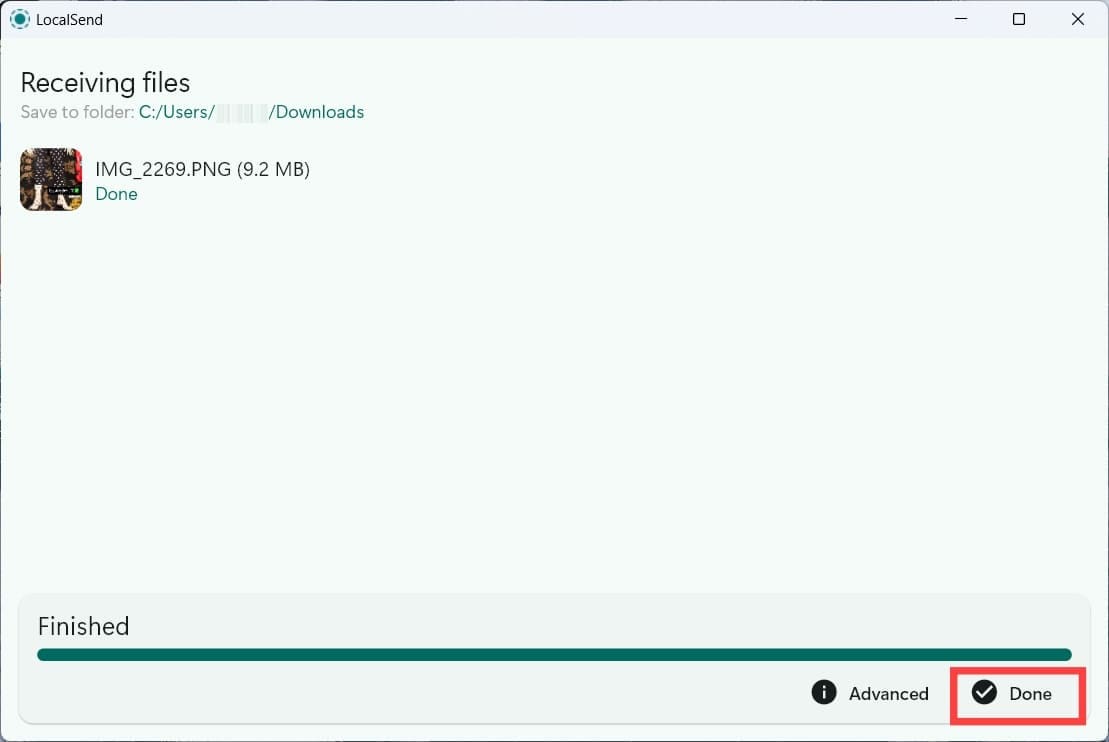
Step 13. You’ll see a confirmation screen telling you the transfer is complete. Press “Done.” The files you’ve transferred will be in the Downloads folder in Windows Explorer. The process is similar on other supported devices, although the interface can vary somewhat between iOS, Android, Windows, macOS, and Linux.
Is LocalSend Safe for Photo Transfer From iPhone to Android?
Yes, for offline transfers, LocalSend should be perfectly safe. This is because the app itself doesn’t collect data of any kind, according to the software’s Privacy Policy. When using LocalSend on a shared or unsecured local network, you should still take normal security precautions. LocalSend encrypts transfers using HTTPS and also offers PIN verification for additional protection.
As an avid gamer, I’ve run into my fair share of error codes and weird faults that have forced me to find fixes to problems I never anticipated. That gave me a passion for sharing those fixes with others so we can all game without feeling like our hardware is rebelling against us.











Write a Comment