You might use your Mac microphone for several reasons. In some cases, you might need it for having conversations with others. And if you’ve just started a podcast, you might use this feature to begin recording your episodes.
When using the microphone on your Mac, you can grant several apps permission to use the tool. If you want to change these settings later, doing so is straightforward – as you’ll learn in this article.
How to Change Your Microphone Access Settings on Mac
To change the microphone access settings on your Mac, you’ll first need to open System Settings on your device.
Once you’ve done that, follow these steps:
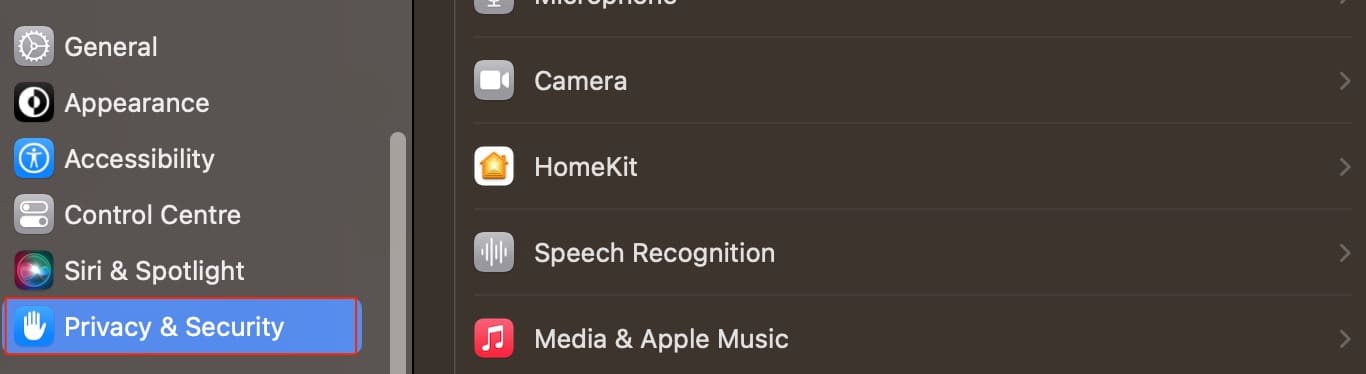
1. Go to the Privacy & Security tab on the left-hand toolbar.
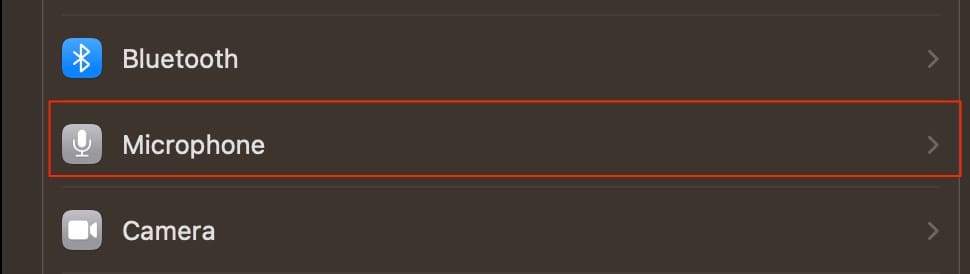
2. Click on the Microphone section when the next list of options appears.
3. To remove access to the microphone for an app, switch the toggle off so that it’s no longer blue.
Changing Microphone Access Settings on Mac Is Easy
As you can see from the steps listed above, changing the access to your microphone with different apps is easy on your Mac. You might decide that you only want to use your mic with an app once before removing it, and if so, that’s not a problem whatsoever.
Now that you’ve read this guide, you should have all the information you need to change your Mac microphone access settings.
Danny has been a professional writer since graduating from university in 2016, but he’s been writing online for over a decade. He has been intrigued by Apple products ever since getting an iPod Shuffle in 2008 and particularly enjoys writing about iPhones and iPads. Danny prides himself on making complex topics easy to understand. In his spare time, he’s a keen photographer.


Write a Comment