You use the mic on your Mac for various things. For example, you can use it on FaceTime or another app. For some users, it’s something you use every day, so when the MacBook microphone stops working, it can cause many problems. The good news is that there are various tips you can try to resolve the issue. Keep reading to see all the methods you can use to get the mic on your Mac working again and get some work done.
It’s always a good idea to start with the basic fixes when the MacBook Microphone stops working, such as restarting your Mac or cleaning the mic with a microfiber cloth or a soft toothbrush. A simple restart is known to fix all sorts of issues, so why not try it? To restart your Mac, click the Apple logo and choose restart. When you restart your computer, you’re also resetting the NVRAM or Non-Volatile Random Access Memory.
Check the App Permissions to Fix MacBook Microphone Stopped Working
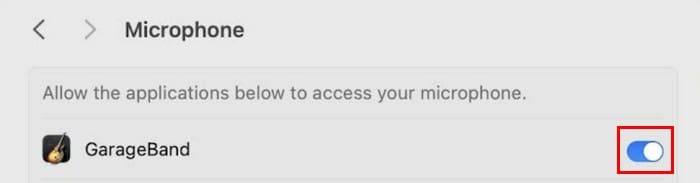
There are various reasons as to why the mic on your Mac is not working. For example, the app where the mic is not working does not have permission to access the mic. You can check to see what apps access the mic by going to System Settings, by clicking on the app icon at the bottom, or by clicking the Apple icon, followed by System Settings. Click Privacy and Security > Microphone, and you’ll see a list of apps that have or want access to your Mac mic.
Toggle the option on the right to allow access to the mic. But for the ones you want to deny access, you can leave them as is.
Check to See What Mic Your Mac is Using to Fix MacBook Microphone Stopped Working
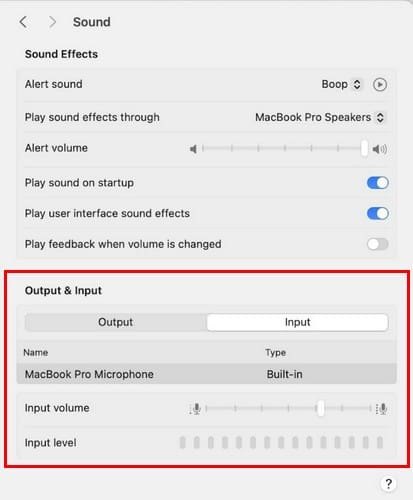
If you need external mics, there is a good chance your Mac has a mic you’re not using as the primary one. That explains why the mic you’re talking into is not working. To see which mic your Mac is using, go to System Settings > Sound > Input.
In the input section, you’ll see a list of all the available mics. Click the one you want to use to change it to the one your Mac uses. You can also increase the Input Volume by using the slider, and below it, you’ll see how strong it is. The more you slide it to the right, the more sensitive the mic will be.
Turn On Dictation on Your Mac
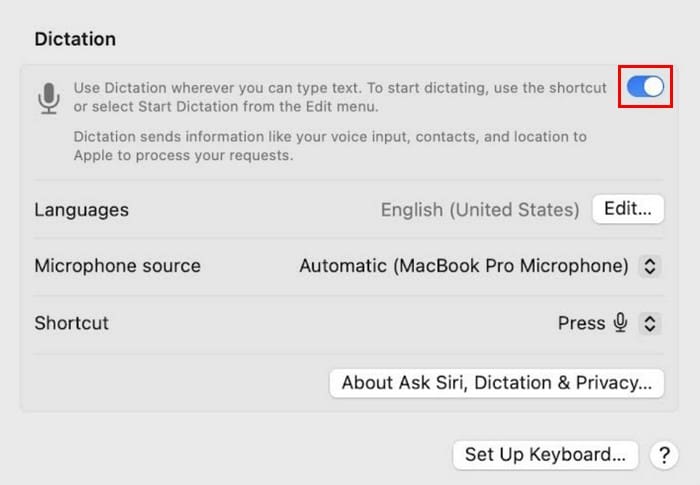
Another possible fix would be to turn on Dictation. You can do this by going to System Preferences by clicking on the app at the bottom or clicking the Apple icon at the top left. Once in Preferences, go to Keyboard > Dictation and click the On option for the feature. Ensure you choose the correct Microphone source for the feature.
Update/Install Your Apps
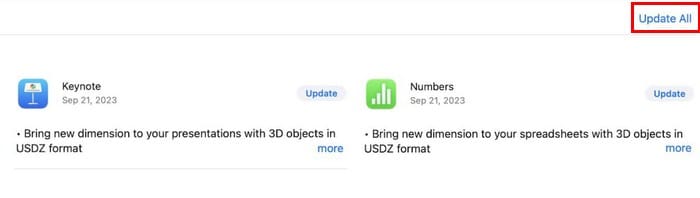
If you noticed that the issue started shortly after you installed an app, you can try updating it to see if the developer already has a fix. You can check for pending updates on your Mac by opening the App Store and clicking Updates. If there are any pending updates, you’ll see an Update All button at the top right.
If it’s an app you’re not happy with in the first place and want to install it, you can do so by opening Finder > Applications, right-clicking on the app, and choosing Move to Trash. But you also have the option to drag the app’s icon to the trash bin. Remember to take out the trash to eliminate the app. If the issue is fixed, then the app is the culprit. If the app is one you’re going to need to use, you can reinstall it and see if the issue comes back, but if it does, it’s up to you to decide if you want to keep it or not.
Contact Apple Support
There is also a hardware issue. In that case, if you have AppleCare Coverage, you’ll need to contact Apple Support. But, if you want to talk to an actual person, you can always go to your nearest Apple Store and ask them all the necessary questions.
When dealing with any issue, it’s always a good idea to start with the basic fixes. In this case, you can start by cleaning the mic with a microfiber cloth to clear the dust. Restarting your Mac can also save you valuable time, and something that’s all it needs. But if the issue continues, you can move on to the more detailed steps and hopefully get the problems fixed if there is no hardware damage. How long has the mic been giving you issues? Share your thoughts in the comments below and don’t forget to share the article with others on social media.
I am a tech geek who loves technology. I have been writing about tech for over a decade, covering various devices and programs. I write about the latest Apple products and services and never go far without my Apple devices. I always stay updated on the latest gadgets, upgrades, features, and news. I aim to make complicated tech information easy for everyone to read. I’ve been with TechniPages from the beginning to help others fix their tech issues with the easy-to-follow guides.
Hi!
So I started using my MacBook Air for school in August and it was working just fine. Until about October it suddenly stopped working. I’ve tried using the microphone for zoom, facetime, and other apps that require a microphone but it doesn’t work. Somehow, however, when I click on Siri, she can hear me. Help plz!
My mic responded only to tapping on the case, but not at all on voice or other sounds.
I tried all the above software fixes to no avail.
Then I found the solution, in my case it was really as simple as cleaning out the tiny mic holes on the left side of the Macbook with an old toothbrush. Getting the dust out.
Just had to easily press the toothbrush on the holes for like ten or twenty times and magic happened!
Thank you thank you! I must have spent 6 hours and a meeting with Geek Squad to try to get my mic working on my Mac air High Sierra. None of it worked until I followed your advice and rubbed a toothbrush over the mic a few times. As you said, works like a charm. I was ready to by a new computer.
I’ve tried all the tips but it still not working. The mic was usable when the computer turn on for few min then it’s die right after. My mac is macOSHighSiera, MacBook air early 2015
I’ve tried all the tips but is still not working the mic was working every time I restart the computer but few second later it not receiving anymore. Im on MacOS High Siera, MacBook Air Early 2015
Shut down your Mac.
Press and hold
Shift on the left side of your keyboard
Control on the left side of your keyboard
Option (Alt) on the left side of your keyboard
With all 3 keys pressed down, press and hold the power button
Keep pressing all four keys for at least 10 seconds
After 10 seconds, release all keys
Power up normally and test
HI Dan im not able to get my microphone working on my apple mac book pro. Could you help me get through this. Ive tried lots of things and am quite stuck . I can hear but can’t record and i would love to give a beekeeping course on Zoom but not much good with out a voice.
thanking you and in truth I’m scared trying to sort it out alone else i lose stuff
Great help thank you! I was able to get it fixed going into dictation. It worked well for that but in the sound menu it still wasn’t registering my voice. I went back to dictation and under the microphone the option Automatic was on, I switched it to internal and that resolved the problem.
Thanks again
I’ve this issue with both OSes since Mojave was released 2 years ago. SIP tampers the TCC database file preventing apps from requesting permissions to access the devices.
Try to use a toothbrush to solve the problem, it works for me and many others!
It was “just” dust on the tiny tiny holes of the side mic of my Mac BookAir.
If you see that the mic is registering vibration, like knocking on the touchpad or the typing of the keyboard, 99% the problem is this one and you can solve it in 5 seconds with a toothbrush.
Thanks anyway to all the suggestion you shared here that probably are great to solve software / drivers related problem.
I can’t thank you enough for sharing this tip! After trying every other possible option – including all of the settings/tricks mentioned above, I also managed to fix my mic issue with a soft bristled toothbrush. I was not convinced this would work as the mic holes are so small and it seemed the toothbrush bristles were too large to fit into those tiny little holes, but it worked!!!!!
==========================================================================
First of all, disable SIP protection in your Mac.
==========================================================================
How to turn off System Integrity Protection in macOS
Click the Apple symbol in the Menu bar.
Click Restart…
Hold down Command-R to reboot into Recovery Mode.
Click Utilities.
Select Terminal.
Type csrutil disable.
Press Return or Enter on your keyboard.
Click the Apple symbol in the Menu bar.
Click Restart…
If you later want to start using SIP once again (and you really should), then follow these steps again, except this time you’ll enter csrutil enable in the Terminal instead.
To check if it is disabled, execute the command csrutil status
and confirm the message: System Integrity Protection status: disabled.
==========================================================================
After that,
Manually manipulate the security database TCC.db.
==========================================================================
1. Open Terminal
2. Make a backup copy of the ~/Library/Application\ Support/com.apple.TCC/TCC.db file
3. Open the database by giving command: sudo sqlite3 ~/Library/Application\ Support/com.apple.TCC/TCC.db
4. Provide your password when requested
5. Within sqlite3, For Skype for Business audio fix type in command: INSERT INTO access VALUES(‘kTCCServiceMicrophone’,’com.microsoft.SkypeForBusiness’,0,1,1,NULL,NULL,NULL,’UNUSED’,NULL,0,1541440109);
7. Type .exit to exit the sqlite3
8. Skype for Business should be visible in the Security & Privacy preferences Privacy-Microphone view
This is not something the user should be required to do, but until the application is fixed, this might be the only way.


Hi!
So I started using my MacBook Air for school in August and it was working just fine. Until about October it suddenly stopped working. I’ve tried using the microphone for zoom, facetime, and other apps that require a microphone but it doesn’t work. Somehow, however, when I click on Siri, she can hear me. Help plz!
God bless you! The PRAM test worked!
Wondering if Zoom created the initial issue
Thanks!!!!
The microphone of my Mac Mojave desktop doesn’t work any more.
I checked the security and sound settings, and tried all advice given here and there. It stilll doesn’t work.
Thanks for any advice.
My mic responded only to tapping on the case, but not at all on voice or other sounds.
I tried all the above software fixes to no avail.
Then I found the solution, in my case it was really as simple as cleaning out the tiny mic holes on the left side of the Macbook with an old toothbrush. Getting the dust out.
Just had to easily press the toothbrush on the holes for like ten or twenty times and magic happened!
Mic works like a charm again!
Thank you thank you! I must have spent 6 hours and a meeting with Geek Squad to try to get my mic working on my Mac air High Sierra. None of it worked until I followed your advice and rubbed a toothbrush over the mic a few times. As you said, works like a charm. I was ready to by a new computer.
OMG thanks for helping me, it worked. I spent 4 hours with apple advisors
hola
hice esto : rm -rf ~ / Library / Application \ Support / com.apple.TCC
y se borraron todos los archivos del PC que farsa
I did this: rm -rf ~ / Library / Application \ Support / com.apple.TCC
and deleted all the files from the PC
I’ve tried all the tips but it still not working. The mic was usable when the computer turn on for few min then it’s die right after. My mac is macOSHighSiera, MacBook air early 2015
I’ve tried all the tips but is still not working the mic was working every time I restart the computer but few second later it not receiving anymore. Im on MacOS High Siera, MacBook Air Early 2015
Hi An,
Try resetting your SMC:
Shut down your Mac.
Press and hold
Shift on the left side of your keyboard
Control on the left side of your keyboard
Option (Alt) on the left side of your keyboard
With all 3 keys pressed down, press and hold the power button
Keep pressing all four keys for at least 10 seconds
After 10 seconds, release all keys
Power up normally and test
rm -rf ~/Library/Application\ Support/com.apple.TCC Operation not permitted even with Sudo and password
Hi Jefferies,
Try first granting Terminal Full Disk Access: Seeing Error “Operation Not Permitted” in macOS Catalina or Mojave?
HI Dan im not able to get my microphone working on my apple mac book pro. Could you help me get through this. Ive tried lots of things and am quite stuck . I can hear but can’t record and i would love to give a beekeeping course on Zoom but not much good with out a voice.
thanking you and in truth I’m scared trying to sort it out alone else i lose stuff
Sara Jane
Hi Sara Jane,
Try plugging headphones into your Mac and then let’s test the microphone.
Once you connect the headphones to your Mac, open System Preferences under the Apple Menu.
Choose Sound
Select the Internal tab, then run some tests speaking various sentences. Adjust the input volume so you see some levels.
You won’t hear the sound in your headphones, but you will see the volume indicator moving up or down depending on your volume.
Once that is set and working, open System Preferences, click Security & Privacy, then choose Privacy.
Select Microphone.
Tick the checkbox next to the Zoom app to allow it to access the microphone.
Repeat these steps for Camera.
Then open zoom and run a test recording using your Macs microphone and camera. Follow Zooms instructions here to run a test.
Hope that helps and works
Liz
Great help thank you! I was able to get it fixed going into dictation. It worked well for that but in the sound menu it still wasn’t registering my voice. I went back to dictation and under the microphone the option Automatic was on, I switched it to internal and that resolved the problem.
Thanks again
I’ve this issue with both OSes since Mojave was released 2 years ago. SIP tampers the TCC database file preventing apps from requesting permissions to access the devices.
The problem is fixed with a PRAM reset.
Try to use a toothbrush to solve the problem, it works for me and many others!
It was “just” dust on the tiny tiny holes of the side mic of my Mac BookAir.
If you see that the mic is registering vibration, like knocking on the touchpad or the typing of the keyboard, 99% the problem is this one and you can solve it in 5 seconds with a toothbrush.
Thanks anyway to all the suggestion you shared here that probably are great to solve software / drivers related problem.
The tooth brush trick did it for me too!
I can’t thank you enough for sharing this tip! After trying every other possible option – including all of the settings/tricks mentioned above, I also managed to fix my mic issue with a soft bristled toothbrush. I was not convinced this would work as the mic holes are so small and it seemed the toothbrush bristles were too large to fit into those tiny little holes, but it worked!!!!!
I have tried all option non of them work; please help do I need to reinstall OS
Hi Jawid, do you solve your problem? Please help me I have the same problem, I also have tried all option, but no of them work. Thanks.
Have you tried resetting the PRAM?
Thank you so much for this article!!! Worked like a charm!
==========================================================================
First of all, disable SIP protection in your Mac.
==========================================================================
How to turn off System Integrity Protection in macOS
Click the Apple symbol in the Menu bar.
Click Restart…
Hold down Command-R to reboot into Recovery Mode.
Click Utilities.
Select Terminal.
Type csrutil disable.
Press Return or Enter on your keyboard.
Click the Apple symbol in the Menu bar.
Click Restart…
If you later want to start using SIP once again (and you really should), then follow these steps again, except this time you’ll enter csrutil enable in the Terminal instead.
To check if it is disabled, execute the command csrutil status
and confirm the message: System Integrity Protection status: disabled.
==========================================================================
After that,
Manually manipulate the security database TCC.db.
==========================================================================
1. Open Terminal
2. Make a backup copy of the ~/Library/Application\ Support/com.apple.TCC/TCC.db file
3. Open the database by giving command: sudo sqlite3 ~/Library/Application\ Support/com.apple.TCC/TCC.db
4. Provide your password when requested
5. Within sqlite3, For Skype for Business audio fix type in command: INSERT INTO access VALUES(‘kTCCServiceMicrophone’,’com.microsoft.SkypeForBusiness’,0,1,1,NULL,NULL,NULL,’UNUSED’,NULL,0,1541440109);
7. Type .exit to exit the sqlite3
8. Skype for Business should be visible in the Security & Privacy preferences Privacy-Microphone view
This is not something the user should be required to do, but until the application is fixed, this might be the only way.
Thank you, Fabiano, for sharing this tip with us and our readers!
Liz