When recording your audio, we recommend using an external microphone. Why? Because your Mac’s mic is not always the best sound quality.
Before recording with your external mic in Adobe Audition, you’ll need to change your external microphone input in the app. This article will show you how to do this on your Mac.
Do You macOS Ventura to Change the External Microphone Input on Adobe Audition for Mac?
After Apple introduced macOS Ventura, the process of performing several tasks on Mac devices changed. Changing the external microphone input, however, is not one of them.
Even if your Mac does not currently have macOS Ventura downloaded, you can change your external mic output settings. You can follow the instructions in this article as they are; the same is true if your Mac is not one of those devices with Touch ID.
Do You Need Adobe Audition 2023 to Follow These Instructions?
Toward the end of 2022, Adobe updated its Creative Cloud apps to their 2023 version. But the good news is that even if yours isn’t fully up to date, you can follow these instructions exactly as they are written.
Having said that, we recommend keeping your app updated. Doing so will allow you to keep using Adobe Audition on your Mac as you currently are, without needing to worry about performance-related issues.
How to Change the External Microphone Input for Adobe Audition on Mac
Now that we’ve covered the basics, let’s look at how you can actually change the external microphone input with Adobe Audition on your Mac. Follow these instructions to achieve your desired result.
1. Connect your external microphone to your Mac and open the Adobe Audition app. If you haven’t downloaded Adobe Audition, you can find it in the Adobe Creative Cloud app for Mac.
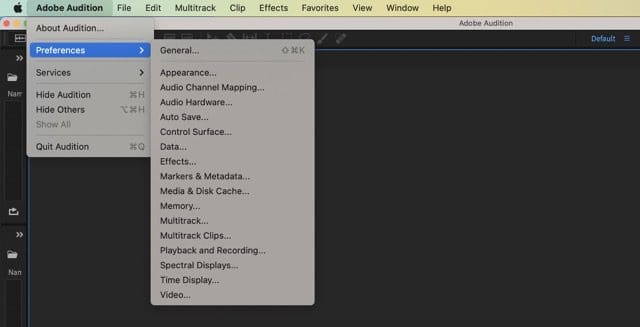
2. Go to Adobe Audition and select Preferences. When the dropdown menu appears, click on Audio Hardware.
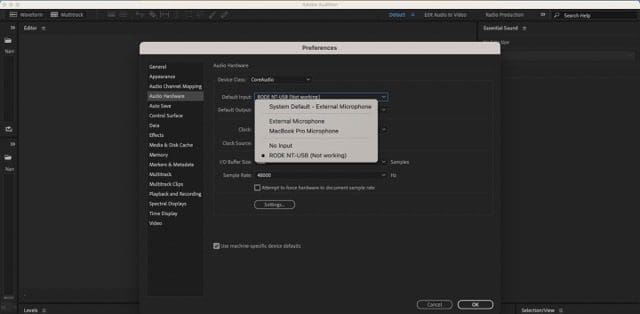
3. Go to the dropdown menu next to Default Input.
4. Select the external microphone’s name that you’ve connected to your device.
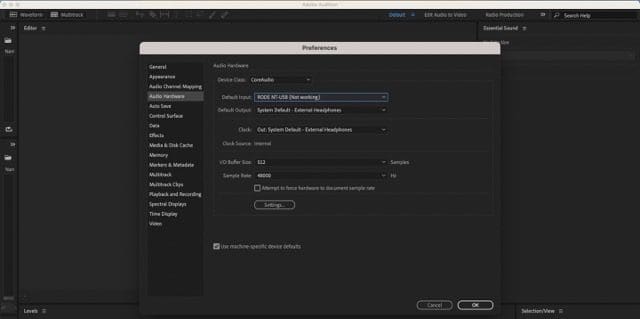
5. Once you’ve chosen your microphone, select OK.
After completing the steps above, you’ll be ready to start recording audio on Adobe Audition. You can, once you’ve done that, edit everything within the app.
Changing Your External Microphone Input: Useful if You Want to Record Higher-Quality Audio
Changing your default input to an external microphone is easy when you use Adobe Audition on your Mac. You don’t need to worry about having the latest version of the app, nor do you necessarily need macOS Ventura installed on your device.
Naturally, you’ll need to ensure that your external microphone is connected to your computer when you use the app in the future. Make sure that you make this the first step before recording future podcasts, songs, or voiceovers for videos.
Danny has been a professional writer since graduating from university in 2016, but he’s been writing online for over a decade. He has been intrigued by Apple products ever since getting an iPod Shuffle in 2008 and particularly enjoys writing about iPhones and iPads. Danny prides himself on making complex topics easy to understand. In his spare time, he’s a keen photographer.


")


Write a Comment