Do you suddenly have files or icons named .DS_Store appearing in your folders or on your desktop? And you have no idea how they got there or how to handle them? If you try and delete these particular files, they simply reappear as soon as you delete them or put them into the trash. So, how do makes those darn .DS_Store files disappear?
.DS_Store (or Desktop Services Store) are hidden cache files created by Mac OS. And if they don’t exist, your OS creates them. These hidden files are automatically created by your mac’s Finder in your computer’s directories. They contain information about your system configuration and settings, such as icon size and other directory metadata. If by chance or accident, you upload these .DS_Store files along with other files, the files may release information about your computer.
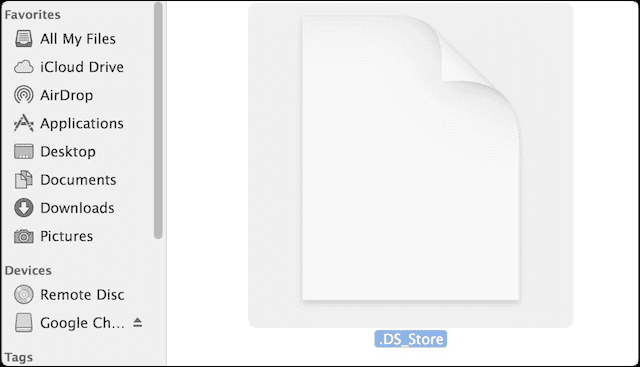
Your Mac places a .DS_Store file into every folder you have open, automatically. If you suddenly see.DS_Store files and unable to get rid of them, you probably accidently activated Show All Files. Though .DS_Store files are invisible to the average user, if you’re sharing with a Windows PC or have hidden files shown in Finder, you see them everywhere, in every folder. You might even see a .ds_store icon on your desktop! In all likelihood, you probably have no idea how the .DS_Store files got there in the first place, what they mean, or how to get them off your desktop or folder.
Don’t Delete .DS_Store Files (unless you have a very good reason)
If you don’t have a particular reason to delete these .DS_Store files (windows sharing might be a solid reason,) it’s best to leave them “as is.” There’s no performance benefit in deleting .DS_Store files. They are harmless files that don’t usually cause any problems. Remember that the .DS_Store file saves your personalized folder settings, such as your icon arrangement and column sortings. And that’s why you normally don’t want to delete them but rather HIDE them.
You can delete them, but they are recreated by OS anyway, primarily to store your preference information.
So for most of us, it’s best to just make .DS_Store files hidden once again
Make Your .DS_Store files Hidden Again
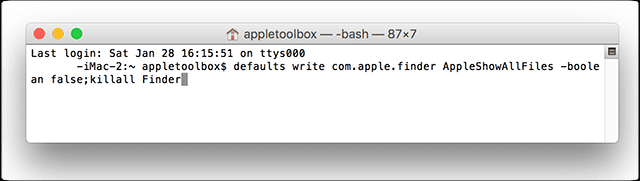
Launch Terminal by selecting Applications > Utilities
Enter the following command: defaults write com.apple.finder AppleShowAllFiles -boolean false;killall Finder
You can also use the command: defaults write com.apple.finder AppleShowAllFiles FALSE;killall Finder
Hit return, the Finder restarts and .DS_Store files (and other invisible files) are hidden again
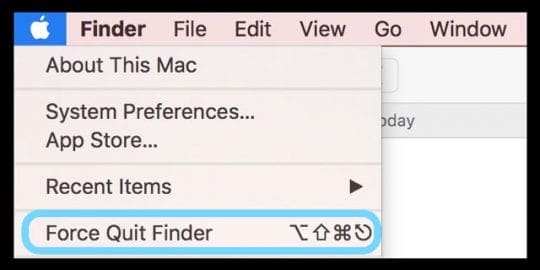
If your .DS_Store file is still visible, relaunch your Finder
Use the keyboard shortcut Option+Shift+Command+Escape OR
Open Finder
Click the Apple menu while holding down the Shift key
Click Force Quit Finder or use the keyboard shortcut Option+Shift+Command+Escape
Unhide Your .DS_Store files
If you decide you want to unhide the .DS_Store File or any other invisible files, just use another (and very similar) terminal command
Launch Terminal
Enter the following command: defaults write com.apple.Finder AppleShowAllFiles TRUE;killall Finder
Or use this command: defaults write com.apple.finder AppleShowAllFiles -boolean true;killall Finder
Press return and your Finder restarts, showing all those hidden files including .DS_Store
If your hidden files or .DS_Store file did not reappear, relaunch Finder
Use the keyboard shortcut Option+Shift+Command+Escape OR
Hold the ⌥ (alt/option) and right-click on the Finder icon in your Dock
Click Relaunch or use the keyboard shortcut Option+Shift+Command+Escape
If You Must Delete, Do It By the Book with Terminal
Remove all DS_Store files
Select Applications > Utilities and launch Terminal
Enter the command: sudo find / -name “.DS_Store” -depth -exec rm {} \;
When prompted for a password enter your OS Administrator password
Automatically remove DS_Store files periodically
Select Applications > Utilities to launch Terminal.
Enter the following UNIX command: sudo crontab -e
When prompted for a password, enter your OS Administrator password
In the vi editor, press the letter I on your keyboard once and enter the following command: 15 1 * * * root find / -name “.DS_Store” -depth -exec rm {} \;
This crontab entry has the following format: <Minute> <Hour> <DayOfMonth> <Month> <DayOfWeek> <User Command>
The system automatically runs the command at 1:15 AM every day. To configure the command for a different time, use different values
To save the entry, press the Esc key once, then simultaneously press Shift+Z+Z
Note: This command runs when your computer is either on or in sleep mode.
Obsessed with tech since the early arrival of A/UX on Apple, Sudz (SK) is responsible for the original editorial direction of AppleToolBox. He is based out of Los Angeles, CA.
Sudz specializes in covering all things macOS, having reviewed dozens of OS X and macOS developments over the years.
In a former life, Sudz worked helping Fortune 100 companies with their technology and business transformation aspirations.
This helped my get rid of the .DS icons from my screen. Thank you!
I’ve been using Macs from the beginning.
In ham talk, SK means a silent key. (decease ham operator). //… Joe
I use a USB and go back and forth between a Mac and Windows computer. When my USB is connected to my macbook, I do not see the .DS_Store Files. But when I connect it to a windows computer, I see them. How do I get rid of/hide them while using my USB on a windows computer?
Because that command runs in the background and periodically, depending on the schedule you set up. So obviously, if your computer is off, it cannot run the command.
Thanks, this Worked!
defaults write com.apple.finder AppleShowAllFiles -boolean false;killall Finder
? BTW, I didn’t try it… BUT would love to know why/how another site posted/used a slightly different string (below) without the “-boolean” and UC “FALSE”
defaults write com.apple.finder AppleShowAllFiles FALSE;killall Finder
Both commands are fine–they are variations. We include “boolean” into our command for folks using really old versions of Mac OS X, that might not recongize the short code. But I’ve added the shorter version into the article, just in case some folks are confused.
Thanks for bringing this to our attention! And we’re glad it worked!
This does NOT solve the problem. The file still exists. I wish for the OS NOT to store the way I rearranged the files last. It’s a useless file to me, and supremely annoying as I would like to have all my directories default upon viewing them, instead of storing how I viewed them the last time, nor how my icons were arranged. It’s supremely infuriating.
I want to get rid of the file, and prevent OSX from even writing the file in the first place. I do not want a file that stores nonsense that makes my life more inconvenient by having stupid “custom” views for every single different directory ever.


This helped my get rid of the .DS icons from my screen. Thank you!
I’ve been using Macs from the beginning.
In ham talk, SK means a silent key. (decease ham operator). //… Joe
I use a USB and go back and forth between a Mac and Windows computer. When my USB is connected to my macbook, I do not see the .DS_Store Files. But when I connect it to a windows computer, I see them. How do I get rid of/hide them while using my USB on a windows computer?
Thank you very much, it worked when I went into terminal and wrote:
defaults write com.apple.finder AppleShowAllFiles -boolean false;killall Finder
So nice to get rid of seeing those files in every folder! 🙂
“Note: If your computer is switched off, this command does not run”
This makes absolutely no sense.
Because that command runs in the background and periodically, depending on the schedule you set up. So obviously, if your computer is off, it cannot run the command.
Great It worked!!!
thank you very much ;D
Tried 3 other websites with random commands and this one worked first time. Cheers
Thanks, this Worked!
defaults write com.apple.finder AppleShowAllFiles -boolean false;killall Finder
? BTW, I didn’t try it… BUT would love to know why/how another site posted/used a slightly different string (below) without the “-boolean” and UC “FALSE”
defaults write com.apple.finder AppleShowAllFiles FALSE;killall Finder
Hi Jim,
Both commands are fine–they are variations. We include “boolean” into our command for folks using really old versions of Mac OS X, that might not recongize the short code. But I’ve added the shorter version into the article, just in case some folks are confused.
Thanks for bringing this to our attention! And we’re glad it worked!
SK
Thank you!! Gone in an instant with your Terminal copy and paste.
Yeah! Thanks for letting us know.
Liz
THANKS! definitely the BEST and the only one that worked! KUDOS 🙂
This is the only one that worked! Thanks
A HUDGE THANKS !
Have been trying to hide those files since yesterday and I’v finally find the right webpage to do it.
😉
The first time I tried it, it didn’t work. So I copied your script and pasted it into terminal. Then it worked just fine! Thanks so much.
I’ve been trying all different commands given on different forums and non have worked…..this does…..brilliant, thanks
Does not remove the file. Only hides it. Change the title of your post to reflect this.
wow…………… great thanx
THANK YOU!!!!
This only hides them… it does not get rid of them.
This does NOT solve the problem. The file still exists. I wish for the OS NOT to store the way I rearranged the files last. It’s a useless file to me, and supremely annoying as I would like to have all my directories default upon viewing them, instead of storing how I viewed them the last time, nor how my icons were arranged. It’s supremely infuriating.
I want to get rid of the file, and prevent OSX from even writing the file in the first place. I do not want a file that stores nonsense that makes my life more inconvenient by having stupid “custom” views for every single different directory ever.
You don’t know how happy this makes me! It worked! I’ve been trying to find a way to get rid of those buggers forever. Gone! Can’t thank you enough.
Thank you, finally,. I appreciate you
THANKYOUSOMUCH!!!!!!!!!! It was driving me crazy : p
WOW Thanks so much!!!!!!!!!!
I have had a .DS_Store for about two years now and i have finally got rid o it thanks to you!
But it simply does not work with my Mac.