If you’ve updated your PC to Windows 11, there’s a chance it no longer recognizes your iPhone. Or perhaps the USB connection suddenly isn’t working. It can be quite frustrating, particularly because there are so many potential causes.
In this article, we’ll be looking at causes and, more importantly, fixes that will get your iPhone detected by Windows 11 once again.
This may be obvious, but restarting both devices can solve many software and memory issues that might cause your iPhone not to be detected by Windows 11. A restart is a good way to freshen things up and ensure no small error is keeping you from accessing your smartphone on your desktop.
Update Your Software
Newer versions of software can sometimes clash with older ones. Newer software can also bring fixes to bugs that caused conflicts in the old versions. Updating both your iPhone and Windows to the latest possible version is also important to ensure that the operating systems aren’t keeping your devices from communicating.
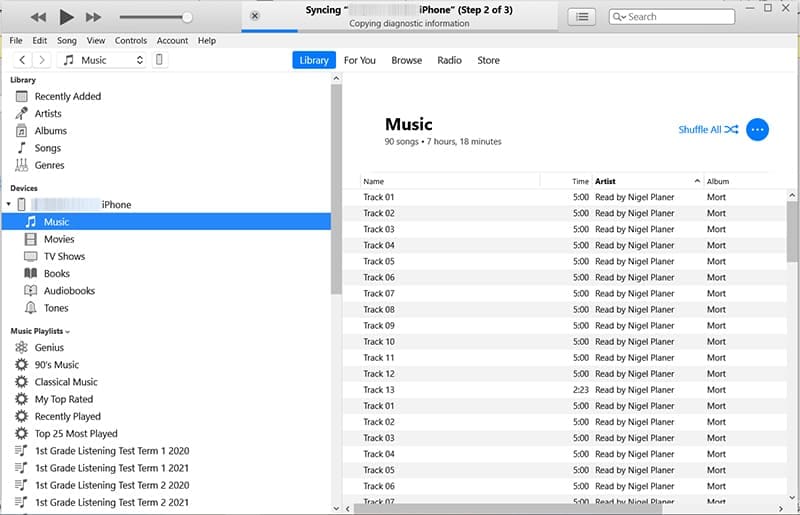
Since iTunes is the main way an iPhone interfaces with Windows (without third-party software), it’s also important to ensure that it’s fully updated and shows your iPhone via an icon in the top menu and also in the sidebar.
Try a New Cable
It could be that the current USB or USB-C connector cable you’re using is broken or damaged in some way. Try to connect your iPhone using a different cable and, if possible, a different USB port. If you hear a chime or feel a vibration, your phone has been connected.
Trust This PC
If you’re plugging in your iPhone into a Windows 11 PC for the first time (or perhaps the first since a major update), you must tell your iPhone that the connected computer can be trusted. You’ll receive a pop-up on your phone, asking you if it should “Trust This Computer.” Press “Trust” to grant permission.
Reset Location and Privacy on Your iPhone
If the “Trust This PC” option popped up and you refused permission (or never got it), then you’ll need to reset this setting via the “Location & Privacy” setting. Here’s what to do:
Step 1. Open Settings and choose “General.”
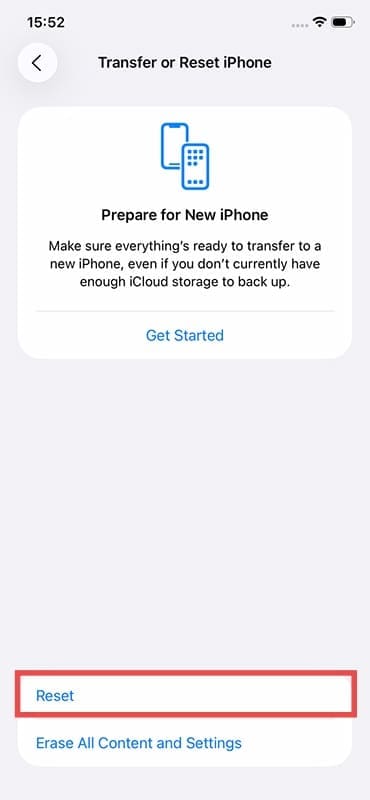
Step 2. Scroll down to “Transfer or Reset iPhone.”
Step 3. Tap “Reset” and choose “Reset Location & Privacy.”
Step 4. This will reset all location and privacy permissions. When you connect your iPhone to your PC, you should see the “Trust This Computer” pop-up appear on your smartphone.
Remove iPhone from Devices on Your PC
If your PC isn’t detecting the USB connection, you might need to remove it from the list of devices in Windows 11 and re-add it. Here’s what you need to do:
Step 1. Ensure that your iPhone is still connected via USB.
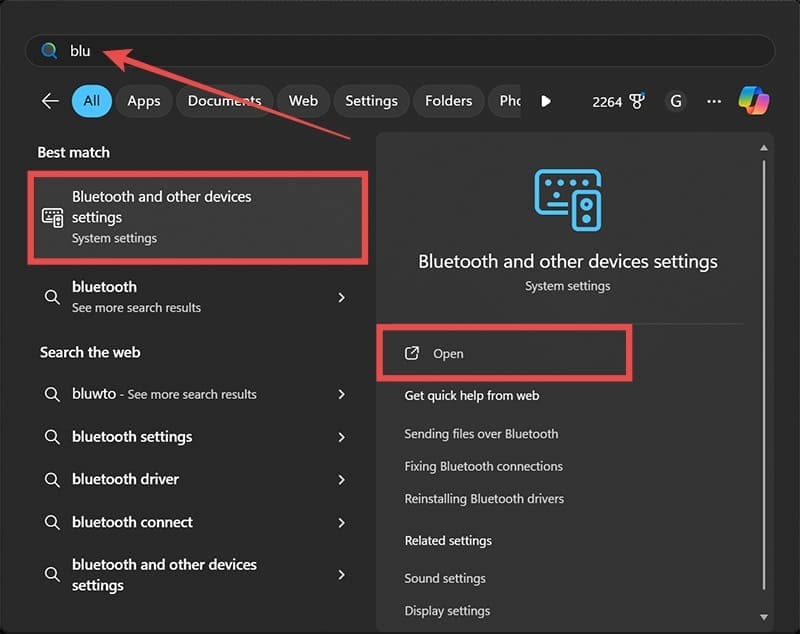
Step 2. Type “Bluetooth and other devices settings” into the search bar and choose the option that pops up.
Step 3. In the window that pops up, scroll down to the “Other devices” subsection.
Step 4. You should see your iPhone listed as a listed device. Click the “View more” icon (three dots) next to its name and select “Remove device.”
Step 5. Unplug your iPhone from your PC and plug it back in. You should receive a pop-up on both devices asking if you want to allow the connection. Confirm that your iPhone is connected and recognized again.
As an avid gamer, I’ve run into my fair share of error codes and weird faults that have forced me to find fixes to problems I never anticipated. That gave me a passion for sharing those fixes with others so we can all game without feeling like our hardware is rebelling against us.


")


Write a Comment