For years, users have been “stuck” with an Apple ID from an email that may not even be accessible anymore. If you wanted to switch to another ID, you could, but it require an entirely different Apple ID and account. Meaning that your App Store purchases would not be synced over to the new account.
This has always been considered an archaic issue, and one that still plagues those with old Google accounts on the Play Store. But Apple is finally doing something about it for its users.
If you have been stuck with an email that was used as an Apple ID from your childhood, it may be a bit embarrassing. But you have a bunch of data synced, including App Store purchases and more, so you can’t just stop using it. Apple has finally loosened its grip and you can now change your Apple ID to an entirely different email address altogether.
Enter the email address that you wish to use moving forward.
Click Continue.
If using a third-party email client, like Gmail, check for the verification code.
Enter the verification code on the screen.
Click OK.
There are some limitations
The biggest limitation is that you cannot change your Apple ID to an @iCloud email address if it was created within the last 30 days. At that point, the Apple ID page will ask you to “try again later”, forcing you to wait for the 30 days to expire.
In some cases, you may see that an email is already in use, and will be greeted with a message stating as much. If there’s a chance that someone else in the family is using that email, then remove it from their account and try again. If not, then you will be forced to use a different email address as your Apple ID.
Finally, there are some users who have been able to create an Apple ID using a phone number instead of an email address. This is only available in some reasons, but if your Apple ID is already an email address, you are unable to change it to a phone number.
What if your Apple ID is a phone number?
If you are trying to change your Apple ID from the Account page, you can just follow the same steps as above. However, instead of a verification email being sent, a verification code will be texted to the registered phone number.
Those who want to update their Apple ID to a new phone number, but are using an iPhone or iPad, will want to follow these steps:
Sign out of every Apple service and iOS/iPadOS device that uses your Apple ID.
The only exception to this is to not immediately sign out of the device you are using to make the changes.
Open the Settings app.
Tap Your Name at the top of the page.
Select Name, Phone Numbers, Email.
Tap Edit next to Reachable At.
Tap Delete.
Select Continue.
Follow the instructions provided.
Enter the phone number you wish to use as your new Apple ID.
Enter the verification code that is texted to the number.
Sign back into your Apple Services and devices with your new Apple ID and password.
What to do after changing your Apple ID
This is where all of the fun and tedious work comes. After updating your Apple ID, you’ll need to go through your various iOS, iPadOS, and macOS devices to update them with the proper Apple ID. If not, you will be unable to download and install updates or applications. Plus, you’ll miss out on the enormously useful syncing features provided by using an Apple ID across all of your devices.
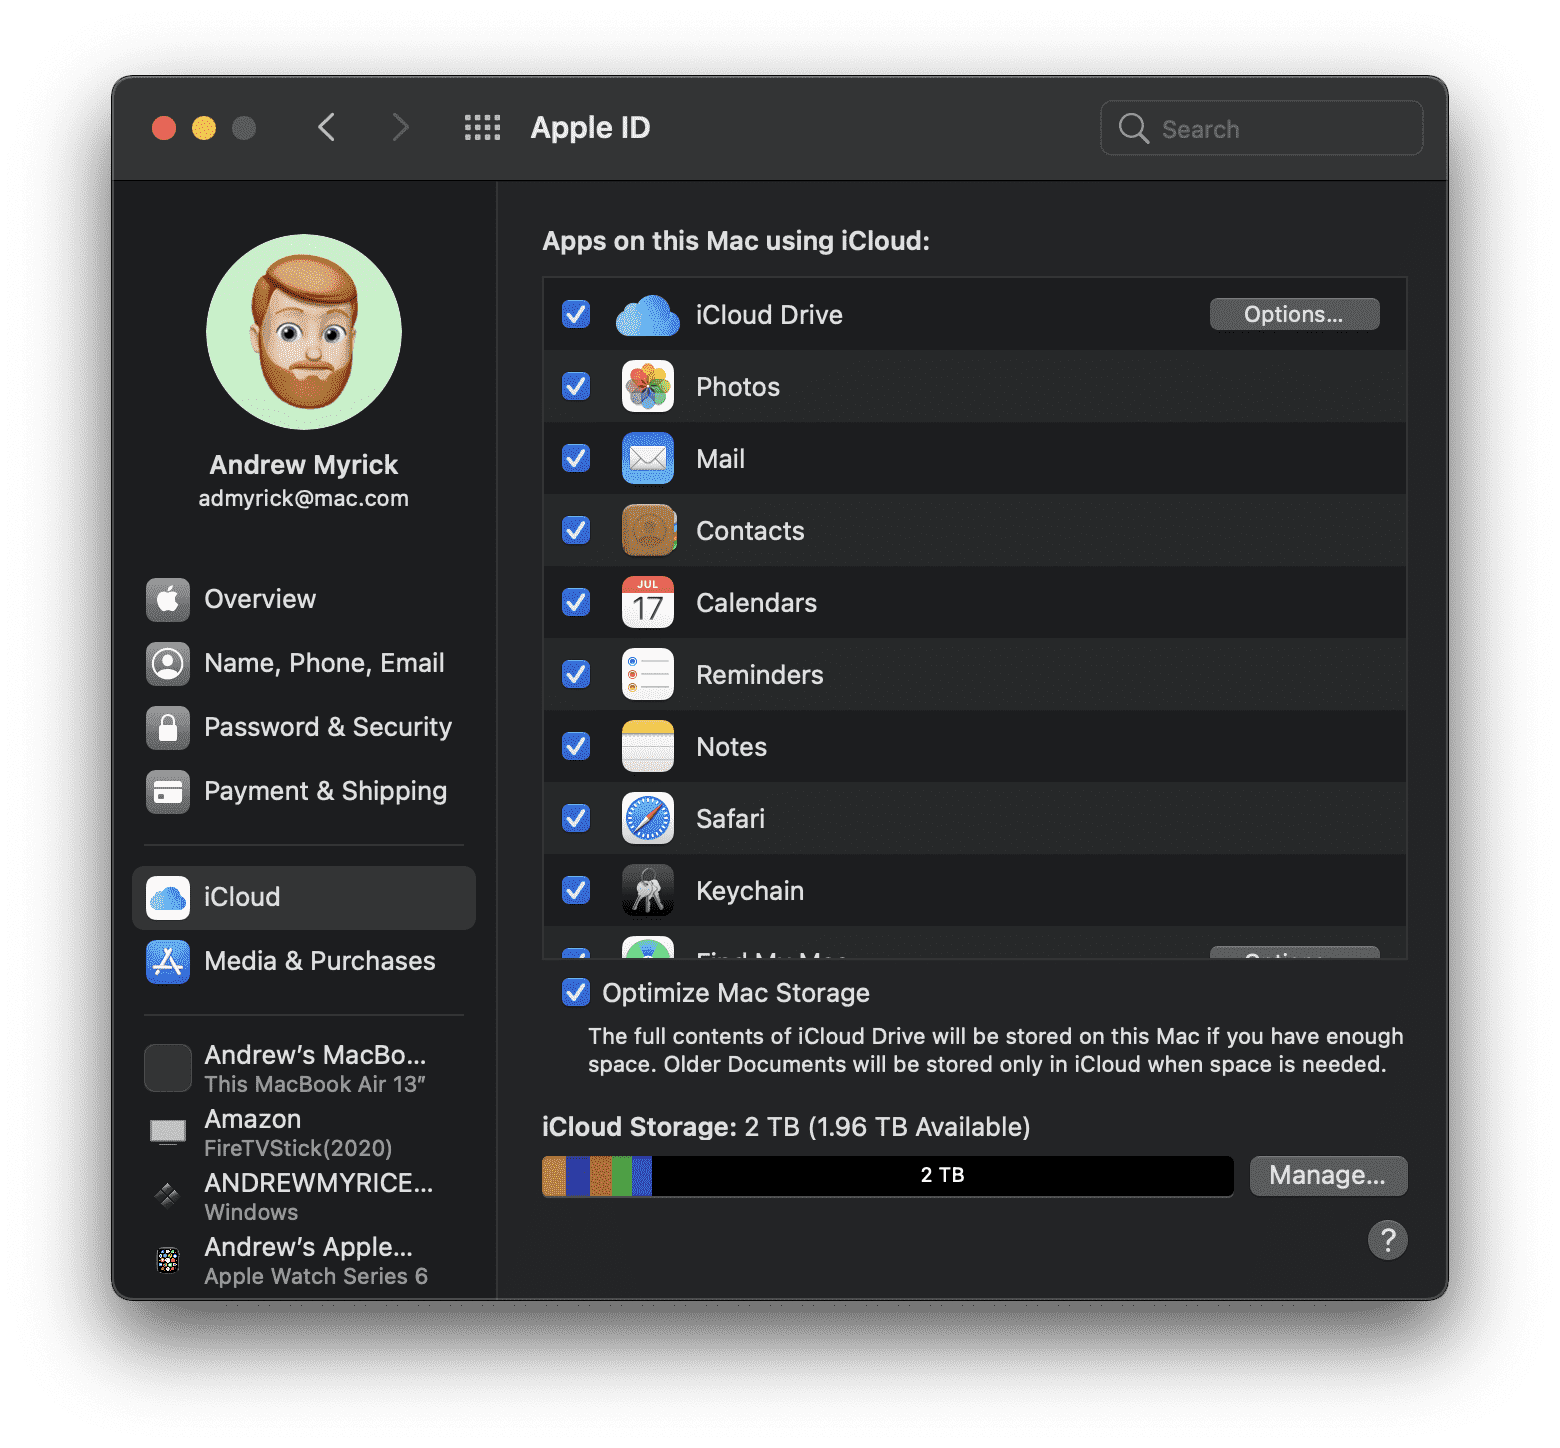
Update your Mac
Starting with the Mac, you’ll need to follow these steps to get your Apple ID updated:
Note: These steps are for those running macOS Catalina or later.
In the Menu Bar, click the Apple logo in the top left-hand corner.
Select System Preferences from the drop-down menu.
Click Apple ID.
Click on iCloud.
If on macOS Mojave or earlier, open System Preferences and then select iCloud.
If you are already signed out, enter your updated Apple ID and password.
Wait a few moments, and your information will populate automatically.
If your Mac is still signed in with the previous Apple ID information, follow these steps:
From the iCloud panel, click Sign Out.
You will be asked if you want to either make copies or delete the iCloud data from your Mac. The data will remain in iCloud until you sign in with your updated Apple ID.
Enter the new Apple ID and password to sign.
It’s worth noting that the syncing process could take some time. Part of it depends on how fast your home internet is, while some of it depends on how much data is actually being synced. Nonetheless, be patient and the information will be synced over.
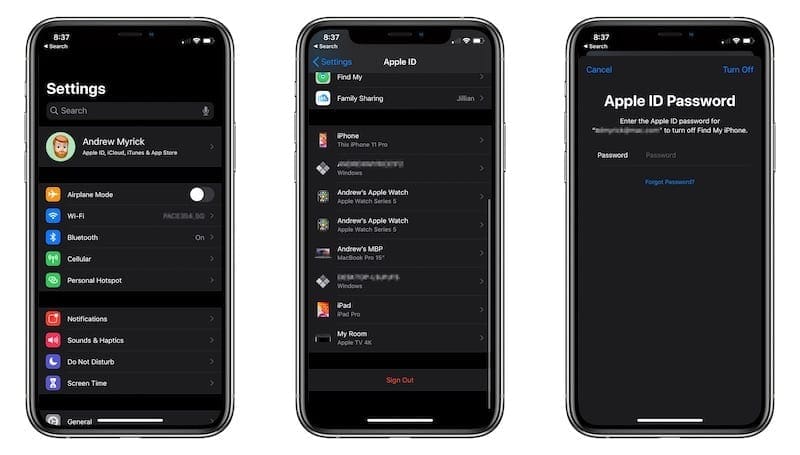
Update your iPhone and/or iPad
Sign out of iCloud on iPhone
For those trying to update their Apple ID on an iPhone or iPad, here are the first steps you’ll need to take.
Open the Settings app on your iOS or iPadOS device.
Tap Your Name at the top of the page.
If you are already signed out, your device will prompt you to sign in with the correct account information.
If you are still signed in, scroll down and select Sign Out.
Follow the onscreen steps.
Enter your updated Apple ID and password.
It’s important to make this your first step, so that your iPhone or iPad can begin syncing your iCloud data. As one might suspect, this process could take some time, so it’s important to be patient as the data is synced.
But the fun doesn’t stop there, as you will want to ensure that the correct Apple ID is being used for FaceTime and Messages.
For FaceTime:
Open the Settings app.
Scroll down and select FaceTime.
If signed out, tap Use your Apple ID for FaceTime.
Enter the updated login information.
If signed in with your old account, tap your Apple ID.
Tap Sign Out.
Tap Use your Apple ID for FaceTime.
Enter the updated information.
For Messages:
Open the Settings app.
Scroll down and select Messages.
Tap Send & Receive.
If signed out, tap Use your Apple ID for iMessage.
Enter the updated login information.
If signed in with your old account, tap your Apple ID.
Tap Sign Out.
Tap Use your Apple ID for iMessage.
Enter the updated information.
Messages may take some time to sync, but you shouldn’t lose any data in the process of changing to a new Apple ID.
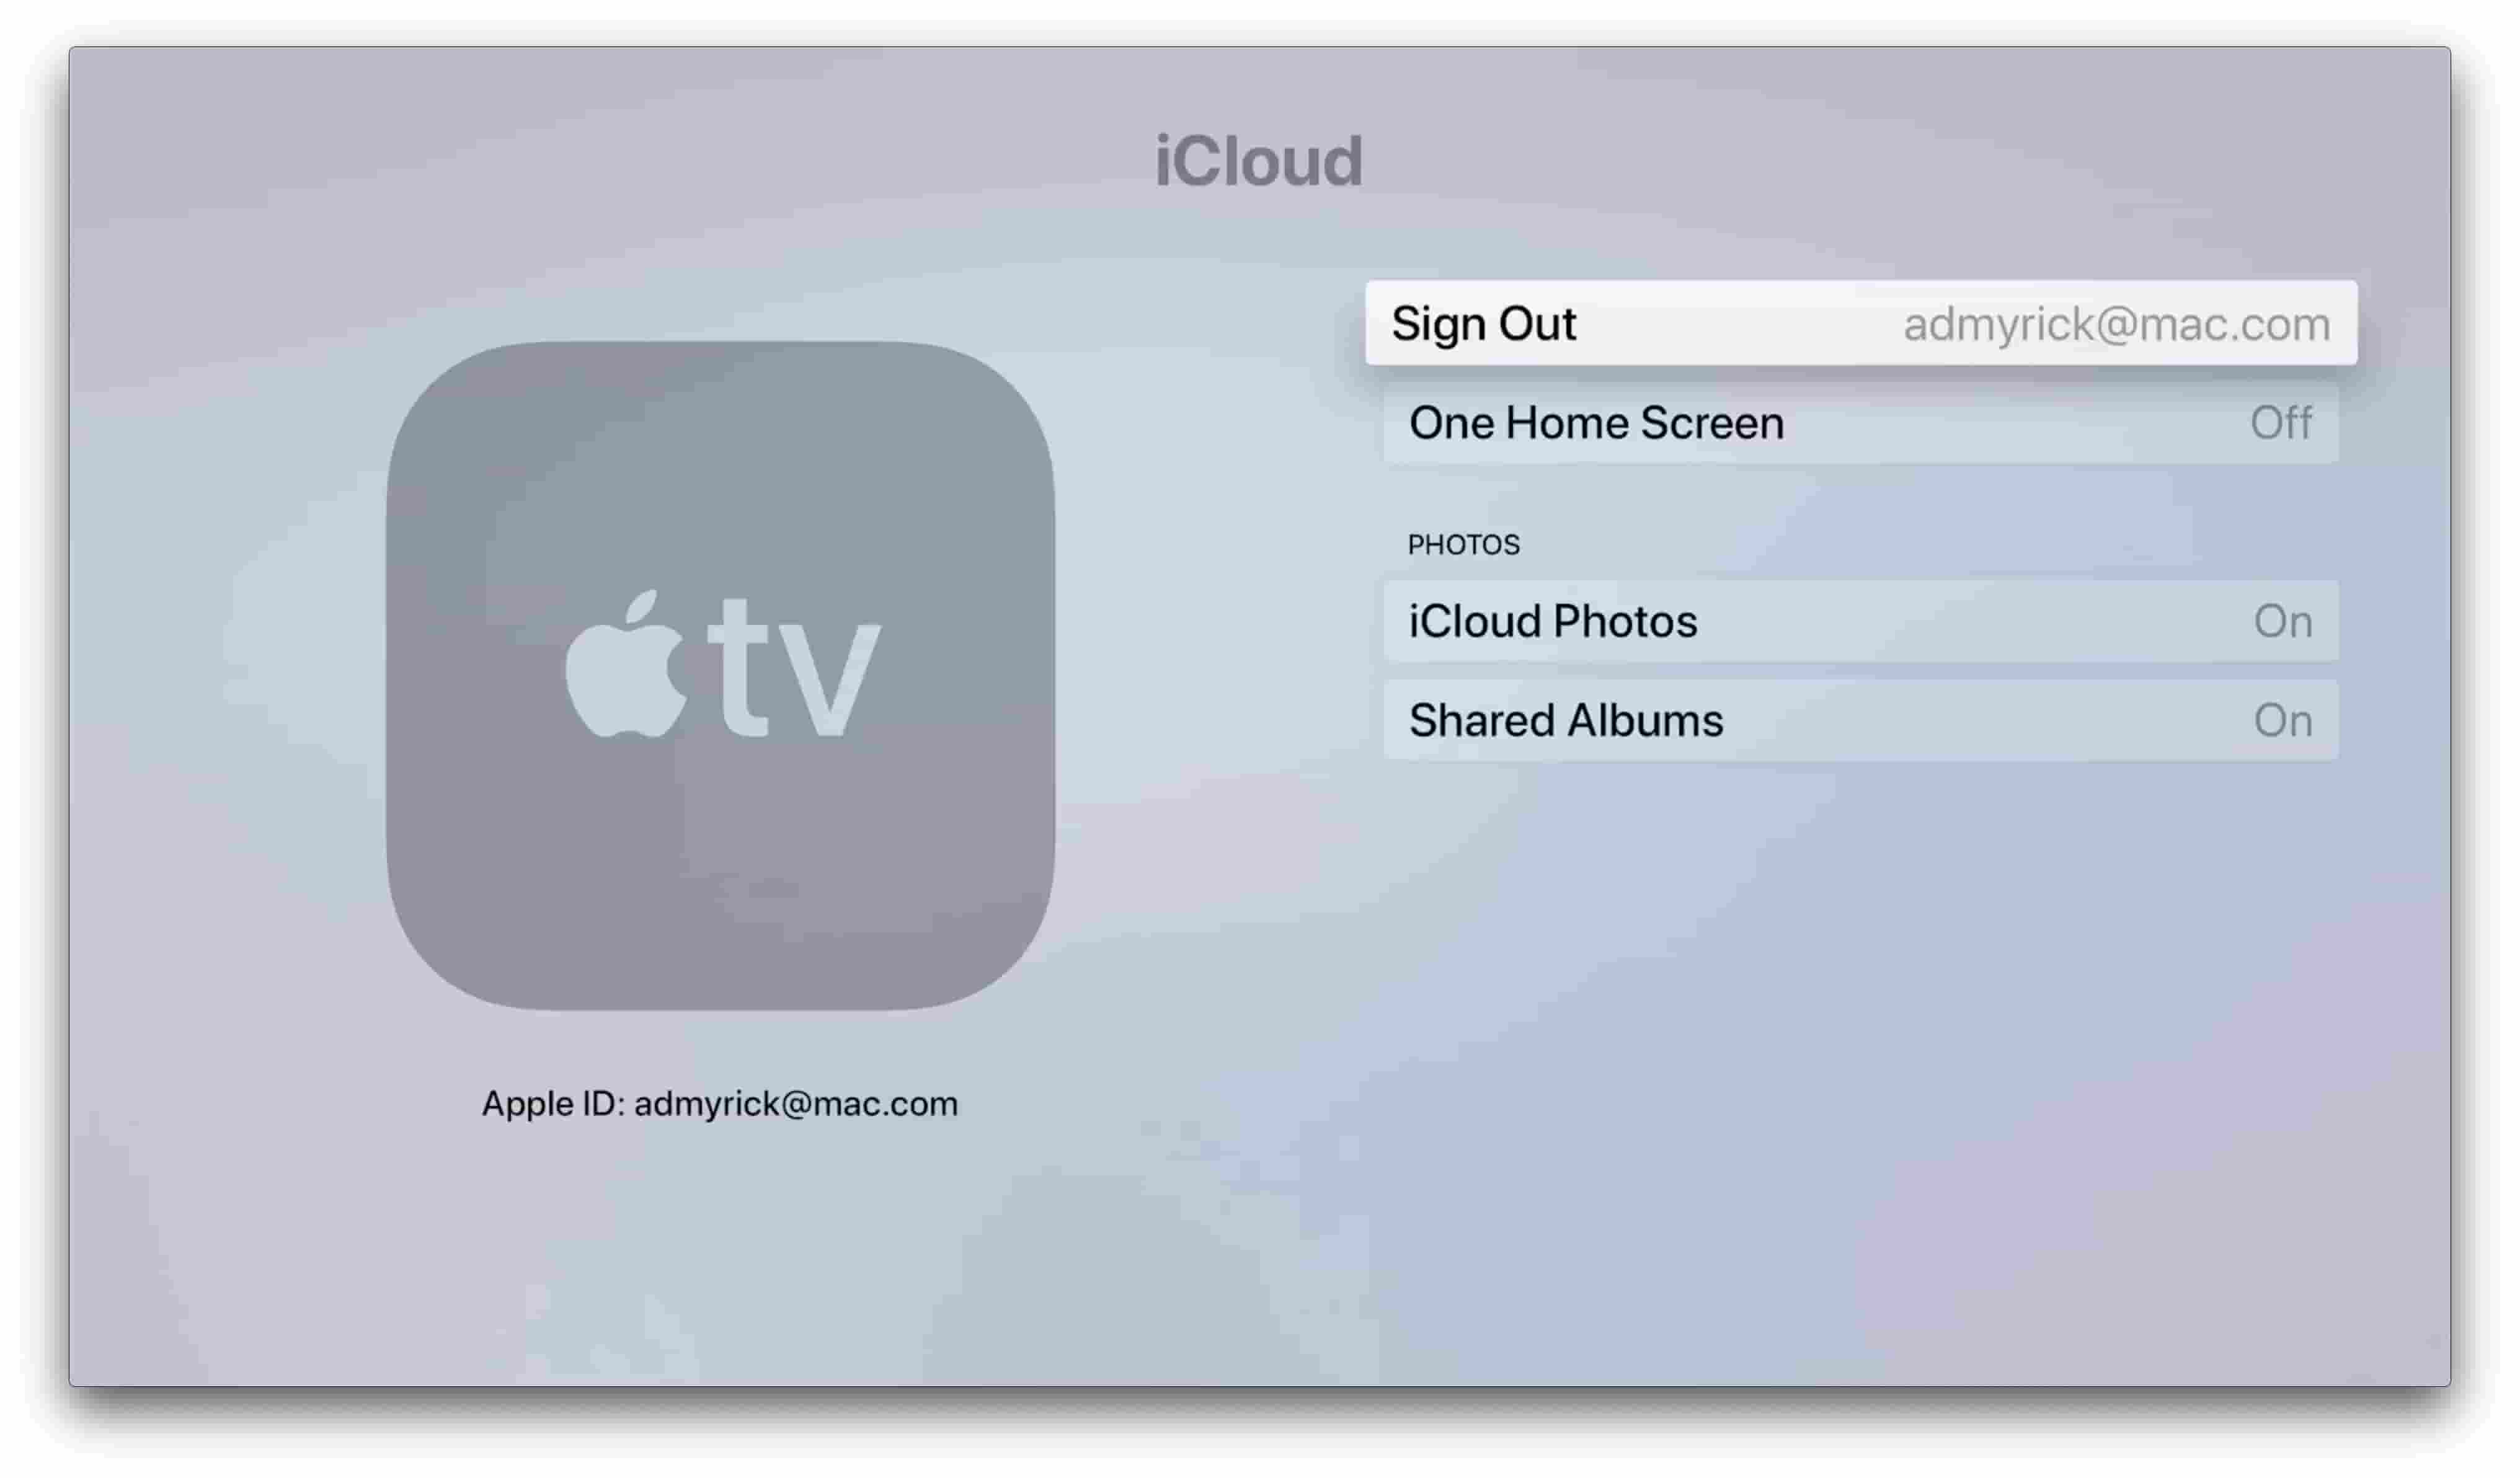
Apple TV
These next steps work for the Apple TV streaming box, along with the Apple TV app found on your Mac or PC.
If playing content from Mac or PC:
Open the Settings app.
Select Accounts.
Click iCloud.
Sign in with your updated Apple ID and Password.
If using the same Apple ID for iCloud and iTunes, select Yes from the pop-up box.
If you are updating the Apple ID on an Apple TV device:
Wake up your Apple TV.
Open the Settings app.
Select iCloud.
Enter your updated Apple ID and password.
Windows PC
Those who want to access their iCloud data from a Windows PC will also need to update the login information. The process is a bit different, yet similar, to that of the Mac.
Open the iCloud for Windows app on your PC.
Click the Sign Out button.
If you are signed in with your previous Apple ID, you will be prompted to make copies or delete the data. The data will remain in iCloud until you sign in with your updated Apple ID.
Andrew Myrick is a freelance writer based on the East Coast of the US. He enjoys everything to do with technology, including tablets, smartphones, and everything in between. Perhaps his favorite past-time is having a never-ending supply of different keyboards and gaming handhelds that end up collecting more dust than the consoles that are being emulated.
A friend of mine, an elderly lady, uses an iPad with not so good results. Somehow she deleted the mail app. This in itself is no big deal but she does not remember her password and she has no cell phone. The email she uses is from some relative and she does not remember who it is. What can I do to help her get back into her email.
Wonderful article! I actually had my Apple ID set to an icloud address for over a year now, then today changed it to a Gmail. Found out I made a mistake and tried changing it back to the iCloud, but then it says: This email address cannot be used as an Apple ID at this time.
This makes me wonder if I have to wait 30 days to use the same iCloud address I had used for over a year before it’ll accept it again as my primary Apple ID? Nothing in Apple’s articles say anything about waiting periods, though. So, not sure.
I’m running into the exact same problem. Did you try again after 30 days? Or were you able to resolve the problem another way?