Is your HomePod not connecting to the Internet or sporadically losing its connection? Hearing the message “I’m having trouble connecting to the internet right now?” If so, you aren’t alone. Quite a few of our readers tell us their HomePods have this particular problem with connecting to the internet intermittently.
Often the obvious solution is the one that works. So before you troubleshoot, check your HomePod to ensure it’s operating with the latest software.
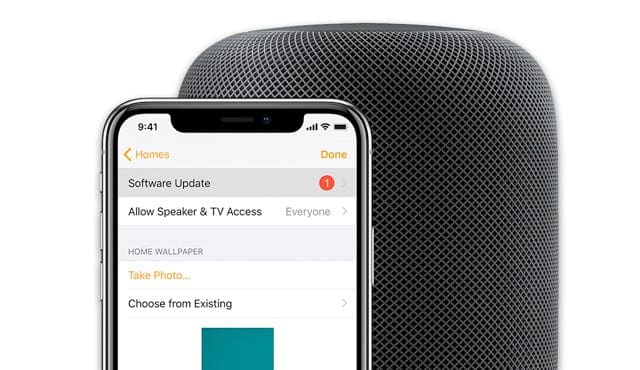
Your HomePod should automatically install software updates, but sometimes, it doesn’t so it’s a good idea to manually check for updates in the Home app on your iDevice (or Mac using macOS Mojave.)
How To Update Your HomePod From Your iDevice
Using the iDevice that you originally set-up your HomePod with, tap the Home App
Make sure your iDevice is also using the latest iOS
Tap the house icon in the upper-left corner
For older iOS versions, this is an arrow icon
Tap Software Update
If an update is available, tap install
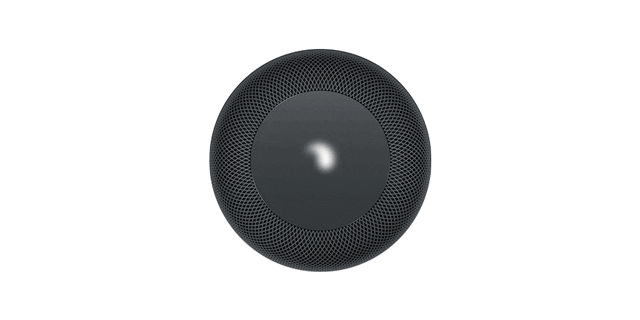
A white spinning light appears on the top of HomePod while it’s updating. The update might take some time. Don’t unplug HomePod until the update is complete
If you have multiple HomePods, this should update all your HomePods at once
How To Update Your HomePod From Your Mac
Only Macs using macOS Mojave and above can update HomePods
Open the Home App
Tap Edit > Edit Home from the menu bar
Select Software Update
If an update is available, tap install
A white spinning light appears on the top of HomePod while it’s updating. The update might take some time. Don’t unplug HomePod until the update is complete
If you have multiple HomePods, this should update all your HomePods at once
Restarts often fix a surprising amount of problems, especially issues that suddenly appear with no apparent reason.
How To Restart Your HomePod
Unplug your HomePod
Wait 30 seconds
Plug the HomePod back into power
If a restart doesn’t help, try a reset
How To Reset Your HomePod With An iDevice
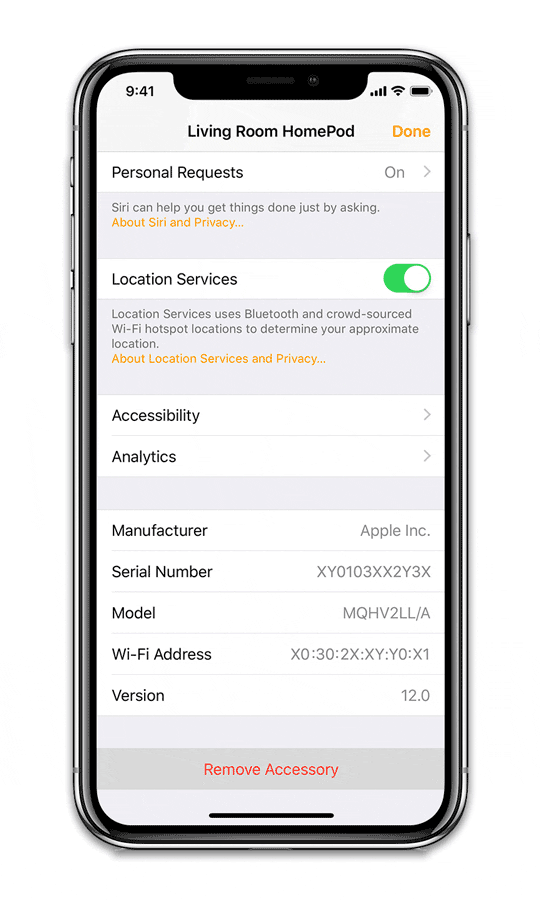
On an iDevice signed in with the same Apple ID used to set-up your HomePod initially, open the Home App
Press and hold the HomePod icon
Tap Settings
Scroll down and tap Remove Accessory, then go through the steps to set-up your HomePod(s) again
If you can’t remove HomePod from the Home app
Unplug HomePod, wait 5 seconds, then plug it back in
Wait 5 seconds, then touch your finger to the top of HomePod and hold it there
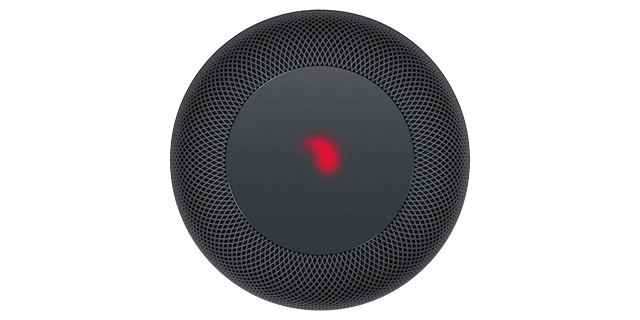
The white spinning light turns red. Keep your finger down
Siri tells you that your HomePod is about to reset
After you hear three beeps, you lift your finger
Reset Your HomePod With a Mac
This works for Mac using macOS Mojave and above
Open the Home app
Double-click HomePod
Tap Settings in the upper-right corner
Scroll to the bottom and select Remove Accessory
Set-Up Your HomePod (Again!)
Plug in and turn on your HomePod
Wait for a flashing white circle on the top of your HomePod
Bring your iPhone/iPad/iPod nearby and unlock it
Wait for a HomePod notification to appear on your screen
Tap Set Up
Follow the on-screen instructions to set-up your HomePod’s location in your space, personal requests, iCloud access, Apple Music, agree to terms and conditions, and so forth
When Siri greets you, the HomePod is now fully set-up
Reset Your Network Settings
Using the iPhone, iPad, or iPod that you originally set-up your HomePod with, go to Settings > General > Reset
Tap Reset Network Settings
Enter your WiFi passcode in again
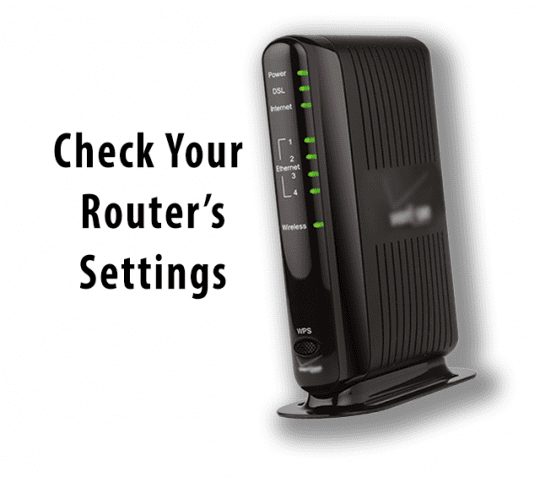
Change Your Router’s Settings
A few readers found that changing some settings on their routers did the trick! They used a few different strategies, so try these one at a time–not all at once.
Reboot your WiFi Router or Modem
Sometimes a simple reset of your WiFi Router is all you need to re-establish a good internet connection.
Rebooting usually means unplugging your router and waiting a few minutes before plugging it back in. But check with your user guide or with your Internet Service Provider on specific instructions for your network and the make/model of your router.
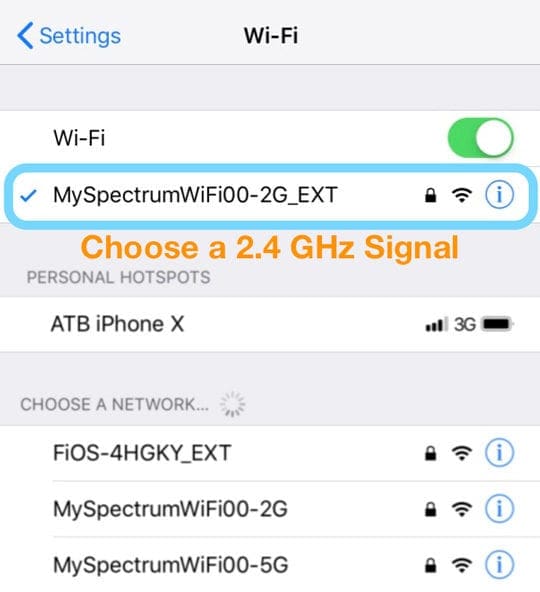
Connect to a 2.4 GHz WiFi Network
Many HomePod users find that their HomePods work better using a 2.4 GHz WiFi signal versus a 5.0 GHz. For people living or working in large spaces or older spaces with plaster walls, the 2.4 GHz frequency works better due to its longer range.
Additionally, 2.4 GHz signals penetrate solid objects much better than 5 GHz.
So if you think space or density of materials is an issue, try using a 2.4 GHz WiFi network and see if your HomePod’s internet performance and reliability improves.
If your HomePod currently connects to a 5 GHz signal, you’ll need to repair it with your iDevice. When repairing, make sure your iPhone is connected to your 2.4 GHz WiFi Network since that’s the default connection for your HomePod.
Turn Off IPv6
Some folks discovered that their HomePods only connected to the internet consistently when they disabled IPv6 on their routers.
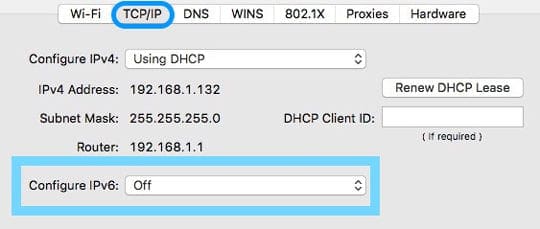
Turn Off IPv6 on a Mac
Choose Apple Menu > System Preferences > Network
If the Network Preference is locked, tap on the lock icon and enter your Admin password to make further changes
Choose WiFi > Advanced
Tap TCP/IP
Click on the Configure IPv6 pop-up menu and verify it is set to Off
You can also look at your router’s user guide or look up your router’s make and model on how to turn off IPv6.
Create a Static or Reserved IP Address for Your HomePod
Another workaround that HomePod folks recommend is setting up and using a static IP address (also called an IP reserved address) for your HomePod(s.)
You need to look at your router’s user guide to find out how to create a static IP address for your HomePod.
Set-Up Your HomePod as a DMZ Device
Another option some people opted for their WiFi network’s configuration was to set their HomePod as a DMZ device.
DMZ (Demilitarized Zone) allows a device to accept all incoming and outgoing traffic. Not a great idea for your computer or iDevice but for a HomePod which doesn’t really store any data, it’s a possible solution to internet connectivity problems.
You need to consult your user manual or reach out to support to learn how to configure your HomePod as a DMZ device.
Reader Tips
The modem may be denying access to the MAC address for the HomePod. If you use Access Control and Timed Access of your network, temporarily disable it. Then, locate your HomePod’s MAC address and add it into any Timed Access before re-enabling Access Control on the network
If you set-up an alarm on your HomePod–try removing these and see if your HomePod connects to the internet consistently. Worked for me!
When setting up your HomePod (or resetting), make sure your phone is connected to a 2GHz WiFi network during setup. No issues since doing this
Try power cycling your modem and router for a full minute. Wait another minute and turn everything back on
Hold your finger on the top after unplugging it and plugging it back in, it should then factory reset
I had this issue before and it was my Internet Service Provider. Once they fixed my upload speeds, my HomePods connected without any problems. So call your ISP
My Homepod had a bad WiFi chip–took it to Apple with my proof of purchase and got a replacement straight away!
For most of her professional life, Amanda Elizabeth (Liz for short) trained all sorts of folks on how to use media as a tool to tell their own unique stories. She knows a thing or two about teaching others and creating how-to guides!
Her clients include Edutopia, Scribe Video Center, Third Path Institute, Bracket, The Philadelphia Museum of Art, and the Big Picture Alliance.
Elizabeth received her Master of Fine Arts degree in media making from Temple University, where she also taught undergrads as an adjunct faculty member in their department of Film and Media Arts.
I’d tried pretty much everything mentioned (iOS 16.3 on iPhone Xs Max with a Homepod 2) and finally called Apple support. They connected to my iPhone and noticed that Spectrum had added an MDM profile for their public wifi access points. We deleted that and, BOOM, the Homepod went from Configuring to Updating immediately. So, if nothing else seems to work, go to Settings -> General -> VPN & Device Management and check if your carrier added something similar. I also have a Meraki Management profile (for work), but that didn’t cause any issues.
The original owner of the Mini HomePod died. I don’t have the original device ( Ipad nor cell phone) used to set up the Mini HomePod.
Is there someone I can speak with to help me setup the Mini HomePod so it can be used
Hi while updating the software I had a power cut how do I recover the situation since doesn’t appear to work by going thru the reset procedure. Help needed