How to Add Docusign to Word on Mac: Step-by-Step Guide
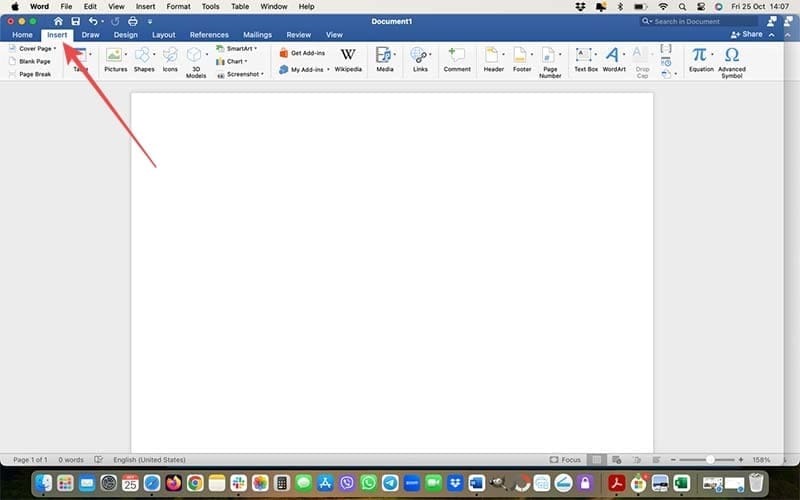
Step 1. Open up Word on your Mac and click on the “Insert” button on the ribbon at the top of the screen.
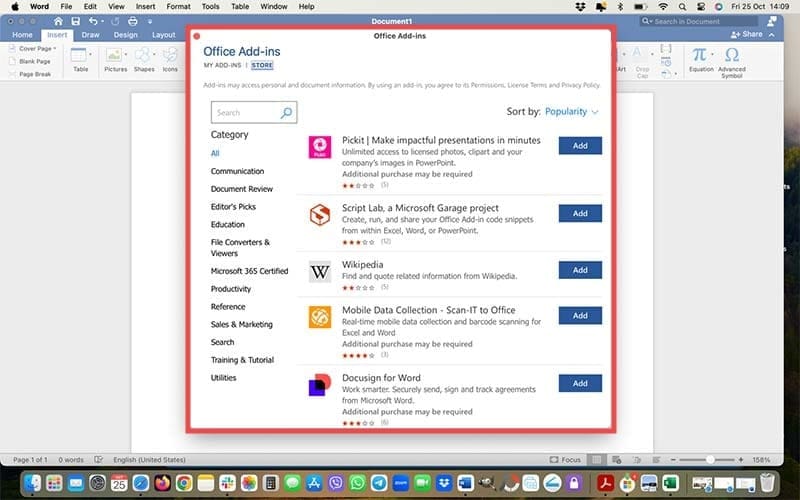
Step 2. Find and select “Get Add-ins.” This will open up the “Store” page.
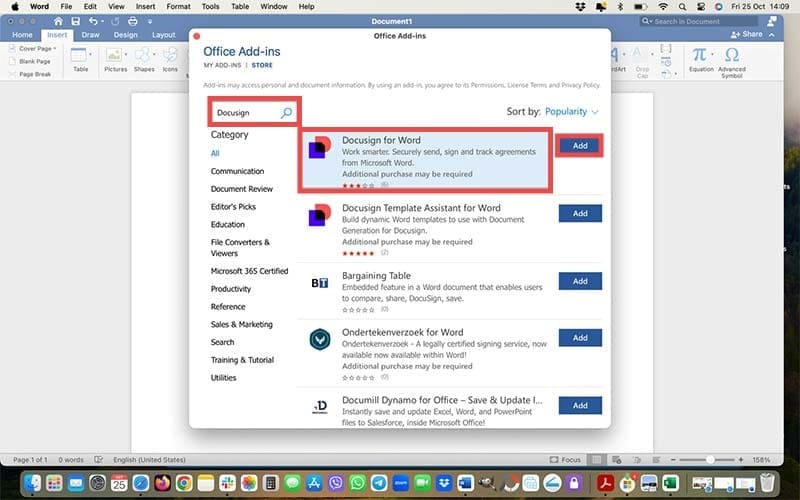
Step 3. Search for “Docusign” in the box provided and click “Add” next to the “Docusign for Word” add-in, when it appears.
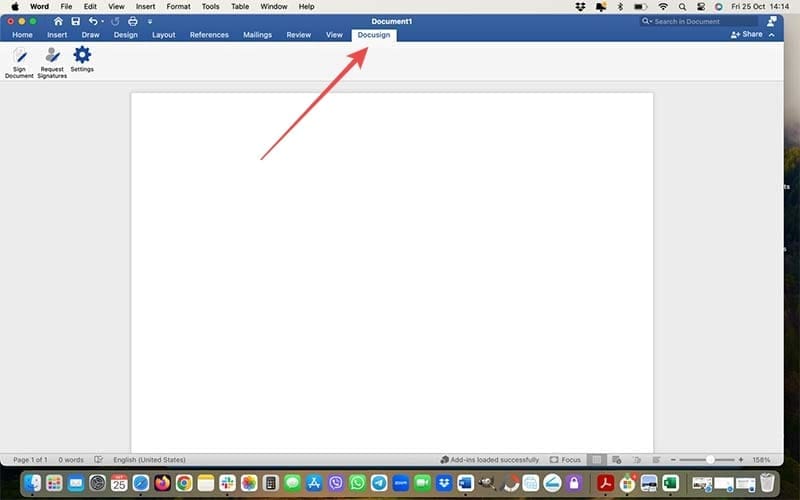
Step 4. Wait for the installation to finish. Once it’s done, you’ll see a new “Docusign” button added as a menu option on your ribbon.
How to Sign a Document with Docusign for Word on Mac
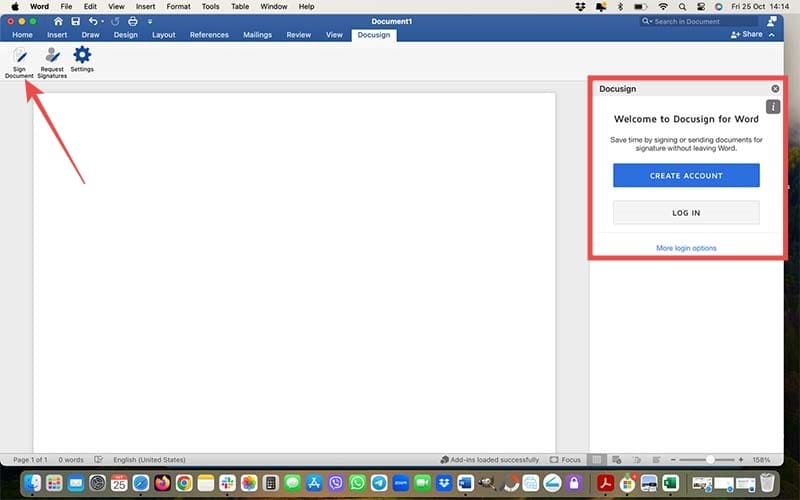
Step 1. Open the document you want to sign and click the “Docusign” button in the ribbon.
Step 2. Select the “Sign Document” option. You’ll then have to sign into your Docusign account. If you don’t have one yet, you can create one via the Docusign website. You’ll just need an email address and some other basic info to set up your account for the first time. As a new user, you can also make the most of Docusign s free trial, or sign up to a paid plan.
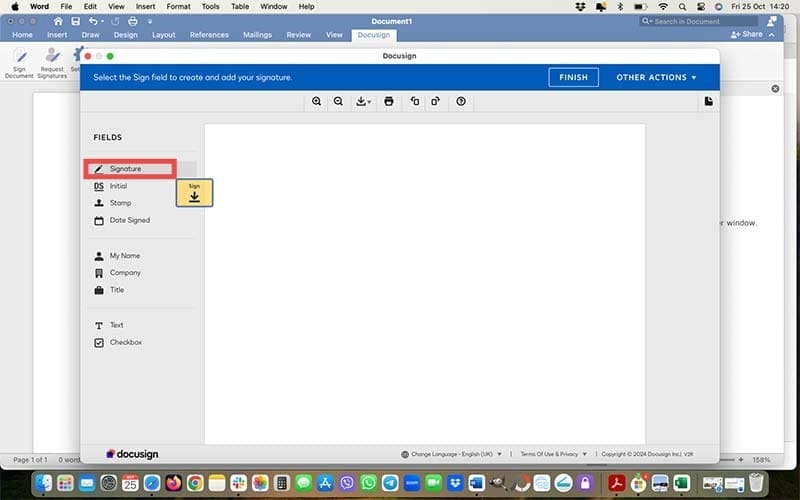
Step 3. Once you’re logged in, you can just drag and drop your Docusign signature onto the document. Or, select the “Signature” button and then click on the document where you want it to appear. You can opt to add your initials and signature date, along with other info, if needed.
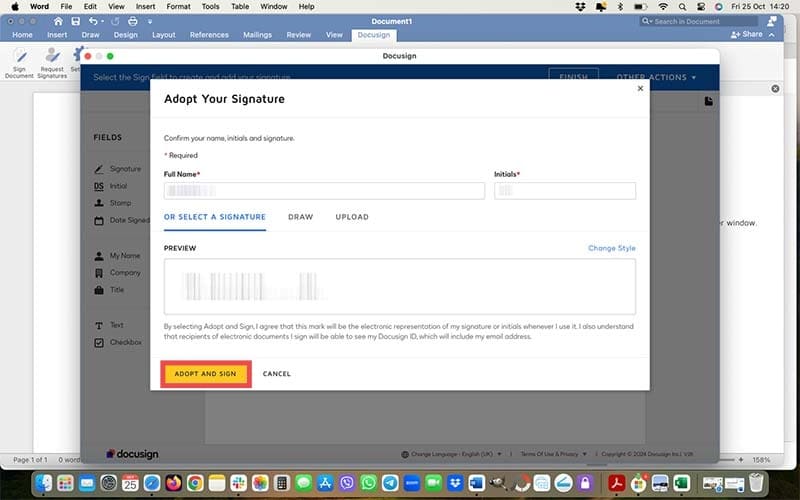
Step 4. Select “Adopt and Sign” to confirm your signature, and then “Finish” to complete the process.
Benefits of Installing Docusign to Word on Mac
Now you know how to add Docusign to Word on Mac, but you might be wondering if it’s worth installing in the first place. There are several advantages to this.
The first and most obvious one is that you’ll be able to sign documents directly by opening them in Word. You won’t have to, for example, save a document to your Mac, then go to the Docusign site, upload the file, sign it, download it again in your desired format, and then send it to the other recipients.
Instead, you can just open whatever docs you have to sign directly in Word, sign them in no time, and save the changes. It’s quick, easy, and convenient.
Bonus Tips: How to Create or Edit Your Docusign Signature
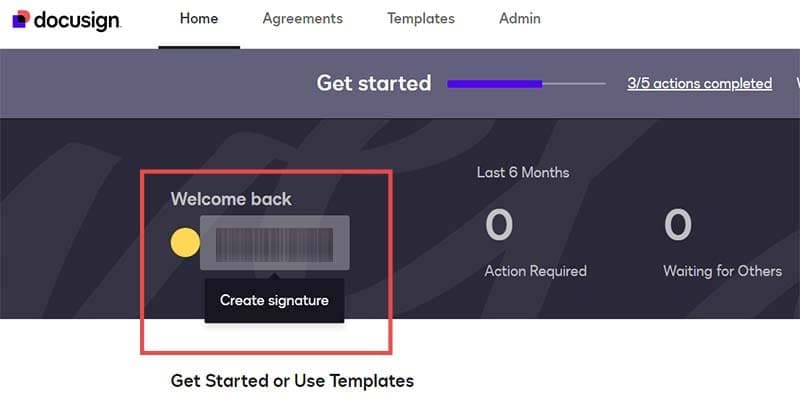
Step 1. Log into your Docusign account via the official Docusign site.
Step 2. Click on your existing signature to adjust it or create a new one.
Step 3. In the “Create Your Signature” menu, type in your name and initials and look through the list of proposed signature styles to select one. You can also click the “Draw” tab and draw your signature using your mouse instead for a more customized creation.
Step 4. Click the “Create” button to finalize your new signature. The next time you use Docusign for Word on Mac or Docusign in general, you’ll be able to add that signature to your docs.
As an avid gamer, I’ve run into my fair share of error codes and weird faults that have forced me to find fixes to problems I never anticipated. That gave me a passion for sharing those fixes with others so we can all game without feeling like our hardware is rebelling against us.


Write a Comment