Sharing files between your iDevice and your Mac is easy with AirDrop–once you set it up correctly. Unfortunately, that’s not as simple of a task as Apple users are used to–it doesn’t “just work” from day 1. So today, we’re outlining the steps to get AirDrop working for all your devices. So let’s learn how to AirDrop today!
Apple introduced AirDrop to the Mac in OS X Lion, as an easy way to share files between computers without having to use email or even a USB drive. It makes sending files between devices extremely quick and simple. Plus, with AirDrop all transfers are automatically encrypted for your safety and security.
AirDrop was also available on iOS from iOS 7 but unfortunately wasn’t compatible with OS X. Thankfully, with OS X Yosemite and all subsequent OS X and macOS releases, Apple designed AirDrop to work between all of its devices.
On a Mac, you can either drag and drop files to an iOS device or use the Share button which is available in certain applications (such as Safari, Preview, and Pages). On iOS, you only need to tap the Share button from relevant apps.
Ensure your devices are compatible with AirDrop
Even though AirDrop is simple to use, there are a few things to check before you start.
You need iOS 7 or later and OS X Yosemite+
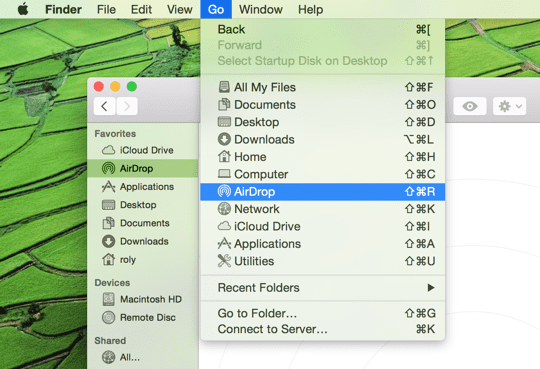
AirDrop works on all Macs from 2012 and later. An easy way to check if it’s supported by your Mac is to go to Finder and select Go from the menu bar. You see AirDrop listed if you have a compatible Mac (see screenshot below)
Do you have an iPhone 5 or newer, iPad 4 or later, iPad Mini 1 or newer, or an iPod Touch 5th generation+? AirDrop only works on these devices and newer generations
Open Finder and select the Go menu to check if your Mac supports AirDrop
If items 1-3 above are all OK, you’re now ready to use AirDrop
AirDrop transfers information uses BOTH WiFi and Bluetooth. To use AirDrop, you need to be signed in with an Apple ID.
Note: it is not necessary to use the same iCloud account on each device, but by doing so you won’t have to approve every file transfer. The devices also need to be within a range of each other to use Bluetooth – usually around 30 meters or so.
Also if your device is locked, AirDrop won’t work because the device won’t even appear on the list.
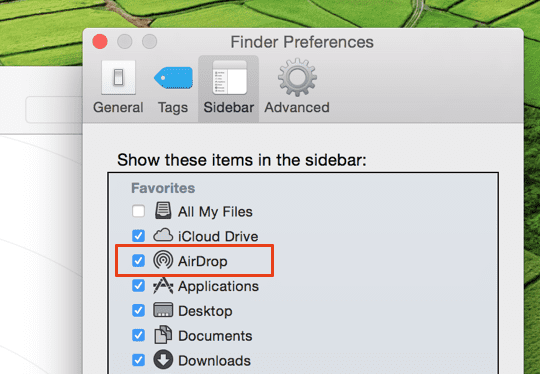
There is also one last check you might perform (though AirDrop should be on and the icon in the Sidebar by default) on your Mac to make sure that AirDrop is shown in Finder windows:
Open Finder and select Preferences from the Finder menu
Click the Sidebar icon and make sure that AirDrop is checked, as shown in the screenshot below
If AirDrop doesn’t appear in the Sidebar, open Finder’s Preferences and check the AirDrop icon
How to use AirDrop
Step 1: turn on Wi-Fi
Make sure you enable WiFi on your iPhone and your Mac.
Note that they don’t have to be on the same WiFi network, but our readers report more consistent results when both the iDevice and the Mac are on the same network–for dual-band (or tri-band) routers, make sure you look at the GHz listed.
You want to connect to the same network, including bandwidth (2.4 GHz or 5 GHz)
Step 2: turn on Bluetooth
Turn on Bluetooth on both devices.
The quickest way on your iPhone is to swipe open Control Center and tap the Bluetooth icon (or go to Settings > Bluetooth.)
Tap the Bluetooth icon in Control Center to enable or disable it.
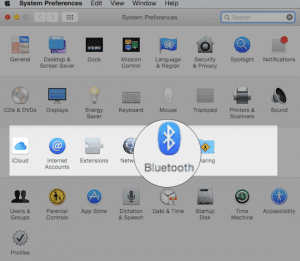
On your Mac, Bluetooth is typically found on the top right of your menu bar, where you can turn it on or off.
If you don’t see it, check System Preferences > Bluetooth and ensure you check Show Bluetooth in the menu bar.
Step 3: turn on AirDrop on your iOS device
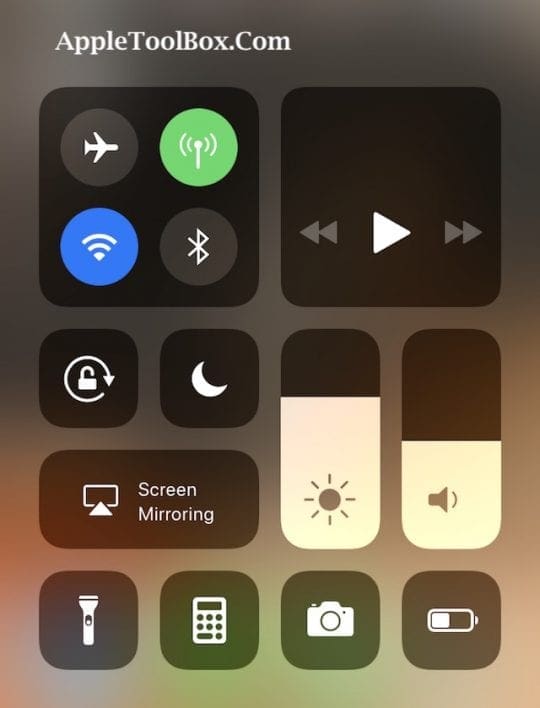
Open the Control Center on your iOS device and long press on the connections tile that shows Airplane mode, WiFi, and Bluetooth icons.
Then, tap on the AirDrop icon.
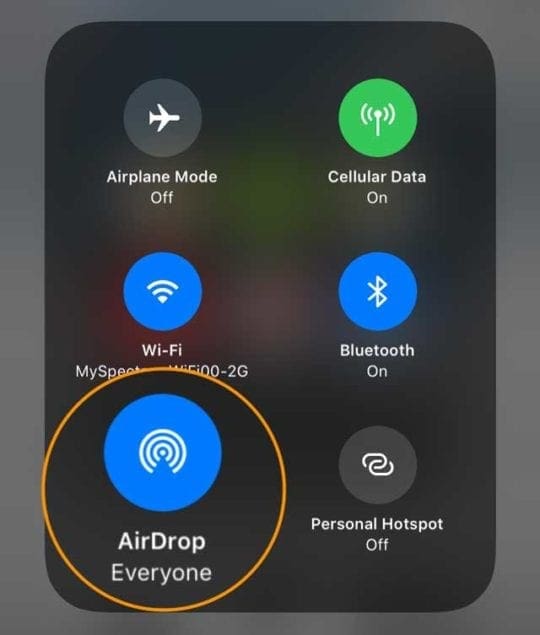
A popup appears with several options (Off, Contacts Only or Everyone), so just choose the desired option.
If it’s someone that you don’t have in your contacts list, Everyone is the only option that you can use.
Most of the time, I tend to leave it set to Contacts Only, just for a bit of extra security…
However, if you’re having problems getting AirDrop to work on your Mac, change this setting to Everyone.
Our readers tell us this often solves their problems when AirDropping files to their Macs!
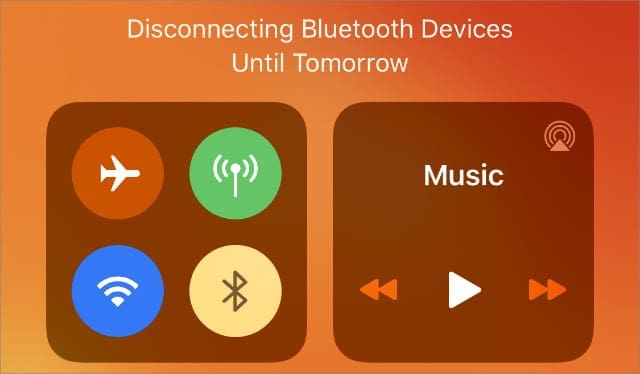
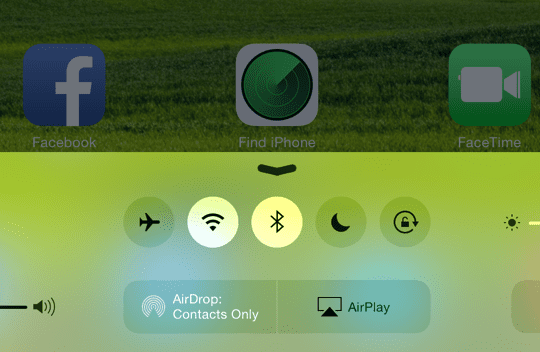
Once you have chosen the relevant AirDrop option, you’ll notice the status shown in the Control Center, as shown in the example above.
Example for iOS 10 and lower, shows that AirDrop is on and ready to use for Contacts only.
Check that your iOS device appears in the Finder on your Mac.
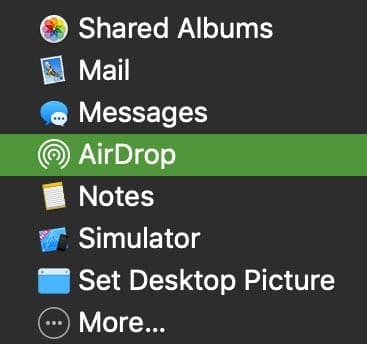
Open Finder and select AirDrop from the Sidebar.
The list of available devices within range should appear in the main window.
AirDrop has been successfully activated on the iOS device.
Or, control who you allow your Mac to be visible to using AirDrop in this window.
As shown in the screenshot above, select the desired option from the blue dropdown list displayed in the main window.
If you don’t see who you expect, choose the second option, and you’ll have the option to search for an older Mac that doesn’t support the latest version of AirDrop.
Step 4: send a file from your iPad, iPhone, or iPod to your Mac or MacBook
On your iOS device (I used an iPhone and iPad for this tutorial), find an item (like an image or a document) that you want to send to your Mac.
As mentioned earlier, some of the built-in apps (like Pages) have sharing buttons to send via AirDrop.
The Photos app also includes this feature, so in this case, I selected a photo, tapped the Share Button, and the Apple ID associated with my MacBook then appeared beneath the picture
Find your Apple ID or your Mac in the share sheet–look for the AirDrop icon in the lower corner
Next up on your iOS device, tap on your Apple ID or Mac to start sending the file.
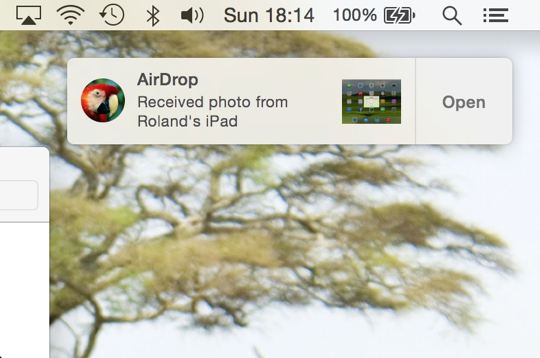
On your Mac, you should also see a notification slide in from the right of the screen, as below.
Your Mac notifies you when an AirDrop transfer has taken place.
If you are signed in to the same iCloud account, you won’t need to approve the file transfer – it transfers automatically and is saved in your Downloads folder.
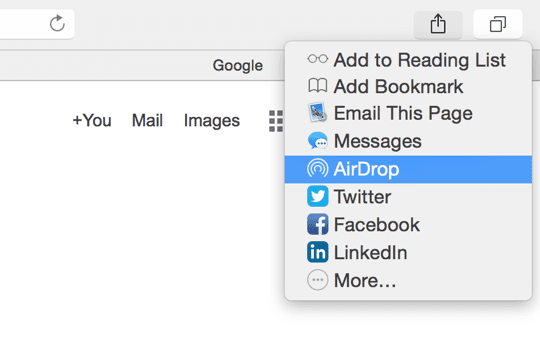
Here’s an example of AirDrop as it appears in the Share menu from Safari:
Many of Mac’s built-in applications allow you to send files using AirDrop.
Having Trouble with AirDrop on Your Mac?
Some of our readers discovered that even with Bluetooth enabled on both devices; they had to open their Mac’s Bluetooth Preferences (System Preferences > Bluetooth or via the Bluetooth icon in the top Menu Bar) for their iPhones and iPads to see it.
So give this tip a try if you’re having issues connecting with AirDrop!
Step 5: send a file from your Mac or MacBook to your iPad, iPhone, or iPod
In this step, we perform the reverse – i.e., send a file from the Mac to the iPad. Just choose an item to share and drag it onto the AirDrop window in Finder, click the Share button in the app window, or Control-click the file in the Finder, then choose Share from the shortcut menu.
In this example, I previewed a screenshot, selected the Share button and clicked on AirDrop.
Nearby devices are shown in the popup as shown below – just choose the Apple ID, recipient’s name, or device you want to share with:
Share almost any file between your Mac and iOS device.
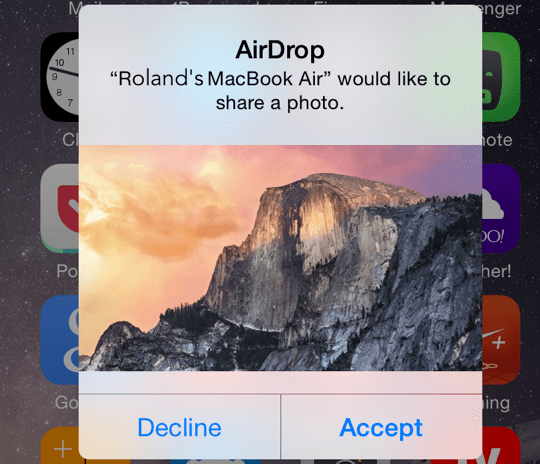
Note: that if you’re not signed in to the same iCloud account on both devices, you see a popup on your iDevice like this:
You can choose to accept or decline files sent from nearby Macs.
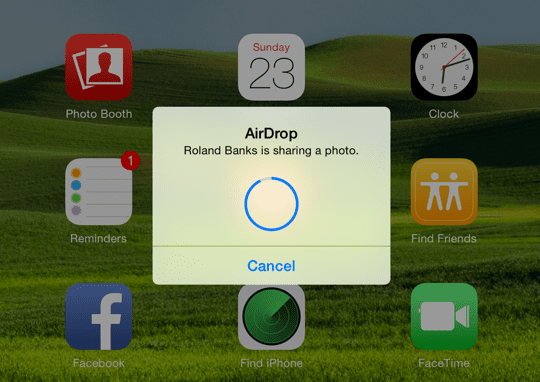
Lastly, when the file transfer is in progress, the iDevice indicates progress as follows:
Easily see when a file transfer is taking place (and the progress).
AirDrop not working?
If AirDrop isn’t playing nice, there are some things to check:
You turned on both WiFi and Bluetooth
Devices are within 30 feet (9 meters) of each other
Personal Hotspot is off on iPhone or cellular iPad
For Macs, choose Go > AirDrop from Finder’s menu bar in the Finder and check the ”Allow me to be discovered by” setting in the AirDrop window is set to Everyone or Contacts. If set to Contacts Only, both devices must be signed in to iCloud, and the email address or phone number associated with the sender’s Apple ID must be in the Contacts app of the receiving device
Check if your Mac’s firewall is blocking connections. Go to Apple menu > System Preferences > Security & Privacy > Firewall tab. Go to your Firewall Options (unlock with admin password if needed), then deselect Block all incoming connections
That’s really all there is to using AirDrop. Of course, you can still use it to transfer files just between iOS devices, but it’s really great to be able to share files quickly and easily with a Mac. Personally, I use it all the time because it takes just a few clicks and it’s done!
AirDrop creates an ad-hoc WiFi network between devices to send files. Apple designed AirDrop to bypass traditional WiFi networks. BUT, you still need both WiFi and Bluetooth enabled, although technically you do not need to be on a WiFi network. You should even be able to AirDrop between two devices without an active WiFi network, so why not give it a try!
A small number of users have reported problems with AirDrop on various Macs, so there are lots of troubleshooting resources available on AppleToolBox support pages and forums.
Reader Tips
I finally got it to work by toggling Bluetooth on my iMac off and then immediately back on again
Reality check! When I am in a rush to send files between my iPhone/iPad and my Mac (or vice-versa), I use iMessage and text it–so fast! And it works when sending to yourself or another Apple ID too!
For folks with older Macs like me, look for an all too tiny phrase at the bottom of your Mac’s AirDrop finder window “Connect to an Older Mac.” Clicking this allows the discovery of older Macs (when trying to do Mac to Mac AirDrop transfers), so you can AirDrop between older Macs too!
Don’t connect your iMac via ethernet–you can’t AirDrop files from your Mac to your iPhone without WiFi! Interestingly, you still can send files from your iPhone to your Mac–go figure!
Roland Banks has been passionate about Apple for more than a decade. He started his career at British Telecom’s research division working on collaborative virtual reality environments, before becoming a video streaming specialist at 3 UK where he helped launch some of the world’s first mobile video services.
Roland moved to Asia 4 years ago, where he writes about his passion for all things Apple.


Write a Comment