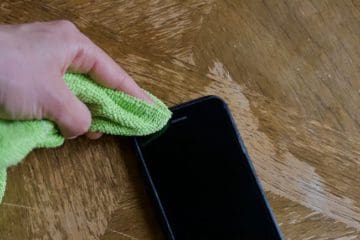
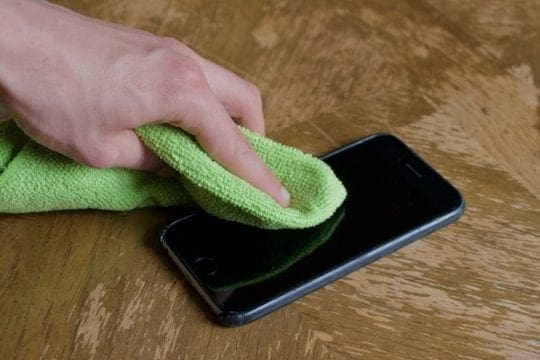
iPhones go everywhere with us: to work, to dinner, to bed, to the bathroom. It’s only fair to expect them to get a little dirty from time to time. Most of an iPhone is straightforward to clean, just wipe it down with a microfibre cloth. But the speakers and microphones are a totally different story.
Cleaning your iPhone screen is easy, but the speaker isn’t so straightforward.
To make matters worse, unlike a fingerprint-covered display, if iPhone speakers or microphones get too dirty they’ll actually stop working correctly. A heavy coating of dust, mud, or even makeup will quickly block the sound going in or out of the grille, meaning your music will sound quiet and people won’t be able to hear you on phone calls.
Despite the grief given to them, iPhones are actually pretty durable pieces of technology. They can usually withstand the occasional drop or small splash of water without any problems. However, the microphones and speakers — located on the front, bottom, and back of an iPhone — are still rather delicate. They have to be because they depend on moving parts to be able to work. That means it’s easy to cause damage to them while trying to keep your smartphone clean.
Fed up of not being able to hear through the dirt on your iPhone? Image: Unsplash
Apple’s recommendation for cleaning the speakers is simply to “clear the debris”. It’s more than a little vague. Fortunately, we’ve come to the rescue to show you exactly how to clear the debris with four different methods, so you’ll know exactly how to clean the iPhone speaker.
Some of this may seem a little obvious, but just in case you hadn’t thought of it, we’re gonna say it anyway. There’s a couple of things you should do before starting to clean any part of your iPhone:
Unplug any cables
Take it out of its case (if you have one)
Consider removing the screen protector
Turn it off!
Clean your iPhone first
Before you work on cleaning your speakers, clean all surfaces of your iPhone to remove any dirt, oil, and grime. And if needed, disinfect your device.
Grab a soft, slightly damp, lint-free cloth like a lens cloth or microfiber cloth
Wipe all the surfaces of your iPhone, even those you don’t routinely come into contact with, like the backside
If the cloth alone didn’t do the job, dampen the cloth with a little warm soapy water and wring it out before using it on your iPhone
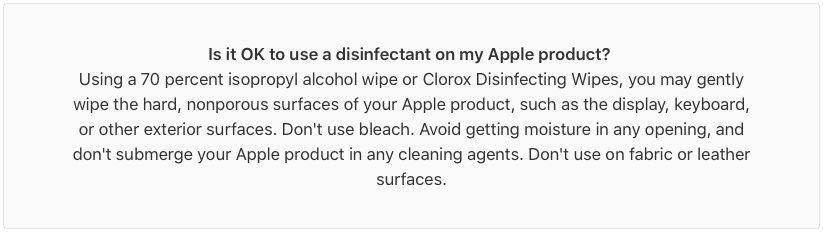
When needed, disinfect your iPhone using a 70 percent isopropyl alcohol or disinfecting wipe (do not use any wipe containing bleach)–again wring it out before applying to your device
Gently wipe all the exterior surfaces of your iPhone
Let your iPhone air dry
Locate your iPhone speakers
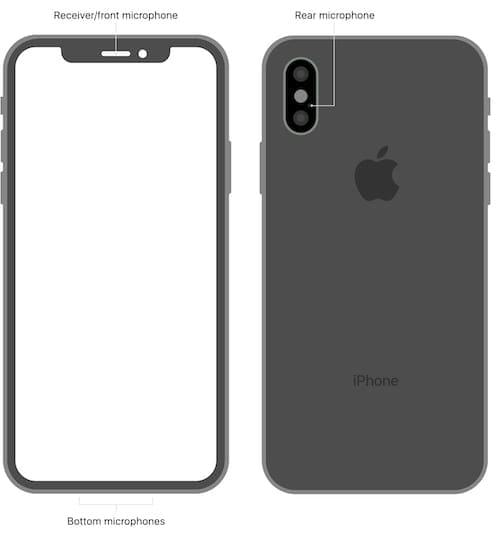
Additionally, it’s helpful to know where the three speakers and microphones are on your iPhone. Each one is covered by a metal grille that keeps dirt from getting inside your iPhone but also does an excellent job of allowing it to build up on the outside.
Microphones and speakers are in three places on your iPhone. Image: Apple
There is one on the front of your iPhone, next to the FaceTime camera. There is also a series of circular holes at the bottom of your iPhone, and one more next to the camera on the back. You should periodically clean each of these speakers and microphones.
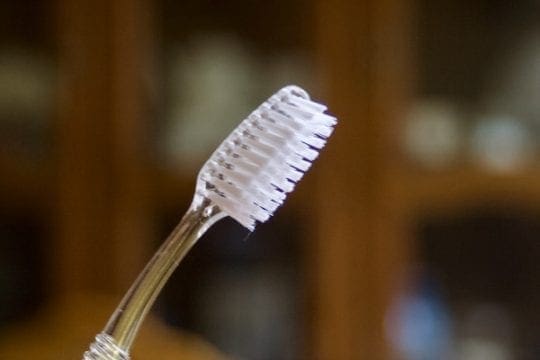
1. Use a soft-bristled brush
It’s not just for cleaning your teeth! Don’t use the same one though.
The first technique for cleaning your iPhone speakers is to brush them with a soft-bristled brush. This could be a toothbrush or a paintbrush — though you should absolutely ensure whatever brush you use is clean and dry. If you use a paintbrush, you may wish to trim the bristles down to a shorter length, allowing greater control.
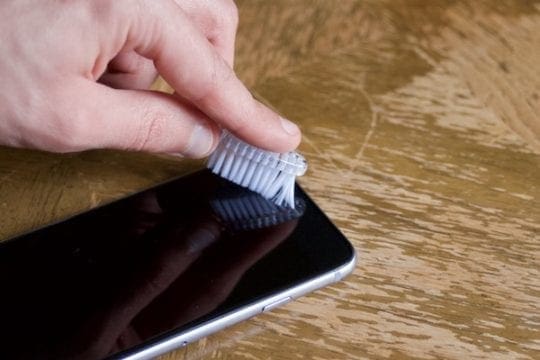
Scrape the dirt out with a clean, dry toothbrush.
When brushing the speaker or microphone, scrub the debris to the edge allowing you to then flick it out. Dried-on dirt may take quite a bit of work to loosen up and break free, but keep at it and try not to be too rough.
2. Use painter’s tape
Painter’s tape is designed not to leave any sticky residue.
Masking tape, or painter’s tape, is specifically designed to avoid leaving glue residue on any surfaces. This makes it a great tool for removing stubborn dirt from your iPhone speaker or microphone. That being said, you still want to be gentle with it, because if any glue did happen to get stuck, it might make your iPhone even dirtier.
Rolled up tape is great for getting the dirt in awkward crevices.
We recommend rolling a short length of tape into a tight cylinder, sticky side out, and then pressing or poking that into the speaker or microphone grille. If you notice that the tape collects any dirt, immediately change it for a clean piece to avoid putting that debris back in the speaker.
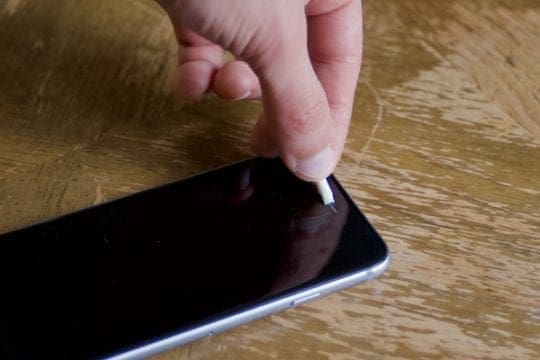
3. Use a toothpick
Toothpicks, for picking out the dirt!
Toothpicks are useful tools in the fight against dirty iPhone speakers. But as with everything else you have to be gentle with them, ensuring you don’t press too hard against the delicate grille.
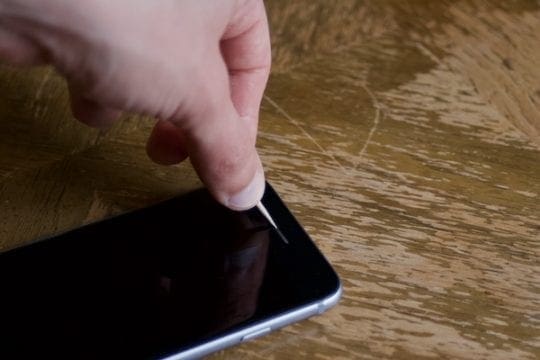
Use the point of a toothpick to gently scrape along the speaker, dragging any dirt to the edges where you can pick it out. You should be able to chip away most dried on bits of dirt, although if you’re struggling you could dampen the tip of the toothpick slightly.
Be careful that the toothpick doesn’t splinter off, creating more mess on your iPhone.
Use the toothpick to transfer that moisture to the dirt and loosen it. However, you have to be extremely careful when introducing liquids to your iPhone as it’s very easy for liquid to get behind the grille and cause permanent damage.
4. Use compressed air, with caution
When used carefully, compressed air is a great tool against dirty iPhones. Image: Viking-Direct
Compressed air, or spray dusters, are a great tool for keeping technology clean, particularly tough-to-reach places like MacBook fans or underneath a keyboard. That being said, compressed air is potentially damaging to your iPhone speaker or microphone. In fact, Apple advises against using compressed air entirely.
This is because compressed air is surprisingly forceful, and it can break the moving parts inside speakers or microphones. Many users have used compressed air haphazardly and found that their speakers or microphones stopped working completely afterward.
However, if you read the instructions on the can and use it from an appropriate distance, it is possible to use compressed air safely. We advise an absolute minimum distance of 6” and suggest spraying the air at an angle instead of straight into the speaker or microphone. Additionally, any loose dirt will fly into the air so you should cover your eyes before spraying.
Can you hear us now? We hope these tips have helped to get your iPhone speakers and microphones clean. If you’ve found your own cleaning techniques, please do share them in the comments below!
Dan writes tutorials and troubleshooting guides to help people make the most of their technology. Before becoming a writer, he earned a BSc in Sound Technology, supervised repairs at an Apple Store, and even taught English in China.
OMG I am blown away by the difference in quality. I used a new toothbrush and masking tape on front and back mics — took less than 5 minutes. THANK YOU for this tutorial. I cannot believe I’ve been living with such horrible sound quality on my videos for over a year.
When I try to face time someone they can’t hear me but when I use Siri when I press the home button it works but when I try to set up Siri listen to “hey Siri” it doesn’t work how do I fix that
Thank you —that was very helpful and concise. I really appreciate it. Have a great day
Bluetack 🙂
Toothpick can damage iPhone speaker.