Despite all of the shortcomings with macOS Catalina’s recent update, there are still a lot of useful features. Many of the core features of macOS have been unchanged, and that includes sharing your Wi-Fi connection.
This is a feature that has been around for quite some time, even before the rebranding to macOS. With Catalina, you can still share your Wi-Fi, and here is how you can make it happen.
The most obvious answer to the question above is to provide an internet connection to another device. But diving a little bit deeper, a few reasons could be just sharing a faster Wi-Fi connection than what’s already available.
Another very useful reason for sharing Wi-Fi from your Mac is if you need to connect a device wirelessly but don’t want to pay for multiple devices. This allows you to work around that limitation without paying unnecessary money out of pocket.
How to share Wi-Fi from your Mac
Before getting started, it’s important to note that you cannot share a Wi-Fi network from a Mac to an iOS device. Your Mac must be connected to the network via an Ethernet cable (hard-wired), in order for this to work. Once your Mac is connected and set up, let’s get started.
Share Wi-Fi from Mac to iPhone or iPad
Now that you are ready to share your connection, you have to do a little preparation in the System Settings app.
Open the System Settings app on your Mac.
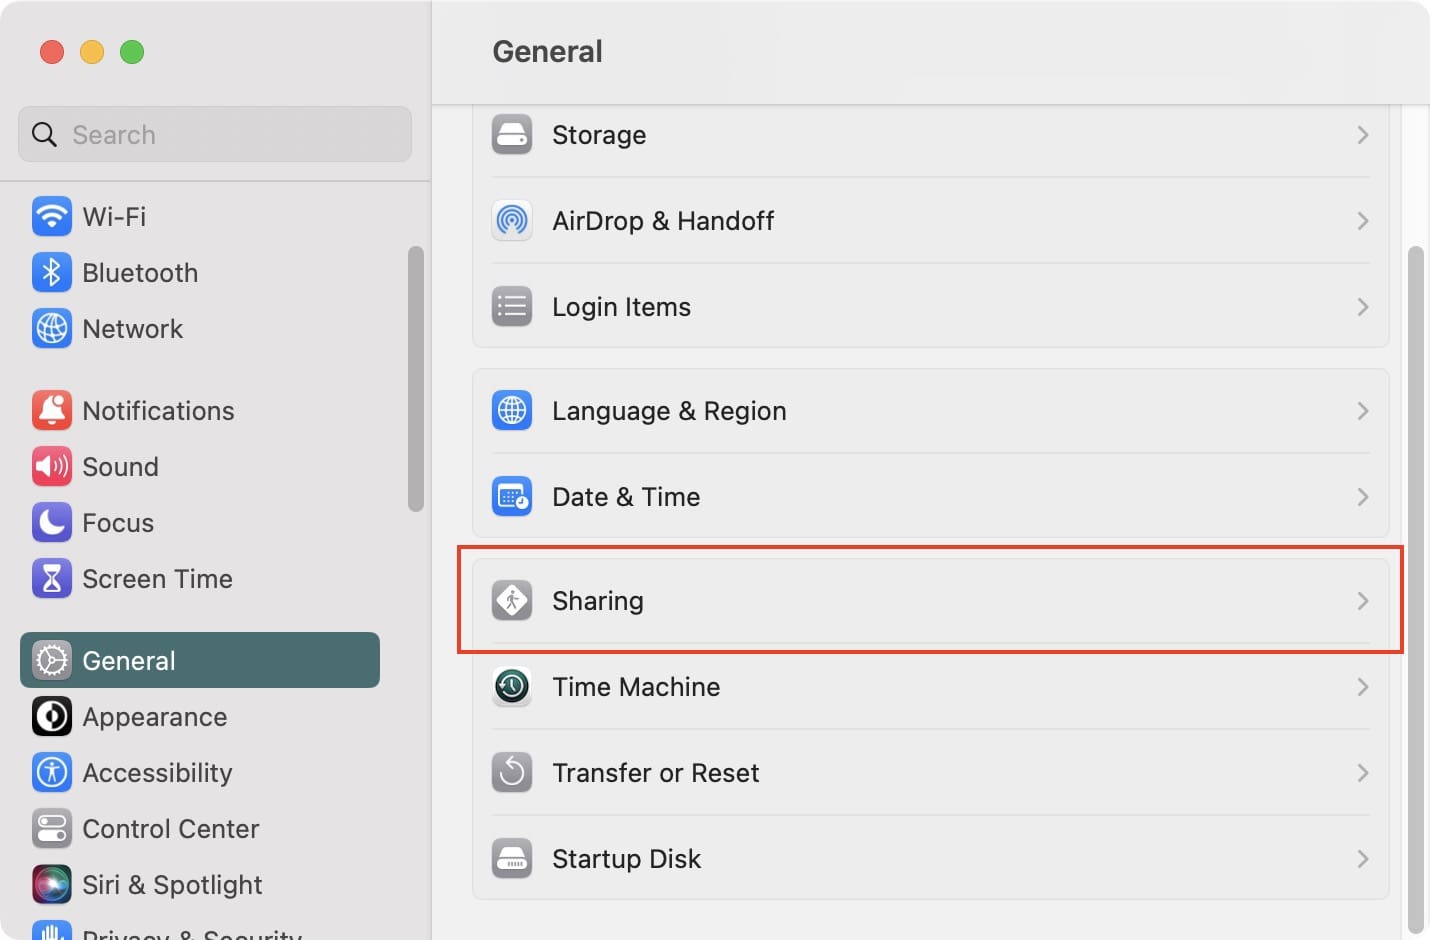
In the sidebar on the left, click General.
On the right side of the window, click Sharing.
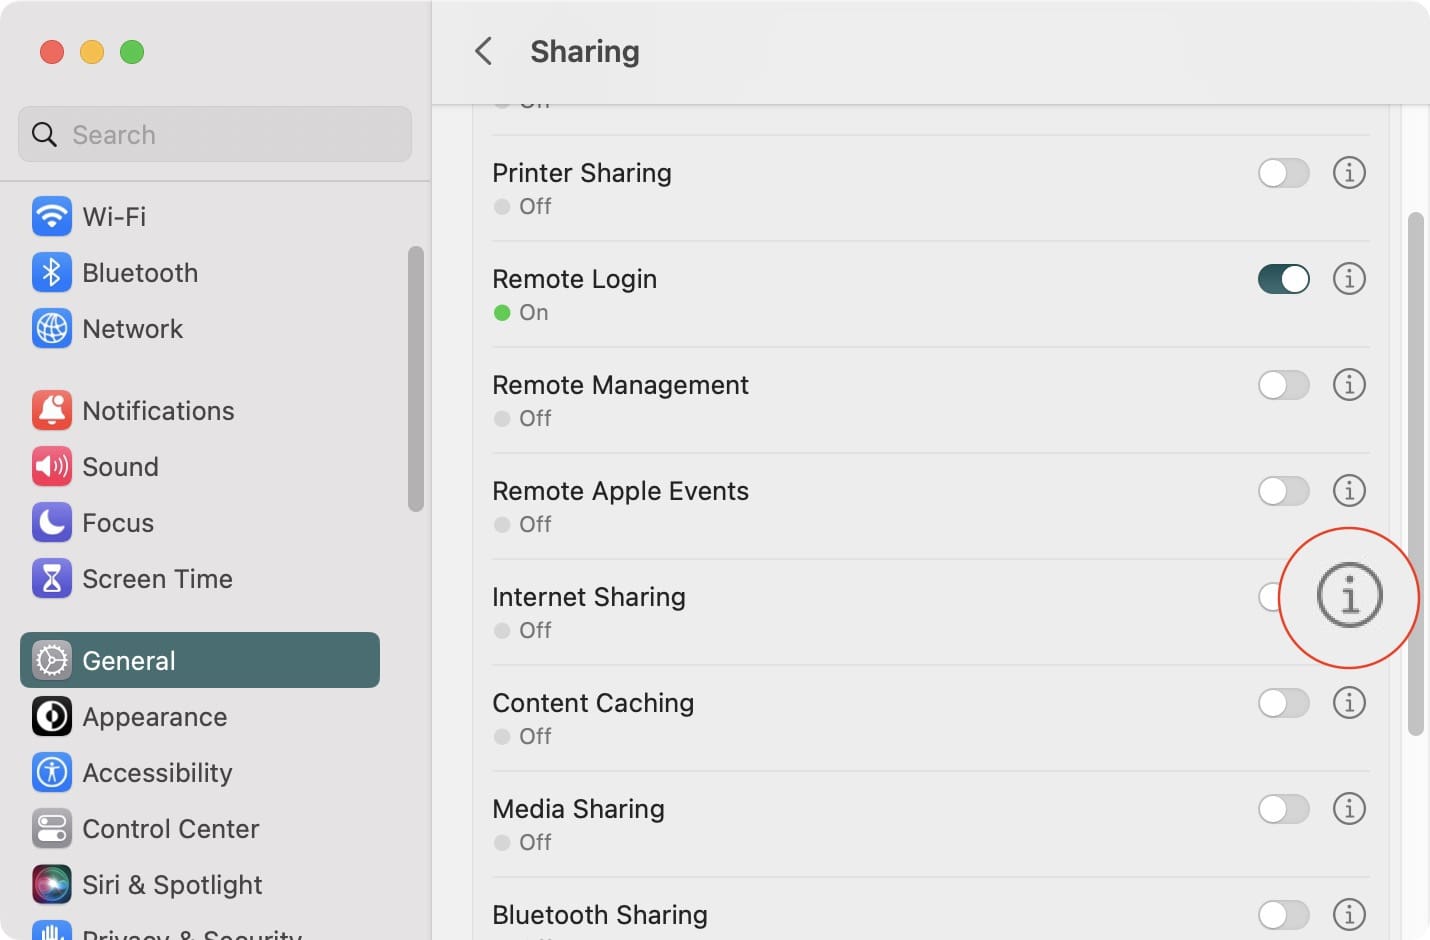
Scroll down until you see Internet Sharing.
Click the Info button to the right of Internet Sharing.
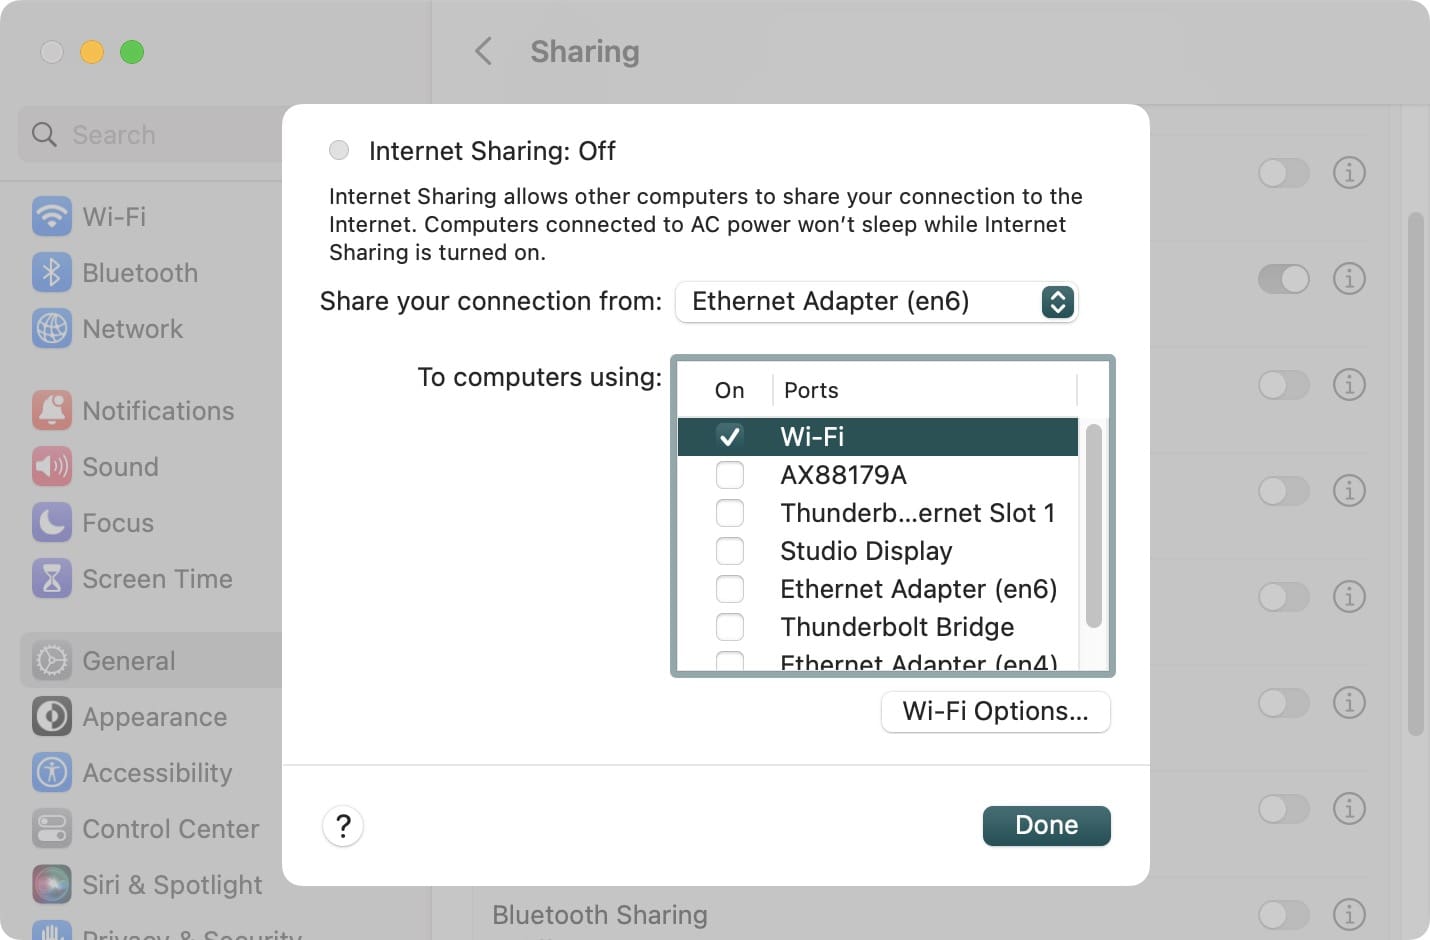
To the right of the to Share your connection from, click the drop-down menu.
Select the internet connection that you want to share. For example, if your Mac is connected via Ethernet, select Ethernet, but if your Mac is connected via Wi-Fi, make sure that Wi-Fi is selected.
In the box next to To Computers using:, locate and select how you want to share the internet connection.
If using Wi-Fi, click the Wi-Fi Options… button.
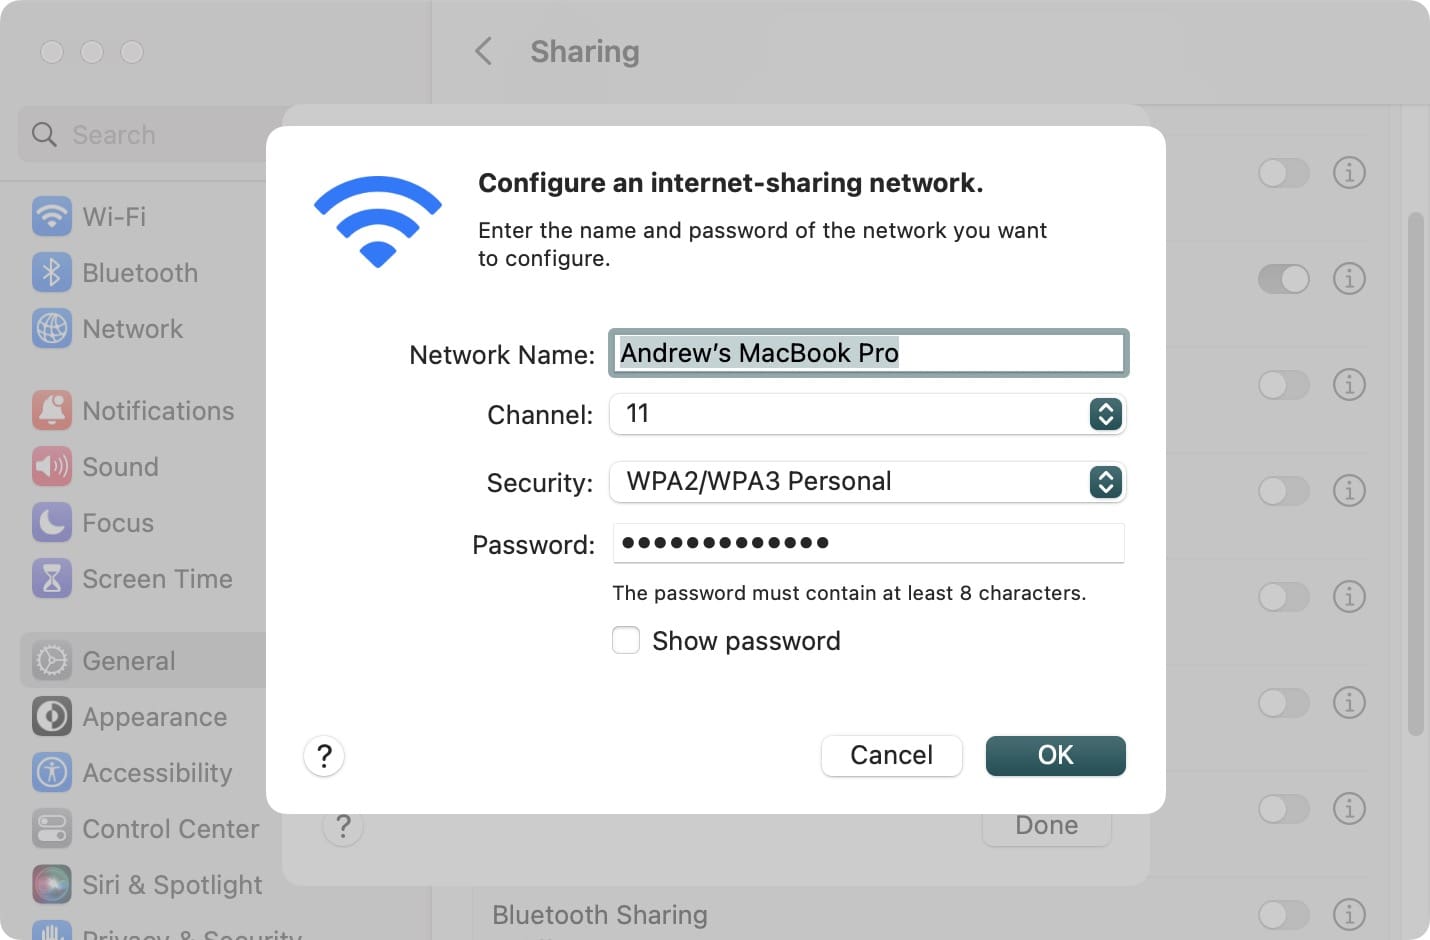
Enter the following pieces of information:
Network Name
Channel
Security
Select WPA3 Personal if all computers that use the shared connection support WPA3.
Select WPA2/WPA3 Personal if some computers that use the shared connection support only WPA2.
Password
Click the OK button once all of the information is entered.
In the bottom right corner, click the Done button.
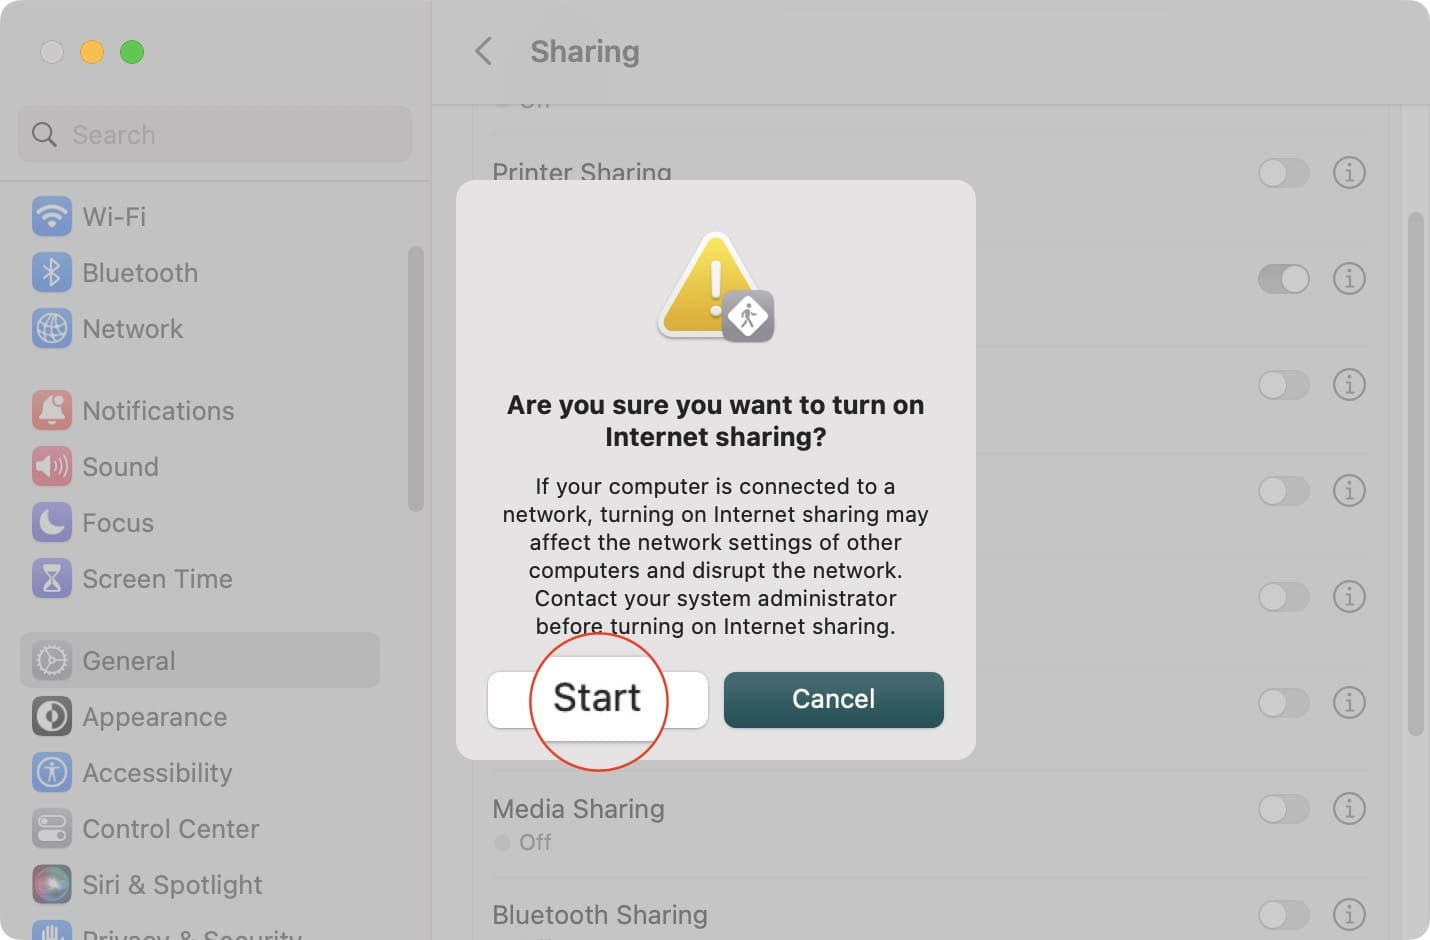
Click the toggle next to Internet Sharing to the On position.
Click the Start button from the Are you sure you want to turn on Internet sharing? dialog box.
This will give you access to a faster Wi-Fi connection thanks to your Mac. And the best part is that you can use both your Mac and iOS devices on this network without any issues. There may be a slight slow-down depending on whether you are watching videos online, but that should be the only hiccup.
In the official macOS Ventura 13 User Guide, Apple does provide the following warning for those who want to share Wi-Fi from your Mac:
WARNING: If your internet connection and your local network use the same port (Ethernet, for example), investigate possible side effects before you turn on internet sharing. In some cases, sharing your internet connection disrupts the network. If you use a cable modem, for example, you might unintentionally affect the network settings of other ISP customers, and your ISP might terminate your service.
Take advantage of Bluetooth
There is another way that you can create a Wi-Fi connection between your Mac and iOS device, and it’s with the help of Bluetooth. Essentially, you are creating a personal network powered by Bluetooth.
Before you can get your Mac and iOS device working together, there are a few prerequisites that are required. First, Bluetooth must be turned on for both devices, as this is the primary means for this working.
You also must pair your iPhone with your Mac through Bluetooth in order for this to work. Here are the steps to pair your devices:
Open the Settings app on your iPhone
Tap Bluetooth
Leave this screen open and continue with the steps below from your Mac.
From your Mac:
Open the System Settings app.
In the sidebar on the left click Bluetooth.
Scroll down to the Nearby Devices section.
Locate your iPhone in the list of available devices.
Click the Connect button.
A code will appear on both the iPhone and Mac, which must confirm the match by tapping Confirm on your iPhone. Voila! Your iPhone and Mac are now paired via Bluetooth.
Once this is done, you’ll need to get the internet connection rolling. This can be done by turning on the Personal Hotspot functionality of your iPhone:
Open the Settings app on your iPhone
Tap Personal Hotspot
Toggle Allow Others to Join to the On position
Provided that the Bluetooth menu on your Mac is still open, right-click on your iPhone and click Connect to Network. The blue connection icon will appear in the top right-hand corner of your Mac and the two devices will now be connected.
This is just another way that you can take advantage of Apple’s ecosystem of products to get some work done. However, it’s important to note that this method is nowhere near as fast as the other methods for sharing the network.
Conclusion
Apple has really killed the game when it comes to communicating between its own devices. Sharing or creating a Wi-Fi connection between both your iPhone and Mac is extremely easy, even with macOS Ventura.
Let us know if you run into any issues when trying to share Wi-Fi from your Mac. If you aren’t having problems, let us know some of your favorite tips and tricks when using your Mac and your iPhone or iPad.
Andrew Myrick is a freelance writer based on the East Coast of the US. He enjoys everything to do with technology, including tablets, smartphones, and everything in between. Perhaps his favorite past-time is having a never-ending supply of different keyboards and gaming handhelds that end up collecting more dust than the consoles that are being emulated.
I’m experiencing a very similar issue. I’ll share my Ethernet (~200Mbps) internet connection to WiFi so I can connect my phone.
Then I’ll click the check to enable internet sharing, and press start in the dialog box that pops up.
My phone will detect the next and mostly connect. Often it gets zero bandwidth and connectivity, or peaks around 10Mbps, and settles around 3-4Mbps on average.
I’m running a Late 2012 Mac Mini Server edition.
Regardless of these speed issues, the WiFi network will disappear after a couple of minutes. If I restart the sharing on the Mac, the network reappears and my iPhone will rejoin.
Then again after a few minutes the network disappears again, and restarting will restore the connection. I’ve tested it Sleep and any other power-saving-type features disabled, and the same cycle of problems persists.
Tried with and with the Firewall, that didn’t have any different result. I’m out of ideas.
I cannot for the life of me get my mac connected to ethernet to share its wifi.
I have gone through all the steps listed above but I keep getting the message that my phone is not connected to the internet.
The wifi will say ‘on’ but ‘is not connected to a network’ on my mac;
I can connect my phone to my MacBook’s network that I created but it just will not connect to the internet.
My phone, when it connects to my mac after my changing IP numbers so both devices match, says to restart the modem or router or contact my ISP.
I have tried using 1.1.1.1., 8.8.8.8, 9.9.9.9 for my DNS server; tried changing the IP address on my phone to match the one on my ethernet connection but nothing.
I’m at a loss for ideas. Any suggestions? Thanks so much.


I’m experiencing a very similar issue. I’ll share my Ethernet (~200Mbps) internet connection to WiFi so I can connect my phone.
Then I’ll click the check to enable internet sharing, and press start in the dialog box that pops up.
My phone will detect the next and mostly connect. Often it gets zero bandwidth and connectivity, or peaks around 10Mbps, and settles around 3-4Mbps on average.
I’m running a Late 2012 Mac Mini Server edition.
Regardless of these speed issues, the WiFi network will disappear after a couple of minutes. If I restart the sharing on the Mac, the network reappears and my iPhone will rejoin.
Then again after a few minutes the network disappears again, and restarting will restore the connection. I’ve tested it Sleep and any other power-saving-type features disabled, and the same cycle of problems persists.
Tried with and with the Firewall, that didn’t have any different result. I’m out of ideas.
Do you use a VPN on either your Mac, iPhone, or both? Try disabling that and see if it makes a difference.
Hi there,
I cannot for the life of me get my mac connected to ethernet to share its wifi.
I have gone through all the steps listed above but I keep getting the message that my phone is not connected to the internet.
The wifi will say ‘on’ but ‘is not connected to a network’ on my mac;
I can connect my phone to my MacBook’s network that I created but it just will not connect to the internet.
My phone, when it connects to my mac after my changing IP numbers so both devices match, says to restart the modem or router or contact my ISP.
I have tried using 1.1.1.1., 8.8.8.8, 9.9.9.9 for my DNS server; tried changing the IP address on my phone to match the one on my ethernet connection but nothing.
I’m at a loss for ideas. Any suggestions? Thanks so much.