There are a lot of new features on the way for iPhone, iPad, and Mac owners when the next major software versions are released. From the redesigned Lock Screen with iOS 16 to Stage Manager on the iPad and Mac, we have a lot to be excited for. And in true Apple fashion, the company is bringing some other features that make it easier to share moments with our closest family and friends.
Until iOS 16 is released, trying to share photos and videos with loved ones hasn’t always been easy, at least if you’re trying to do so from iCloud. Instead, we’ve needed to rely on third-party solutions like Google Photos, Dropbox, or other storage solutions. Thankfully, iCloud Shared Photo Library aims to change all of that.
With iCloud Shared Photo Library, this works similarly to iCloud Family, just with photos. You can share photos and videos with up to five other people of your choosing.
These photos and videos can be sent using a Shared Library, with everyone in the group being able to add content. Collaboration even goes so far as to show any of the edited photos, as soon as the edits have been saved. Apple is also making it easier to share your photos, as the Photos app will provide Smart Suggestions.
As you might expect, this is a feature coming to iOS 16, iPadOS 16, and macOS Ventura later this year. The final version of the software is expected to arrive sometime in the Fall, likely coinciding with the release of the next iPhone.
How to use iCloud Shared Photo Library
For those who want to use iCloud Shared Photo Library, there’s a bit of a setup process to follow in order to get everything working properly. There isn’t a magic button that just appears in the Photos app, but instead, you’ll actually need to manually go through the process of creating the Shared Photo Library and adding contacts. Here’s you can set up and use iCloud Shared Photo Library:
Open the Settings app on your iPhone.
Scroll down and tap Photos.
Under Library, tap Shared Library.
Tap the Start Setup button.
If you want to add people to the library now, tap the Add Participants button.
Select up to five contacts that you want to add.
Tap the Continue button.
Choose one of the following options:
All My Photos and Videos
Choose by People or Date
Choose Manually
Once selected, tap the Continue button.
If you want to invite non-family members to your Shared Library, tap the Add Participants button.
Select the contacts that you want to add.
Tap the Invite via Messages button.
Select one of the following options if you want to enable Share from Camera.
Share Automatically
Share Manually Only
Tap the Done button.
And that’s it! Now your iCloud Shared Photo Library has been set up, making it easier than ever to share those precious moments with the people closest to you.
How To View iCloud Shared Photo Library
With your Shared Photo Library created and the necessary people invited, you might be wondering how you can view the library. Well, it’s extremely easy to do so, and here are the steps you need to take:
Open the Photos app on your iPhone or iPad.
In the top right corner, tap the icon with three horizontal dots (…).
From the drop-down menu, select one of the following:
Both Libraries
Shared Library
There’s a third option listed when you see the drop-down menu, and that’s just to take you back to your personal photo library. But you’ll now be able to see whenever a new photo or video is added to the Shared Library, even if it wasn’t taken by the person who created the library.
Automatically Send Images and Videos to Shared Photo Library
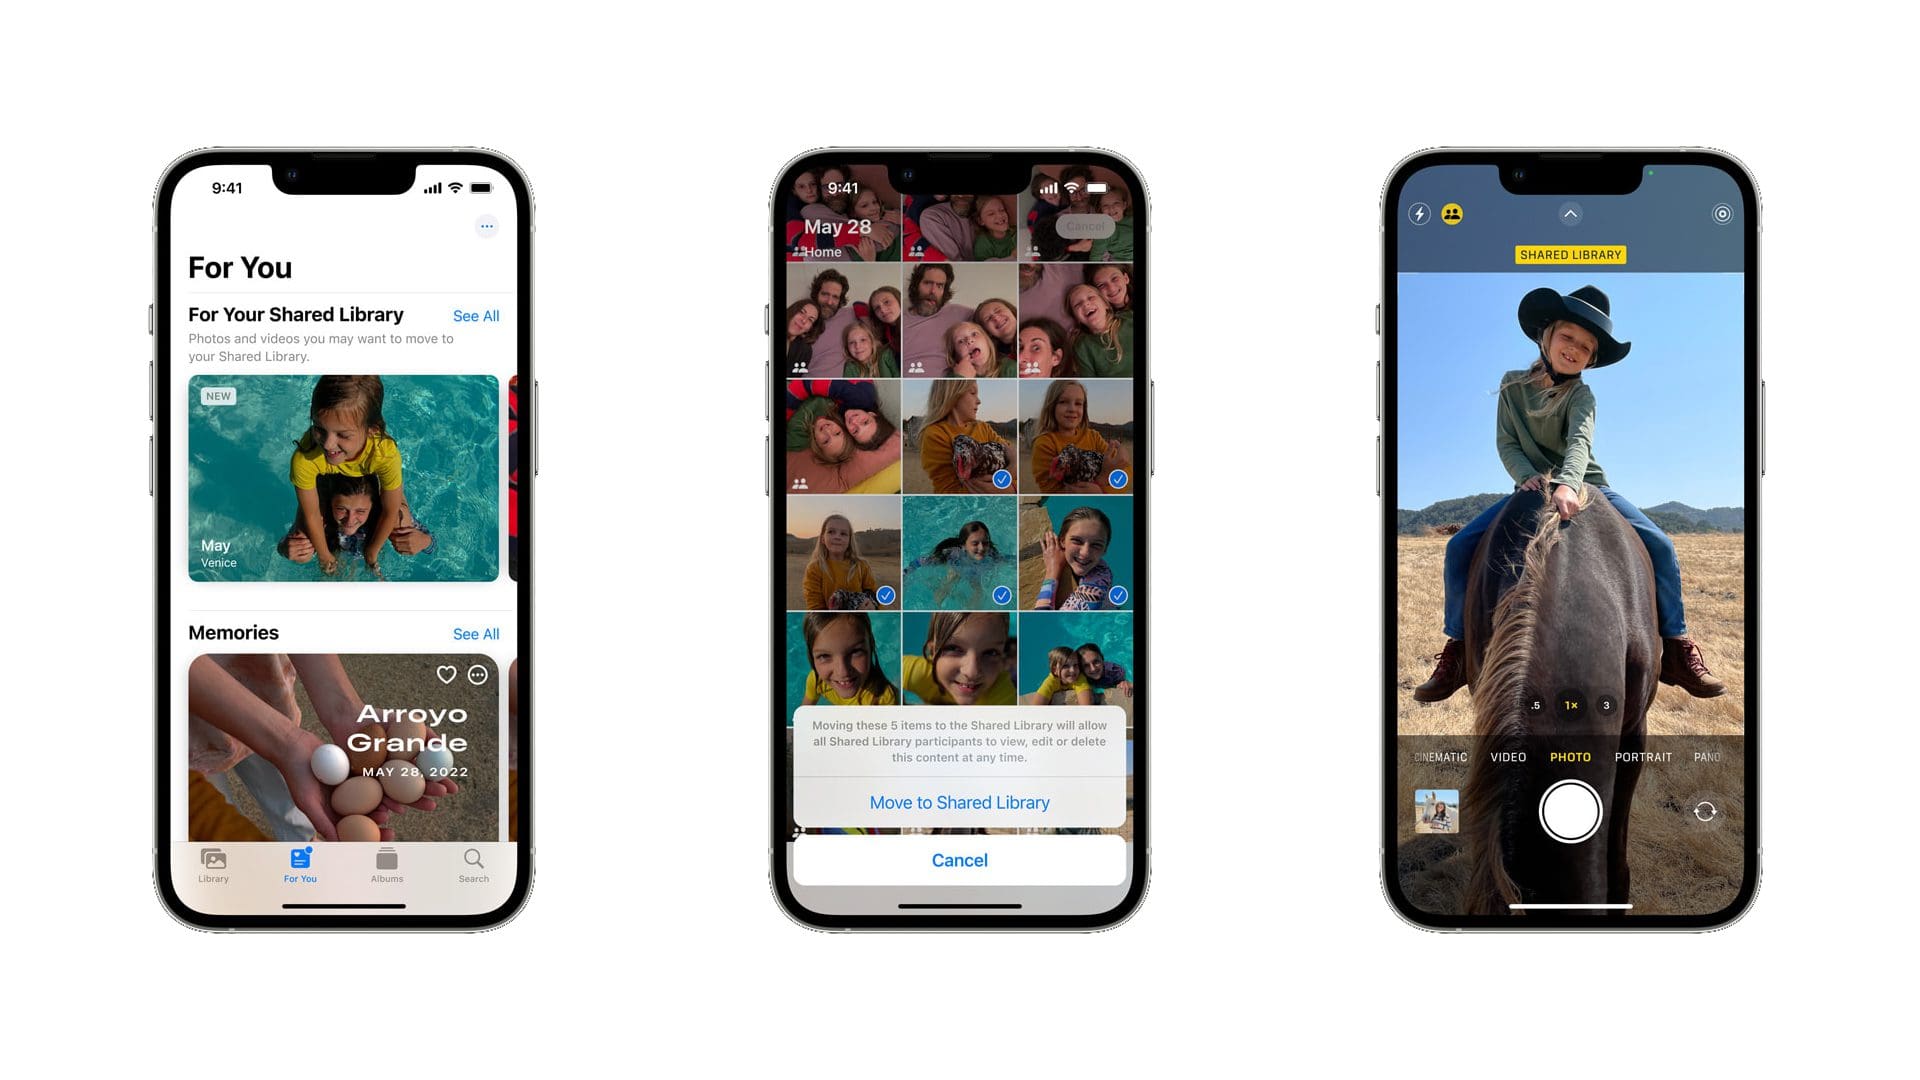
Say you’re on a family or group vacation, and you want to make sure that all of the pictures and images are shared with everyone. That’s something that Apple also thought about, as you can toggle between your on-device library or your Shared Photo Library. Just by adding a button in the default Camera app, you can switch between libraries with ease.
Open the Camera app.
In the top left corner, tap the Group icon next to the Flash icon.
Once selected, you’ll see a Shared Library message appear above the viewfinder. Now, whenever you take a picture, it will be automatically sent into the Shared Library as opposed to the personal library. If you want to take pictures that are not sent to the Shared Library, tap the same icon referenced above. A Personal Library message appears above the viewfinder, confirming the location of where the image or video will be saved.
Andrew Myrick is a freelance writer based on the East Coast of the US. He enjoys everything to do with technology, including tablets, smartphones, and everything in between. Perhaps his favorite past-time is having a never-ending supply of different keyboards and gaming handhelds that end up collecting more dust than the consoles that are being emulated.


Write a Comment