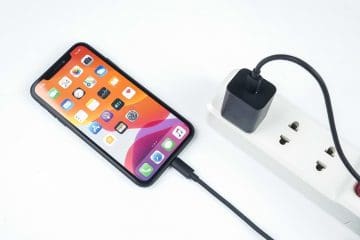
Is your iPhone not charging? We’ve all been there. You plug your charger in when your battery is low, and nothing happens. You try multiple times — but still, nothing changes. Pain.
Most of us use our iPhones everywhere. They go wherever we are, traveling round in pockets, bags, jackets, and your hands. Quite the workout for a piece of technology, don’t you think?
All that travel comes at a price. And our iDevices, like many things, fall apart and start showing signs of wear and tear over the long term. One of the most frequent issues we hear about at Apple ToolBox are problems with iDevices, and most particularly, iPhones not charging via the lightning port (USB-C port if you have an iPhone 15 or later).
Our team has had problems in the past where iPhones simply won’t charge *at all*. But other readers report that their iPhones connect intermittently; sometimes, they don’t charge. And on some occasions, their devices show that their iPhones are charging — when they aren’t really charging at all. People who have this issue frequently get the authentic cable message appearing on their iDevices when plugging in.
Still, others face progressively worse problems when plugging into the lightning port for charging. At first, they might have success by wiggling the cable inside the port. Others find that placing the iDevice and the cable at certain angles gets them a connection. In short, iFolks use a variety of creative messing around that helps, but it’s usually temporary. Any way you slice it, it’s maddening and frustrating when your iPhone or iDevice won’t charge!
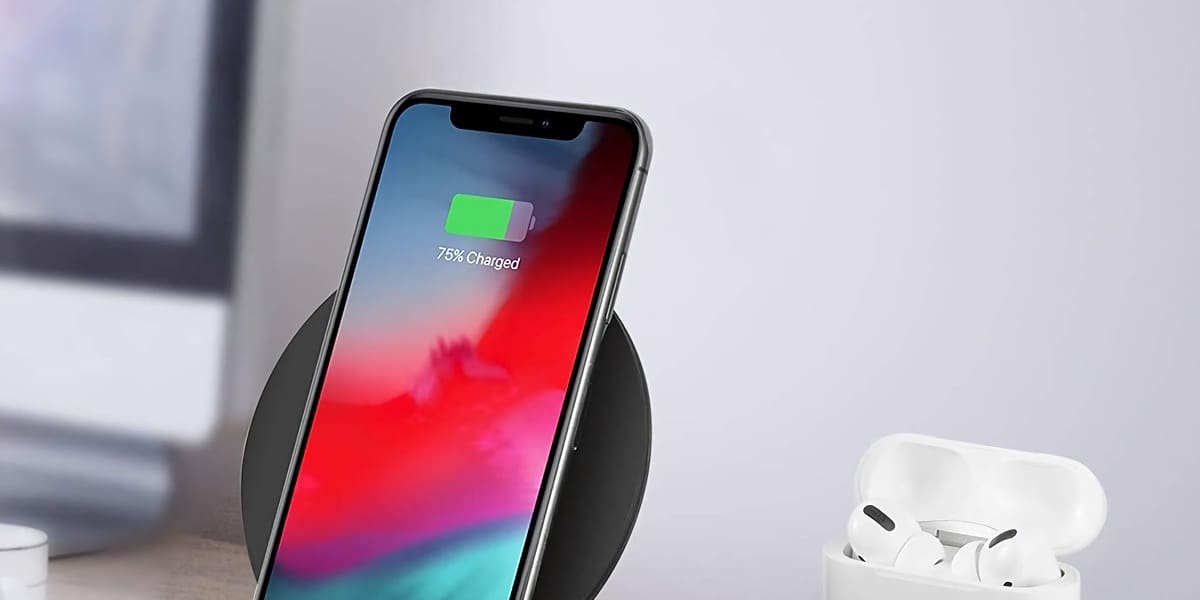
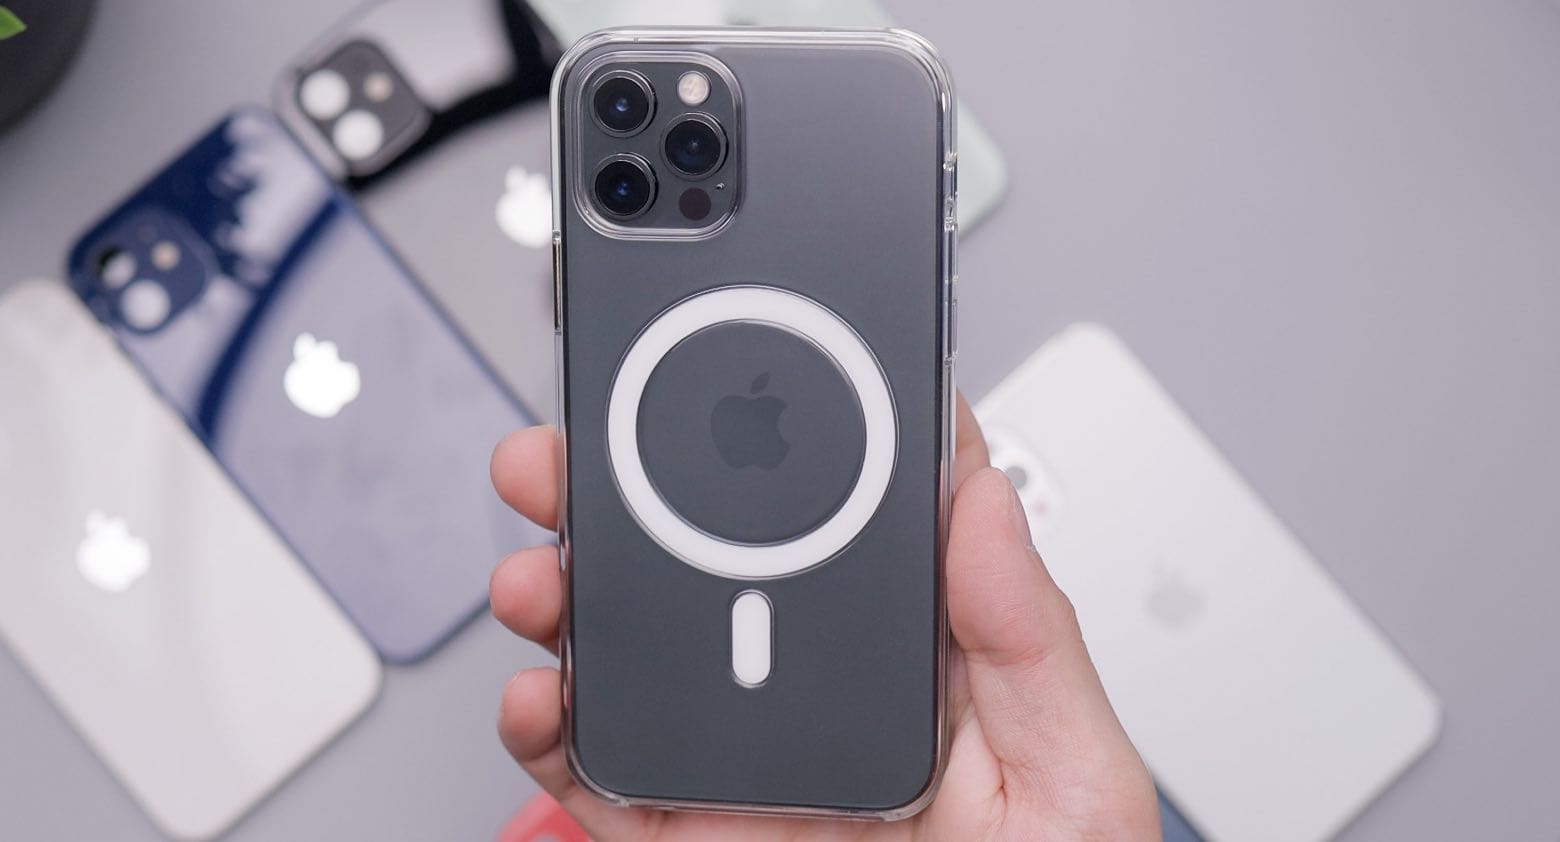
If you use wireless charging, you might also experience problems where you place your iPhone on the MagSafe charging area — but nothing happens. In most instances, you can solve this problem by removing any cases that aren’t compatible with MagSafe.
The Solution(s) for iPhone Not Charging
If your iPhone is not taking a charge, there are a few things to do before you chuck the thing out the window (or worse, pay for a visit or replacement part with Apple Support). For most of us, charging problems result from a blockage in the lighting port. Like the now-defunct headphone jack, the lightning port tends to collect lint, dust, and other debris from your pocket, handbag, or wherever you store it.
And it’s usually not very obvious. The lightning port is pretty darn small and with the naked eye doesn’t look like much more than a dark hole. So things often block our port without us even realizing it, until the inevitable arrives and our iDevices won’t charge.
Another common reason is the slight corrosion that occurs on the contacts from everyday exposure to moisture (it’s in the air, so not much you can do about that). All air contains moisture; some climates more and some climates less, commonly referred to as humidity or water vapor. Anyway, over time this moisture leads to a thin layer of corrosion on metal surfaces, including the contacts of our iDevice’s lightning port.
The good news is that the lighting port is pretty easy to clean. Just make sure you proceed carefully and use the right tools and techniques.
Proceed With Caution
Before you evoke your inner DIY, perform a quick checklist on the condition of your charger. Make sure your lightning cable isn’t frayed, kinked, or even chewed through. If it is, replace with a new cable and see if this solves your charging problems.
And if available, try a different charging cable. For best results, make sure that your lightning cables are Apple certified. These certified cables work best with your Apple products.
If you are charging via your computer, try charging with the charger plugged into the wall and see if your iPhone or other iDevices charges up. Sometimes the USB ports on our computers lack the power to fully charge our iDevices.
Finally, try another charger and see if the problem is your charger unit. If you don’t have an additional charger, ask a family member, friend, neighbor, or even visit an apple store or reseller.
Cleaning Your Lighting Port
First, the obvious but must-be-said statement: turn off your iPhone before you start any of the cleaning steps below! And be mindful that when you plug the male connecter into the lightning port, lint or dust may get compacted at the back. So even though you might not see anything inside the lightning port, the chances are that there’s dirt and lint caked and compacted in the back.
For Suspected Corrosion:
Unplug then re-plug lightning cable repeatedly (at least 7-8 times).
Polishes the corrosion off.
Use an electrical contact cleaner.
Removes oil, dirt, and corrosion.
Spray onto a Q-Tip and then insert Q-Tip gently into lightning port or clean the cable plug first and then insert the cleaned plug into the socket and move it around to clean your iDevice’s port.
Do NOT spray directly into lightning port.
Pressure from electronic contact cleaners may cause damage to nearby parts (such as mics).
Clean all contacts, on cable and on iDevice.
Allow; they before using (at least 30 seconds).
For Dust, Dirt, and Debris
Scrape the inside of the port with a plastic or wooden toothpick, an unused nylon bristled makeup brush, or something similar.
Removes most of your fat clumps of lint, debris, and dust.
If possible, shave a wooden toothpick down slightly with a sharp knife so that it’s very thin.
Check deep inside the port with a flashlight and magnifying glass if available.
Look for any dirt caked in the corners and in the bottom.
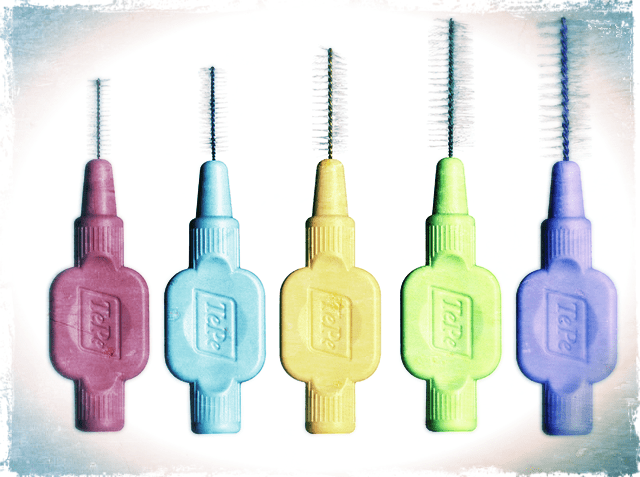
If corners or bottom are still dirty, use a paperclip or other strong probe (like dental flossers or interdental brushes) and carefully scrape the dirt to dislodge and remove it.
Spray your lightning port with some canned compressed air.
Use a Q-Tip dipped in rubbing alcohol and insert it into the port.
Gently clean inside the port.
Place some surgical gauze or a piece of a screen cleaning wipe over the port and pushed it in using the lightning cable head.
The gauze or wipe traps the dirt and grime clogging the port’s insides.
Remember to always to allow a minute or two for the port to dry when using canned air or rubbing alcohol. These are designed to evaporate quickly, but best practice is to wait just a bit before returning to use.
After cleaning is complete, power on your iDevice, plug in your lightning cable, and see if your device starts to charge.
When your iPhone continues not to charge, verify that both the cable and charger work with another iDevice. If they do, perform a hard reset by holding down the home button or volume down button and pressing the power button letting go when the apple logo appears. In situations where your iPhone still won’t charge, clean again and perform another hard reset.
At times when you are still stuck with your iPhone not charging, check if you are currently enrolled in AppleCare and if so, contact Apple for support. If not covered under AppleCare or a warranty, consider a DIY repair and replacing the lightning connector yourself.
iPhone Not Charging With Wireless Charger
We’ve pretty much exclusively talked about charging your iPhone with wires in this guide, but some users will have issues with their device not charging via a wireless charger instead. There are three main things you can do in these situations:
Check to see if your iPhone is supported by wireless charging. If you own a device earlier than the iPhone 8, you unfortunately cannot charge your device wirelessly.
If you own an iPhone 8 or later, try removing your iPhone’s casing. This is a common reason why devices won’t charge properly, especially if you don’t use a MagSafe-compatible case.
Should removing your case not work, turn your iPhone off and on again. If your iPhone has a Home Button, hold the standby button until slide to power off appears. And if it doesn’t, hold the standby button and one of your volume buttons until you see slide to power off. Turn your iPhone off, switch it back on again, and check to see if you can now charge your device as normal.
What Worked for Our Readers?
My iPhone would charge, but not let me connect to iTunes, etc., on my laptop. I blew compressed air, I took a toothpick to it, nothing. I tried a contact cleaner and a toothpick as you recommended. And I saw a lot of yuck at the end of the toothpick. It dawned on me that it was what I wanted out. A lot more poking got a lot of yuck out. Hey, guess what works like a charm. Thanks.
My phone was having sporadic problems charging and recognizing data connectivity through the lightning adapter. I was this close from taking it to have the charging port replaced. I didn’t occur to me that it could be just dirt/dust accumulated. Your article lit up the bulb and voila! Cleaning the port did the trick. Thanks!
I found myself with the common problem of being unable to charge my iPhone 7. I tried cleaning the lightning fittings on the phone, but the phone still wouldn’t charge. Then, I realized that the problem was with the USB connection into the wall plug. Wiggling that USB always starts the charging successfully.
Sharpened coffee stirrer, got out the packed in lint and voila, my phone started charging again. If this didn’t work I was heading to the Apple Store to spend the evening waiting in line. Thanks.
Wrapping It Up
Discovering that our iDevices aren’t their usual selves is very frustrating. Our iPhones are so much a part of us, they go where we go and help make our lives easier, richer, and hopefully better. Plugging in and charging up is second nature. We don’t even think about our devices not charging, until that happens. Luckily, in most cases, the solution is to clean the connections on both the iPhone port and the charging cable.
If you find that your iPhone or another iDevice just isn’t charging up or is showing a lot of intermittent charging behavior, the tips above hopefully got you and your iPhone or iDevice back on track. Moving forward, try and give your iPhone a good clean now and then. So, when you swipe clean all those fingerprints, pick up your cleaning tool of choice and give your lightning port a quick maintenance dusting. Think of it as preventative care.
For most of her professional life, Amanda Elizabeth (Liz for short) trained all sorts of folks on how to use media as a tool to tell their own unique stories. She knows a thing or two about teaching others and creating how-to guides!
Her clients include Edutopia, Scribe Video Center, Third Path Institute, Bracket, The Philadelphia Museum of Art, and the Big Picture Alliance.
Elizabeth received her Master of Fine Arts degree in media making from Temple University, where she also taught undergrads as an adjunct faculty member in their department of Film and Media Arts.
recharger port on 2012 model MacBook Pro not stopped syncing the recharger cord connection pins. Is there an easy fix for this first time ever problem?
My phone was having sporadic problems charging and recognizing data connectivity through the lightning adapter. I was this close from taking it to have the charging port replaced. I didn’t occur to me that it could be just dirt/dust accumulated. Your article lit up the bulb and voila! Cleaning the port did the trick. Thanks!
A few months ago I have replaced charging post from mobilesentrix but now the charging port is not working properly, then I visit repairing shop and the shop owner does the same thing as you describe above. thank you for sharing this
This is a very good response. I was in a shop looking at new phones today and I decided to look online. A small clean of the port and my phone is now charging, like a bull. Thank you!
Was having loads of charging problems with my iPhone 6s and noticed that various lightning cables weren’t fully inserting and clicking in place.
Just followed all of the tips, persevered slowly and carefully and can’t believe how much debris came out of the socket, or how much dirt came off the contacts.
It’s a bit like belly button fluff, where does it all come from? ….. lol. Anyway, my precious phone is now back to normal and charging a treat. Thank you.
I had been charging my iPhone today while in my car and later on I found that the cable would not stay in the phone to charge it just pops out. Does not make any difference what cable I use to charge.
Any thoughts
I’d look in your iPhone’s lightning port to see if something got stuck or pushed up inside it. You probably need a flashlight or penlight and depending on your eyesight, a magnifying glass or use another device using the Magnifier accessibility feature (I know I would need this!)
If you can’t see anything–try using an interdental brush or something similar to gently brush out the port.
If problems continue and you’ve tried a few different cables with the same result, contact Apple or set-up an appointment at your nearest Apple Store for a Genius to inspect.
My 10 day old iPhone x won’t let lightening pin go in! There is no debris in it…..it’s brand new! Of course, we just left for a 10 day road trip and no Apple store available anywhere! Help please!
First, try a different lightning cable if possible–if no one in your traveling group has one, ask someone if you can try their lightning cable/charger when stopping at a gas station, cafe, hotel, etc.
We need to determine if the problem is your device or the cable itself.
Check the port for any damage–see if there is anything obstructing it. Also, check your lightning cable end to see if anything is bent or if there is any dirt, grease, and so forth causing an issue.
I used a toothpick and proceed to clean the charging part of my phone… Now works like a charm. I had to insert it quite a lot though to remove all this lint. THANK YOU
If your charger isn’t working, then it probably needs replaced. Before you spend any additional resources, use another cable with the charger, just to make sure it is indeed a charger issue and not a cable gone bad. Remember that lint and other debris can also get trapped in the chargers ports so make sure to clean both the cable and the charger, before using.
After spending money on replacement chargers and then trying to charge my Iphone 6s at Night in all sorts of positions to get it to charge I though I’d check the internet and behold your post came up. After cutting down a coffee stirrer I managed to remove about half a pea size of dust and debris (I know a lot I am an engineer). plugged my I phone to a charger and WHAM!!! charging straight away.
Hi so, I tried cleaning, and restarting but its not responding to the charger or anything. What do i try next? Nothing is working to charge it, or restart it.
Holy Crud, thanks for the info, I was having to use odd angles, took forever to charge. Turned iPhone off ,used a tooth pick and pulled out several big wads of lint…. and I mean several… I wear sweat pants a lot. Phone starts charging right away and quickly… Thanks again
Use Low Power Mode (iOS 10 and above)
Delete Apple Stock Apps that You Don’t Use
Turn OFF Location Services for most apps
Disable Background Refresh on most apps
Brinkley, Unfortunately it doesn’t sound like a software issue. Does the charger work with any other iPhone or iPad? You may need to buy a new one if it doesn’t. Good luck.
I’m sorry but I have three Apple devices and the lightning port has failed on all three soon after warranty expiration. It’s not the cable because I have three cables and also I’ve checked my cables on friends devices and also tried their cables. This port is a dud, I’ve never experienced port failures with the older 32 pin port other than frayed or broken cables. Apple wants to charge me for the repairs, but instead, I’m filing a complaint with my local consumer advocate, as these ports are not fit for purpose.


recharger port on 2012 model MacBook Pro not stopped syncing the recharger cord connection pins. Is there an easy fix for this first time ever problem?
Thanks
R2K
Hi Elizabeth,
Your article help me to get my IPhone 8+ charge and make the micro USB to function normally. Lots of thanks.
Jo
Thank you, Elizabeth. You just saved me a trip to the Genius Bar in the middle of the pandemic.
My iPhone would charge, but not let me connect to iTunes, etc on my laptop.
I blew compressed air, I took a toothpick to it, nothing.
I tried a contact cleaner and a toothpick as you recommended.
And I saw a lot of yuck at the end of the toothpick.
It dawned on me that it was what I wanted out.
A lot more poking got a lot of yuck out.
Hey, guess what works like a charm. Thanks
My phone was having sporadic problems charging and recognizing data connectivity through the lightning adapter. I was this close from taking it to have the charging port replaced. I didn’t occur to me that it could be just dirt/dust accumulated. Your article lit up the bulb and voila! Cleaning the port did the trick. Thanks!
A few months ago I have replaced charging post from mobilesentrix but now the charging port is not working properly, then I visit repairing shop and the shop owner does the same thing as you describe above. thank you for sharing this
This is a very good response. I was in a shop looking at new phones today and I decided to look online. A small clean of the port and my phone is now charging, like a bull. Thank you!
I found myself with the common problem of being unable to charge my iPhone 7.
I tried cleaning the lightning fittings on the phone, but the phone still wouldn’t charge.
Then I realized that the problem was with the USB connection into the wall plug.
Wiggling that USB always starts the charging successfully.
Was having loads of charging problems with my iPhone 6s and noticed that various lightning cables weren’t fully inserting and clicking in place.
Just followed all of the tips, persevered slowly and carefully and can’t believe how much debris came out of the socket, or how much dirt came off the contacts.
It’s a bit like belly button fluff, where does it all come from? ….. lol. Anyway, my precious phone is now back to normal and charging a treat. Thank you.
It worked !! ✅Thanks
Thank you so much.
I have had to wiggle my charger for months when charging my phone.
So I used a toothpick and dug out a lot of lint from the lightning port and then cleaned it with a cue tip and rubbing alcohol.
It seems to be ok now.
I had been charging my iPhone today while in my car and later on I found that the cable would not stay in the phone to charge it just pops out. Does not make any difference what cable I use to charge.
Any thoughts
Hi Pat,
I’d look in your iPhone’s lightning port to see if something got stuck or pushed up inside it. You probably need a flashlight or penlight and depending on your eyesight, a magnifying glass or use another device using the Magnifier accessibility feature (I know I would need this!)
If you can’t see anything–try using an interdental brush or something similar to gently brush out the port.
If problems continue and you’ve tried a few different cables with the same result, contact Apple or set-up an appointment at your nearest Apple Store for a Genius to inspect.
Liz
My 10 day old iPhone x won’t let lightening pin go in! There is no debris in it…..it’s brand new! Of course, we just left for a 10 day road trip and no Apple store available anywhere! Help please!
Hi Tally,
First, try a different lightning cable if possible–if no one in your traveling group has one, ask someone if you can try their lightning cable/charger when stopping at a gas station, cafe, hotel, etc.
We need to determine if the problem is your device or the cable itself.
Check the port for any damage–see if there is anything obstructing it. Also, check your lightning cable end to see if anything is bent or if there is any dirt, grease, and so forth causing an issue.
Sharpened coffee stirrer, got out the packed in lint and voila, my phone started charging again.
If this didn’t work I was heading to the apple store to spend the evening waiting in line.
Thanks,
You guys have saved me so much hassle thanks!
Apps, logins, and music backed up for a funeral and the phone decided to not charge.
Charger issue – No, any other issue -No – sleepless night – Yes!
Followed your advice to clean with a humble toothpick and hey presto – 6S! (Success- get it?) cheers guys
Thank You soooo much! this was some amazing advice and it really helped!!
Great advice! Phone is completely charged now that I’ve cleaned the inside connections
Thank you so much for this great tutorial! I was not going to spend $100 at an Apple store but thankfully I found this tutorial. Thanks so much!
Thanks for sharing your story Rion! We’re ad that you saved a trip (and some money too). That’s awesome and why we are here.
Cheers for letting us know,
Liz
I used a toothpick and proceed to clean the charging part of my phone… Now works like a charm. I had to insert it quite a lot though to remove all this lint. THANK YOU
Actually, my lightning headphones work perfectly fine but my charger won’t. Is it possible that I can still fix my charger?
Hi Tay,
If your charger isn’t working, then it probably needs replaced. Before you spend any additional resources, use another cable with the charger, just to make sure it is indeed a charger issue and not a cable gone bad. Remember that lint and other debris can also get trapped in the chargers ports so make sure to clean both the cable and the charger, before using.
Goodluck,
Liz
After spending money on replacement chargers and then trying to charge my Iphone 6s at Night in all sorts of positions to get it to charge I though I’d check the internet and behold your post came up. After cutting down a coffee stirrer I managed to remove about half a pea size of dust and debris (I know a lot I am an engineer). plugged my I phone to a charger and WHAM!!! charging straight away.
Hi so, I tried cleaning, and restarting but its not responding to the charger or anything. What do i try next? Nothing is working to charge it, or restart it.
Holy Crud, thanks for the info, I was having to use odd angles, took forever to charge. Turned iPhone off ,used a tooth pick and pulled out several big wads of lint…. and I mean several… I wear sweat pants a lot. Phone starts charging right away and quickly… Thanks again
My SE battery drain too fast and also sometime it charge and sometime it doesn’t charge….help me
HI Mark,
Sorry to learn about your iPhone SE charging and battery draining problems. We have a great article on how to better manage battery performance.
Here’s some quick tips:
Use Low Power Mode (iOS 10 and above)
Delete Apple Stock Apps that You Don’t Use
Turn OFF Location Services for most apps
Disable Background Refresh on most apps
Check out the article for more tips!
Keep us posted!
SK
My iPhone 7 fails to charge when plugged into the original charger. Even after I’ve done all the cleaning suggested above.
Using the same cable plugged into USB socket on my computer, it always charges.
Suggests to me that it’s a software rather than a physical problem.
Brinkley, Unfortunately it doesn’t sound like a software issue. Does the charger work with any other iPhone or iPad? You may need to buy a new one if it doesn’t. Good luck.
I’m sorry but I have three Apple devices and the lightning port has failed on all three soon after warranty expiration. It’s not the cable because I have three cables and also I’ve checked my cables on friends devices and also tried their cables. This port is a dud, I’ve never experienced port failures with the older 32 pin port other than frayed or broken cables. Apple wants to charge me for the repairs, but instead, I’m filing a complaint with my local consumer advocate, as these ports are not fit for purpose.
That didn’t help me with the problem of it being stuck in headphone mode
Matt, Have you looked at the tips in the headphone mode post? If not , please look at https://appletoolbox.com/iphone-stuck-in-headphones-mode-fix/. The tips have been helpful to many users.
can the battery be replaced on ipad. it is a 4th generation?
Hi Cheryl,
Yes indeed! Check Apple’s Battery Support Page for options.
Keep us posted on how this battery replacement service works for you and your iPad.
SK