If you want the highest security possible for your folders and files, there’s a method through the Disk Utility to password protect a folder, which we’ll go into below. You can also use third-party apps.
Using Disk Utility to Password Protect a Folder
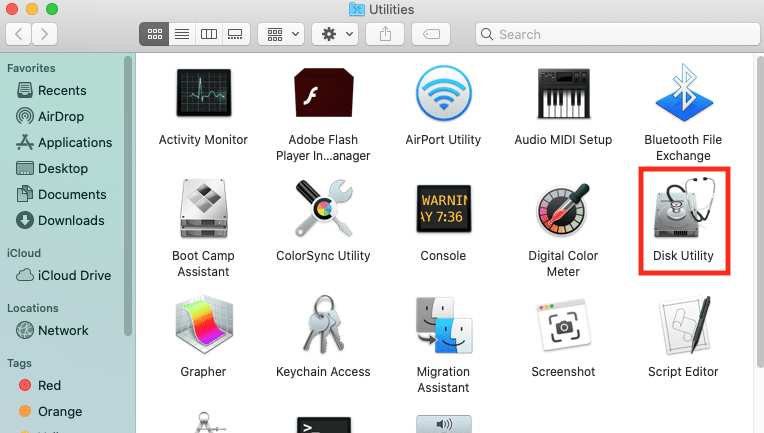
Click on the Go Menu.
Select Utilities.
Click on the Disk Utility.
Select File in the top left of the screen.
Click New Image.
Select Image from Folder…
You can now select the folder you want protected from a list of your current folders. Select the folder and then hit Choose on the bottom right of the screen.
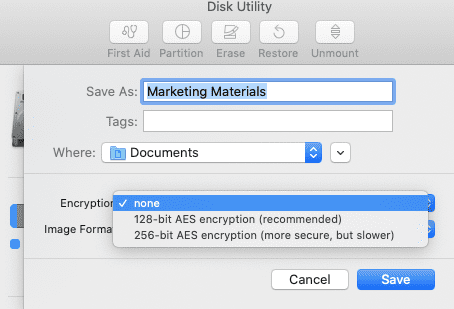
You can select between the 128-bit or the 256-bit option in the field next to Encryption:. Select 128-bit for the faster option and 256-bit for the even more secure option.
Enter your password in both fields to set and verify.
You can now rename the folder, if you wish.
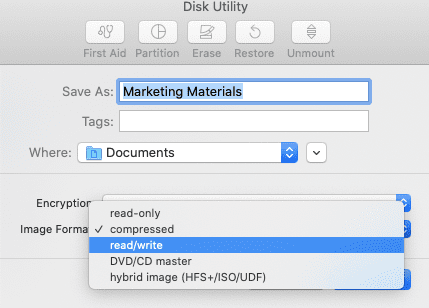
Under Image Format, you can select read/write from the menu. This allows you to add and update files after you have set the password. If you don’t select this option, all the content in the folder will be locked from changes.
Select Save to finish.
Password Protecting a Folder Without Disk Utility
For more ease of use, there are also third-party apps that allow you to encrypt your files. Make sure to download them from the App Store so that they are vetted by Apple for security.
One example is Encrypto, which allows you to password protect your folders. Searching the App Store for “password protect folders” can help you find a variety of apps that help secure folders and files.


")


Write a Comment