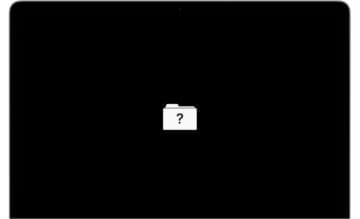
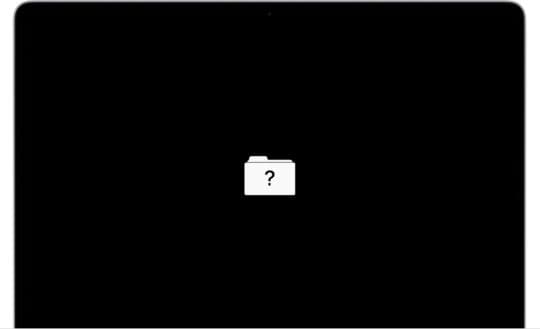
The worst feeling in the world is starting up your Mac and being greeted with an error screen. Your mind scrambles as you panic to find a solution, but you just have no idea how to fix it. If you’ve ever opened your Mac and seen a flashing folder with a question mark on a black screen, it can be quite a serious issue that will require you to take drastic action. This can be scary if you’ve never had to fix your computer before or ever had to make technical tweaks to it, but don’t worry—we’ll help you out through every step in this comprehensive guide. Read on below if you want to find out how to fix the macOS question mark flashing folder error.
You might receive this ominous error for multiple reasons, and all of them indicate a serious hardware or software issue. Although the issue is serious, it is definitely fixable, so don’t panic! You may receive this error due to the following reasons:
A failed update that corrupted your drive.
A corrupt NVRAM setting file.
Hard drive cable issues (for older Macs).
A physically damaged hard drive.
How to Fix the macOS Flashing Folder Question Mark Error
Image credits: Apple
There are various ways for you to fix your Mac if you have a flashing folder icon with a question mark. If your Mac shows the warning momentarily before booting up normally, this may point to a software issue (which is good news for you!). Here’s how you can fix your Mac when you see this error.
Reset your NVRAM
NVRAM stands for Non-Volatile Random Access Memory and contains crucial system information, including bootup info. Resetting your NVRAM takes a couple of seconds, if you know how. Here’s a step-by-step guide:
Turn off your Mac device.
Restart your Mac and immediately hold Option-Command-P-R.
Release the keys after approximately 20 seconds.
That’s all you need to do to reset your NVRAM! If this doesn’t work, you can try the alternative methods below.
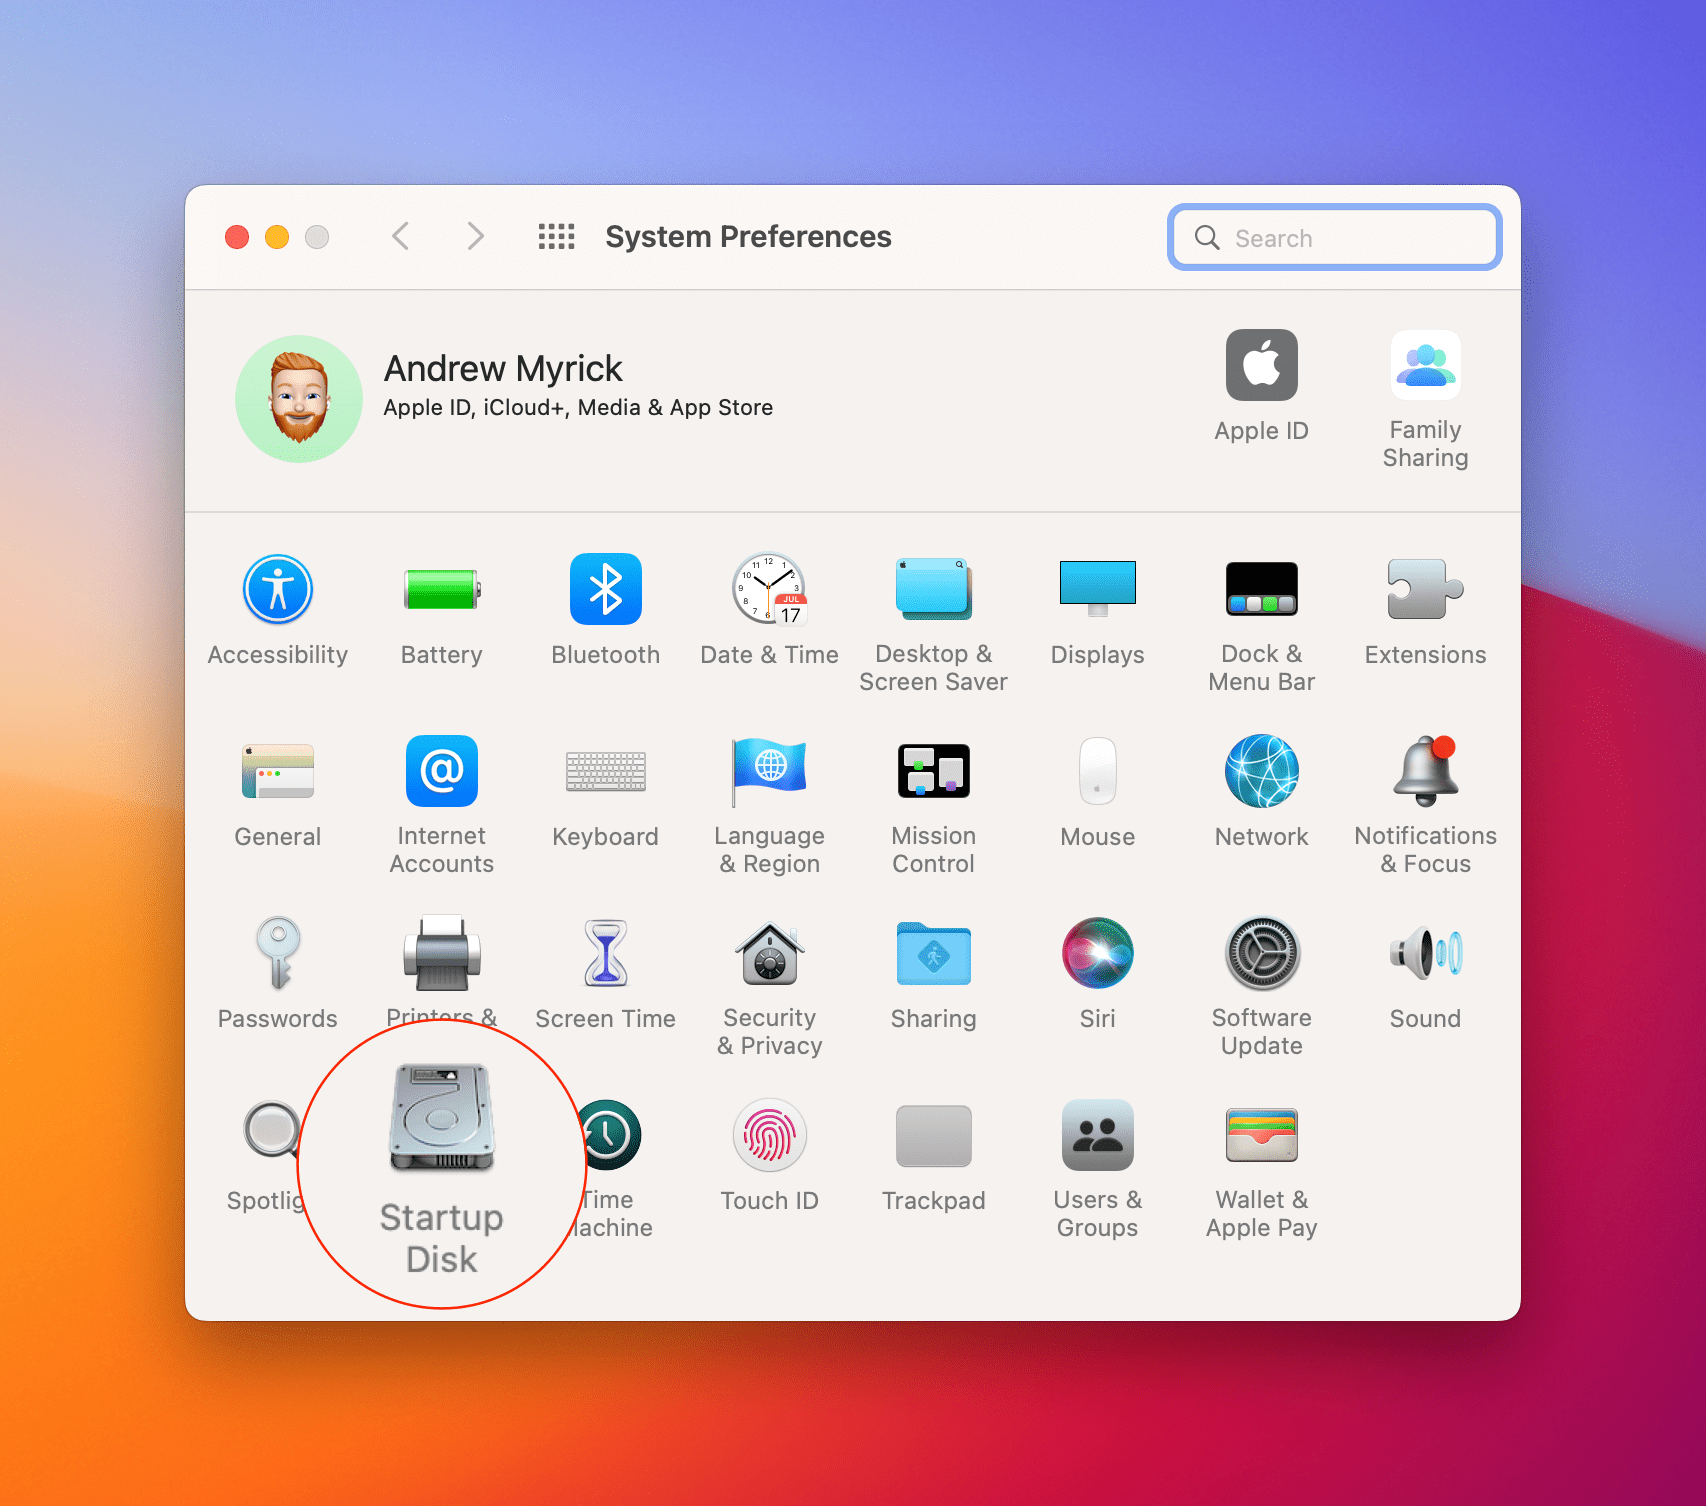
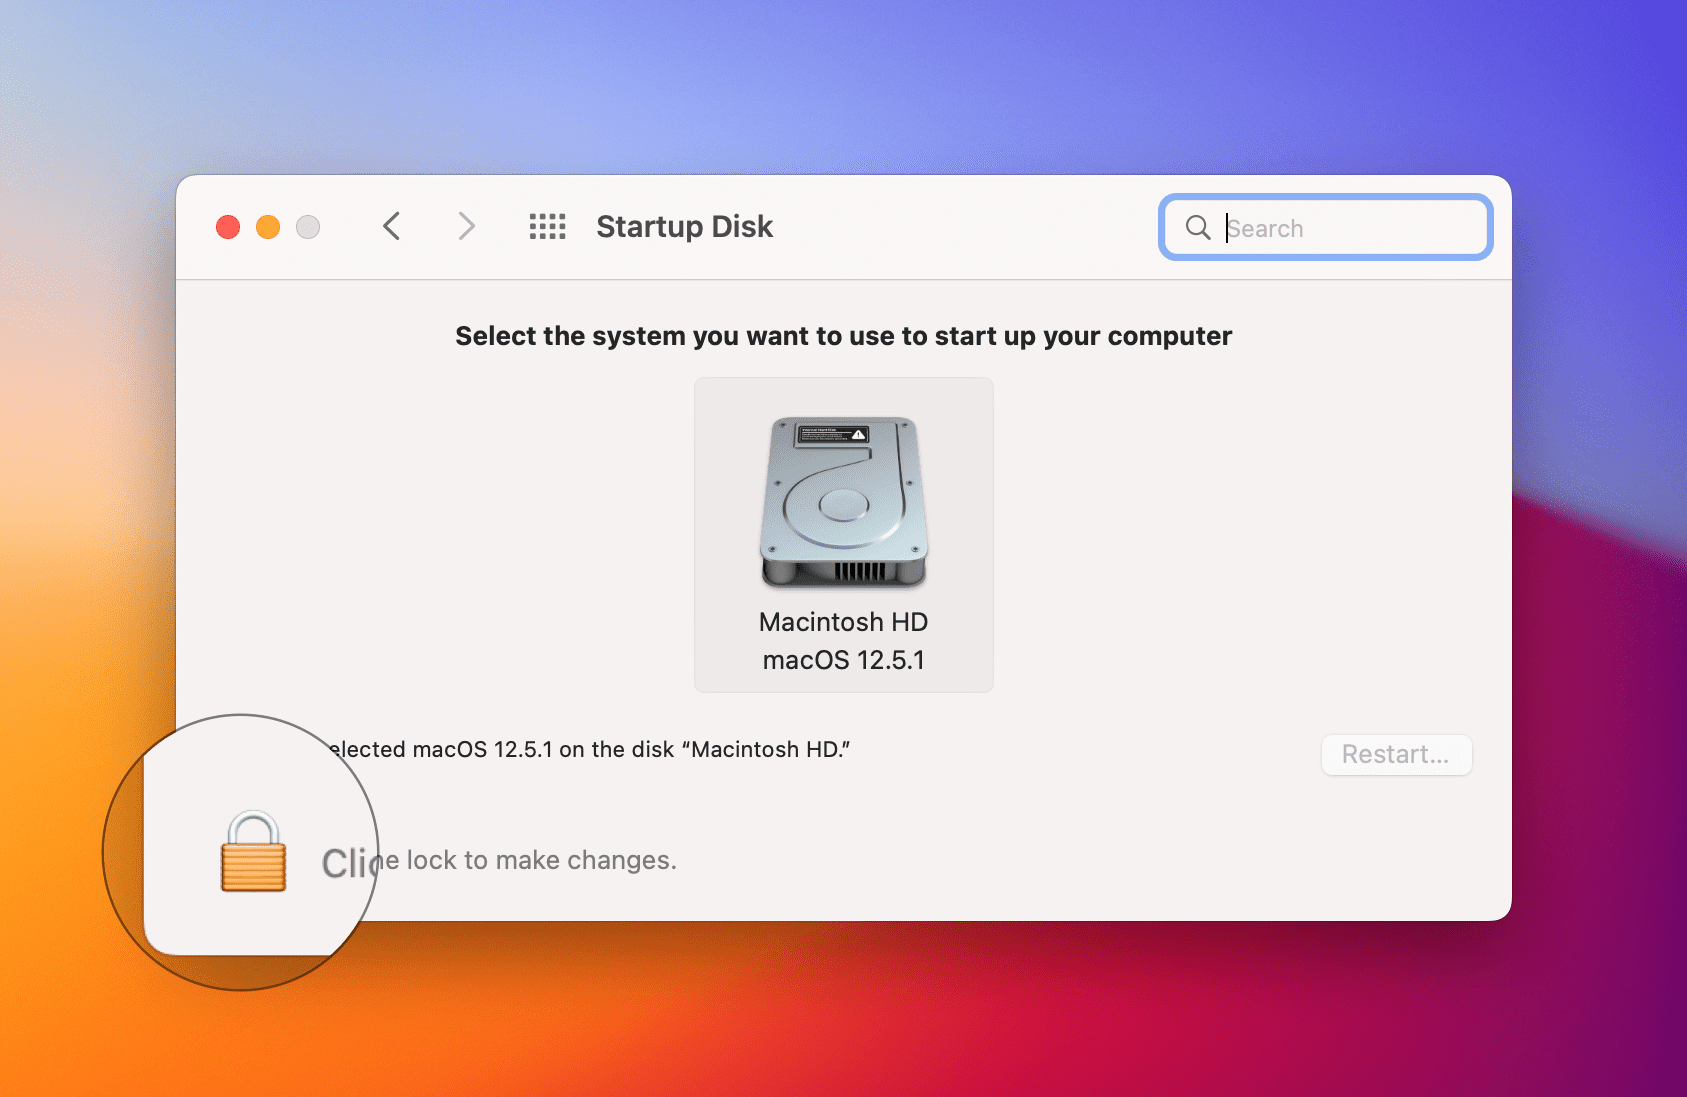
Reselect the startup disk
You may be experiencing the flashing folder error because your Mac might be confused about what startup disk you’re trying to boot up. Here’s how you can select the appropriate startup disk:
Go to System Preferences (you can use Spotlight or your dock).
Select Startup Disk.
Click the lock in the bottom left corner (you’ll need admin privileges).
Check that the correct startup disk is active.
Restart your computer.
Start your Mac in Recovery Mode
Mac’s Disk Utilities function in Recovery Mode provides you with the tools to fix your computer when you’re experiencing these exact types of problems. Access this by going into Recovery Mode by following these steps:
Hold down the power button for a few seconds to turn off your device completely (do not turn it off via the Apple menu).
Turn your Mac back on and immediately press Command+R to enter Recovery Mode.
On the screen that pops up, press Disk Utility then First Aid.
Select the startup disk and let Recovery Mode fix your Mac for you.
Reinstall macOS
In more drastic circumstances, you may need to reinstall your OS and restore your computer either to a backup or to factory settings in order to fix the macOS flashing folder question mark error. In some ways, this can be poetic as you start fresh. Most people would prefer to revert back to a backup, though. First, you’ll need to format your startup disk. Here’s how you can do all that.
To format your startup disk:
Boot your Mac in Recovery Mode (turn it off via the power button, restart while pressing Command+R).
Select Disk Utility, choose your startup disk or hard drive and select Erase.
Press Erase Volume Group to delete all data from your hard drive.
Once you’ve done that, boot in Recovery Mode again. Now we’re going to reinstall macOS by following these steps:
Select the Reinstall macOS option from the Disk Utilities menu and press continue.
Follow the in-depth instructions provided to you on screen.


Write a Comment