If your iPhone, iPad, or Mac storage is full, you might start to wonder what is this “System Data” category that keeps using up your space. “System Data” can bloat to fill up your entire device, but we can get rid of it.
System Data includes things like Siri voices, fonts, dictionaries, logs and caches, your device’s Spotlight index, Keychain and CloudKit database, and other resources currently in use by the system. For older versions of iOS and macOS, you may see the “System” and “Other” folders instead. These are basically the same thing as “System Data” on new versions of the operating systems, which combines the two folders.
Typically, the “System Data” category in your iPhone, iPad, or Mac storage shouldn’t use more than 10 GB of space. Of course, when you only have a 16 GB device, that already sounds like far too much. But for some users, “System Data” grows much bigger than 10 GB, swelling to 50 GB or more.
It’s no good having a smart device if there’s no space for photos, videos, and apps on it. Find out what you can do to fix it below.
Contents
- How Do I Check the Storage on My Device?
- What Creates “System Data” Storage?
- What’s the Difference Between “System” and “Other” Storage?
- How Do I Get Rid of “System Data” Storage on My iPhone, iPad, or iPod Touch?
- How Do I Get Rid of “System Data” Storage on My Mac?
How Do I Check the Storage on My Device?
There are several ways to check the storage on your device. When you check, wait at least two minutes for the data to update, otherwise you won’t see the latest reading.
How to Check the Storage on an iPhone, iPad, or iPod Touch
Checking storage requires the same method across all three of these devices:
- Go to Settings > General > [iDevice] Storage.
- Find a chart of your storage at the top of the page.
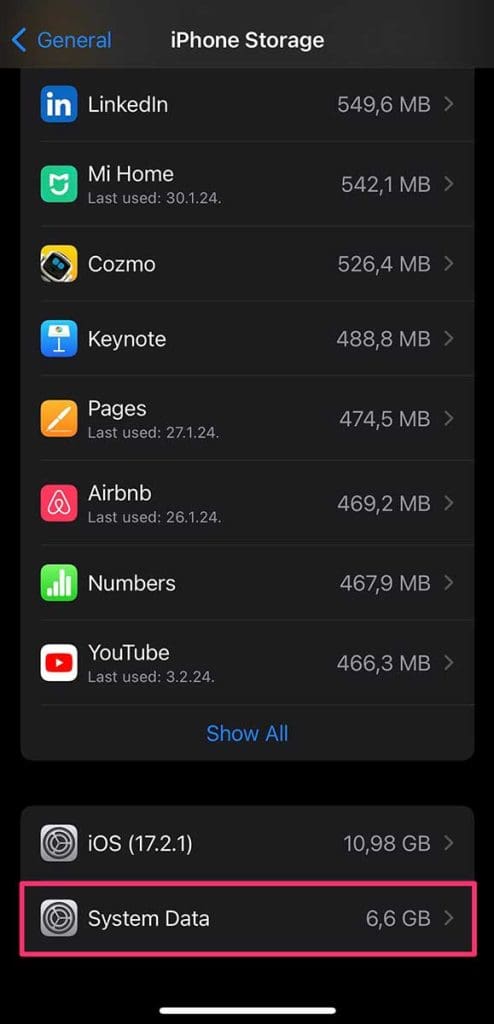
- Scroll to the bottom of the list to find how much storage your System Data uses.
Your largest apps are listed beneath the storage chart.
How to Check the Storage on a Mac
The latest versions of macOS have made it easier than ever to find your storage:
- Open the Apple Menu and select System Settings.
- Go to General.
- Select Storage, followed by All Volumes (if you have more).

You’ll see a colored bar on the screen, with each color representing a different type of storage (e.g., documents, applications, system storage, etc.), as indicated by the key below. Hover your mouse over a color to see how much space each type of storage takes up.
For older versions of macOS, you may need to use this method instead:
- From the menu bar, go to Apple Menu > About This Mac > Storage.
- Hover your mouse over each section in the chart to see its category.
- Click ‘Manage’ to see a detailed breakdown of your Mac storage.
You can also check the storage taken up by each folder on your Mac:
- From the menu bar in Finder, select Go > Computer.
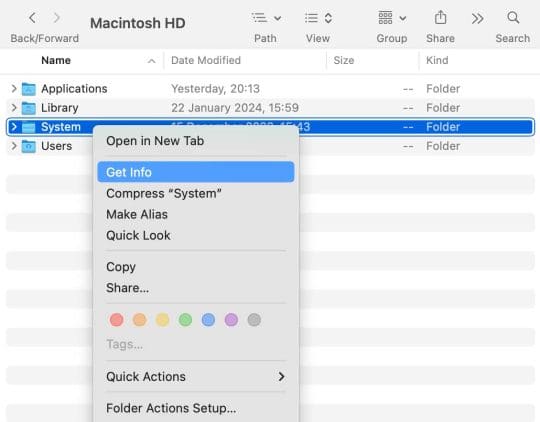
- Control-click a file or folder and select Get Info to see its size.

- Check each folder on your Mac to discover what uses the most space.

What Creates “System Data” Storage?
In its simplest form, “System Data” storage includes everything that doesn’t fit into the standard storage categories: Apps, Media, Photos, Books, etc. Though Apple hasn’t provided an official list of what all falls into the “System Data” folder, we know that it contains cached data from several apps. It’ll also hold temporary files generated by daily use of your device, in addition to the following:
- Software updates
- Siri voices
- Logs
Most of these shouldn’t take up much space, but there are occasions when they bloat and fill your entire storage. This is particularly common with cached files, which build up as you stream videos or music from the web. But it also happens with corrupted software updates that keep re-downloading themselves.
Apple says you don’t need to delete these files yourself because your device does it automatically. But clearly, that’s not always the case.
What’s the Difference Between “System” and “Other” Storage?
With older versions of iOS and macOS, you might notice a lot of storage on your device goes to “System” as well as “Other.” There isn’t always a clear-cut difference between these categories, but typically, “System” includes your device’s operating software.
As well as some system files, “Other” storage also catches other file types that are too few to be categorized. In newer versions of both operating systems, “Other” and “System” are combined into “System Data.”
How Do I Get Rid of “System Data” Storage on My iPhone, iPad, or iPod Touch?
Follow the steps below to remove “System Data” storage on your iPhone or iPad. Continuously check your storage after each step to ensure you haven’t already fixed the problem.
Click here to skip to the Mac instructions.
1. Use a Computer or iCloud to Back Up Your Device
For many users, the solution to their “System Data” storage problem was as simple as connecting their iPhone to a computer for 10 minutes or so. We suggest you take this opportunity to back up your device using iTunes or Finder.
You need a recent backup of your device for later troubleshooting steps. But it also seems that when you use a computer to back up your device, iTunes or Finder clears away corrupted or unnecessary files taking up your storage.
How to Back Up Your iPhone to a Computer
You have two options to back up your device to a computer – your Mac or iTunes. If you have macOS 10.15 or earlier, your only option is to back up using iTunes. The same goes if you want to back up to a PC.
For the Mac, follow these steps:
- Use the cable that came with your device to connect it to a computer running the latest macOS version.
- Unlock your iPhone and go to the Home screen.
- Open Finder on your Mac and under Locations choose your device.
- Click on Trust this iPhone.

- Choose “Back up all of the data on your iPhone to this Mac.”
- Click Back Up Now.

Between Step 5 and Step 6, you’ll also be given the option to “Encrypt Local Backup.” This basically amounts to setting a password for the backup, and whether you use it is your choice.
As for backing up via iTunes, you’ll typically use this method when you have a Windows PC with iTunes installed:
- Connect your iPhone to your computer using a cable.
- Open the iTunes app and click your iPhone’s icon at the top-left of the window.

- Select Summary.
- Navigate to “Backups” and choose Back Up Now.

As with backing up via a Mac, you’ll have the option to encrypt your backup and apply a password to it. If you need to locate the backup later, head to Edit > Preferences and click Devices. You’ll access a complete list of the backups you’ve made.
How to Back Up an iPhone to iCloud
If you’re using iCloud, you can set it to back up your device’s contents daily:
- Head to Settings and select your name.
- Tap iCloud followed by iCloud Backup.
- Toggle iCloud Backup on.
As long as your device is connected to a power source, connected to Wi-Fi, and locked, iCloud will create a backup every day. Letting it happen when charging is best. You’ll also see the Back Up Now option if you follow these steps – use it to create your own backup.
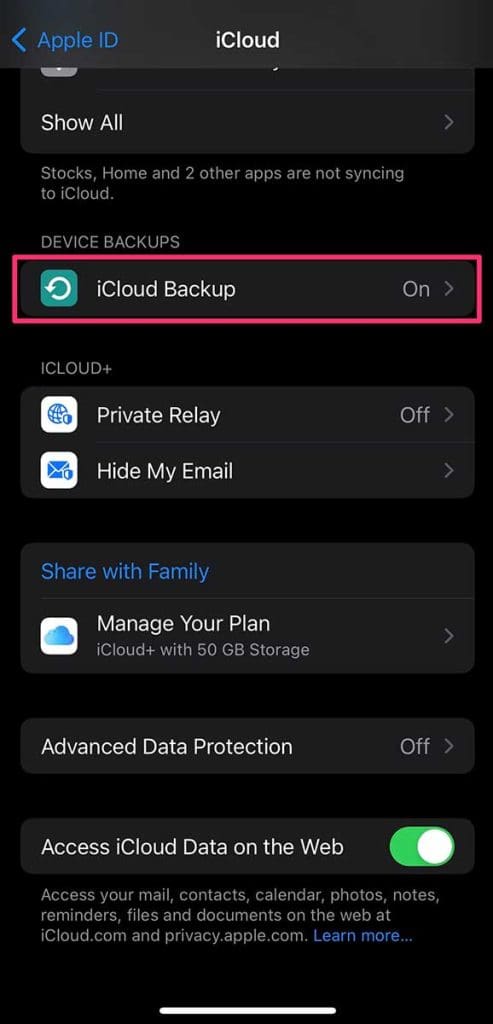
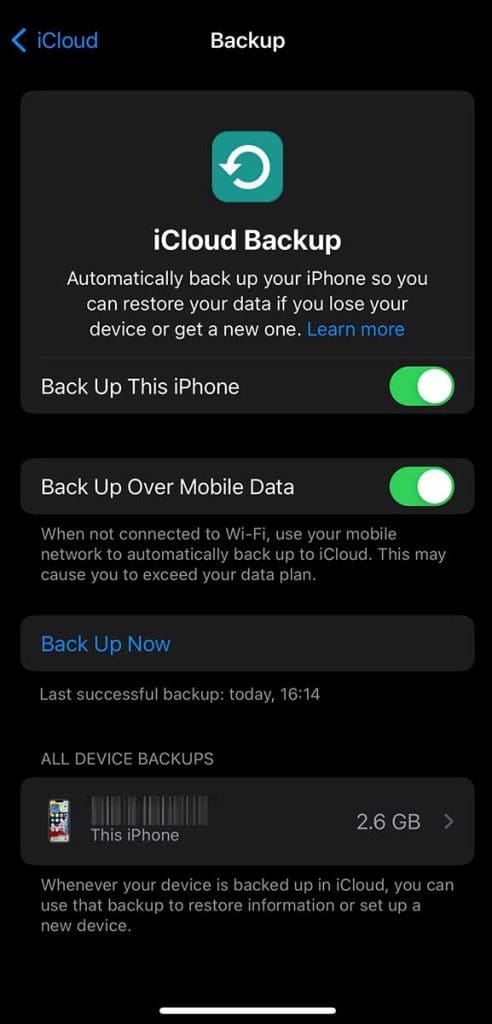
If you need to check when was the last iCloud backup completed, use these steps:
- Open Settings and tap your name.
- Go to iCloud, followed by iCloud Backup.
- Under All Device Backups, tap on your device name.

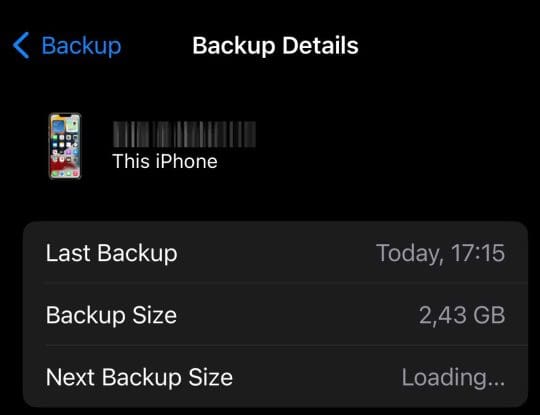
- Here, you can check when the latest backup was done and its size.

2. Update to the Latest Version of iOS
Apple frequently eliminates troublesome software errors with new releases of iOS and iPadOS. Update to the latest public release if you haven’t done so already. It’s likely to provide a wealth of improvements to your device.
Rather than selecting Software Update in the Settings app, we recommend you use a computer to update your iPhone. This is because you need less free storage to do so, and it’s more likely to get rid of corrupted software update files that may be using up “System Data” storage on your iPhone.
How to Update an iPhone Using a Computer
As with backing up, you can use a Mac or iTunes to run an operating system update on your device. For Mac, the steps are pretty simple:
- Make sure you have the most up-to-date version of macOS.
- Open the Finder window.
- Connect your iPhone to your Mac using the cable that came with it.
- Choose your iPhone from the list in the left sidebar.
- Select General, followed by Check for Update.
- Assuming an update is found, hit Download and Update.

From here, you can follow the instructions to run an update. Your Mac will ask you to enter your iPhone’s passcode at some point during this process, assuming the device has one.
For Windows users, updating via iTunes is the only option:
- Use your device’s cable to connect it to your computer.
- Open the iTunes App and click the iPhone button at the top-left of the screen.
- Select Summary, followed by Check for Update.
- Hit Update to install any available device updates.

Make sure you use the Eject button to disconnect your device from your computer when you’re done – you don’t want your new update getting corrupted.
What if I Don’t Want to Update My Device?
Many users with older devices are hesitant to update to the latest software. This is sometimes a wise move, as older devices struggle to keep up with the latest software demands. But for those running an older operating system, it may be why you see such a large “System Data” folder.
Your iPhone, iPad, or iPod touch may have downloaded a new update already. If this is the case, it’s already taking up “System Data” space, unless you update or restore your device.
Beta Software and Jailbroken Devices
Many users are taking part in the Apple Beta Software Program to test drive upcoming releases of iOS and iPadOS. Other users have jailbroken their iPhone, iPad, or iPod touch to unlock new customization options. In both cases, your device may become less stable and prone to excess “System Data” storage.
Downgrade from beta software or un-jailbreak your device to eliminate excess “System Data” storage.
3. Restore Your Device to a Recent Backup
Corruptions in your operating software can take up a lot of “System Data” storage on your iPhone. You can fix this by restoring your device to a recent backup using iTunes or Finder. You shouldn’t lose any data doing this, but it does reinstall your operating software.
How to Restore a Recent Backup Using a Computer
You’ll either use your Mac or Windows PC for the backup restore, with Windows users needing to go through iTunes. If you have a Mac, the steps are pretty simple:
- If you haven’t already, back up your device.
- Use the cable that came with your device to connect it to your Mac.
- Under the General section in Finder, click Restore Backup.
- Select the backup you want and hit the Restore button.

iTunes has a slightly different process:
- Connect your iPhone to your computer and open the iTunes App.
- Click the iPhone icon at the top-left of the screen.
- Select Summary, followed by Restore Backup.

In both cases, you’ll be asked for a password if you decide to encrypt the backup you made earlier.
4. Get Rid of Cached Files and Other Data
If your “System Data” storage still takes up a lot of space after restoring your backup, you might need to clear some of the cached files and data on your device.
These build up over time as you use your iPhone, iPad, or iPod touch for various tasks. Your device should automatically delete them, but you can do it yourself by following the tips below.
Clear Website Data and History From Safari:
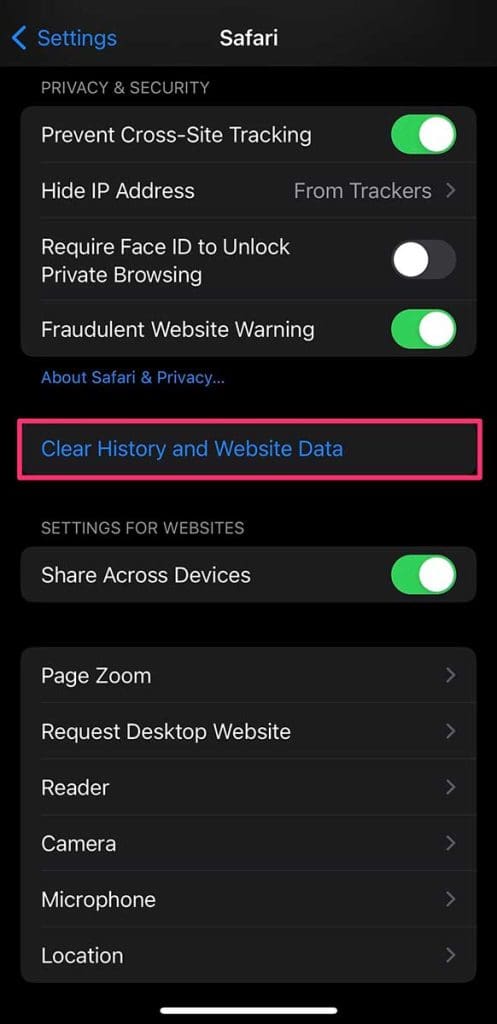
- Go to Settings > Safari.
- Scroll down and tap Clear History and Website Data.
- Confirm you want to Clear History and Data.

You need to sign in to websites again after you clear Safari’s data.
You can also clear your cookies and cache while keeping your history:
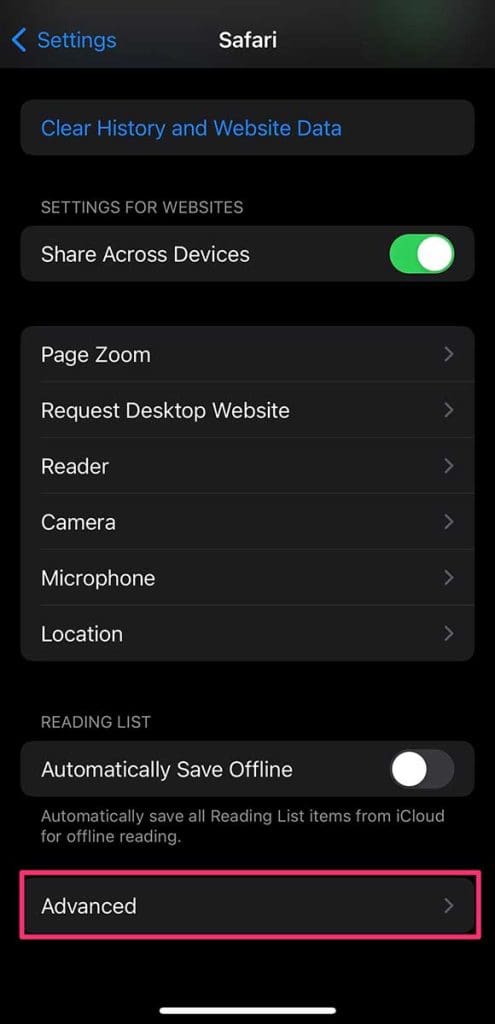
- Head to Settings followed by Safari.
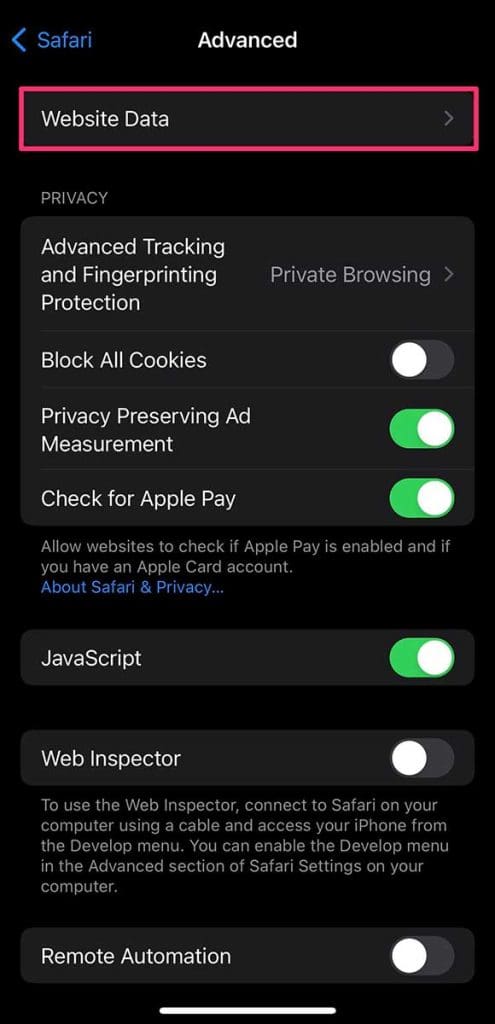
- Tap Advanced.
- Select Website Data and hit Remove All Website Data.
Delete Old Conversations From Messages
A build-up of old messages can take up lots of space on your devices. If you’re like us and can barely breathe due to the amount of text messages you receive, you can delete the old messages on your phone to free up some space in “System Data.”
- Open the Messages app and find a conversation you want to delete.
- Swipe left on the conversation.
- Tap the Trash icon.
You can also delete multiple conversations at once:
- Hit Edit in the top-left corner of your Messages app.
- Choose Select Messages.
- Tap each conversation you wish to delete.
- Hit Delete.
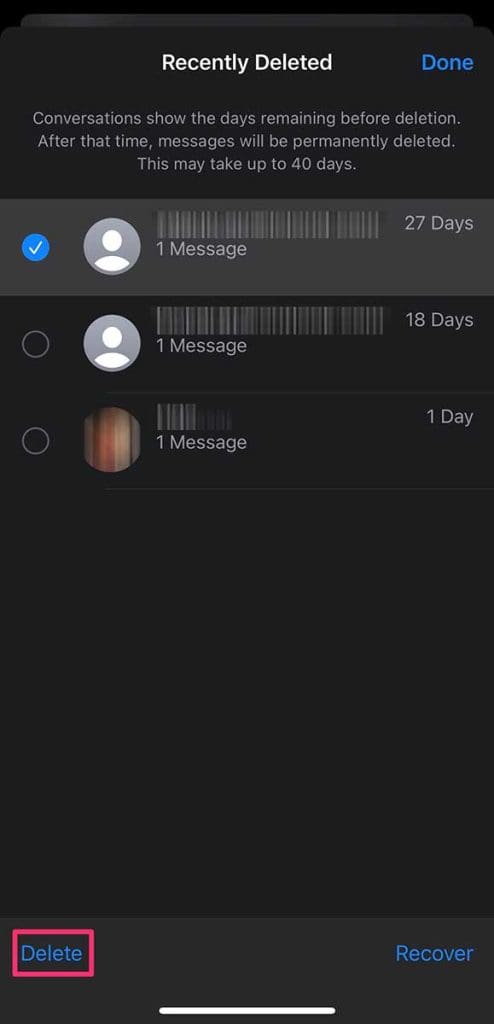
You’re not done yet. Though you’ve deleted the conversations from your Messages app, they’ll stay on your iPhone for 30 days. That’s because they’re in the Recently Deleted folder, meaning they’ll carry on taking up space in “System Data” for about a month. Let’s get rid of them manually instead:
- Open the Messages app and select Edit.
- Choose Show Recently Deleted.
- Choose the conversations you want to delete permanently and hit the Delete button.

Remove Your Recently Deleted iCloud Photos and Videos
If you have files you’ve deleted on iCloud, you have the same problem as you have with your device – they stay in Recently Deleted for a while. Get rid of them using these steps:
- Open iCloud.com or iCloud Drive.
- Select Recently Deleted from the sidebar.
- Choose the files you want to remove and hit Delete.

Due to the way iCloud works, you should also temporarily change the date on your device to at least 40 days in the future. This will automatically delete anything in iCloud’s Recently Deleted folder, assuming it’s set at the default of 30 days before deletion:
- Go to Settings > General > Date & Time.
- Turn off the Set Automatically button.
- Change the date to at least 40 days in the future.
- Go Home, then return to Settings and correct the date.
Temporarily Sign Out of iCloud
Signing out of iCloud on your iPhone stops the service from storing your messages and media. So, a temporary sign-out may be a good idea while you handle “System Data” on your device:
- Go to Settings > [Your Name].
- Scroll down and tap Sign Out.
- If prompted, enter your Apple ID password.
- Choose what data to keep on your device and tap Sign Out.
- Tap Sign Out again to confirm.
You can also follow these steps to sign back in whenever you want to start using your Apple ID.
Update, Offload, or Delete Apps
Getting rid of apps, offloading the data from apps you don’t use, and updating every app on your device also helps clear some space in “System Data.” Offloading data is an obvious fix, and deleting apps means all their associated data is gone. For updating, you may clear space because the update eliminates corrupted files from a previous failed update in “System Data.”
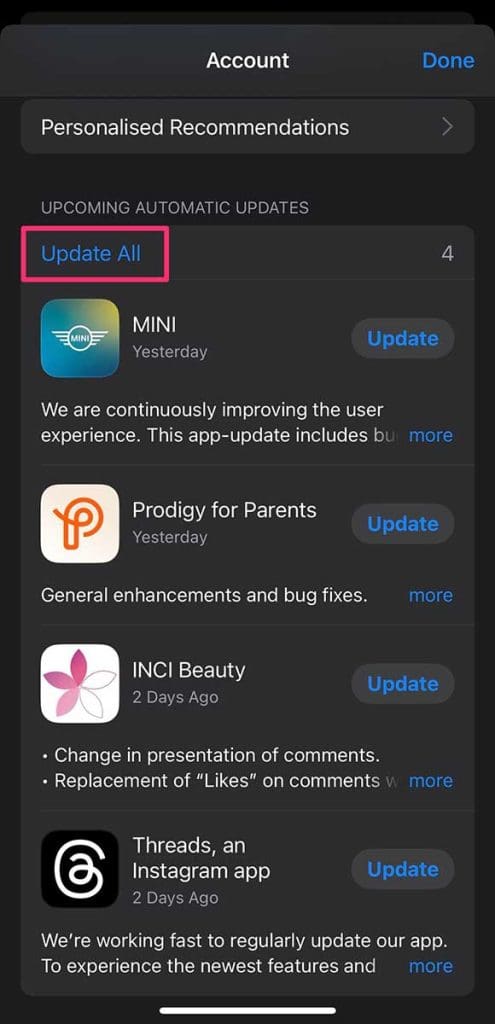
Update every app on your device:
- Open the App Store.
- In the top-right, tap the user account icon.
- Scroll down and tap Update All.

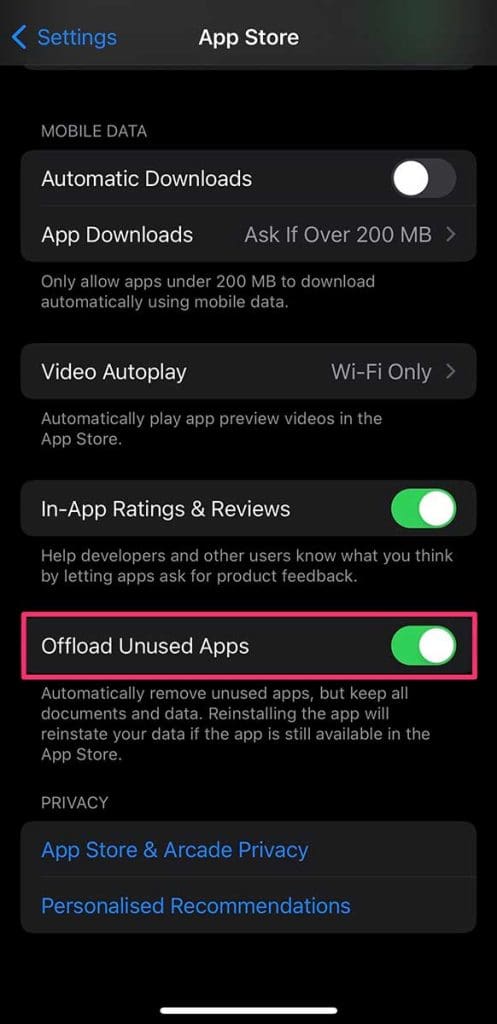
Offload data from apps you don’t use:
- Go to Settings, followed by App Store.
- Turn on Offload Unused Apps.

Your phone will now automatically offload apps after 12 days of inactivity.
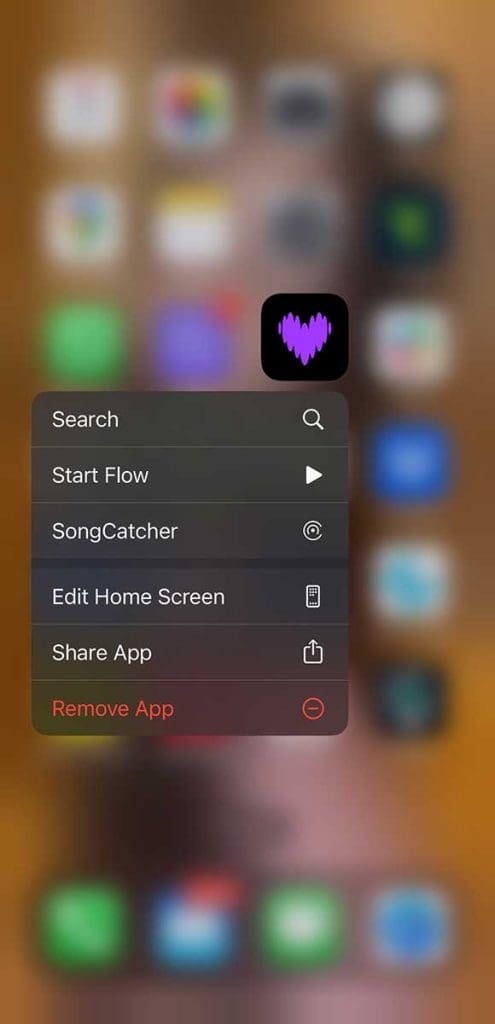
Delete apps you no longer want:
- From the Home screen, touch and hold unwanted apps.
- Choose Remove App from the pop-up menu.
- Select Delete App to remove it from your device.

5. Erase Your Device and Reinstall the Latest Software
You already restored your device from a backup, but if you still can’t get rid of “System Data” storage, you may need to erase it entirely.
We suggest you do this using DFU mode (Device Firmware Update mode), which erases and rewrites every single line of software and firmware on your device. It’s the deepest level of restore available to iOS and iPadOS devices.
After erasing your device, set it up as new and import data using iCloud, iTunes, or Finder.
Entering DFU mode can get complicated, so we recommend you check out this separate article we already wrote explaining how to do it for each device.
Alternatively, you can use the Settings menu to erase it:
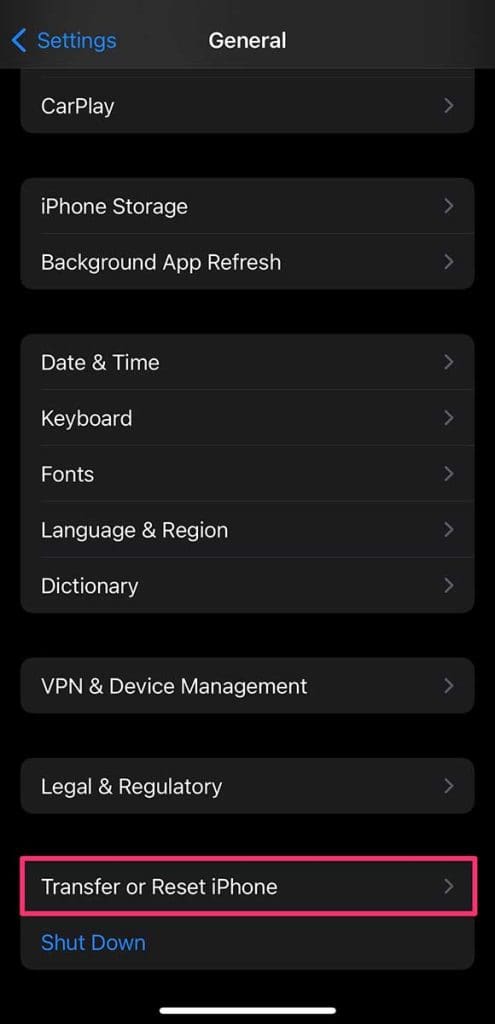
- Open Settings and go to General.
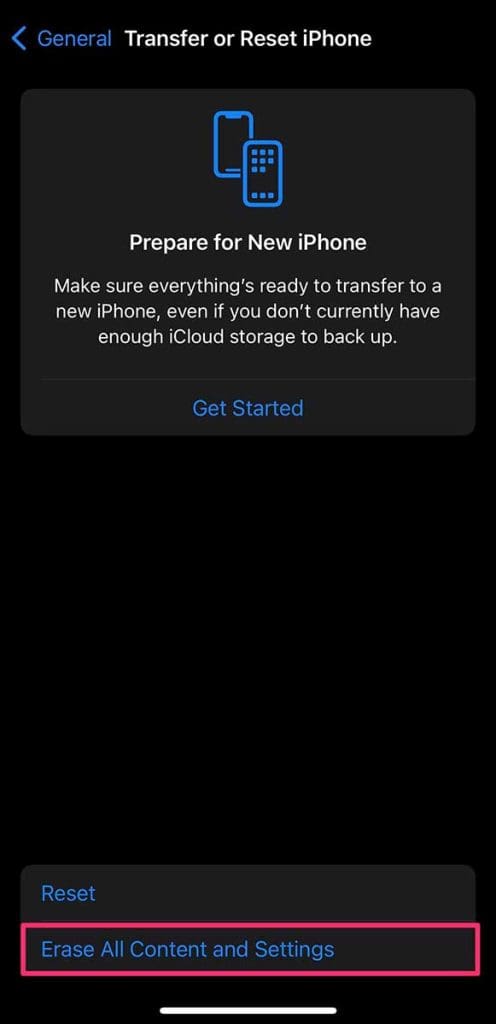
- Select Transfer or Reset iPhone.
- Choose Erase All Content and Settings.
Either way, you’re essentially choosing the nuclear option here. Once you’ve erased the device, you’ll have to repeat the entire setup process. That includes reinstalling apps and anything not backed up to your iCloud. We recommend only doing this if nothing else seems to work for clearing “System Data.”
How Do I Get Rid of “System Data” Storage on My Mac?
Use the steps below to reduce “System Data” storage on your Mac. We’ve listed the steps from most to least common. Hopefully, you don’t need to use all of them.
1. Back up Your Mac Using Time Machine
Time Machine is an excellent tool for Mac users. It saves snapshot images of your Mac going back in time. That way, if you deleted a file two weeks ago, you can look at your Mac from that time and retrieve it.
Most people use Time Machine with an external drive. If that drive isn’t connected all the time, your Mac still saves Time Machine snapshots to the local system files. The next time you make a Time Machine backup, your Mac transfers the snapshots to your Time Machine drive.
If you use it, connect your external Time Machine drive and make a new backup. Your Mac will transfer any snapshots from your system files.
Make a new backup of your Mac before proceeding.
2. Delete Device Backups from iTunes or Finder
Other common “System Data” storage uses are iPhone, iPad, or iPod touch backups made on your Mac. If you use iTunes or Finder to back up your other devices, that backup uses space in your system files.
Take a look at your existing device backups using Finder or iTunes, depending on your macOS version. Then delete old backups you don’t need anymore.
How to Delete Device Backups in macOS Catalina Up to macOS Sonoma
- Connect your iPhone, iPad, or iPod touch to your Mac.
- Open Finder and select your device from the sidebar.
- From the General tab, click Manage Backups.

- Locate the backup you want to delete, right-click, and select Delete.
- Hit the OK button.
How to Delete Device Backups in macOS Mojave or Earlier:
- Open iTunes on your Mac.
- From the menu bar, go to iTunes > Preferences > Devices.
- Select the backup you want to delete and click ‘Delete Backup.’
3. Manually Delete Large Files and Folders in Finder
Storage categories work slightly different on your Mac. Most noticeably, “System Data” uses far more storage than it would on an iPhone or iPad. That’s because it also counts some of your personal files, making the categories less useful.
The best way to get a grip on where your Mac storage goes is by using Finder. This way you can pinpoint the exact files and folders taking up most of your space and decide if they are important or not.
Anything you don’t need can go to the Trash, but make sure you empty it and create a new Time Machine backup before checking your storage again.
Don’t delete anything from the Library or System folders unless you’re certain you don’t need it.
4. Use a Third-Party Application
A range of third-party applications exist to get rid of “System Data” storage on your Mac. Many of these make it easier to locate problematic files or automatically remove unnecessary files from your system.
The most common app to use for this is OmniDiskSweeper, developed by the Omni group. This app shows you the largest files on your drive, making it easy to trash them. Another good app to use is CleanMyMac X by MacPaw.
You should independently research any third-party app before installing it on your Mac.
5. Reinstall the Operating Software on Your Mac
If you still can’t get rid of the “System Data” storage on your Mac, it may be time to pull out the big guns. Use the recovery partition on your Mac to reinstall your operating software. This rewrites each line of code in macOS and hopefully removes the corruption that’s eating up all your storage.
Reinstalling macOS shouldn’t affect your content, such as photos, videos, or documents. But we recommend you make a new backup of your Mac anyway.
How to Reinstall macOS From a Recovery Partition
The exact method you’ll use depends on whether your Mac has an Apple silicon processor. Apple started introducing these processors in 2020, though it staggered their use. For instance, Mac Pro only started using Apple silicon in 2023.
Check Apple’s Support page for Apple silicon to confirm if your device has one of these processors. If it does, follow these steps:
- Shut down your Mac by going to Apple Menu > Shut Down.
- Wait at least 30 seconds for your Mac to power off fully.
- Press the power button to turn on your Mac, releasing when you see Options.
- Select Options and click the Continue button.
- Choose Reinstall macOS Sonoma from the list of options.
- Select Continue and follow the onscreen instructions.
- You may have to enter your Mac’s password to unlock its disk so the reinstallation can take place.
Make sure you keep your Mac connected to a power source, as the reinstallation takes a fair amount of time. Once it’s done, your Mac will usually connect to a setup assistant. Follow the steps in that assistant to complete the reinstallation.
Of course, your Mac may not have an Apple silicon chip, even if it’s running the latest macOS. If that’s the case, the reinstallation process is a little different:
- After turning your Mac off, press and release the power button to turn it back on.
- Immediately after powering the Mac on, press and hold Command + R.
- Continue holding until you see a spinning globe or the Apple logo.
- Select a Wi-Fi network, if prompted.
- Enter your username and password if prompted.
- Choose Reinstall macOS Sonoma from the list.
- Hit Continue and enter your password again, if needed.
- Wait for installation to complete while keeping your Mac connected to a power source.
We hope this guide made it easy to get rid of all that “System Data” storage on your iPhone, iPad, or Mac. If it keeps coming back, just return to this article and try a different step.
And don’t forget to let us know how you get on in the comments below.

Dan writes tutorials and troubleshooting guides to help people make the most of their technology. Before becoming a writer, he earned a BSc in Sound Technology, supervised repairs at an Apple Store, and even taught English in China.











As i have seen in so many posts regarding this issue. Cleaning up the safari cache, or updating to IOS 14 did not work for me. So every time my other storage goes up, i just restart my ipad/iphone to clear the other storage. I don’t know how, but it does the trick..
Thank you for writing a great piece on Iphone storage. I have a 16GB Iphone that was full. “Other” was taking 4 GB and System was taking 6 GB. I went through all the steps except wiping my phone clean on my first attempt. “Other” was reduced, I forgot how much, but it returned the next day. On my second attempt something happened and my phone would not turn on, it just kept showing the Apple icon and then would go blank, then show the icon, then blank etc. It would not turn on. I shut down Itunes, unplugged the phone, then turned on Itunes and plugged in the phone. Same thing for a while then I tunes detected the phone had an issue and suggested I wipe it clean. I did, then loaded the back up I made that evening. That process freed up almost 4 GB. Thank you for your help.
Just to add that restoring from the cloud worked. Thanks to all!
Holding down the home button and power button didn’t work for me. it just showed more ‘other’ rather than have it go down
I tried first method – did not work – tried second method and the window “Open iTunes when this iPhone is connected” is grey – I cannot check it or uncheck it.
Now what?
I could back up and restore, but what happens to all my IMs and such? Does all that get saved?
I just don’t want to lose data.
Thanks in advance.
We all want to delete the data we get on our iPhones sometimes. Whether that’s because you want to keep your Messages app tidy or because a message had something in it you don’t want someone else to see, a simple swipe usually takes care of things.
The most secure way is using professional third-party software like iPhone Data Eraser, which is a reliable and effective tool to smash everything on your iPhone, including musics, contacts, messages, photos, videos, apps, account info, passwords, and other personal data.
it is strictly classified data: NSA files are colored yellow “others”
not uploaded yet – so you have to keep it on your device for now
This is a super great love here you blog i contents to come.
I followed what the author of this article said, but instead of doing it as new, I just restored the backup and the 3GB of other I had went down to 700MB. Thank you! This was for my iPad2
i have barley anything on my iPhone 4 and i cant take pictures, download any apps and basically cant do anything. its really annoying because a friend of mine has the same phone with the same GB but has soo many pictures and lots of apps and still has room! i have 5 apps and like 200 pictures and thats all. barley any music as well. i want to restore my phone and try but i still want my messages! like is there any way to keep your messages?
This should have been fixed long ago. I watch many movies on my Ipad and whenever I delete one it just turns into other space. I have to disconnect from my computer turn off the Ipad and then reconnect to computer and boot the Ipad. This works for me most of the time. The fact that Apple hasn’t made the fix to this a priority is baffling.
I just found the best solution to remove all other data in my iPhone4 on iOS 6.0.1. After every new suggested way in internet I just got only fraction of this yellow bar reduced and that was frustrating. Then I thought about Cydia, because my iPhone is jailbroken. First I installed a program called CleanMyI but it also did very small part of the job. Then I found iCleaner. In couple munutes iTunes showed no yello bar at all and I’m finally happy 🙂 Good luck!
This did not work. I have an 8gb iPod 4, and the Others is up to 3.9gb of space.
didnt work for me either…….everything went back to the same as it was.
how do you backup as NEW, in other words how do rename or name the backup as NEW??
Read my replay further up. I tried everything to get rid of 17GB of other. Restoring from iCloud worked. If you don’t have one, set up is free.
I’m having the same issue. 10GB of other. I can’t backup to icloud as it will only hold 5GB. I’m stuck doing restore from my computer and it does the same things. Just puts the corrupt data right back on. Did you expand icloud storage or how did you figure it out?
Funny, but I have 25GB of space, but AFTER doing the restore, even though I have a 64GB iPhone, the full backup is about 3 1/2 Gigs, so it fits. Try to do a backup with the 5 free. It will probably work. I think Apple keeps a record of what you have, but doesn’t need to back up the actual songs, movies, etc.
yea i have the same problem ” i got 9.4 GB data on others … dunno why
i have no calender events , my contacts its about 20m.b i backed it up and deleted,… i got i cleaner and cleaned all chases , temp , logs ..
i wanna know WHY THERE”S 9G.B IN OTHERS.. !
Note : i got 6.1.2 ios and i can see that all ppl whos facing the problem already have the same version..
help please ..
Read my replay further up. I tried everything to get rid of 17GB of other. Restoring from iCloud worked. If you don’t have one, set up is free.
I tried this and it did not work for me, the Other is still like almost 3 GB! HELP!!!
Hey, Apple, where you are? Shall we go for Samsung and android?
I really don’t understand why there is 1GB+ other data on my iPad4 (6.1.2 OS) while my iPhone4 (6.1.2 os) doesn’t have even single byte. Both are been synchronized on same computer and same iTune version. Anybody have another idea why or having same problem?
Thanks
I have a apple iPod touch 4th generation with a storage of 8 gb. 1.30 gb of my iPod space was occupied by others. It grew every day .1 GB. So this is what i did and it works really works. If you have a wallpaper app delete it. You can get it for free when you need it from the app store. Move all your pics to your computer and delete them from you iPod. This gave me a extra 2gb space. Hope this helped.
using iFile I found out that there were around 3 gig under /var/mobile/Library/Assets/com_apple_MobileAsset_SoftwareUpdate which I deleted without noticing any problems
I tried all sorts of things to get rid of the other. What i didn’t want to do was restore via itunes as I did not want to take iOS 6. In the end i just flattened the phone back to zero from within the phone- Settings/General/Reset/Erase all content and settings. From itunes I then restored as a new phone. Bit of a nuisance as I’ve lost all stored wifi passwords etc but other is down to 0.3gb which is fine.
Thanks for the article. I had to try the final suggestion – reset and then back up .. it worked wonders! Others was over 4G but after doing what you suggested went to 1. Thank you!
I have a 64 GB I phone 4S and had a 17 GB OTHER section. I normally use iCloud for backup, but I also occasionally back up to my MacBook Pro for security, and also to do a faster restore. I had tried hints from many websites, but nothing seemed to work. I tried doing a restore from the computer, but that just put back the 17 GB other section. I then try to restore from iCloud, and that actually worked. I did find initially that it didn’t restore all of my programs, but then I hooked it up to the computer and the computer restored all the applications music etc. perfectly. I didn’t lose anything, including memos notes, and all my applications were put back in their original locations. I was able to add after doing this about 10 GB of movies, games et cetera. I now have 6 GB free, and less than 2 GB in my other section. The great thing is that my iCloud backup is now under 1.4 GB! This is terrific because I can now back up a 64 GB iPhone with the free 5 GB that Apple offers me!
Is this something that’s just arisen on the i-devices? I suddenly noticed the other day that my “Other” yellow bar had become large. As far as I can remember, it was always thin and negligible. I had never heard of this problem before and it seems that, of late, many people have experienced it.
Is there something different in a recent version of the iOS?
In my case, I noticed it after I had installed Podcasts as well as after I had set up synching many, many iPhotos folders.
As always with these things, which of hundreds of variables is responsible is hard to determine. The number of solutions are legion, too.
The hold down home and power button reset did NOT work in my case; neither did the check/uncheck “Open iTunes when connected”. N.B.: That choice will be greyed out for many users. You have to go to iTunes, Pref, Devices, and uncheck “Prevent iPods, etc. from synching”.
I also tried the turn off synching of photos and turning that back on– no dice. I even deleted all photos.
I started to get into the Disk Aid… Media, iTunes Music Control trick that’s been touted– but some have reported that renders their music players non-functional. And the DA warning not to play around with those files unless you know what you’re doing was enough to scare me off.
I’m still playing around; have synched some more times, deleted several apps I don’t use; deleted some photos within non-Apple camera apps; etc.
Somewhere along the way, my yellow bar did drop below 1 gb, so I guess I have to be content. (It certainly wasn’t anywhere near the 3gb, 6gb, 12gb, etc. that people have reported having.)
Yeah, I tried that too, but what if I don’t want to restore my ipod?? I have many imessages and photos, videos and voice memos that I don’t want to loose.
I have a apple iPod touch 4th generation with a storage of 8 gb. 1.30 gb of my iPod space was occupied by others. It grew every day .1 GB. So this is what i did and it works really works. If you have a wallpaper app delete it. You can get it for free when you need it from the app store. Move all your pics to your computer and delete them from you iPod. This gave me a extra 2gb space. Hope this helped.
If you update to the newest IOS it can help, also delete any apps that have had problems downloading via wi-fi recently. Go to general/settings/usage to delete apps and data. If the data is corrupted I believe that the only way to delete it is by restoring it. Hope this helped pals 😀
~ Your Friend
I tried all of these things, including restoring my iPhone, but none of them worked. I still have 4.50 GB of other data on my phone. Any other ideas?
Kate, did you ever get yours figured out. I did a reset on my iphone se and after the reset before restoring or anything it still shows i have over 11gb on other. i dont see how to fix it.
Becky, I think the way out on this one is to connect your iPhone into a computer running iTunes and then doing a restore. That usually cleans up the the “other” space. Remember to backup and then restore.