Since its launch in 2015, Apple Music is now one of the premier streaming services in the world. Despite its popularity, there are certainly some hidden or lesser-known Apple Music tips to the platform.
Whether you’re an Apple Music pro, brand-new to the platform or you’re thinking about signing up, here are 17 must-know Apple Music tips to help you get the most out of the streaming service.
1. Learn the difference between Apple Music and iTunes Match
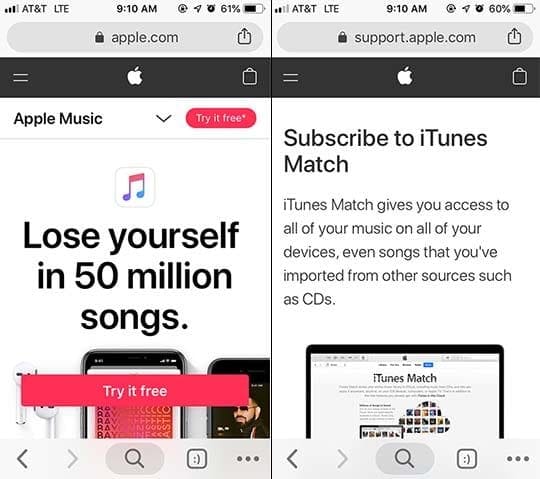
iTunes Match and Apple Music are similar, but distinctly different services.
Before you start using Apple Music, it’s useful to know the difference between it and another music-oriented service that Apple offers: iTunes Match. The primary difference is that Apple Music is a streaming platform (like Spotify), while iTunes Match is simply a way for users to upgrade their existing music libraries.
Let us explain. iTunes Match lets subscribers “match” up to 100,000 songs from their libraries and have instant access to those DRM-free tracks (from the iTunes Store) across up to 10 of their devices. Content purchased from iTunes won’t count toward the limit and the whole service costs $24.99 a year.
2. This Apple Music tip is all heart
Just tap on the three-dot menu in any Now Playing page for this Apple Music tip.
Apple has some amazing curation algorithms going on beneath Apple Music’s surface. But they can get a lot better if you constantly improve it. It’s extremely easy to let Apple Music know what you like and dislike, but it may not be a feature that all people use (even though they should).
Just tap on the three-dot menu in any Now Playing page. From here, you’ll see two prominent buttons: Love and Dislike. Use them accordingly. This feedback will significantly improve Apple’s algorithms and impact playlists, artist and album recommendations in the For You tab. Speaking of which …
3. Check out For You
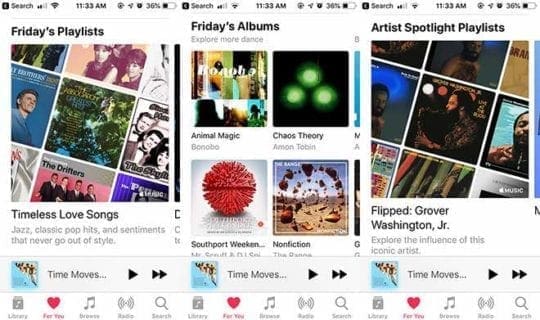
For You is a great place to find new music.
Like most streaming services, you can simply stick to searching for artists and playing the tunes you already know on Apple Music. But the platform’s For You section, which is tailored to your individual tastes, is definitely worth a look if you want to find new and exciting artists.
You’ll find various playlists and albums of the day, as well as your recently played tracks and new releases from across the genre spectrum. If you’ve activated Apple Music’s social feature (which we’ll get to later), you can also see what your friends are listening to.
4. Make use of Apple’s live stations
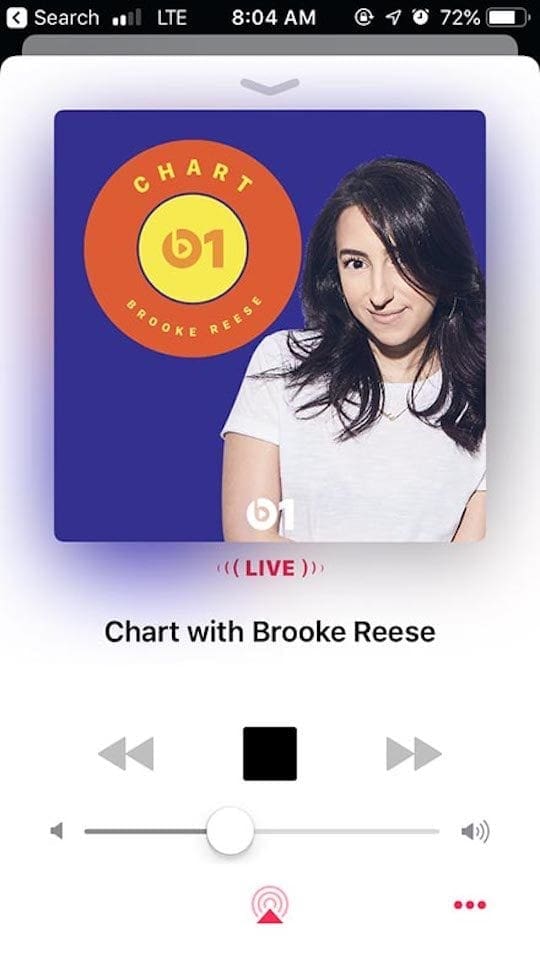
Live radio with a real DJ is just plain cool.
One of the best features of Apple Music that helps the platform stand out in the streaming sphere is Beats 1. Essentially, it’s a live, 24/7 radio station where you’ll hear an actual DJ mix tracks, talk about music, and occasionally interview artists.
It’s seriously one of the best features, especially if you miss the old-school feel of traditional radio stations and if you appreciate a human touch. Beats 1 can be found under the Radio tab in iOS, where there are other live radio stations. Do note that other “stations” under Radio are just dynamic playlists.
5. Leverage song “stations”
Stations are a great way to find more music you might like.
At this point in the article, you know about Apple’s music curation and its live radio offerings. But, like other streaming platforms, Apple offers personalized “stations” based on a particular track or artist — and they’re definitely worth it.
Just tap the three-dot menu when in Now Playing and tap Create Station. (You can also tap the three-dot menu on an artist page to create a station.) Once you do, Apple will automatically create an endless, curated “station” playlists related to that track or artist. It’s a perfect option for finding more music that you like.
6. Bump up the audio quality
Turning on “High Quality Streaming” will give audiophiles a better listening experience.
Apple wants to help you save on cellular data costs. That’s why, by default, playback in Apple Music is set to a lower-quality standard when using cellular data. If data costs aren’t an issue for you and lower-quality music offends your earbuds, then you can change it.
Just go to Settings —> Music —> Cellular. Tap the switch next to High Quality Streaming. Unlike some other streaming platforms, Apple Music doesn’t have different tiers of audio quality. Similarly, it automatically sets the streaming to a higher level of audio quality when you’re o Wi-Fi. But the cellular option is worth knowing.
7. Download for offline listening
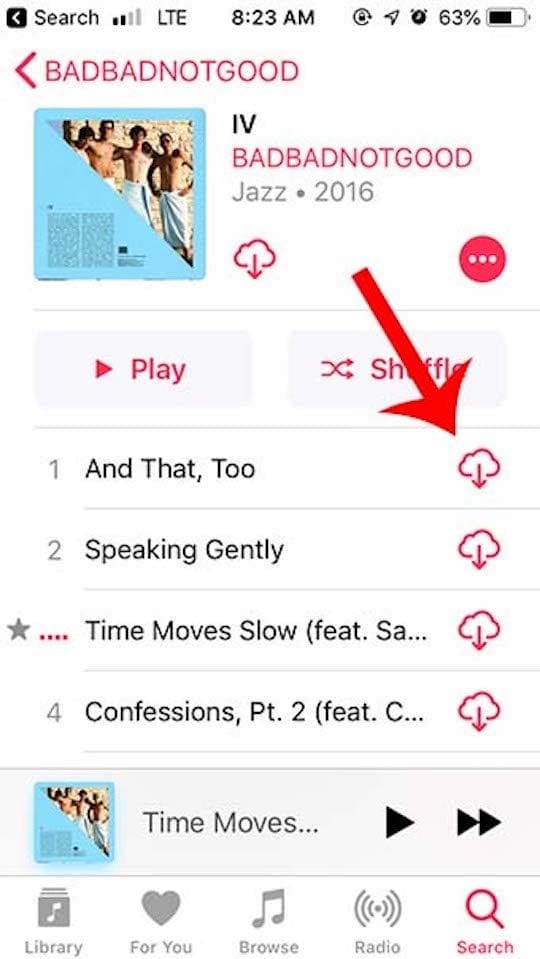
Downloading songs for offline listening can help you save data.
Apple Music is great on Wi-Fi or cellular, but you can also download tracks for listening offline. That’s great for jamming out on an airplane or when you’re just trying to save your cellular data. There are a couple of options to do so, too.
On any Now Playing page, you can tap the cloud download icon. The cloud download icon also appears in album view and in other places throughout Apple Music. Alternatively, if you go to Settings —> Music and enable Automatic Downloads, Apple Music will automatically download music that you add to your Library.
8. Optimize your Apple Music storage
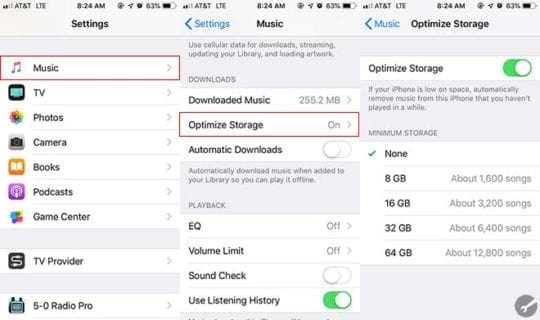
Optimizing your Apple Music storage can free up space on your phone.
Of course, while downloading music is a great way to save on date, it comes with a cost: decreased local storage on your iPhone. If you download a lot of music to your device, there isn’t really a way around it. But you can have Apple Music automatically optimize your library if storage is getting tight.
Just go to Settings —> Music —> Optimize Downloads. You’ll be brought to a screen where you’ll input the minimum amount of storage you want to allocate to Apple Music. When your device starts running low on local storage, Apple Music will seamlessly delete songs that you haven’t played in a while and tracks you added the longest time ago. Don’t worry though, they’ll still be in your library.
9. Look for Essentials and Next Steps
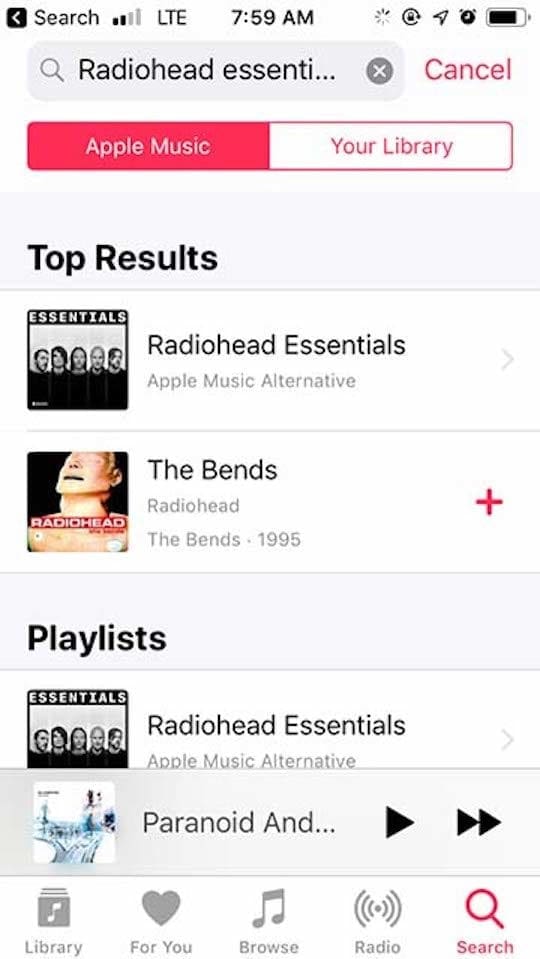
Just found a new artist you like? Essentials and Next Steps are both great places to start.
Apple Music’s human and AI curation is legendary. But there’s also two other types of curated playlist you may have missed (because they aren’t under recommendations). They’re called Essentials and Next Steps — and they’re definitely worth a listen.
Just search for any artist followed by “essentials” or “next steps” in the search bar. The Essentials playlist will give you the most popular and accessible songs from any artist. The Next Steps playlist will dig a bit further and find deeper cuts like B-sides and non-single tracks.
10. Take advantage of Siri
Siri + Apple Music is a powerful pairing.
One of the advantages of using Apple Music on Apple devices is that you can take advantage of Siri for deep playback control. For better or worse, that’s just not something that’s currently possible for a platform like Spotify on iOS or HomePod.
Just try it. You can say “Hey Siri, play Dreams by Fleetwood Mac.” But it goes deeper than that. Try saying “Hey Siri, play the latest song by Drake” or “Hey Siri, play the most popular song from 2017.” You’ll be surprised at the level of granular control the digital assistant has over Apple Music.
11. Use your iPhone’s EQ
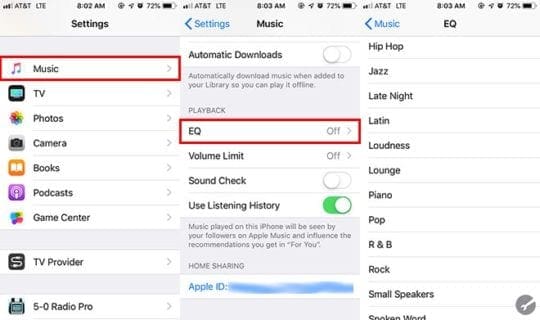
Tap on the Late Night setting to turn your music “up to 11.”
If you’re using Apple Music on your iPhone, you may not know that iOS actually has a slew of EQ settings baked right in. They can be found under Settings —> Music —> EQ. Keep in mind that this will impact both songs stored locally on your device and songs streamed through Apple Music.
There’s a variety of presets to choose from, from Jazz to Rock to Spoken Word. Pro tip: the Late Night option will actually make your music sound louder, just in case you need to turn things up to 11. There are similar settings in Android, but you can access them directly by tapping the three-dot menu in Apple Music.
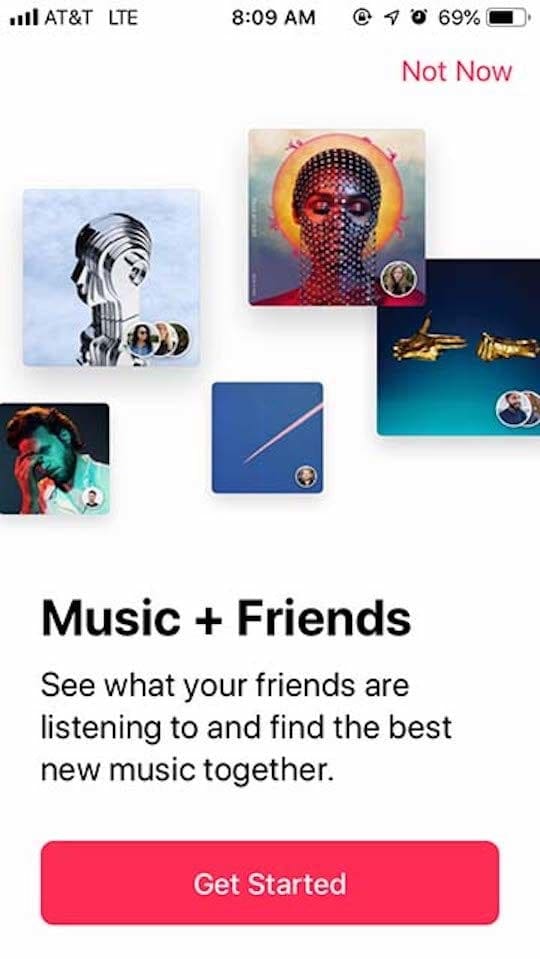
12. Find your friends
This Apple Music tips lets you find your friends on Apple music.
Most of the time, music is just plain better when it’s shared. Apple Music actually has a built-in social platform so you can see what your friends are listening to, and vice versa. To set it up, just go to For You and tap on the profile icon in the upper-right corner. From here, you’ll see a See What Friends Are Listening To option. Tap it and follow the instructions.
To search for friends, open Apple Music and tap on Search. Then, type in your friend’s Apple Music nickname (@applemusicnickname) or their Apple ID name. You should see an option pop up that says People — just tap on the profile and hit Follow. You can also follow friends on Apple Music.
13. Get Apple Music for free
If you’re a Verizon subscriber or are considering switching, you could get free Apple music for six months.
Want Apple Music for free? Of course you do. Unfortunately, the platform doesn’t offer a free tier with ads like some of its competing streaming services. But if you’re on Verizon or you’re willing to switch carriers, there’s another option for getting free Apple Music (at least temporarily).
Last year, Verizon announced an exclusive partnership with Apple offering six months of Apple Music for free to its wireless customers. It’s currently available to both new and current Verizon customers. If that sounds like something you’d be interested in, just go to Verizon’s dedicated page on the matter to [learn more].
14. Stop HomePod from messing up for you
For when you don’t want your friend’s taste to mess up your Apple Music curation.
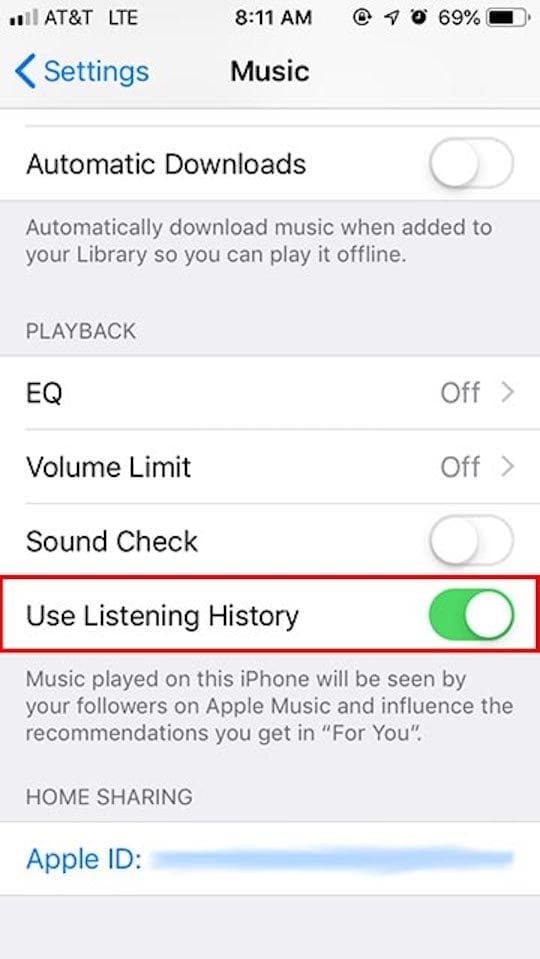
Unlike your iPhone, a HomePod is probably a device that other people in your household will use. But what happens when a roommate, family member or friend who likes a completely different genre of music starts playing their favorite tracks? It can seriously screw up your recommendations. Luckily, you can disable HomePod’s part in curating your recommendations.
On your iOS device, just open the Home app. Then navigate to your HomePod and tap on Details. From there, make use Use Listening History is disabled. From now on, HomePod’s history can’t impact your Apple Music personalization. (You can do this on iOS, too. Just go to Settings > Music.)
15. Wake up to Apple Music
With Apple Music, you’ll never have to be jarred awake by Radar ever again.
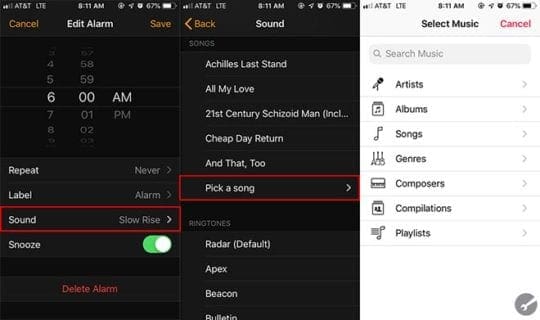
You probably use your iPhone as an alarm clock. And if you’ve been doing so for any length of time, you probably hate every single sound built into iOS (if I hear Radar one more time…). While it’s a bit hidden, you can actually use any track from Apple Music as a wake-up call.
Just open the Clock app and navigate to your alarms. Tap Edit and then tap on any alarm. Then, select the Sound menu and tap on Pick a song. From here, you’ll be brought to your iCloud Music Library. You can choose any track that you’ve added to your Library — though there’s no option to search Apple Music from within the Clock app.
16. See those lyrics
Never sing the wrong lyrics to a song again with this Apple Music tip.
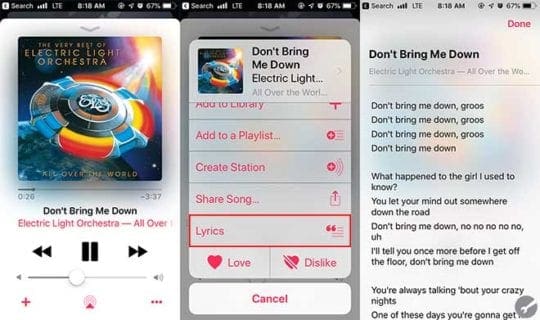
Sometimes, you’re probably singing a song all wrong (is it “don’t bring me down, Bruce” or “don’t bring me down, groos”?). That’s okay, but it’s worth noting that Apple Music actually has lyrics for some songs built into the platform. So you can see what your favorite artists are actually singing without leaving the app.
On any Now Playing page, just tap the three-dot menu in the lower-right corner. From there, you should see a Lyrics button in the menu that appears. Tapping on this will bring you to a new page with the song’s lyrics. Keep in mind that not all songs support this feature quite yet, but most popular tracks do.
17. Use Shortcuts
Don’t be intimidated by Shortcuts — it’s seriously useful when used with Apple Music.
Apple Music is pretty simple to use on its own. But it, like anything else, can be upgraded by using Apple’s little-known Shortcuts app. You can unlock a lot of functionality you wouldn’t otherwise have using Shortcuts. And that’s why it’s a shame why more people aren’t using it.
Want to quickly remove all of the duplicate tracks from your library? You can do that with a single tap. Want to see your entire year of music, like your top tracks and artists, in a single place? You can do that, too. To get started, read our previous guide on the best Shortcuts for Apple Music.
Have any Apple Music tips that we missed? Let us know below!
Mike is a freelance journalist from San Diego, California.
While he primarily covers Apple and consumer technology, he has past experience writing about public safety, local government, and education for a variety of publications.
He’s worn quite a few hats in the journalism field, including writer, editor, and news designer.
When I press dislike, the song continues to play!!!
I already know that I don’t like the song, that’s why I am pressing dislike, but why does Apple Music make me listen to it anyway?
By comparison, when I press dislike on Pandora, the song immediately stops (thank goodness) and moves onto the next station.
My second question is if I dislike a song does that removes it from my service across all stations and channels?
For example, if I am listening to John Coltrane and a Frank Sinatra songs start to play, I will dislike it because I don’t want Sinatra on the Coltrane channel, but does that mean I lose the Sinatra song on all channels?
I have a separate Sinatra station, and I definitely want to listen to it there.
Awesome question. The like/dislike feature is Apple Music is certainly not as “smart” as Pandora and many of us wonder what it does (if anything.)
What it’s supposed to do is help Apple Music’s recommendation algorithm determine suggestions for you AND remove that song you disliked from showing up in your favorites for a few weeks.
But for most users, it doesn’t appear to work.
And you are correct in that it does not stop the song from playing.
For your second question, when you dislike a song it does not completely remove it from your personalized Apple Music experience (stations and channels) but it places those songs lower on your preference scale–so that song and artist appears less often.
Since you have a Sinatra station, it knows you like Sinatra already so it’s unlikely to remove Sinatra songs from its recommendations for you.
What we’ve discovered is that Love/Dislike works minimally. What’s more powerful is adding and removing artists to help Apple provide better recommendations based on your listening preferences.


")


Howdy!
I have a question about the like/dislike feature.
When I press dislike, the song continues to play!!!
I already know that I don’t like the song, that’s why I am pressing dislike, but why does Apple Music make me listen to it anyway?
By comparison, when I press dislike on Pandora, the song immediately stops (thank goodness) and moves onto the next station.
My second question is if I dislike a song does that removes it from my service across all stations and channels?
For example, if I am listening to John Coltrane and a Frank Sinatra songs start to play, I will dislike it because I don’t want Sinatra on the Coltrane channel, but does that mean I lose the Sinatra song on all channels?
I have a separate Sinatra station, and I definitely want to listen to it there.
Thanks for your help, much appreciated!
Hi Michael,
Awesome question. The like/dislike feature is Apple Music is certainly not as “smart” as Pandora and many of us wonder what it does (if anything.)
What it’s supposed to do is help Apple Music’s recommendation algorithm determine suggestions for you AND remove that song you disliked from showing up in your favorites for a few weeks.
But for most users, it doesn’t appear to work.
And you are correct in that it does not stop the song from playing.
For your second question, when you dislike a song it does not completely remove it from your personalized Apple Music experience (stations and channels) but it places those songs lower on your preference scale–so that song and artist appears less often.
Since you have a Sinatra station, it knows you like Sinatra already so it’s unlikely to remove Sinatra songs from its recommendations for you.
What we’ve discovered is that Love/Dislike works minimally. What’s more powerful is adding and removing artists to help Apple provide better recommendations based on your listening preferences.
Liz