Having the ability to manage your Mac files automatically is crucial if you want your computer to run efficiently. By adding actions to Mac files, you can greatly enhance your workplace performance and improve productivity. Here is how you can add automated actions in order to manage Mac Files.
The best option would be to use iCloud. This has the added benefit of keeping your files safe and sound because it is in the ‘’cloud’’. You can always sign in to check your files if you have your Apple ID with you.
Using folders is another great way to organize your data on a Mac. It would be a good habit to create as many folders as you need. You can store your folders in the Documents folder on your Mac computer or device.
This can be either the local hardware documents or the iCloud documents. Make sure that these folders are labeled properly in order to avoid confusion.
Your Automated Best Friend
There is an Automator function on Mac that will help create and organize files automatically. Essentially the app is used to run a script that runs other scripts that creates folders and accepts input from you based on what you want to do with these folders.
By creating your own workflows you’ll save a lot of time and become far more efficient in your workplace. You could rename hundreds of files or convert files into a different format automatically and it is far better to do it this way than manually. How do we do this?
Otto Method
It’s called Automator and it is an app that is found on your Mac and the icon is called Otto and he comes in the shape of a robot holding a long tube. To find it got Spotlight in the top right corner and then type in the word Otto. Automator should then appear. Open it by giving it double-click on the app icon. You then direct the app to manipulate and change the files by rewriting the script.
Your first step is to decide what type of workflow you want to do: it could be a plug-in, an application, image capture, calendar-based actions, or some other automated service.
After you’ve decided what you want to do, then press Choose.
Manual Method
Now for something practical. This is an example of the old and impractical manual method. If for instance you would like to change the format of your photos from jpeg to png then here is what you should do.
Double-click on an image. This will open up the Preview menu.
Click on X spot and you’ll be presented with a tab that will convert your photos – one at a time, every time.
Automator Method
For the Automator option, you should do the following.
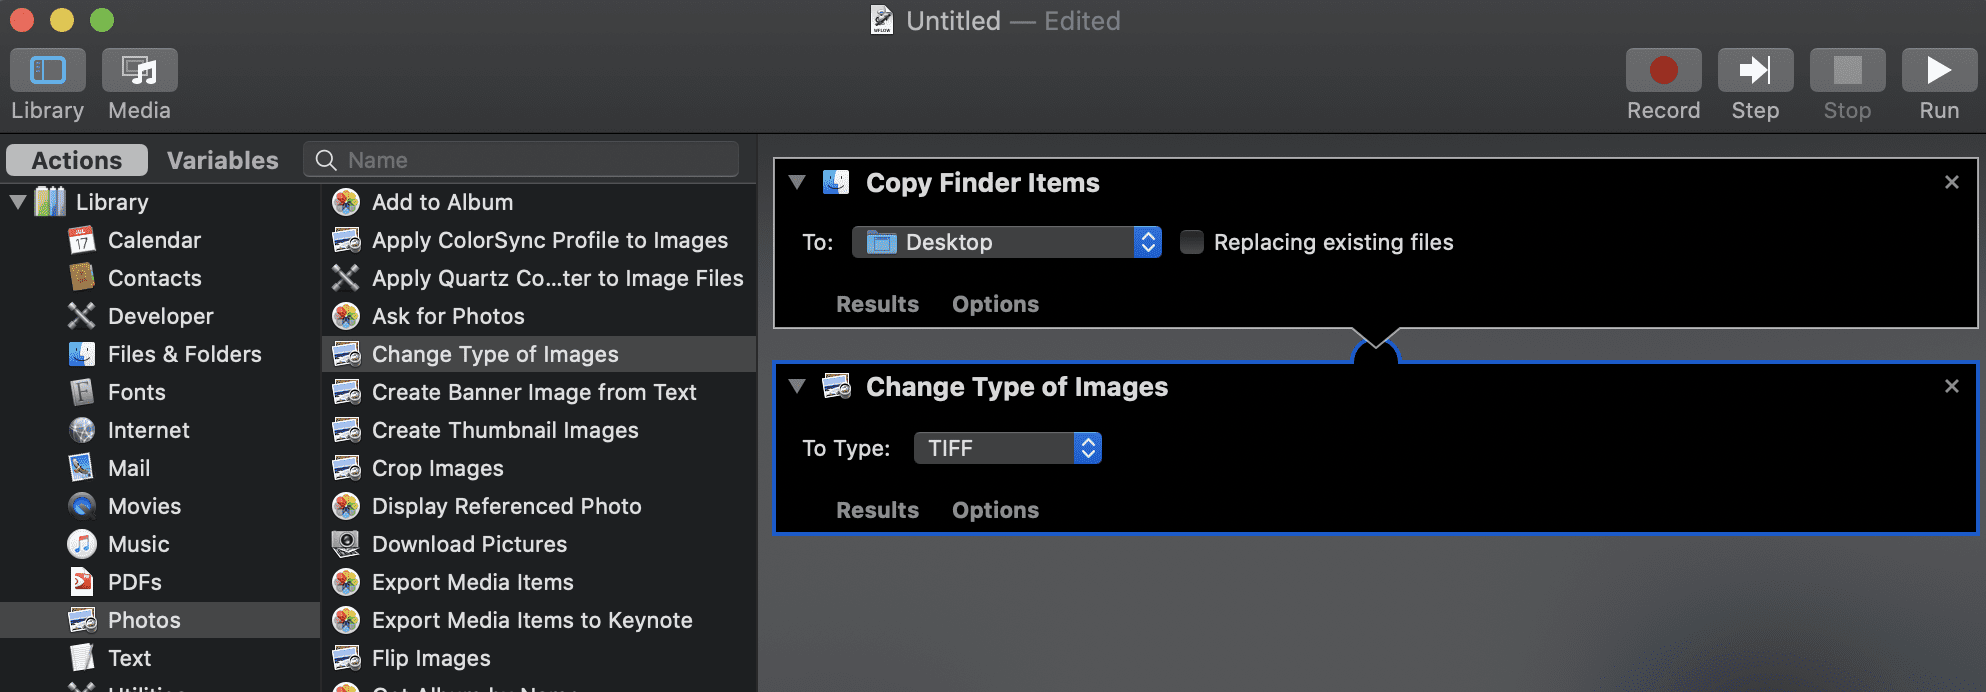
From the drop-down menu choose Photos.
Then, choose Change Type of Images.
The next step is to drag these words from the left side of the screen over to the right.
A pop-up screen will appear – press the button in the bottom right-hand corner which is labeled Add.
Notify the app what you want to do.
In this instance, you want to convert the image so check to make sure that the action you want to take has been done.
Next, go to File Folder in order to choose which folders you want to convert.
Select Get Selected Finder Items. This will allow the app to select which items should be converted.
Select Run.
If nothing happens then this means the workflow has stopped because you didn’t choose your items correctly.
Select Get Folder Contents.
The key is to highlight the correct folder before your press Run. This will help you to avoid the workflow crashing. After the action is completed it will tell you how long the action took to complete.
Conclusion
By doing it this way, you should save a lot of time. Automator is there to help you organize your Mac files, and it’s well worth your time to learn how it works. We recommend trying it out on your own time before doing it at your workplace. It’s an amazing tool to have at your disposal, but take care to avoid making errors on your work computer.


Write a Comment