Being able to pay for goods and services without ever needing to take out your wallet in public is an incredibly convenient feature. Apple Pay continues to grow in popularity, as it is becoming supported by more retailers and more banks on a regular basis.
Apple Wallet Card Verified but “Verify” Button Still Shows
Unfortunately, when it comes to adding a card to your Apple Wallet, the steps are easy enough to follow, but things don’t work as advertised. It seems that in the case of some USAA members, while Apple Pay is supported, the Apple Wallet card verified but “verify” button still shows.
This can occur if there is something going on with either the USAA servers or even Apple’s servers. If the Verify button appears after adding a card, you’ll need to follow the on-screen steps in order to complete the verification process. However, even after those steps have been followed, you may find that the Verify button still remains for one reason or another. If this happens to you, here are the steps that you can take:
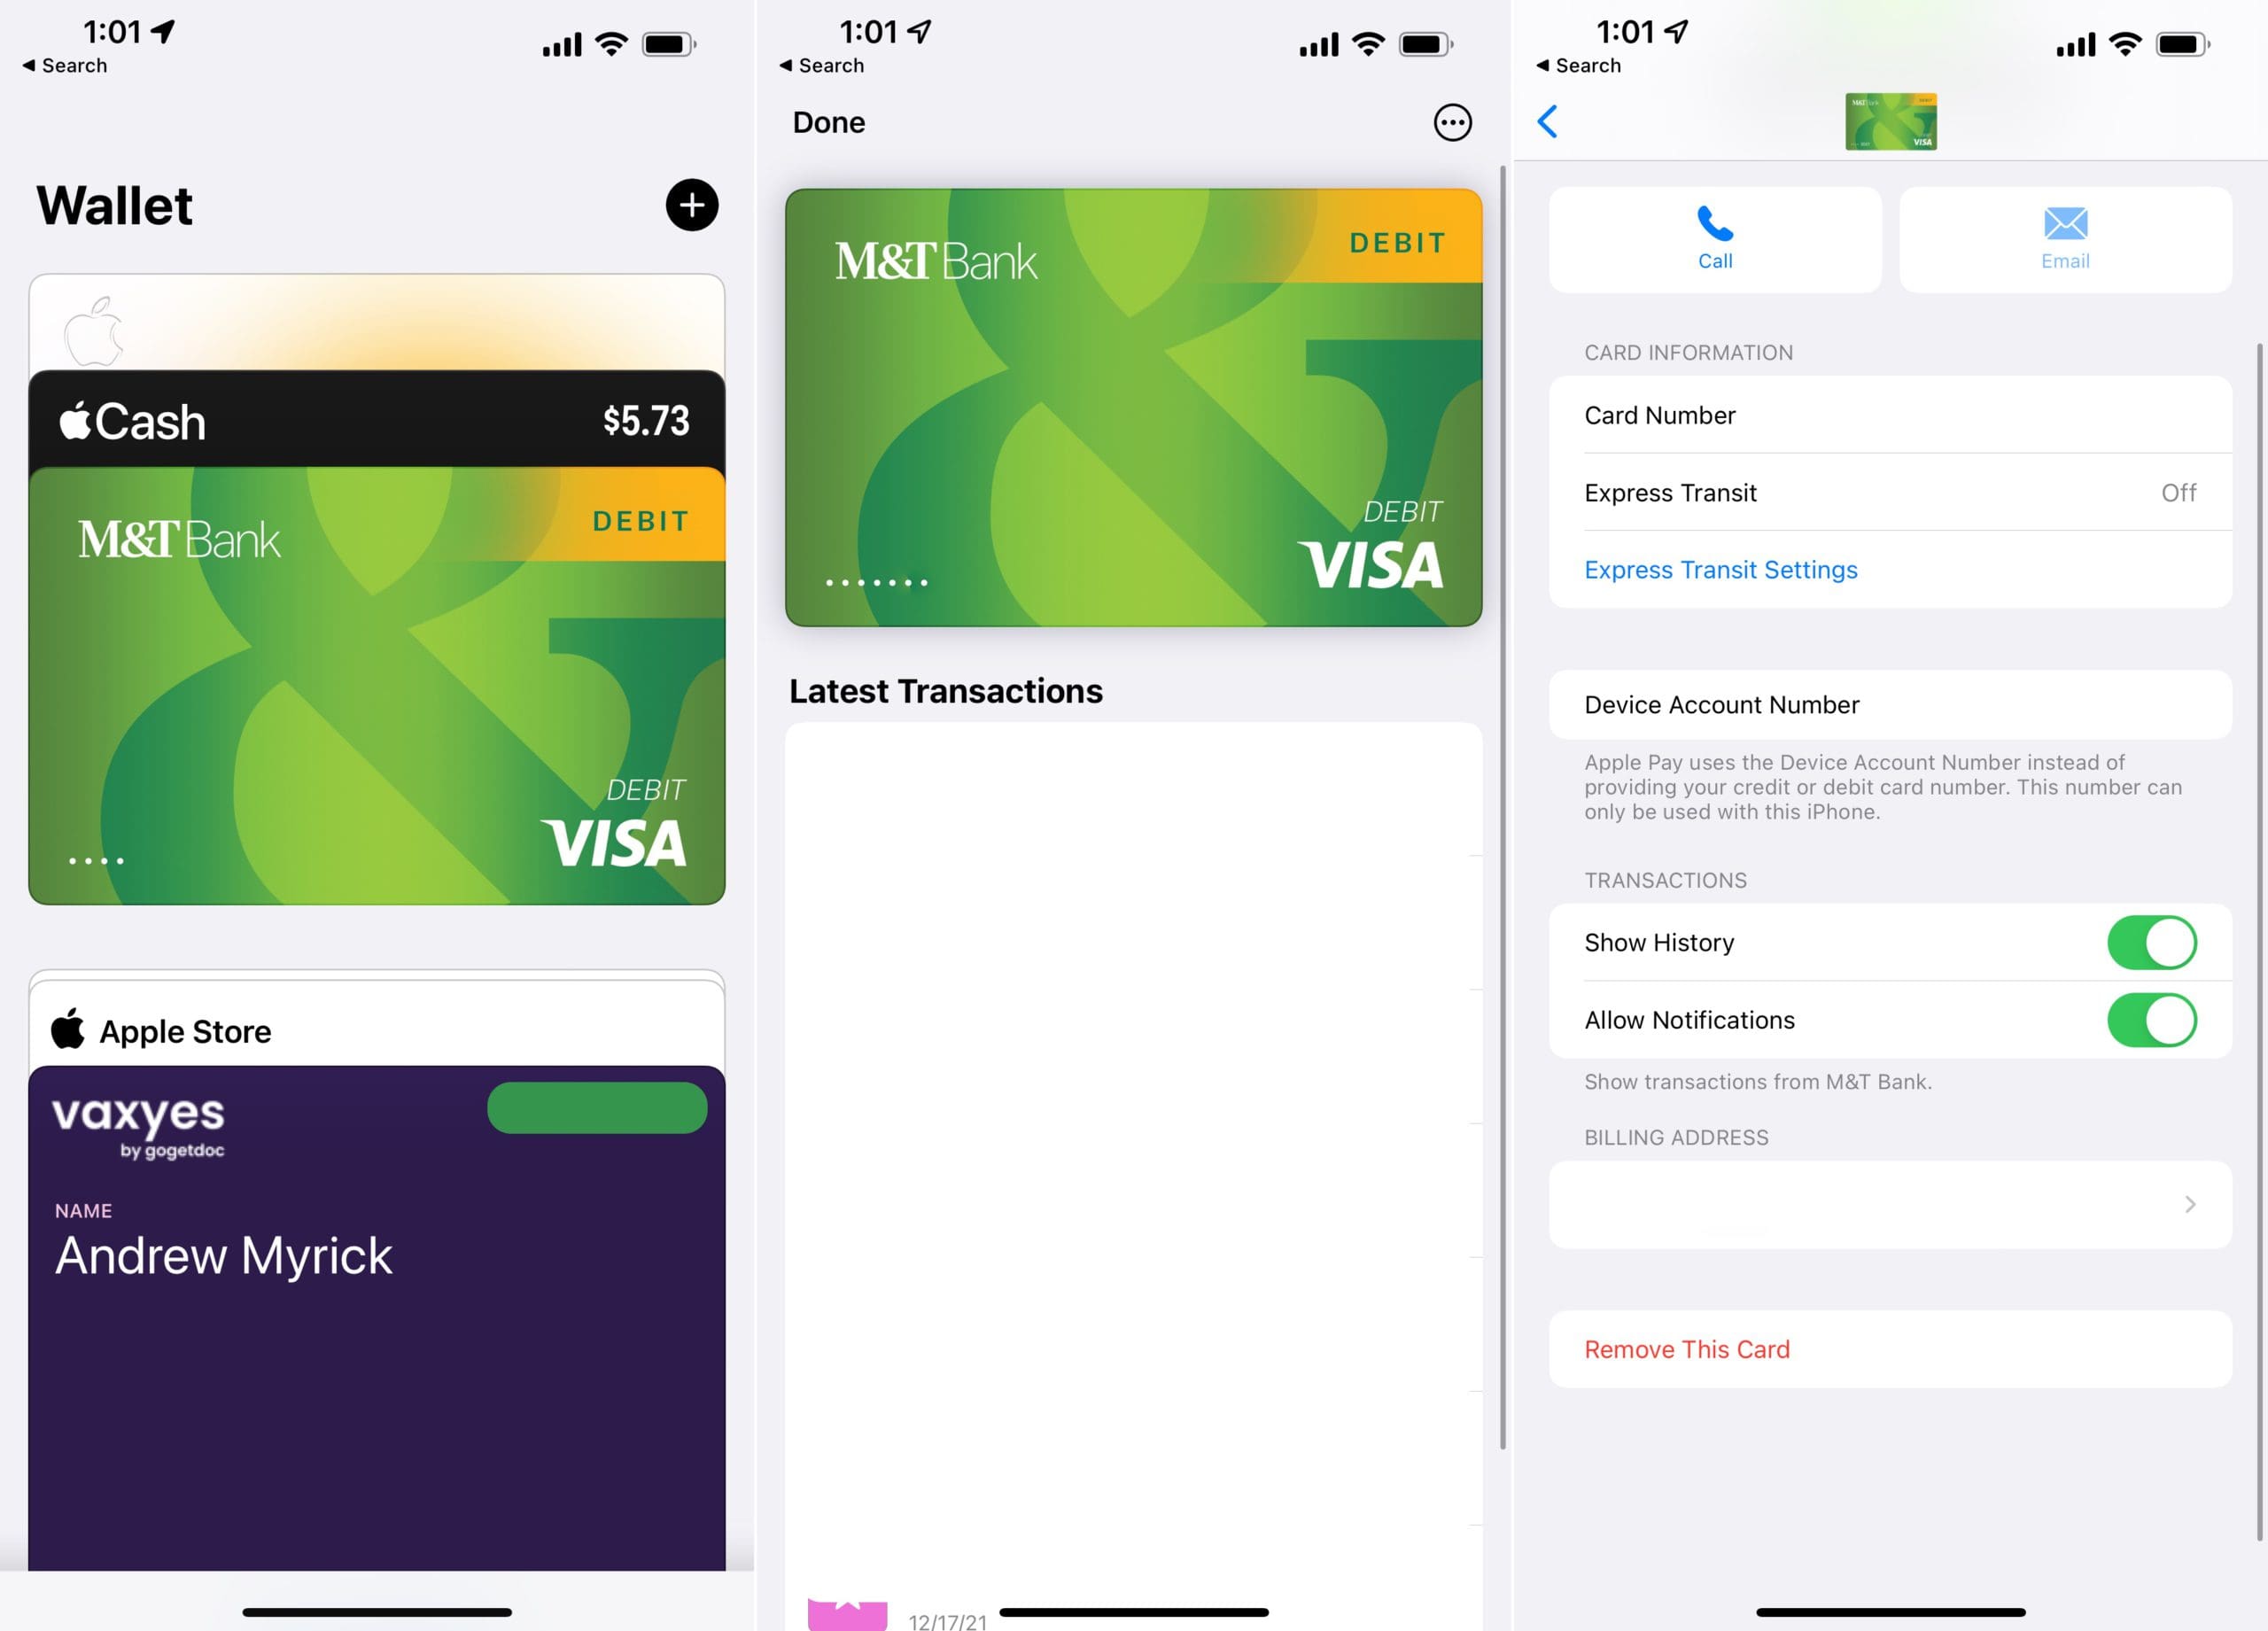
Open the Apple Wallet app.
Select the card that you need to remove.
Tap the three dots in the top right corner.
Scroll down to the bottom and tap Remove This Card.
Enter your passcode to confirm, if prompted.
Open the USAA app on your iPhone.
Log into the account associated with the card you are adding.
Open the menu and tap ATM/Debit Card.
Tap Add to Apple Pay.
Follow the on-screen instructions to complete the process.
But what about those who are not using a card from USAA and are still unable to get rid of the Verify button? The first step you could take is to follow the method above to remove the card. Then, follow these steps to try adding the card back to Apple Wallet:
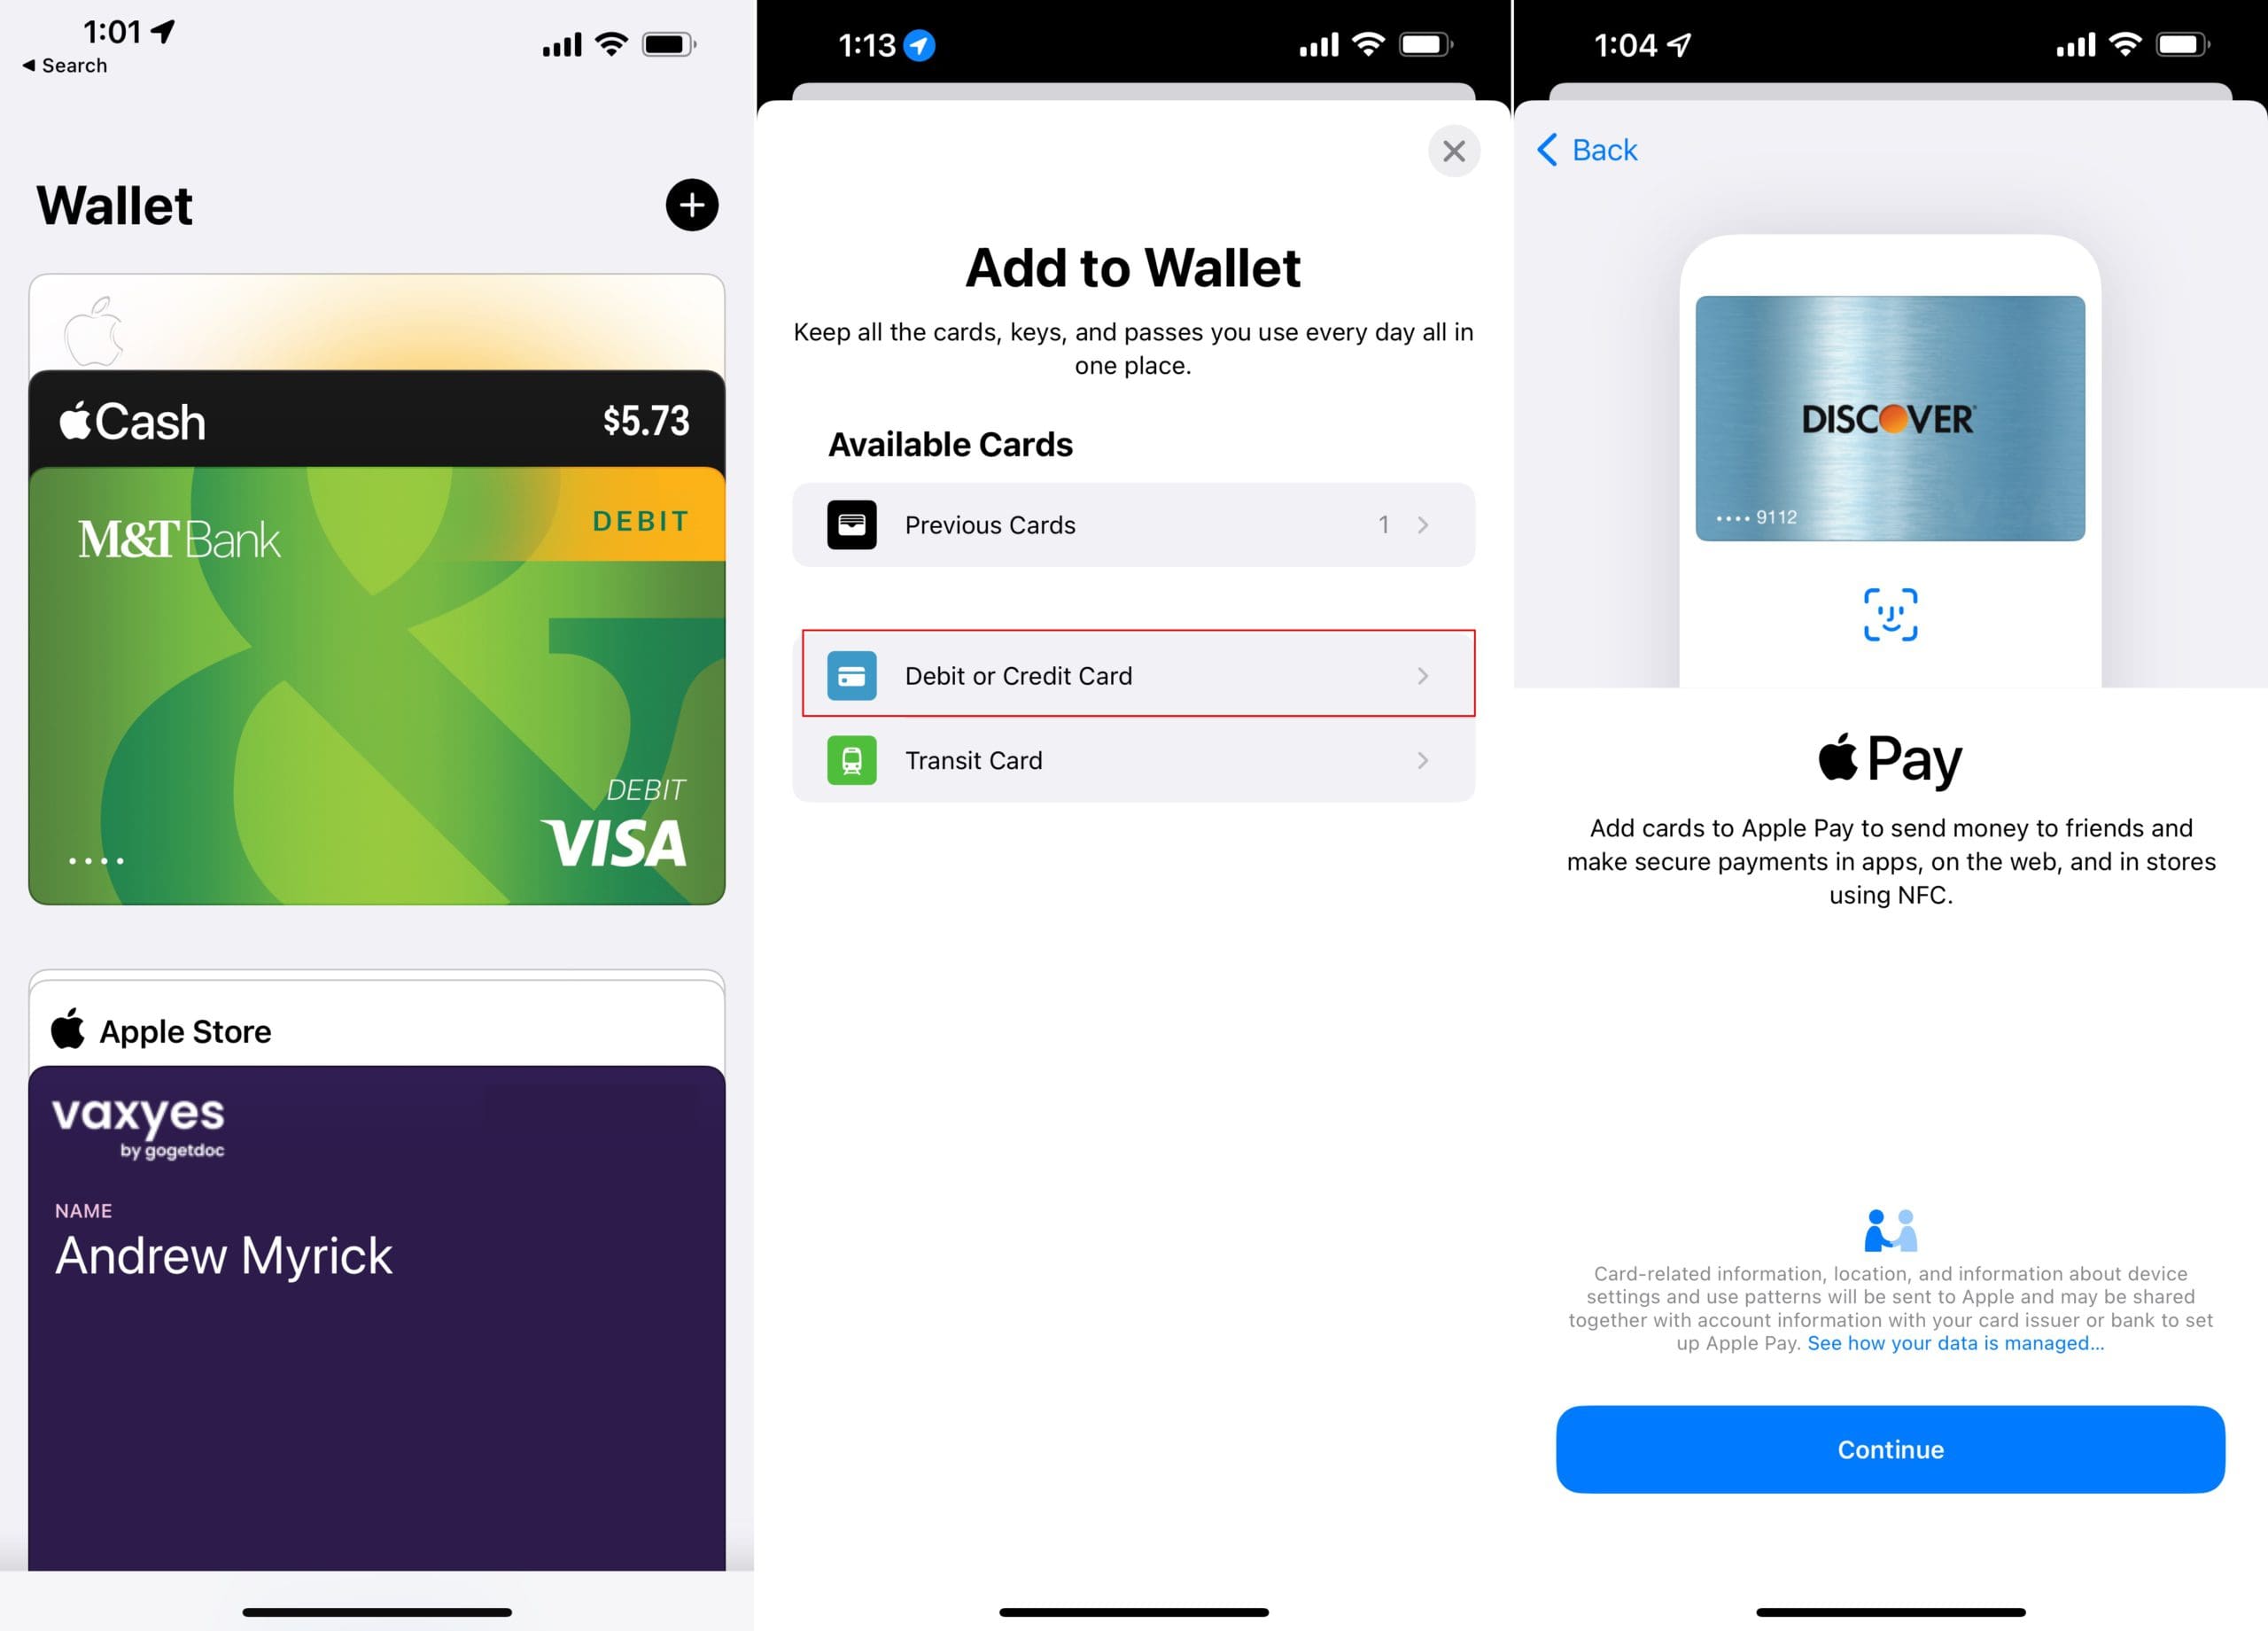
Open the Apple Wallet app on your iPhone.
Tap the Plus (+) icon in the top right corner.
Select Debit or Credit Card.
Tap the Continue button.
Follow the on-screen instructions to add the card details.
If presented with the Verify button, follow the on-screen instructions to complete the verification process.
One additional step that we found helpful when it comes to dealing with the Verify button is to restart your iPhone. Sometimes disconnecting and reconnecting to a network will force the app to update with the correct information, including the removal of the Verify button.
Andrew Myrick is a freelance writer based on the East Coast of the US. He enjoys everything to do with technology, including tablets, smartphones, and everything in between. Perhaps his favorite past-time is having a never-ending supply of different keyboards and gaming handhelds that end up collecting more dust than the consoles that are being emulated.


")


Write a Comment