Suppose that you let your child use your iPad, but you want to put certain restrictions on it so they don’t visit adult sites, watch adult content, or purchase a bunch of apps from the App Store! That’s the beauty of restrictions on iPad, iPhones, and other Apple devices.
Related Articles
- How to Set Up Parental Controls on an iPad
- Can Children Under 13 Have Apple IDs? How to Create an Apple ID for a Child
- How to Use Screen Time With Your Family Sharing Account
- The Best iOS Features for Limiting Screen Time
- Simple Tips to Stop Your Kids From Hacking Screen Time
iPads and iPhones have a tool called Content & Privacy Restrictions, which you can also access on macOS devices. In this guide, you will learn how to use the feature and customize its various areas — allowing both you and your children to use your device(s) without encountering content that you don’t want to (or shouldn’t) see.
Contents
- How Do You Enable Restrictions on iPhone and iPad? (iOS 12 and Later)
- How to Allow and Disallow Apps in Content & Privacy Restrictions
- Setting Up Restrictions For iOS 11 and below
- What Is Restrictions Passcode (Screen Time Passcode) on iPhone or iPad?
- Limiting Websites and Explicit Language
- Setting App Limits
- Adjusting Privacy Restrictions
- Allowing and Disallowing Changes
- What Do Restrictions Do on an iPhone or iPad?
How Do You Enable Restrictions on iPhone and iPad? (iOS 12 and Later)
You can enable restrictions on your iPad by following the instructions listed below.
- Go to Settings > Screen Time > Content & Privacy Restrictions.
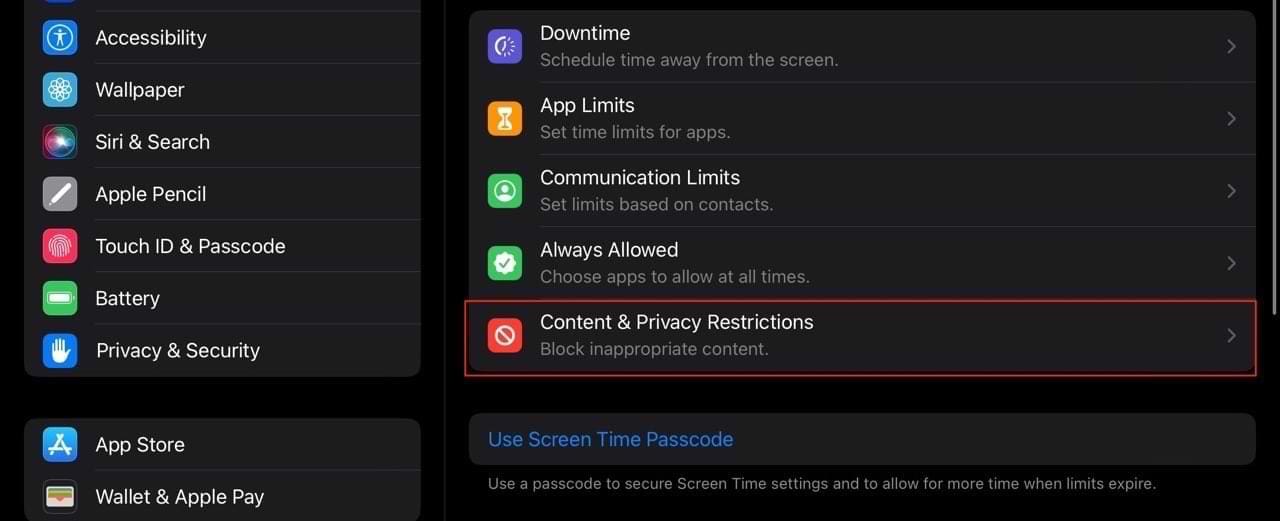
- If you don’t have a Screen Time Passcode, set one up before making any changes in Content & Privacy Restrictions. Write down or otherwise store that Screen Time Passcode, so you don’t forget it. You’ll need to enter it to make any changes or disable Restrictions in the future.
- Toggle on Content & Privacy Restrictions.
How to Allow and Disallow Apps in Content & Privacy Restrictions
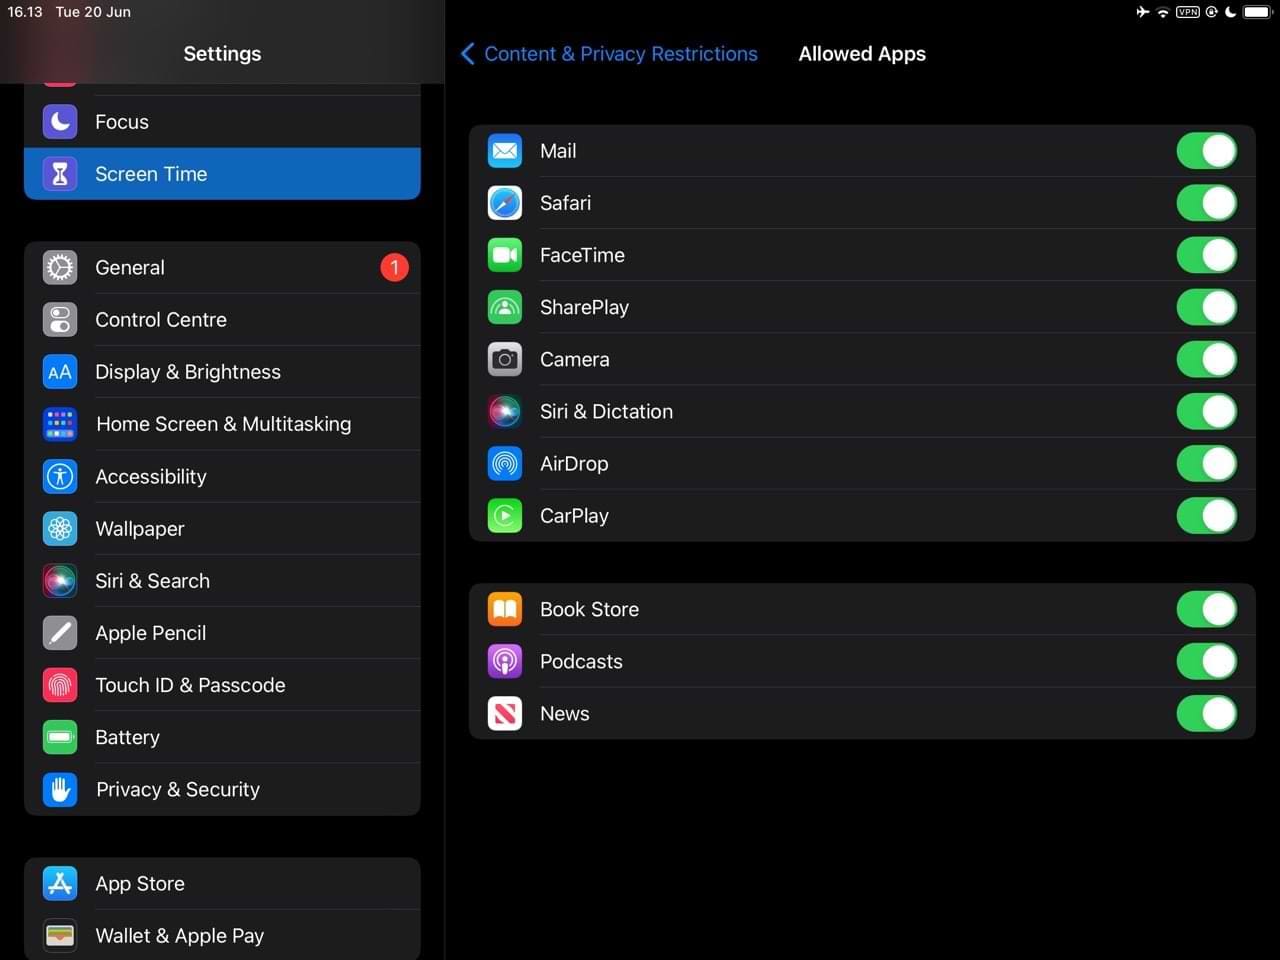
When allowing and disallowing apps in Content & Privacy Restrictions, you can only toggle these for native Apple apps — such as Mail, FaceTime, and Safari.
Nonetheless, you can allow or disallow apps by following these instructions.
- In Screen Time > Content & Privacy Restrictions, go to Allowed Apps and click on this tab.
- Toggle apps you want to no longer allow off by ensuring that the button next to them is no longer green. You can toggle them again to turn them green, which will have the opposite effect.

The default setting is Allow, so check all the items and ensure that you set up all the restrictions you want.
Setting Up Restrictions For iOS 11 and below
If you use an iOS device that operates on iOS 11 or below, the rules for setting up restrictions are different.
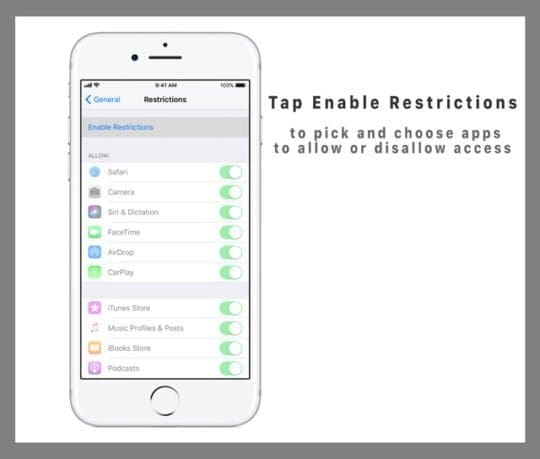
- Go to Settings > General > Restrictions and tap Enable Restrictions.

- It prompts you to set an arbitrary four-digit passcode. Then it re-prompts you to confirm that passcode. This is so that your child cannot go into the settings and re-enable your restrictions without knowing the passcode.
- Write down or otherwise store that Restrictions Passcode, so you don’t forget it. You’ll need to enter it to make any changes or disable Restrictions in the future.
- Toggle apps off to disallow users from accessing those app.

What Is Restrictions Passcode (Screen Time Passcode) on iPhone or iPad?
Your Restrictions or Screen Time is a four-digit passcode set-up by the parent or iDevice user to limit the apps, content, and store purchases, and other services that children and other users have access to. Once set, that passcode can’t be changed if your device has Restrictions are enabled.
If you forget your Screen Time or restrictions passcode, you must restore your iDevice using iTunes to reset this passcode. However, you cannot restore the iPhone or iPad from a backup that contains the Restrictions, so either choose a backup made before restrictions were set or choose to set up as new.
Limiting Websites and Explicit Language
You’ll probably want to gain more control over websites and explicit language when using the Content & Privacy Restrictions feature on your iPad, and the same goes for iOS users. If you have children using your devices, you’ll even more so want to have these tools dialed in and suitable for younger audiences.
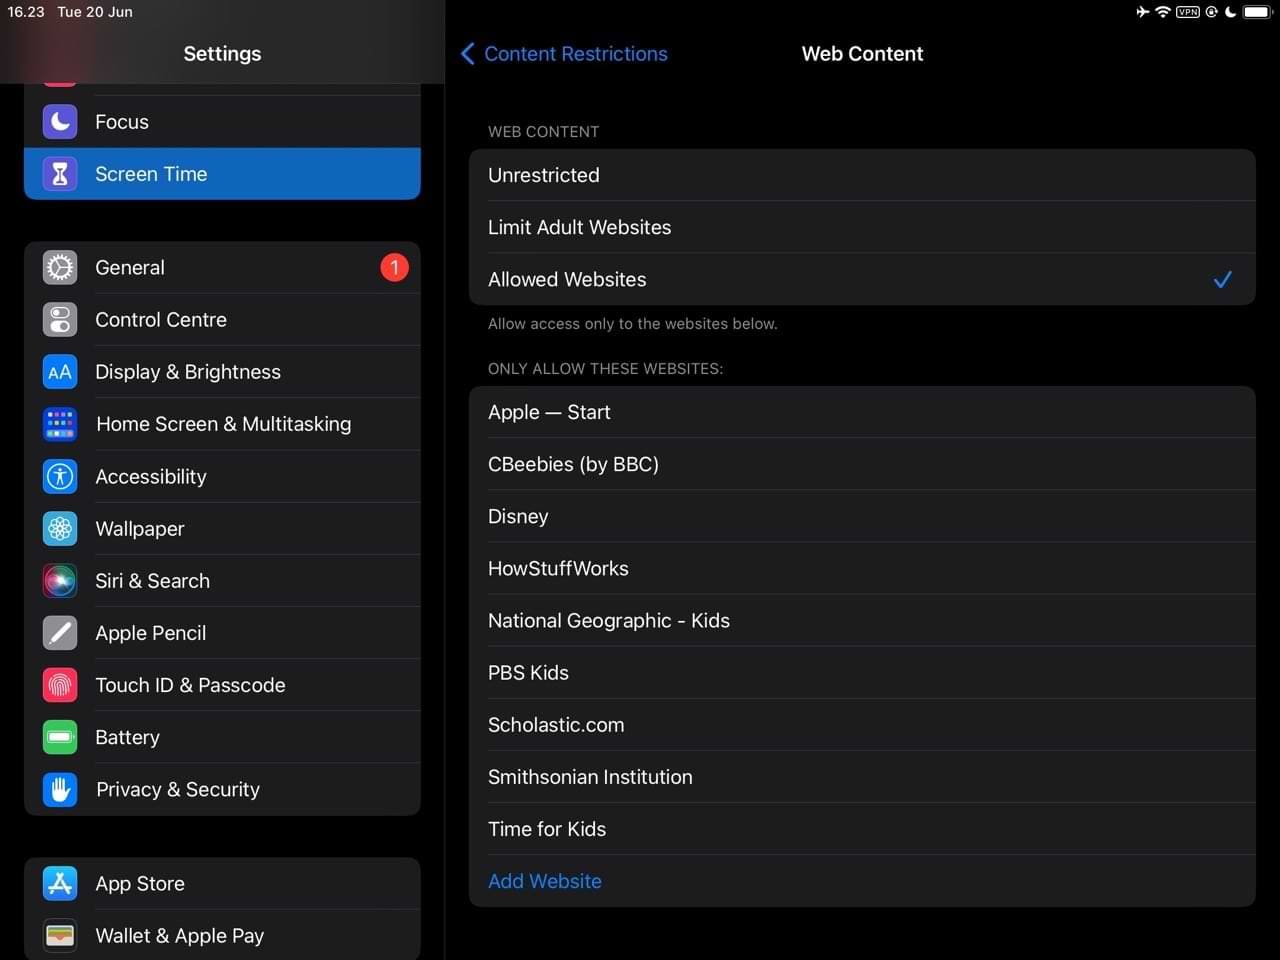
You can limit websites and explicit language by going to Content & Privacy Restrictions > Content Restrictions. When you’re there, you can go to Web Content and choose from Limit Adult Websites, Unrestricted, and Allowed Websites.
- Unrestricted: Allows all websites to be used on your iPad.
- Limit Adult Websites: Restricts users from accessing websites with explicit content.
- Allowed Websites: Creates a list of websites that users are allowed to visit. You can customize this however you want, and it’s possible to include new websites by selecting Add Website.
Setting App Limits
Though this isn’t strictly a Content & Privacy Restrictions feature, being able to set app limits is very useful if you don’t want your children to spend too long on certain apps — such as streaming services or social media. And if you want to put barriers between yourself and doing the same, you’ll also find this feature quite useful.
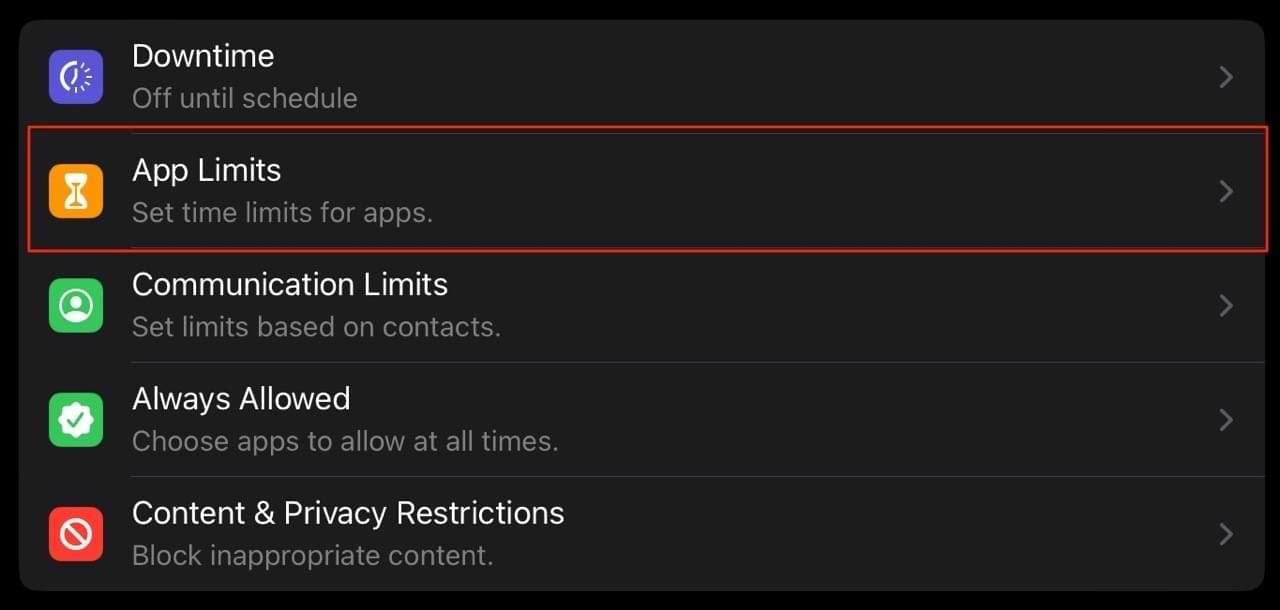
You still have to go into Screen Time, but this time, you have to go to App Limits on the main page.
When you’re there, follow these steps to add new app limits:
- Select Add Limit.

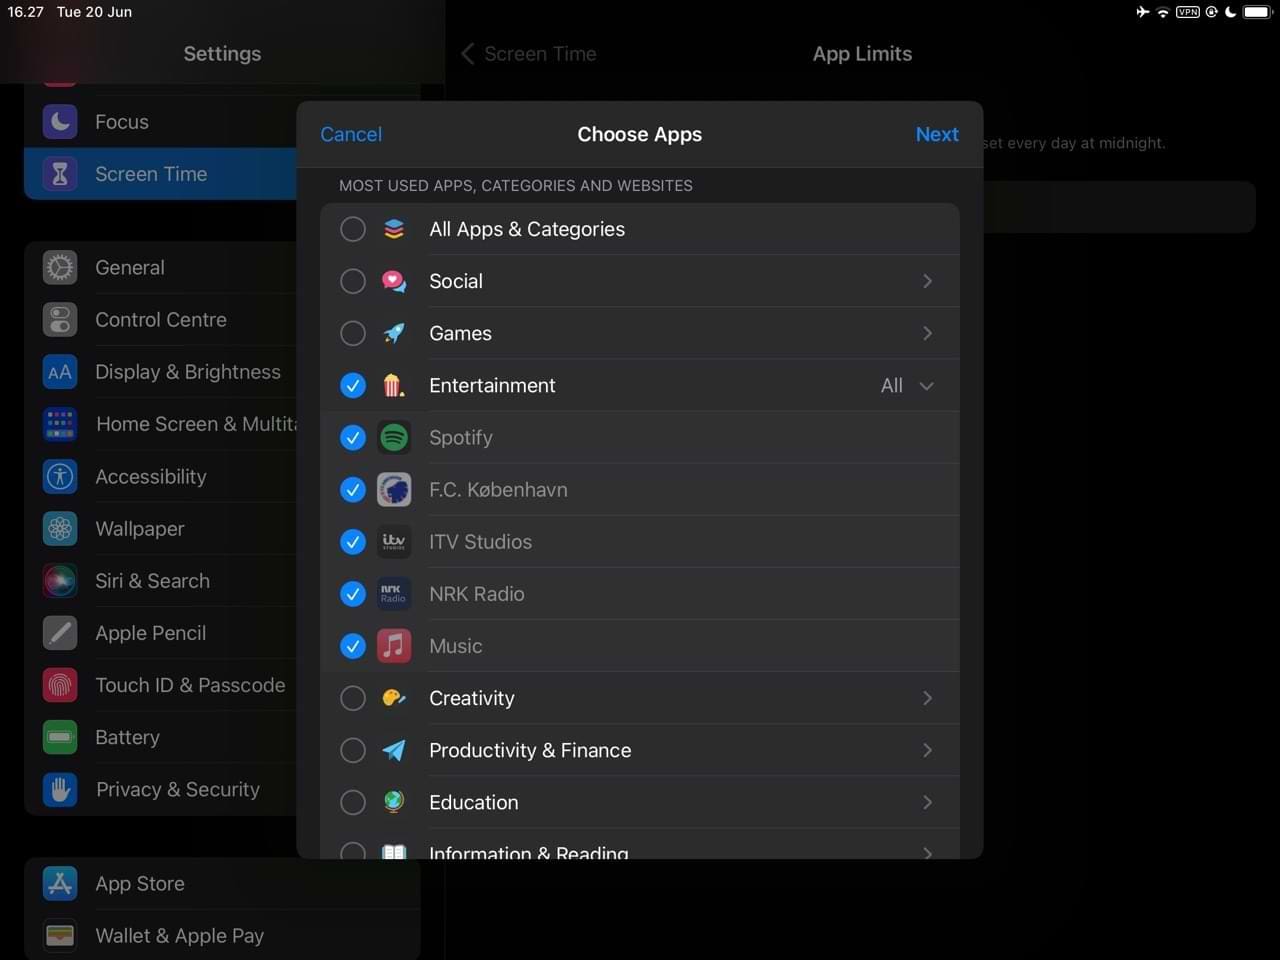
- Choose the app category you want to add limits for. You can also, if you prefer, expand each category to pick specific apps that you want to include in your limit.

- Click on Next when you’re done.
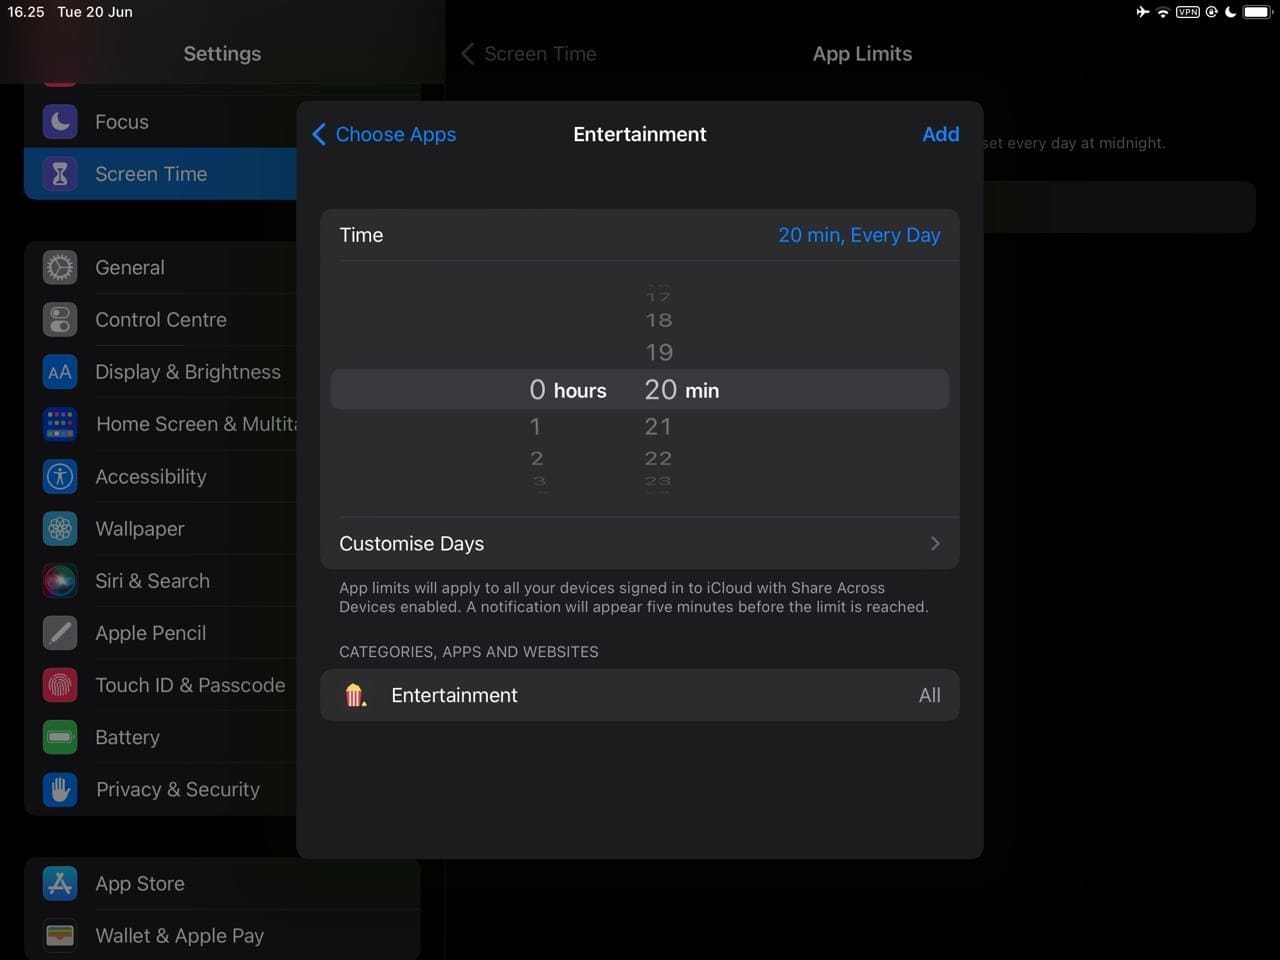
- Enter how many hours and minutes you want your apps to be accessible for. If you need to, click on Customize Days to choose the specific days for which your changes will take effect.

- Select Add after you’re happy with the adjustments you’ve made. Your changes will come into play immediately.
Adjusting Privacy Restrictions
You can also alter your restrictions for Location Services, Calendars, Share My Location, and many other features within your iPad setting. Under Content & Privacy Restrictions, scroll down to Privacy.
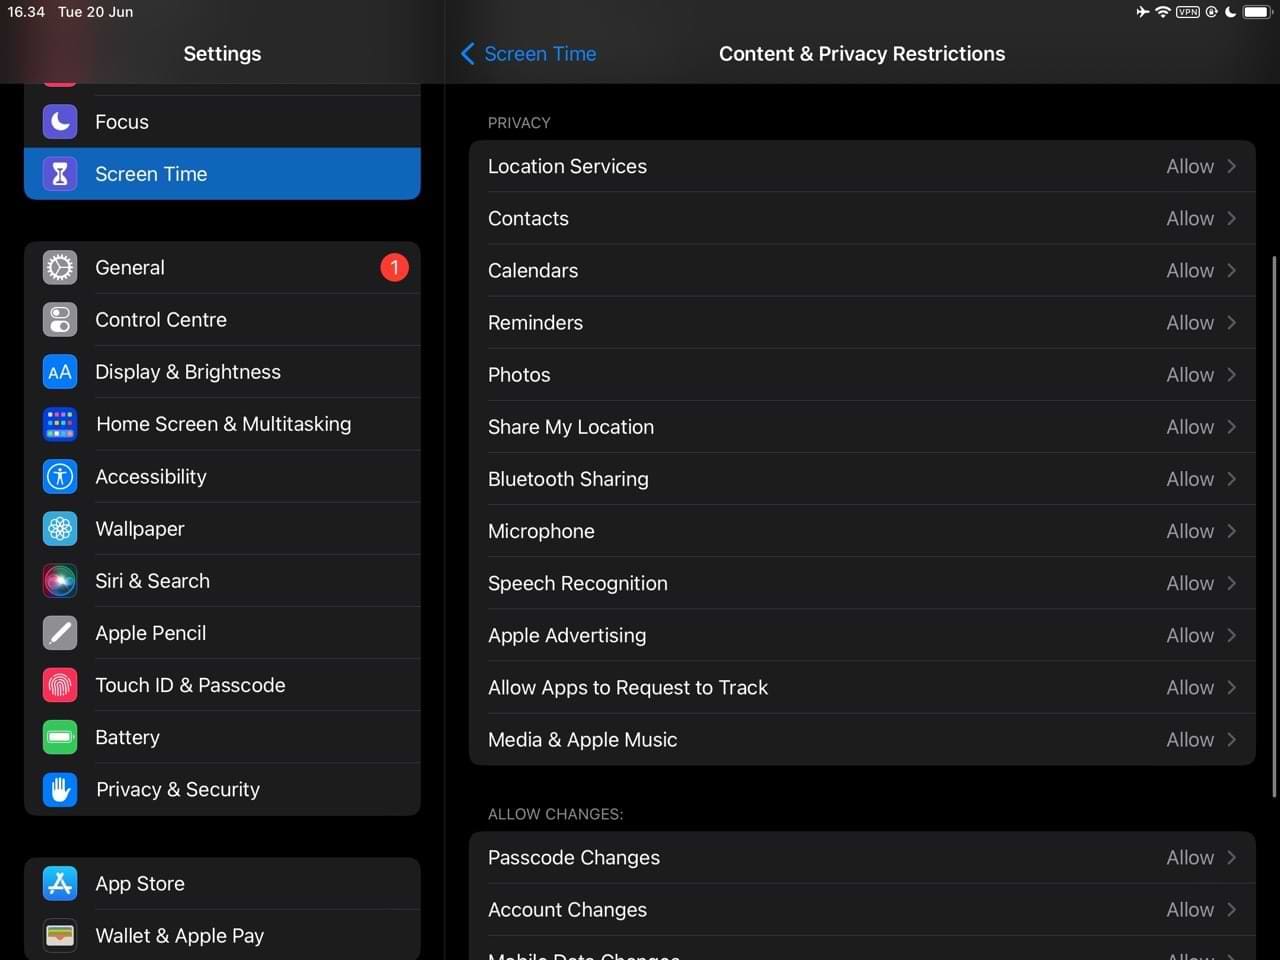
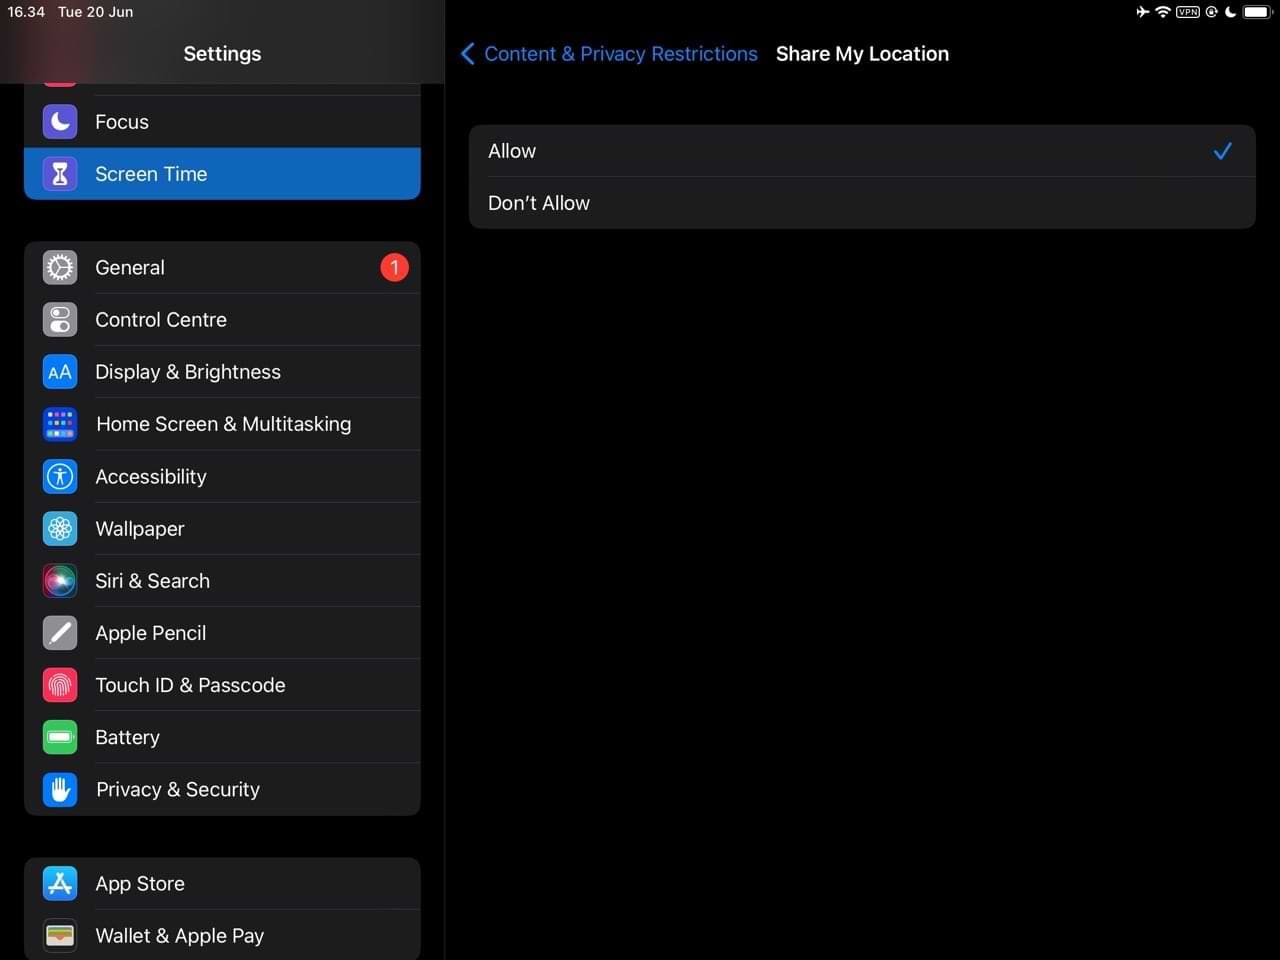
In each section, you will see Allow and Don’t Allow. Choose whichever option fits your needs for each category.
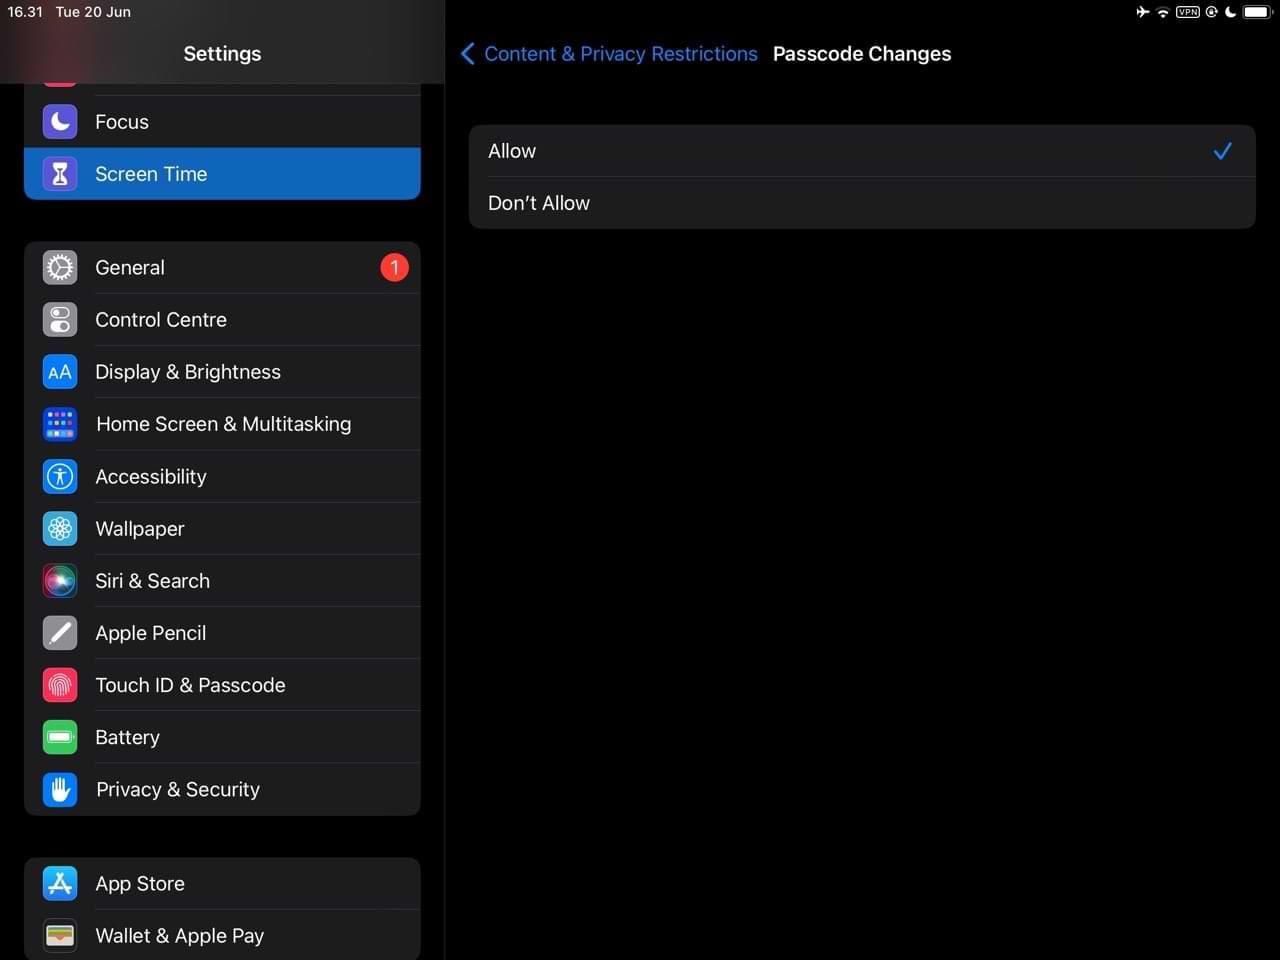
Allowing and Disallowing Changes
In Content & Privacy Restrictions, you can allow or disallow changes for each of the following:
- Passcode Changes
- Account Changes
- Mobile Data Changes
- Reduce Loud Sounds
- Driving Focus
- TV Provider
- Background App Activities
To change any of these, go to Screen Time > Content & Privacy Restrictions. When you’re there, go to Allow Changes. In each section, you’ll see two options: Allow and Don’t Allow. Choose whichever your preferred option is; this is the same as the previous section.
What Do Restrictions Do on an iPhone or iPad?
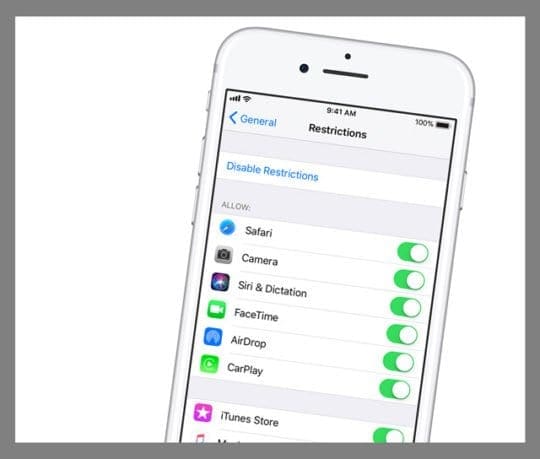
The icons for the respective disabled apps will no longer show up on the Home screen. This means that even you cannot access them.
However after your child is done using the iPad, you can re-enable them by tapping on “Disable Restrictions” (shown above). But you will need to know the Restrictions or Screen Time password that was set previously.

Obsessed with tech since the early arrival of A/UX on Apple, Sudz (SK) is responsible for the original editorial direction of AppleToolBox. He is based out of Los Angeles, CA.
Sudz specializes in covering all things macOS, having reviewed dozens of OS X and macOS developments over the years.
In a former life, Sudz worked helping Fortune 100 companies with their technology and business transformation aspirations.







I would like to restrict all settings but not the entire ipad; how do I do that?
I don’t want my employees to have the ability to change anything including screen saver background.
Hi Kathy,
You probably want to institute a management profile on your company owned devices. Apple calls this a use supervised device and it limits what the user can see and do on the company owned device.
If you’re an administrator or have a person who deploys this technology to the employees, check out this Apple white paper on how to set up supervision, using Apple Deployment Program or Apple’s Configurator 2 to set up your employees’ devices.