These days, iPhone cameras are better than we ever could have imagined. You can use them for simple snapshots on the go, but you also have the capacity to get more creative if you wish. And if you want to transfer edited photos from your camera or computer, tools like AirDrop make doing that easy.
If you import photos from your camera, you might notice that the location you took it in doesn’t appear. Fortunately, fixing that in your Camera Roll is simple – and you’ll learn how to do precisely that in this article.
Do You Need iOS 16 to Change Photos’ Locations on Your iPhone?
The answer to this question is that it depends. If you only want to change one picture’s location, then no – you don’t need iOS 16 downloaded on your device.
Things are a little different if you want to change multiple photos’ locations in one go, however. To do that, you will need to have already downloaded iOS 16 on your iPhone.
How to Change a Single Image’s Location on iPhone
Let’s start by looking at how you can change a single image’s location on your iOS device. The process is straightforward, and the instructions you need to follow are listed below.
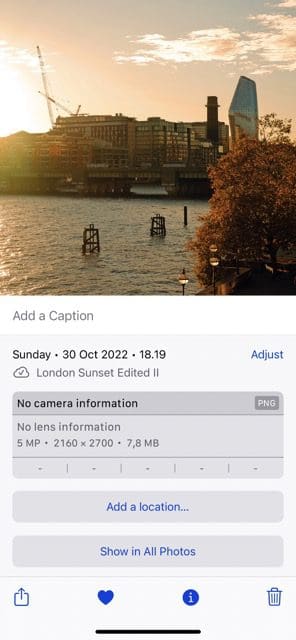
Open your Camera Roll.
Find and select the photo you wish to edit the location for.
You’ve got two options for changing the image’s location. The easiest is to swipe up, but you can also click on the three dots icon in the top right.
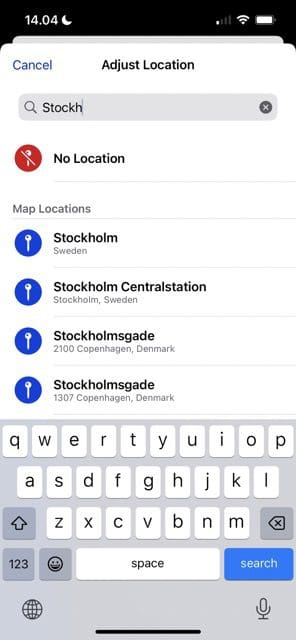
If you swiped up, select Add a Location. And if you instead tapped the three dots icon, choose Adjust Location.
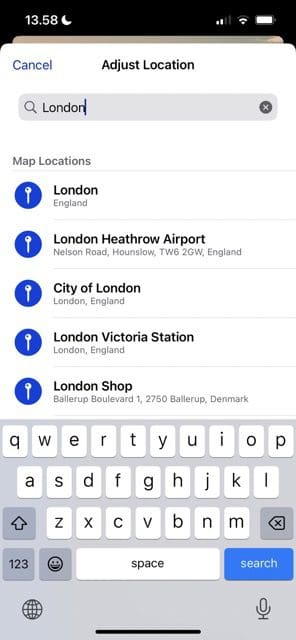
Enter the location you want to change your image to.
Once you’ve added the location, you’ll see it appear at the top of your screen when you scroll.
How to Change Multiple Images’ Locations on iOS
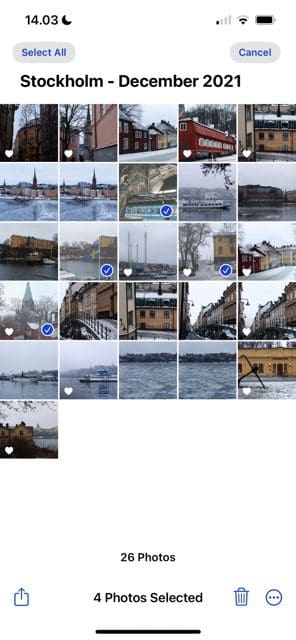
Changing multiple images’ locations is handy if you want to batch-edit pictures that you took in the same place. Once you’ve downloaded iOS 16, follow these instructions.
Go to Select in the top right and choose the pictures that you want to edit the locations for.
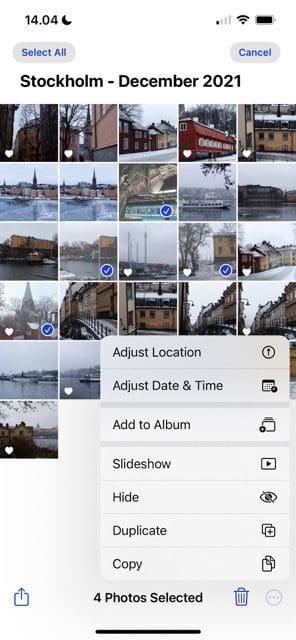
Click on the three dots icon in the bottom right-hand corner.
Select Adjust Location.
Enter the location you’d like to set for your pictures.
Like when you adjust a single image, you’ll see the new location appear at the top of your photo.
Changing Your Pictures’ Location on iPhone Is Easy
Regardless of whether you want to edit the location for one or multiple photos, doing so on your iPhone is easy. You can adjust the setting as many times as you want, allowing you to add something more accurate if you feel that doing so is necessary.
Once you’ve added locations for your photos in your Camera Roll, you can use the search function – or your map – to find these pictures later. And even if you took a picture on your iPhone, you can adjust the location you were given to something different.
Danny has been a professional writer since graduating from university in 2016, but he’s been writing online for over a decade. He has been intrigued by Apple products ever since getting an iPod Shuffle in 2008 and particularly enjoys writing about iPhones and iPads. Danny prides himself on making complex topics easy to understand. In his spare time, he’s a keen photographer.


Write a Comment