You might want to block websites on your Mac for several reasons. Maybe you want to stop your children from accessing sites they shouldn’t be on, or perhaps you want to enjoy higher levels of productivity – but you find that you constantly get distracted when you sit down to work.
Regardless of why you want to block certain websites on your computer, you’ve got a selection of options you can try. And in this guide, you’ll discover some of the top ways to restrict access to different sites on your Mac.
Sometimes, you might only want to block websites for certain times each day. Social media could be one example, and YouTube could be another. These platforms can lead to you not completing the level of work that you’d typically like to do, but you may not notice adverse effects when you access them during your free time.
For websites that you only want to block intermittently, you might find that Downtime is the best tool for the job. You’ll need to switch on Screen Time if you want to use it, but you can find the complete list of steps that you should follow below.
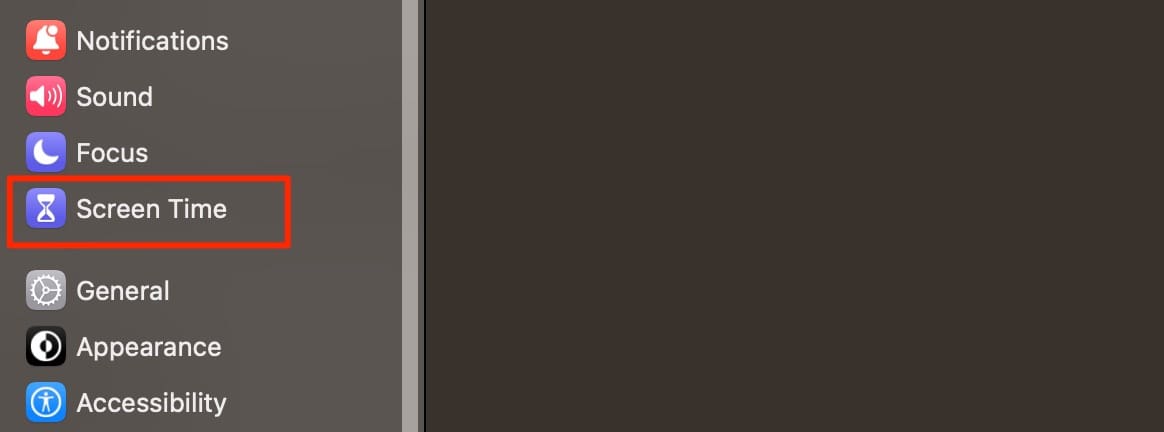
1. Open System Settings and go to Screen Time.
2. Switch the Screen Time toggle on.
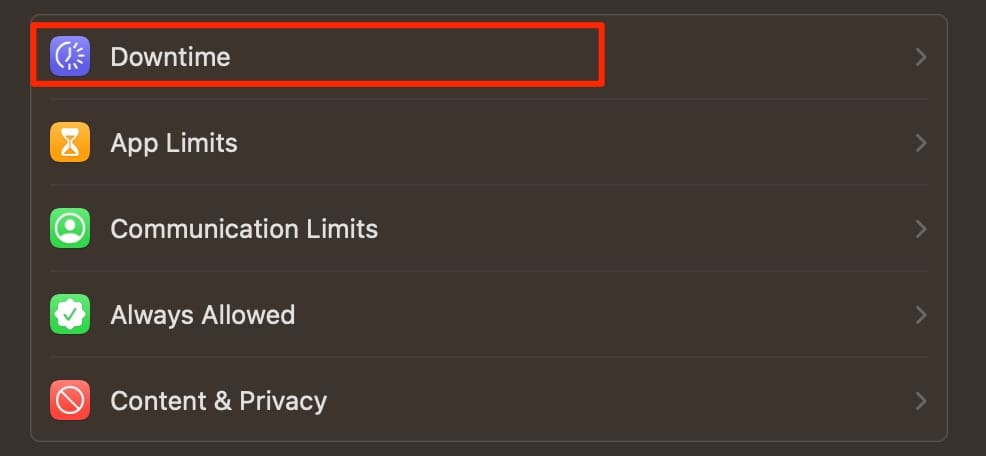
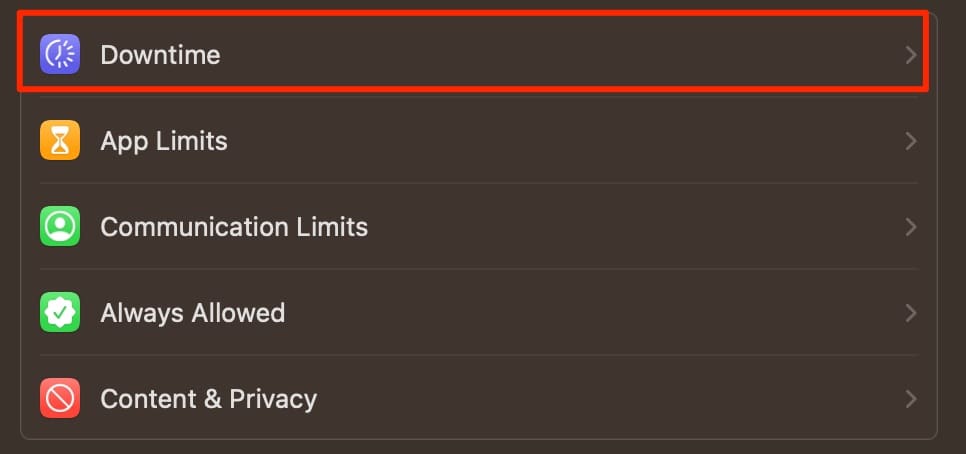
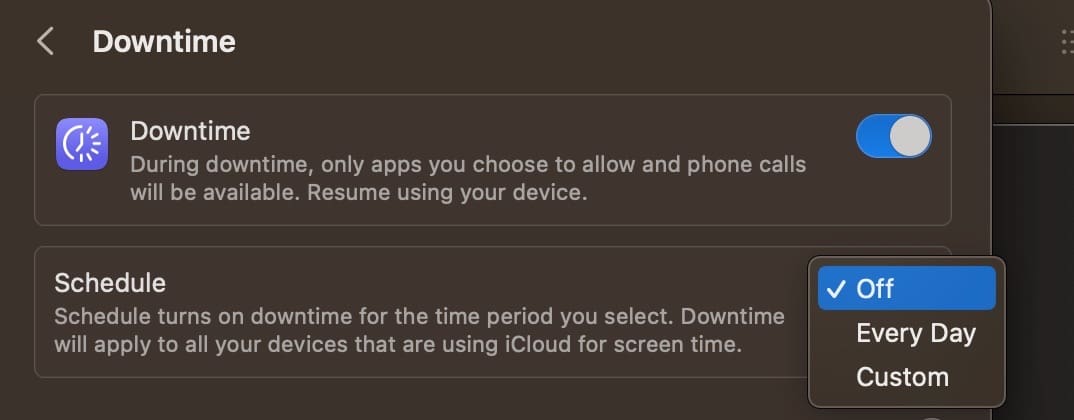
3. Go to Downtime and switch the toggle on here as well.
4. Choose between Every Day or Custom from the Schedule dropdown menu, depending on what you want to use.
5. Customize your Downtime schedule however you want.
When you turn on Downtime, you’ll block all websites and apps that you don’t allow. You’ll see a timer icon with the message displaying that you’ve reached your limit.
2. How to Block Websites Using Terminal
If you’re comfortable with using Terminal on your Mac for various commands, you can also set up a website block list with it. Just follow these steps.
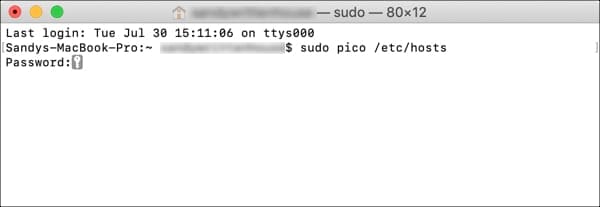
Open Terminal with Applications > Utilities from your Dock or with Finder open click Go > Utilities from the menu bar and choose Terminal.
Copy and paste or type the command below and then hit Return.
sudo pico /etc/hosts
Enter your Mac user password and hit Return.
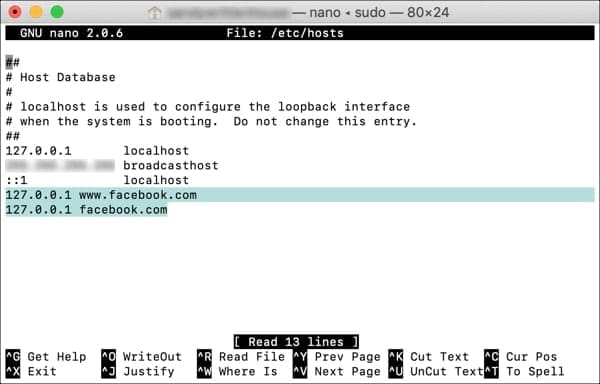
Enter the hosts file in Terminal
Go to the bottom using your arrow key and type: 127.0.0.1 followed by a space and then the website you want to block. Hit Return. List each site on a separate line. (See screenshot below.)
Press Control + O (capital letter O) and hit Return to save.
Press Control + X to close nano.
Close the Terminal window.
Blocked websites with Terminal on Mac
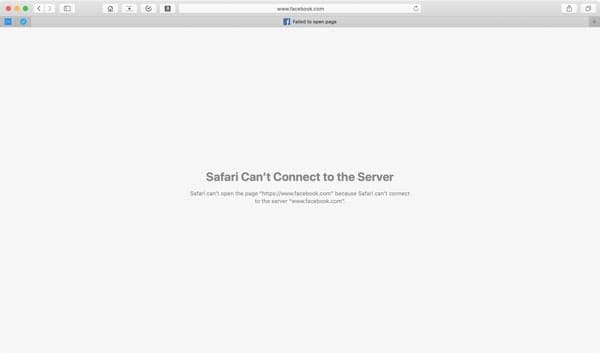
Now, when you open a browser and go to one of the sites you listed in Terminal, you should be blocked from accessing it.
Blocked website in Safari on Mac
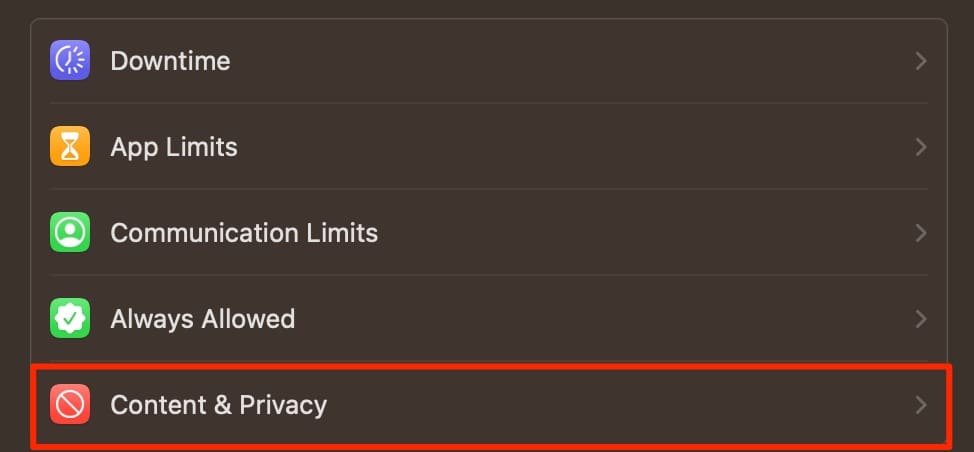
3. Restrict Websites Via the Content & Privacy Feature
If you have children who use your Mac, restricting explicit content is a good idea. You’ve got two options here; you can either restrict only inappropriate websites, or you can make a specified list of websites that you’ll approve access to.
How to Block Inappropriate Websites
To block inappropriate websites only, follow these steps.
1. Go to System Settings > Screen Time.
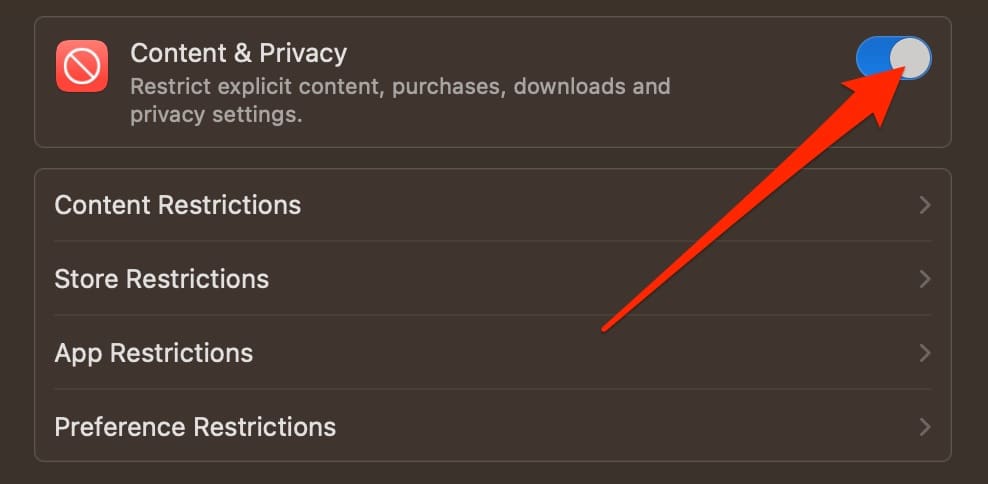
2. Select the Content & Privacy tab.
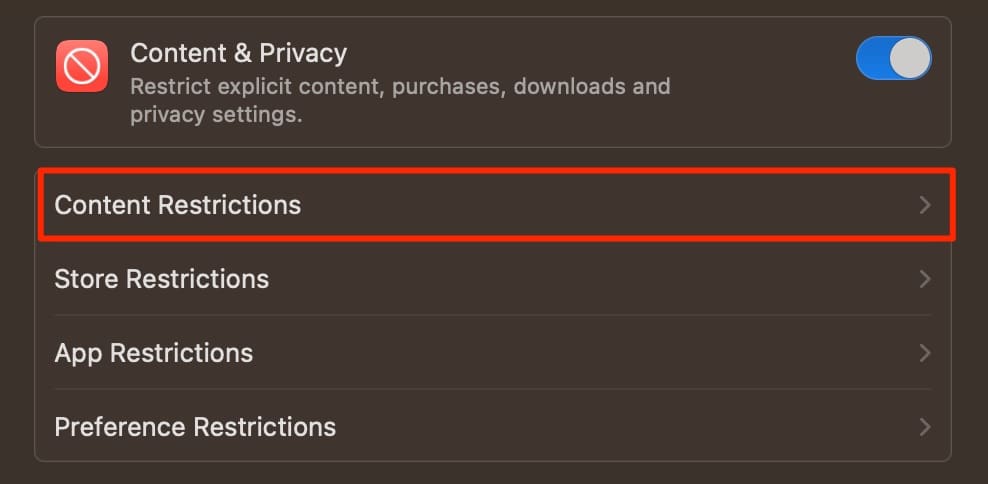
3. Switch the Content & Privacy toggle on. Then, go to the Content Restrictions tab.
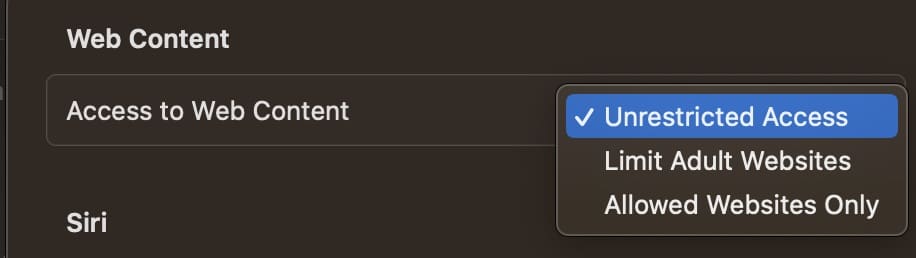
4. Expand Access to Web Content and click on Limit Adult Websites.
How to Only Allow a Specific Set of Websites
To only allow a specific set of websites, you can follow these instructions instead.
1. Go to System Settings > Screen Time > Content & Privacy.
2. After toggling Content & Privacy on, click on Content Restrictions.
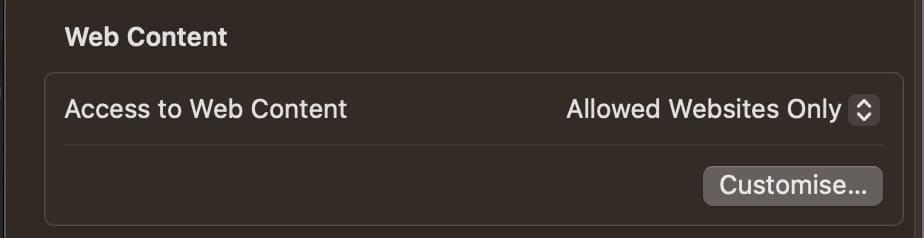
3. Expand the dropdown menu next to Access to Web Content. Here, choose Allowed Websites Only.
4. Click on Customize.
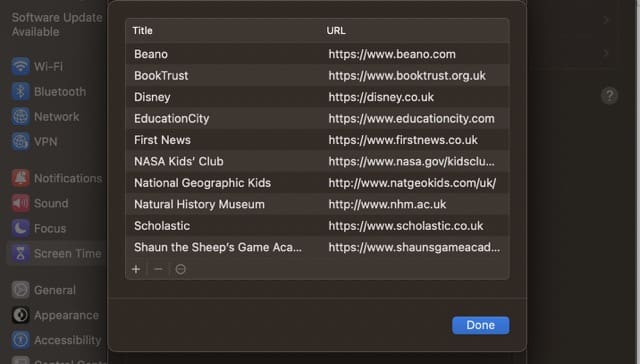
5. Hit the + icon to allow websites to be accessed on your Mac. Every other site will be blocked.
4. Use a Third-Party Website Blocker
In addition to using the different settings on your Mac, you can also try using third-party website blockers. Some are better than others, but Cold Turkey is one site blocker you should consider checking out. Another worth thinking about is 1Focus.
When using a third-party website blocker, you should have access to tools that allow you to restrict access for certain periods of time. On top of that, you can often access free versions – though you won’t be able to use as many features as you would with a paid plan or one-time purchase.
When looking for a third-party website blocker on your Mac, find one that’s difficult to uninstall or reverse. Some are harder to unblock in this respect, and if you have limited willpower, putting more barriers in place will help keep you on track.
Restrict Access to Websites on Your Mac Whenever You Feel Is Necessary
As you can see from this guide, you’ve got plenty of options when it comes to blocking websites on your Mac. Apple has added a selection of useful tools to help you stay on track in recent years, and these are an ideal starting point. In addition to blocking sites on your Mac via these means, you can share your settings across your iPhone and iPad as well.
In addition to using the website-blocking features on your Mac, you’ll find a broad range of options elsewhere. It’s worth looking at different third-party website blockers, as these can add an extra layer of friction and stop you from removing the restrictions you’ve put in place.
Danny has been a professional writer since graduating from university in 2016, but he’s been writing online for over a decade. He has been intrigued by Apple products ever since getting an iPod Shuffle in 2008 and particularly enjoys writing about iPhones and iPads. Danny prides himself on making complex topics easy to understand. In his spare time, he’s a keen photographer.


The Allowed only websites feature does not work. It does not save the websites you want your children to use only.