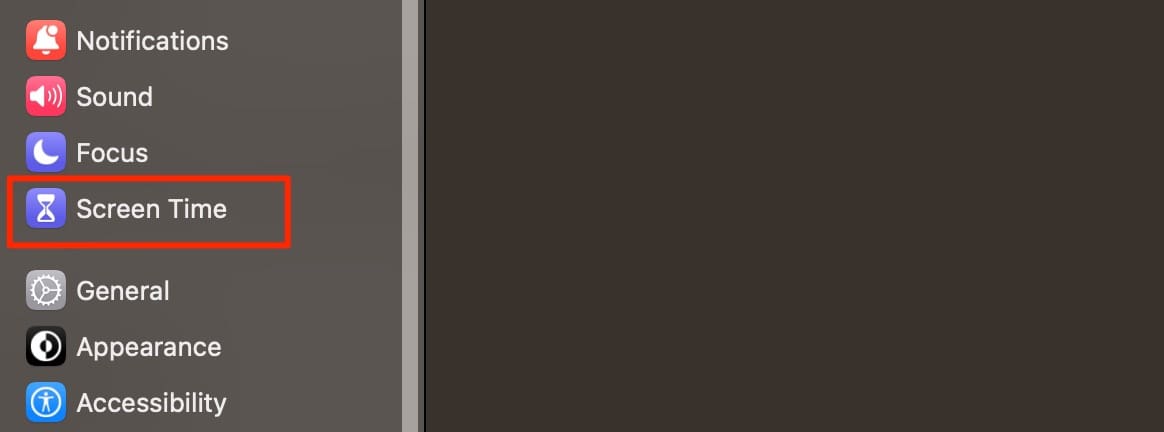
Screen Time is one of the most useful tools you can use to limit how long you spend mindlessly scrolling on your Apple device. And when you activate the feature, you’ll have access to several useful things you can use to limit app access when needed.
If you’re looking to spend more time away from your screen, Downtime is arguably the best Screen Time feature for this. You can enable the tool for certain times each day, along with scheduling which days you don’t want the feature switched on for.
To help you get the most out of Downtime, we’ll show you how to customize your settings on your iPhone, iPad, and Mac. You’ll also find out what happens when you switch the feature on.
When you turn Downtime on, your device will restrict access to certain apps on your device. You won’t be able to access many apps that you might use for leisure, such as social media – and you may also find that access to some of your favorite instant messaging tools is also limited.
If you want to continue having access to certain apps while Downtime is enabled on your iPhone, iPad, or Mac, you can customize these settings. We’ll show you how to do that later, but let’s first talk about the different things you can change specifically within Downtime.
Which Settings Can You Customize in Downtime?
You can customize a selection of things when using Downtime on your Apple device. To make things easier for you to read, we’ve broken the most important ones down into various subsections.
1. The Days You Schedule Downtime For
When using Downtime, you might not want to activate the feature every single day. On weekends, for example, you may wish to give yourself a bit more flexibility than you would during the week.
You can decide whether you want to schedule Downtime for every day or if you’d like to only use the feature on specified ones. Doing both is straightforward; you’ll find individual options within your settings to pick whatever you want.
For the days that you don’t want to use Downtime, you can simply toggle the option off for those.
2. Whether You Schedule Downtime
Besides scheduling the specific periods you want Downtime to take effect, you can also pick whether you want to schedule the feature full stop. You’ll see an option to choose whether you want to turn on the feature for scheduling – and if you switch the toggle on, you can also decide if you want to turn on Downtime until your scheduled time begins.
If you don’t want to schedule Downtime ever, you have an option to turn the feature on for the rest of the day.
3. The Times That You Use Downtime Each Day
In addition to choosing which days you use Downtime for, you can also customize the times that you turn the feature on. If you opt to pick that you want to activate the tool each day, you can choose a recurring time period for your request to take effect.
Alternatively, if you choose to customize your days, you can pick different times for each day that you use the feature.
How to Customize Your Downtime Settings in Screen Time
Now that you know more about the settings you can customize in Screen Time, let’s look at how you can access and change these features. The process differs depending on the device you use, so we’ll break the instructions down accordingly.
iPhone and iPad
Customizing your Downtime settings is pretty much the same if you use an iPhone or iPad, though the layout will slightly differ when you expand sections and whatnot. Nonetheless, you can follow these steps to achieve your desired result:
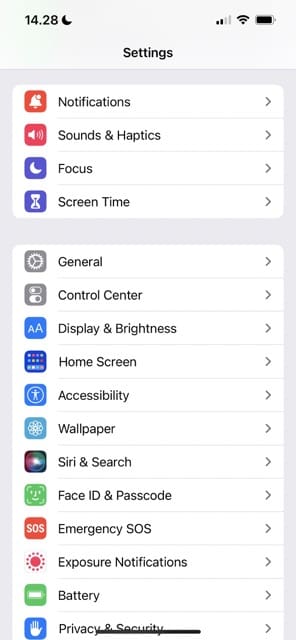
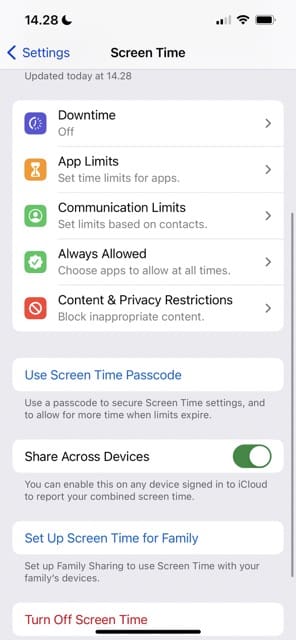
Open the Settings app and go to Screen Time. If you haven’t already switched Screen Time on, select Turn on Screen Time.
Tap the Downtime tab, which is the first one you’ll see under your average daily times.
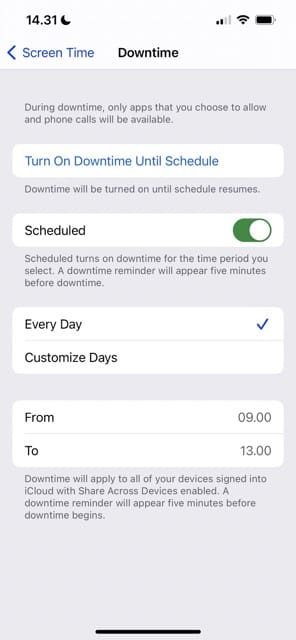
If you only want to turn on Downtime for one day, hit the Turn On Downtime Until Tomorrow button. Otherwise, toggle Scheduled on.
To turn Downtime on every day, select Every Day and choose your time. To customize when you use the feature, follow these steps instead:
Click on Customize Days.
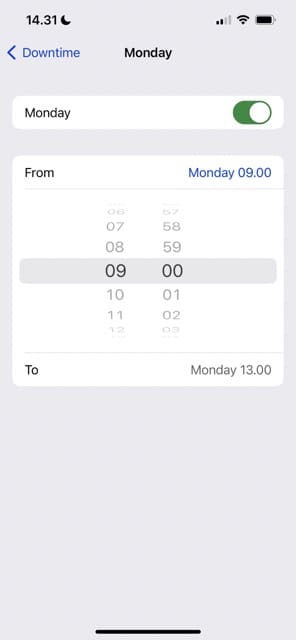
Open the day you want to customize.
If you want to change the times you’ve activated Downtime for, select From or To – and scroll through until you’ve chosen your ideal times. To switch Downtime off for a specific day, click on the toggle so that it’s no longer green instead.
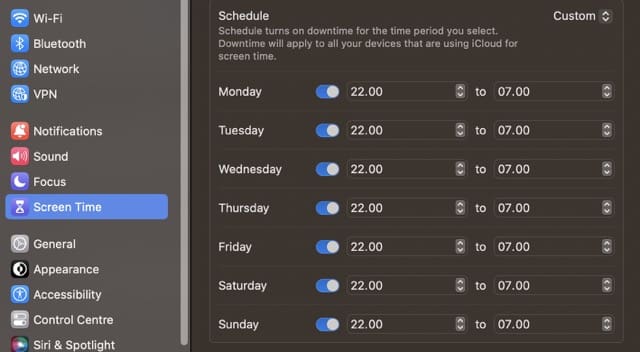
Mac
Customizing Screen Time on a Mac is slightly different, and these steps will help you achieve the result you’re looking for.
1. Open your System Settings and go to Screen Time. If you need to, turn the feature on.
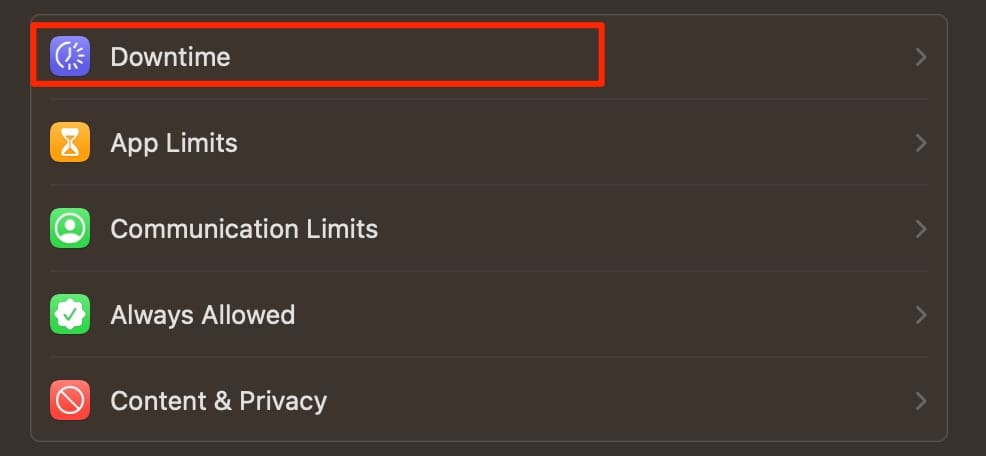
2. Select Downtime when your list of options appears.
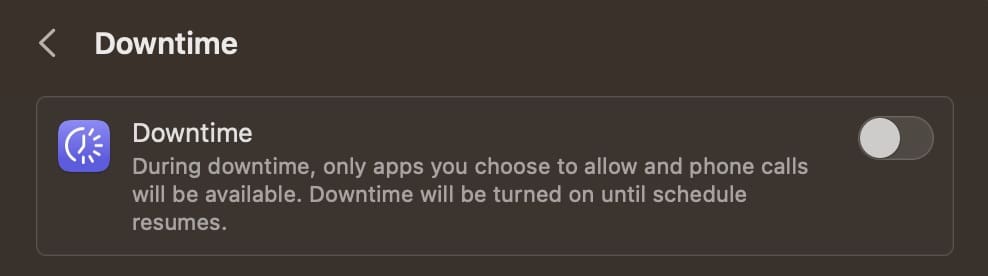
3. Toggle Downtime on at the top of your screen.
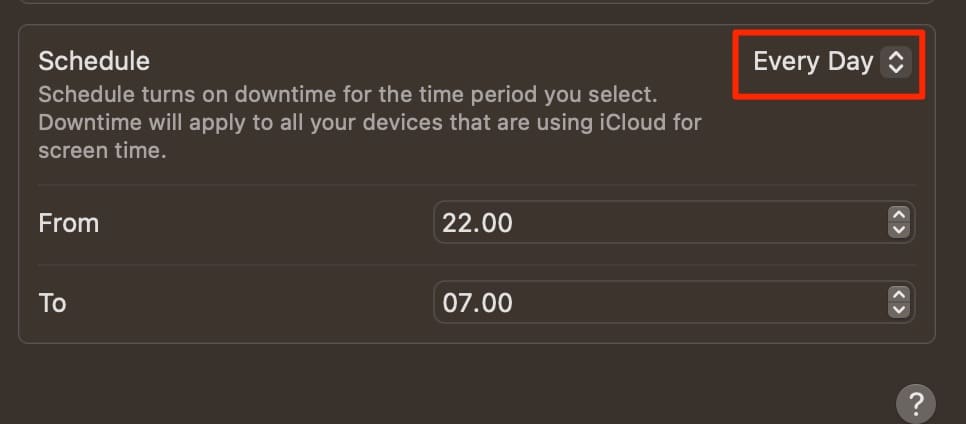
4. Next to Schedule, expand the dropdown menu and choose how you want to customize Downtime.
If you choose Every Day, you can pick your start and end times.
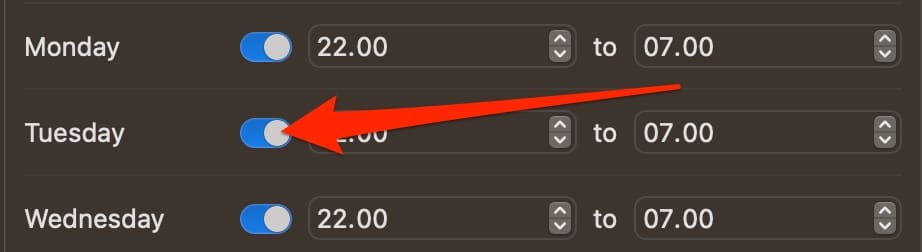
To customize your times for different days, select Custom. Then, when the window changes, expand the dropdown menus to choose your different times.
If you’d like to turn off Downtime for a certain day, you can click on the toggle next to your day and switch it off.
How to Allow Apps During Downtime
If you want to allow certain apps during Downtime, you’ll need to follow a different process. Like the previous section, we’ve broken down the steps you should take depending on the device you use.
iPhone and iPad
To allow certain apps on your iPhone and iPad during Downtime, you can follow the instructions we’ve listed below.
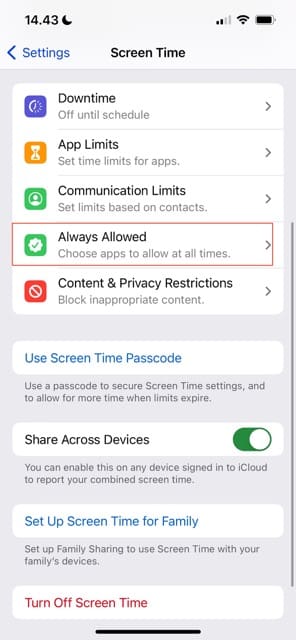
1. Open the Settings app and go to Screen Time.
2. Select Always Allowed.
Next to the apps you want to access during Screen Time, click on the + icon. You’ll see a list of allowed apps at the top of your screen.
You can also let others contact you during Downtime by going to Contacts. Here, you can decide if you want to only let certain people get in touch – or whether everyone can.
Mac
To enable app access on your Mac during Downtime, follow these instructions instead:
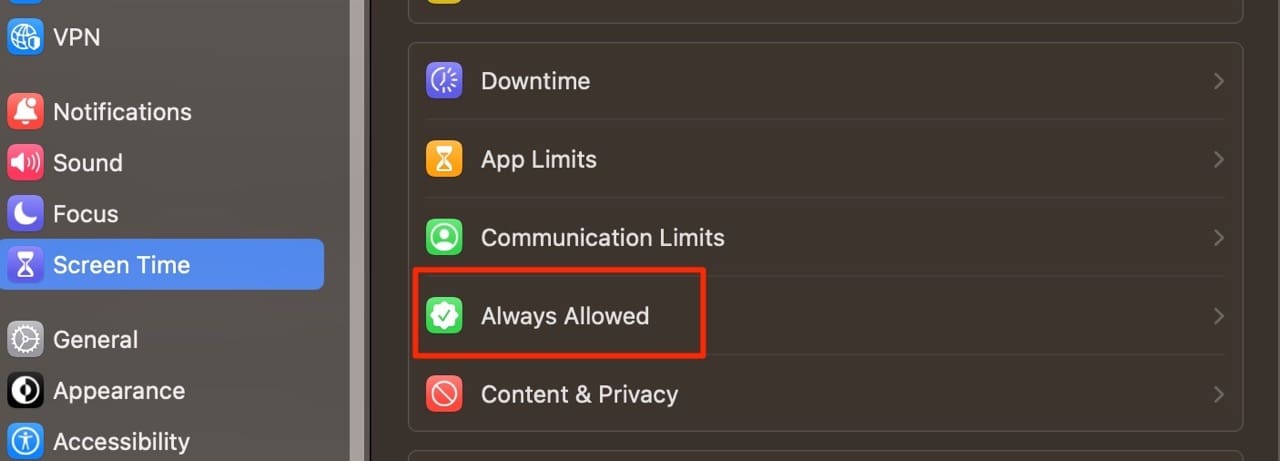
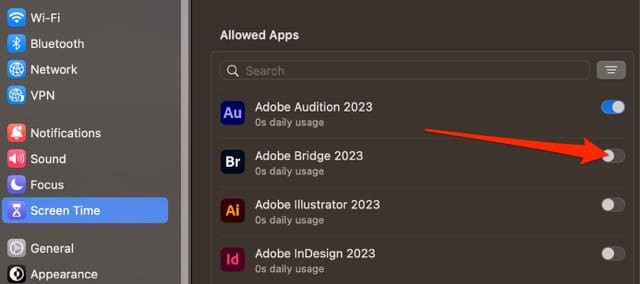
1. Open System Settings and go to Screen Time > Always Allowed.
2. To allow apps during Downtime, click the toggle so that the space turns blue.
Like on your iPhone and iPad, you can customize who’s allowed to contact you by going to the During Downtime section at the top of Always Allowed.
Fit Your Screen Time Settings Around Your Needs
Downtime is an incredibly useful feature for stopping you from spending too much time mindlessly scrolling on apps and websites. You can use it to take your productivity to the next level without needing to exert too much willpower, which will free up your brain to focus on more important tasks.
If you use a Mac, the process for customizing Downtime is slightly different. But regardless of the device you use, changing everything to fit your needs is simple.
Danny has been a professional writer since graduating from university in 2016, but he’s been writing online for over a decade. He has been intrigued by Apple products ever since getting an iPod Shuffle in 2008 and particularly enjoys writing about iPhones and iPads. Danny prides himself on making complex topics easy to understand. In his spare time, he’s a keen photographer.
This is very helpful but it seems you cant create multiple downtimes times on the same day
ie. i would like my daughter to have regular breaks – so Id like to set downtime as 1.5 hours on / 1.5hrs off on certain days maybe 3x a day. if you cant do this on an iphone is there an app for this you know of please? Im sure other parents have multiple downtimes options in a single day on android phones.
any advice appreciated. thank you.