For various reasons, you may want to hide or unhide your iTunes, iBooks or App store purchases. First let me say that you cannot delete purchase history. In this short article, we are going to show how to hide and unhide your purchase history on your computer or your iOS device (iPad, iPhone or iPod touch).
Hide or restore your purchases on your computer
To hide your purchase history:
Launch iTunes
Navigate Store > Sign in and enter your Apple ID credentials
Select your purchase type that you want to hide (music, movies, apps, TV shows, Books etc.)
Click Purchased (img 1)
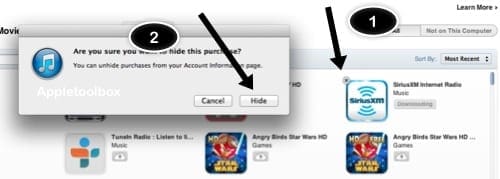
Click on the content that you want to hide
Move your cursor over the purchase you want to hide
Click the “X” to hide it (img 2)
To unhide your purchase history:
Launch iTunes and choose Store > Sign in and enter your Apple ID info to sign in
Navigate Store > View my Account
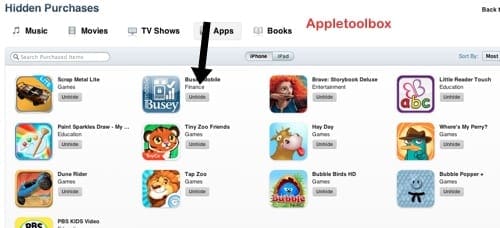
Click on View Hidden Purchases (img 3)
Click the Unhide button to restore hidden purchases (img 4)
Hide or unhide purchases on your iPad, iPhone or iPad touch
To Hide:
Launch App Store or iBooks or iTunes Store depending the purchase that you want to hide
Tap “Purchased”
Swipe left or right on the purchase you want to hide
Tap the hide button
To restore your purchase
Launch App Store or iBooks or iTunes
Scroll down and sign in (if not signed in already)
Tap your Apple ID and then View Apple ID
Tap Hidden Purchases
Find the item you want to unhide and tap the unhide button
Note: As of Now (January, 2013), you cannot hide purchases in iOS 6.
Obsessed with tech since the early arrival of A/UX on Apple, Sudz (SK) is responsible for the original editorial direction of AppleToolBox. He is based out of Los Angeles, CA.
Sudz specializes in covering all things macOS, having reviewed dozens of OS X and macOS developments over the years.
In a former life, Sudz worked helping Fortune 100 companies with their technology and business transformation aspirations.
Check if your device has any restrictions turned on–for iOS 12, go to Settings > Screen Time > Content & Privacy Restrictions and for iOS 11 and below, check Settings > General > Restrictions.
I would like to hide purchase I have in my ibooks cloud. I do not have a computer. Now I am finding out that you can not hide them from your device!!! This is crazy! Not everyone has a computer! I have an Iphone and Ipad. I don’t think I need a computer too! If I have an Apple product I should be able to use the product to do what I need. Not go to a computer to do it. I’m very disappointed. This needs to be fixed!
i don’t have an apple computer. How do I un hide music using my iPhone so I can download it? It’s sucks having spent hundreds of dollars on music and not being able to listen to it be I don’t have access to an apple computer. I have to do it on my phone.


i hid my app store app.how do i unhide it?
Hi Michelle,
Check if your device has any restrictions turned on–for iOS 12, go to Settings > Screen Time > Content & Privacy Restrictions and for iOS 11 and below, check Settings > General > Restrictions.
Sam
I would like to hide purchase I have in my ibooks cloud. I do not have a computer. Now I am finding out that you can not hide them from your device!!! This is crazy! Not everyone has a computer! I have an Iphone and Ipad. I don’t think I need a computer too! If I have an Apple product I should be able to use the product to do what I need. Not go to a computer to do it. I’m very disappointed. This needs to be fixed!
i don’t have an apple computer. How do I un hide music using my iPhone so I can download it? It’s sucks having spent hundreds of dollars on music and not being able to listen to it be I don’t have access to an apple computer. I have to do it on my phone.